
1. Introducción
This manual provides essential information for the safe and effective operation, setup, and maintenance of your Sealey SR123 Spot Welder with Digital Timer. The SR123 features integral electronic control, allowing the operator to select material thickness, which automatically calculates the optimum weld duration. It also includes a pulse mode, suitable for high-stress steels commonly found in modern vehicle construction. Please read this manual thoroughly before use and retain it for future reference.
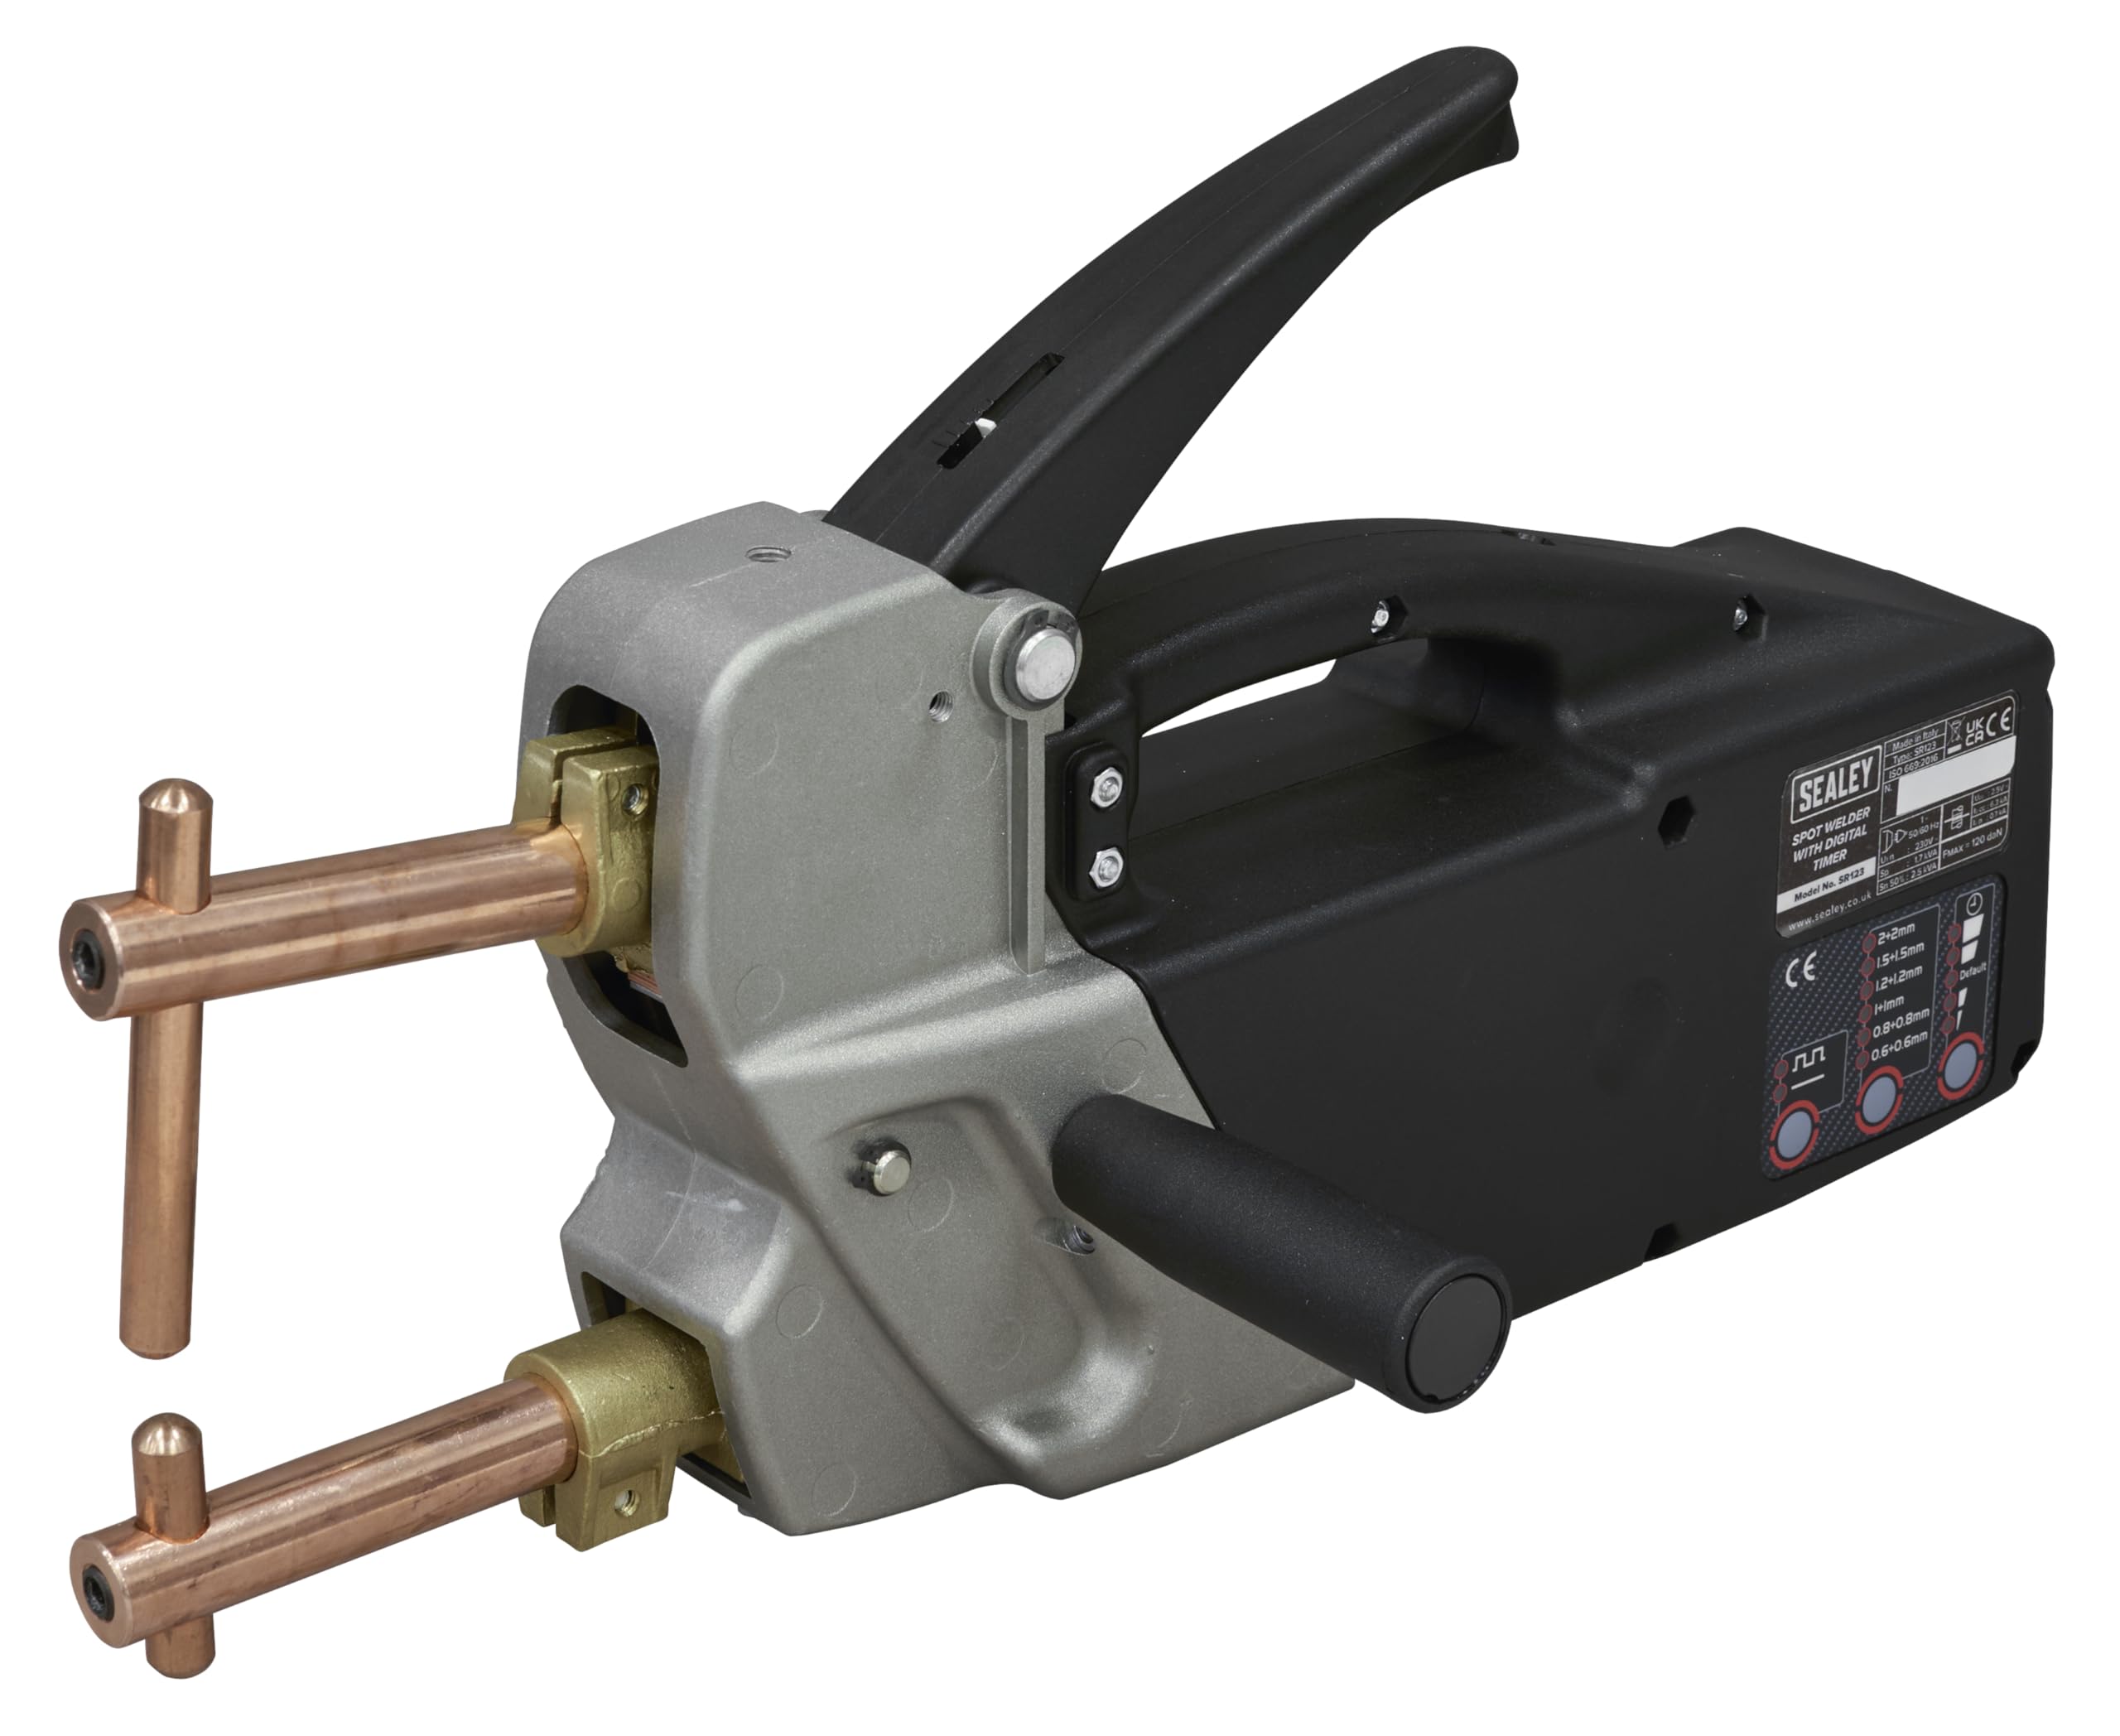
Image 1.1: The Sealey SR123 Spot Welder, showcasing its ergonomic design and welding arms.
2. Información de seguridad
ADVERTENCIA: Always follow general safety precautions when operating welding equipment. Failure to do so may result in serious injury or damage to the equipment.
- Equipo de protección individual (EPI): Always wear appropriate PPE, including welding helmet with proper shade, safety glasses, welding gloves, and protective clothing to prevent burns and eye damage.
- Área de trabajo: Ensure the work area is clean, well-ventilated, and free from flammable materials. Keep bystanders away from the welding area.
- Seguridad eléctrica: Connect the welder to a properly grounded power supply. Do not operate in damp or wet conditions. Inspect power cords for damage before each use.
- Humos y Gases: La soldadura produce humos y gases que pueden ser peligrosos para la salud. Trabaje en un área bien ventilada o utilice ventilación local.
- Superficies calientes: Welding arms and electrodes become extremely hot during operation. Allow them to cool before handling or storing.
- Mantenimiento: Disconnect the welder from the power supply before performing any maintenance or changing electrodes.

Imagen 2.1: Másview of the spot welder highlighting key features including safety warnings and controls.
3. Características del producto
The Sealey SR123 Spot Welder is designed for efficient and precise spot welding with several key features:
- Digital Electronic Control: Automatically calculates optimum weld duration based on selected material thickness.
- Parámetros ajustables: All automatically selected parameters can be manually overridden by the operator if specific requirements demand it.
- Modo de pulso: Features a pulse mode for enhanced welding performance on high-stress steels.
- Construcción ligera: Die-cast aluminium head and chassis reduce overall weight for improved handling and reduced operator fatigue.
- Reducción de calor: Compuesto casing and handle minimize heat transfer to the operator during extended use.
- Accesorios incluidos: Supplied with 120mm welding arms, electrodes, and a side handle for immediate use.
- Clase de aislamiento: Rated as Insulation Class B.

Image 3.1: Visual representation of the welder's key features, including adjustable jaw pressure, digital controls, versatile welding capabilities, and a robust handle.
4. Configuración
- Desembalaje: Carefully remove the spot welder and all accessories from the packaging. Inspect for any shipping damage.
- Attach Welding Arms: Securely attach the 120mm welding arms to the welder head. Ensure they are firmly seated and tightened.
- Install Electrodes: Insert the electrodes into the welding arms. Ensure they are clean and properly aligned.
- Attach Side Handle (Optional): If desired, attach the side handle for improved grip and control during operation.
- Conexión de energía: Connect the welder to a suitable power outlet (refer to specifications for voltage requirements). Ensure the power supply is grounded.
- Preparación de la pieza de trabajo: Clean the surfaces of the materials to be welded. Remove any rust, paint, or grease to ensure a good electrical contact and strong weld.

Image 4.1: Detail of the welding arms and electrodes, showing how they are assembled for operation.
5. Instrucciones de funcionamiento
- Encendido: Turn on the spot welder. The digital control panel will illuminate.
- Select Material Thickness: Use the control panel to select the thickness of the material you intend to weld. The system will automatically calculate the optimal weld duration. Refer to Image 5.1 for control panel details.
- Pulse Mode (Optional): For high-stress steels, activate the pulse mode via the control panel if required.
- Ajustar parámetros (opcional): If necessary, you can manually override the automatically selected weld parameters using the controls.
- Posición de la pieza de trabajo: Place the materials to be welded between the electrodes. Ensure good contact and alignment.
- Iniciar soldadura: Firmly press the operating lever. The weld will only start when sufficient pressure is applied, preventing accidental firing. Hold the lever until the weld cycle is complete.
- Inspeccionar la soldadura: After the weld, release the lever and carefully remove the workpiece. Inspect the weld for quality and penetration.
- Repetir: Continue welding as needed, ensuring electrodes remain clean and properly aligned.

Image 5.1: The digital control panel, showing options for material thickness selection (e.g., 0.6+0.6mm to 2+2mm) and pulse mode.

Image 5.2: The spot welder actively joining two metal pieces, demonstrating its application.
6. Mantenimiento
Regular maintenance ensures the longevity and optimal performance of your spot welder. Always disconnect the power before performing any maintenance.
- Inspección de electrodos: Regularly inspect electrodes for wear, pitting, or mushrooming. Worn electrodes should be dressed or replaced to ensure consistent weld quality.
- Limpieza: Keep the welder clean and free from dust and metal particles. Use a dry cloth to wipe down the casing. Avoid using solvents that could damage the composite materials.
- Arm and Jaw Inspection: Check the welding arms and jaws for any signs of damage or looseness. Ensure all fasteners are tight.
- Inspección de cables: Periodically inspect the power cable and welding cables for cuts, abrasions, or signs of heat damage. Replace damaged cables immediately.
- Almacenamiento: Guarde la soldadora en un entorno seco y limpio cuando no esté en uso.
7. Solución de problemas
If you encounter issues with your Sealey SR123 Spot Welder, refer to the following common problems and solutions:
| Problema | Posible causa | Solución |
|---|---|---|
| No llega energía al soldador | Cable de alimentación desconectado, disyuntor disparado, interruptor de alimentación defectuoso. | Check power connection, reset circuit breaker, contact qualified service personnel if switch is faulty. |
| Poor weld quality or no weld | Dirty electrodes, worn electrodes, incorrect material thickness setting, insufficient pressure, dirty workpiece. | Clean or replace electrodes, verify material thickness setting, ensure firm pressure on operating lever, clean workpiece surfaces. |
| chispas excesivas | Dirty or worn electrodes, incorrect weld settings. | Clean or replace electrodes, adjust weld duration/thickness settings. |
| Welder overheats | Ciclo de trabajo excedido, mala ventilación. | Allow welder to cool down, ensure adequate ventilation around the unit. |
8. Especificaciones
| Especificación | Valor |
|---|---|
| Número de modelo | SR123 |
| Marca | Sealey |
| Dimensiones del producto | 46.6 x 34.2 x 16.6 cm |
| Peso del artículo | 10.6 kilogramos |
| Clase de aislamiento | B |
| Included Arms | 120mm welding arms |
9. Garantía y soporte
The Sealey SR123 Spot Welder comes with a Garantía de 1 años. Please refer to the official Sealey website or your purchase documentation for full terms and conditions regarding warranty claims and customer support.

Image 9.1: Sealey brand logo indicating a 1-year guarantee.
For technical assistance or spare parts, please contact your authorized Sealey dealer or visit the official Sealey websitio: www.sealey.co.uk.