1. Introducción
Thank you for choosing the Franke FFPS200 Mambo Single Handle Pull-Out Kitchen Faucet. This manual provides detailed instructions for the safe installation, operation, and maintenance of your new faucet. Please read this manual thoroughly before installation and retain it for future reference.
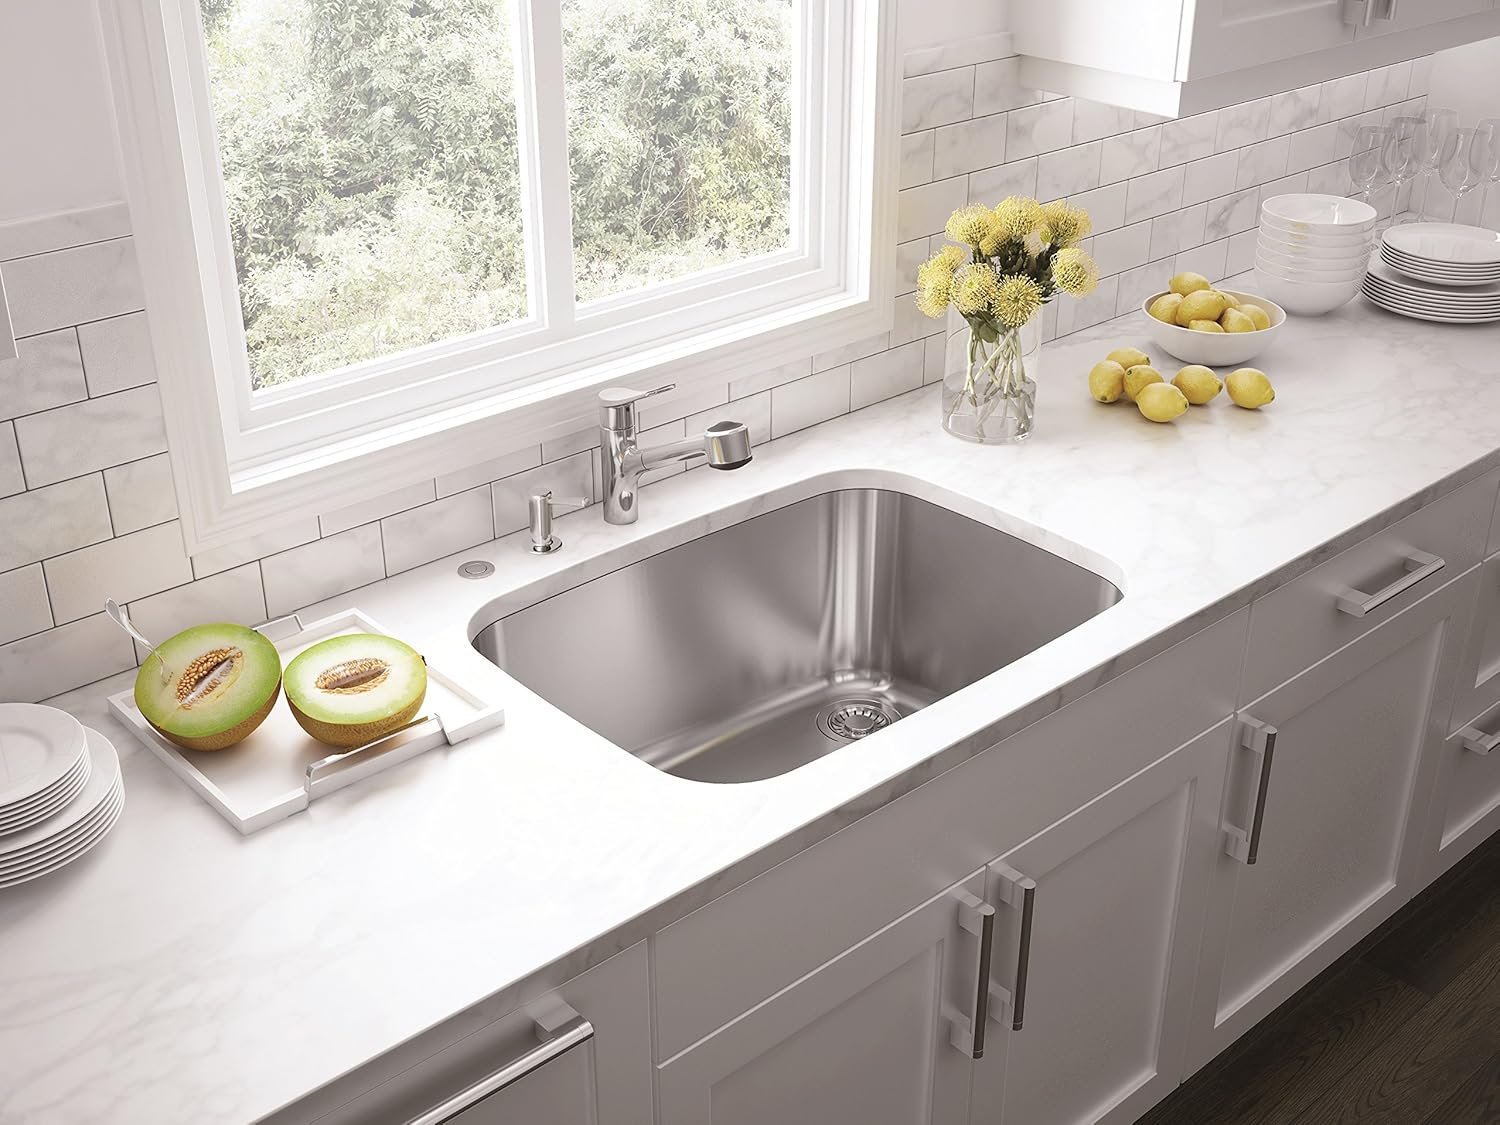
Image: The Franke FFPS200 Mambo faucet in a kitchen setting.
2. Información de seguridad
Observe siempre las siguientes precauciones de seguridad durante la instalación y el uso:
- Cierre el suministro principal de agua antes de comenzar cualquier instalación o mantenimiento.
- Utilice equipo de protección personal adecuado, como gafas y guantes de seguridad.
- Asegúrese de que todas las conexiones estén seguras para evitar fugas.
- Si no está seguro acerca de alguna parte de la instalación, consulte a un plomero calificado.
- No utilice productos químicos agresivos ni limpiadores abrasivos en el acabado del grifo.
3. Contenido del paquete
Verifique que todos los componentes estén presentes antes de la instalación:
- Franke FFPS200 Mambo Faucet Body
- Cabezal rociador extraíble
- Herrajes de montaje (tuerca, arandela, junta)
- Hot and Cold Water Supply Lines (20" stainless flex with 0.75 comp-fittings)
- Weight for Pull-Out Hose
- Guía de instalación (este manual)
4. Configuración e instalación
Follow these steps for proper installation of your Franke FFPS200 faucet:
- Prepare el fregadero: Ensure the sink has a 1-3/8-inch diameter hole for faucet mounting. Clean the area around the faucet hole.
- Monte el grifo: Insert the faucet body through the hole in the sink or countertop. From underneath, secure the faucet using the provided mounting nut and washer. The 1.5-inch long base mounting nut facilitates easy under-counter installation. Tighten securely but do not overtighten.
- Conectar las líneas de suministro de agua: Attach the hot and cold water supply lines to the corresponding water supply valves. The 20-inch stainless flex supply lines with 0.75 comp-fittings allow direct connection to most common supply valves. Ensure a watertight seal.
- Instalar la manguera extraíble y el peso: Connect the pull-out hose to the faucet's main body connection point. Attach the hose weight to the pull-out hose at the designated location, typically below the sink, to ensure smooth retraction of the spray head.
- Prueba de fugas: Once all connections are made, slowly turn on the main water supply. Check all connections for any signs of leaks. Operate the faucet to ensure proper water flow and temperature control.
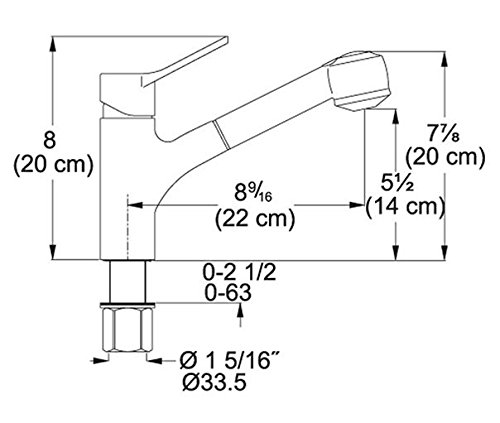
Image: Technical drawing with key dimensions for installation.
5. Instrucciones de funcionamiento
The Franke FFPS200 Mambo faucet features a single handle for easy control and a convenient pull-out spray head.
- Flujo y temperatura del agua: The extra-large single handle controls both water flow and temperature. Lift the handle to increase flow. Move the handle left for hot water and right for cold water.
- Cabezal rociador extraíble: Grasp the spray head and pull it out from the spout. The flexible hose allows for extended reach. Press the button on the spray head to switch between spray patterns (if applicable). After use, guide the spray head back into the spout; the hose weight will assist in smooth retraction.
- Caño giratorio: The faucet spout has a 150-degree swivel range, allowing you to direct water flow across a wide area of your sink.
6. Mantenimiento y limpieza
Proper care will ensure the longevity and appearance of your Franke faucet.
- Limpieza del acabado: Limpie regularmente el acabado cromado con un paño suave.amp Paño y jabón suave. Enjuague bien y seque con un paño suave para evitar manchas de agua. Evite limpiadores abrasivos, productos químicos fuertes o estropajos, ya que pueden dañar el acabado.
- Cartucho cerámico: The faucet is equipped with a durable ceramic cartridge designed for leak-free operation and easy servicing. If you experience persistent drips or leaks, the cartridge may need inspection or replacement. Consult a professional if necessary.
- Mantenimiento del aireador: Desenrosque periódicamente el aireador del cabezal rociador y limpie cualquier residuo o depósito mineral. Esto ayuda a mantener un flujo de agua óptimo.
7. Solución de problemas
Consulte la siguiente tabla para conocer problemas comunes y sus soluciones:
| Problema | Posible causa | Solución |
|---|---|---|
| Bajo caudal de agua | Clogged aerator; partially closed supply valve | Clean aerator; fully open supply valves |
| Fuga del pico | Cartucho de cerámica desgastado | Replace ceramic cartridge (consult professional) |
| Fugas en la base | Loose mounting nut; damaged gasket | Tighten mounting nut; inspect and replace gasket |
| Spray Head Does Not Retract | Peso de la manguera desalojado u obstruido | Check and reposition hose weight; clear obstructions |
If you encounter issues not listed here or if the suggested solutions do not resolve the problem, please contact Franke customer support.
8. Especificaciones
- Marca: Franco
- Número de modelo: FFPS200
- Tipo de acabado: Cromo
- Material: Metal
- Cantidad de asas: 1
- Número de agujeros: 1
- Tasa de flujo máxima: 2.2 galones por minuto (GPM)
- Altura del pico: 5.5 pulgadas
- Alcance del surtidor: 8.5625 Inches (from product description, specification says 5.5 inches, using description's more specific value)
- Ubicación del mango: Arriba
- Installation Hole Requirement: 1-3/8 pulgadas
- Tipo de cartucho: Cerámico
9. Garantía y soporte
Franke products are manufactured to high-quality standards and come with a manufacturer's warranty. For specific warranty details, including coverage and duration, please refer to the warranty card included with your purchase or visit the official Franke website. For technical assistance, replacement parts, or customer support, please contact Franke customer service directly.