
Introducción
Gracias por la compraasing the SENTRY CL933 Big Screen Weather Alarm Clock. This device combines a digital alarm clock with a large LCD display, providing essential information such as time, date, indoor temperature, humidity, and a weather forecast. This manual will guide you through the setup, operation, and maintenance of your new alarm clock.
Información de seguridad
- No exponga la unidad a temperaturas extremas, luz solar directa o humedad alta.
- Evite dejar caer o someter la unidad a impactos fuertes.
- No mezcle baterías viejas y nuevas, o diferentes tipos de baterías.
- Retire las baterías si la unidad no se utilizará durante un período prolongado.
- Limpie la unidad con un paño suave y seco. No utilice limpiadores abrasivos ni disolventes.
- Este producto es solo para uso en interiores.
Contenido del paquete
Por favor, compruebe que todos los elementos estén presentes:
- SENTRY CL933 Big Screen Weather Alarm Clock
- Manual de usuario (este documento)
Producto terminadoview
The SENTRY CL933 features a large, easy-to-read LCD display and intuitive controls. Familiarize yourself with the main components:
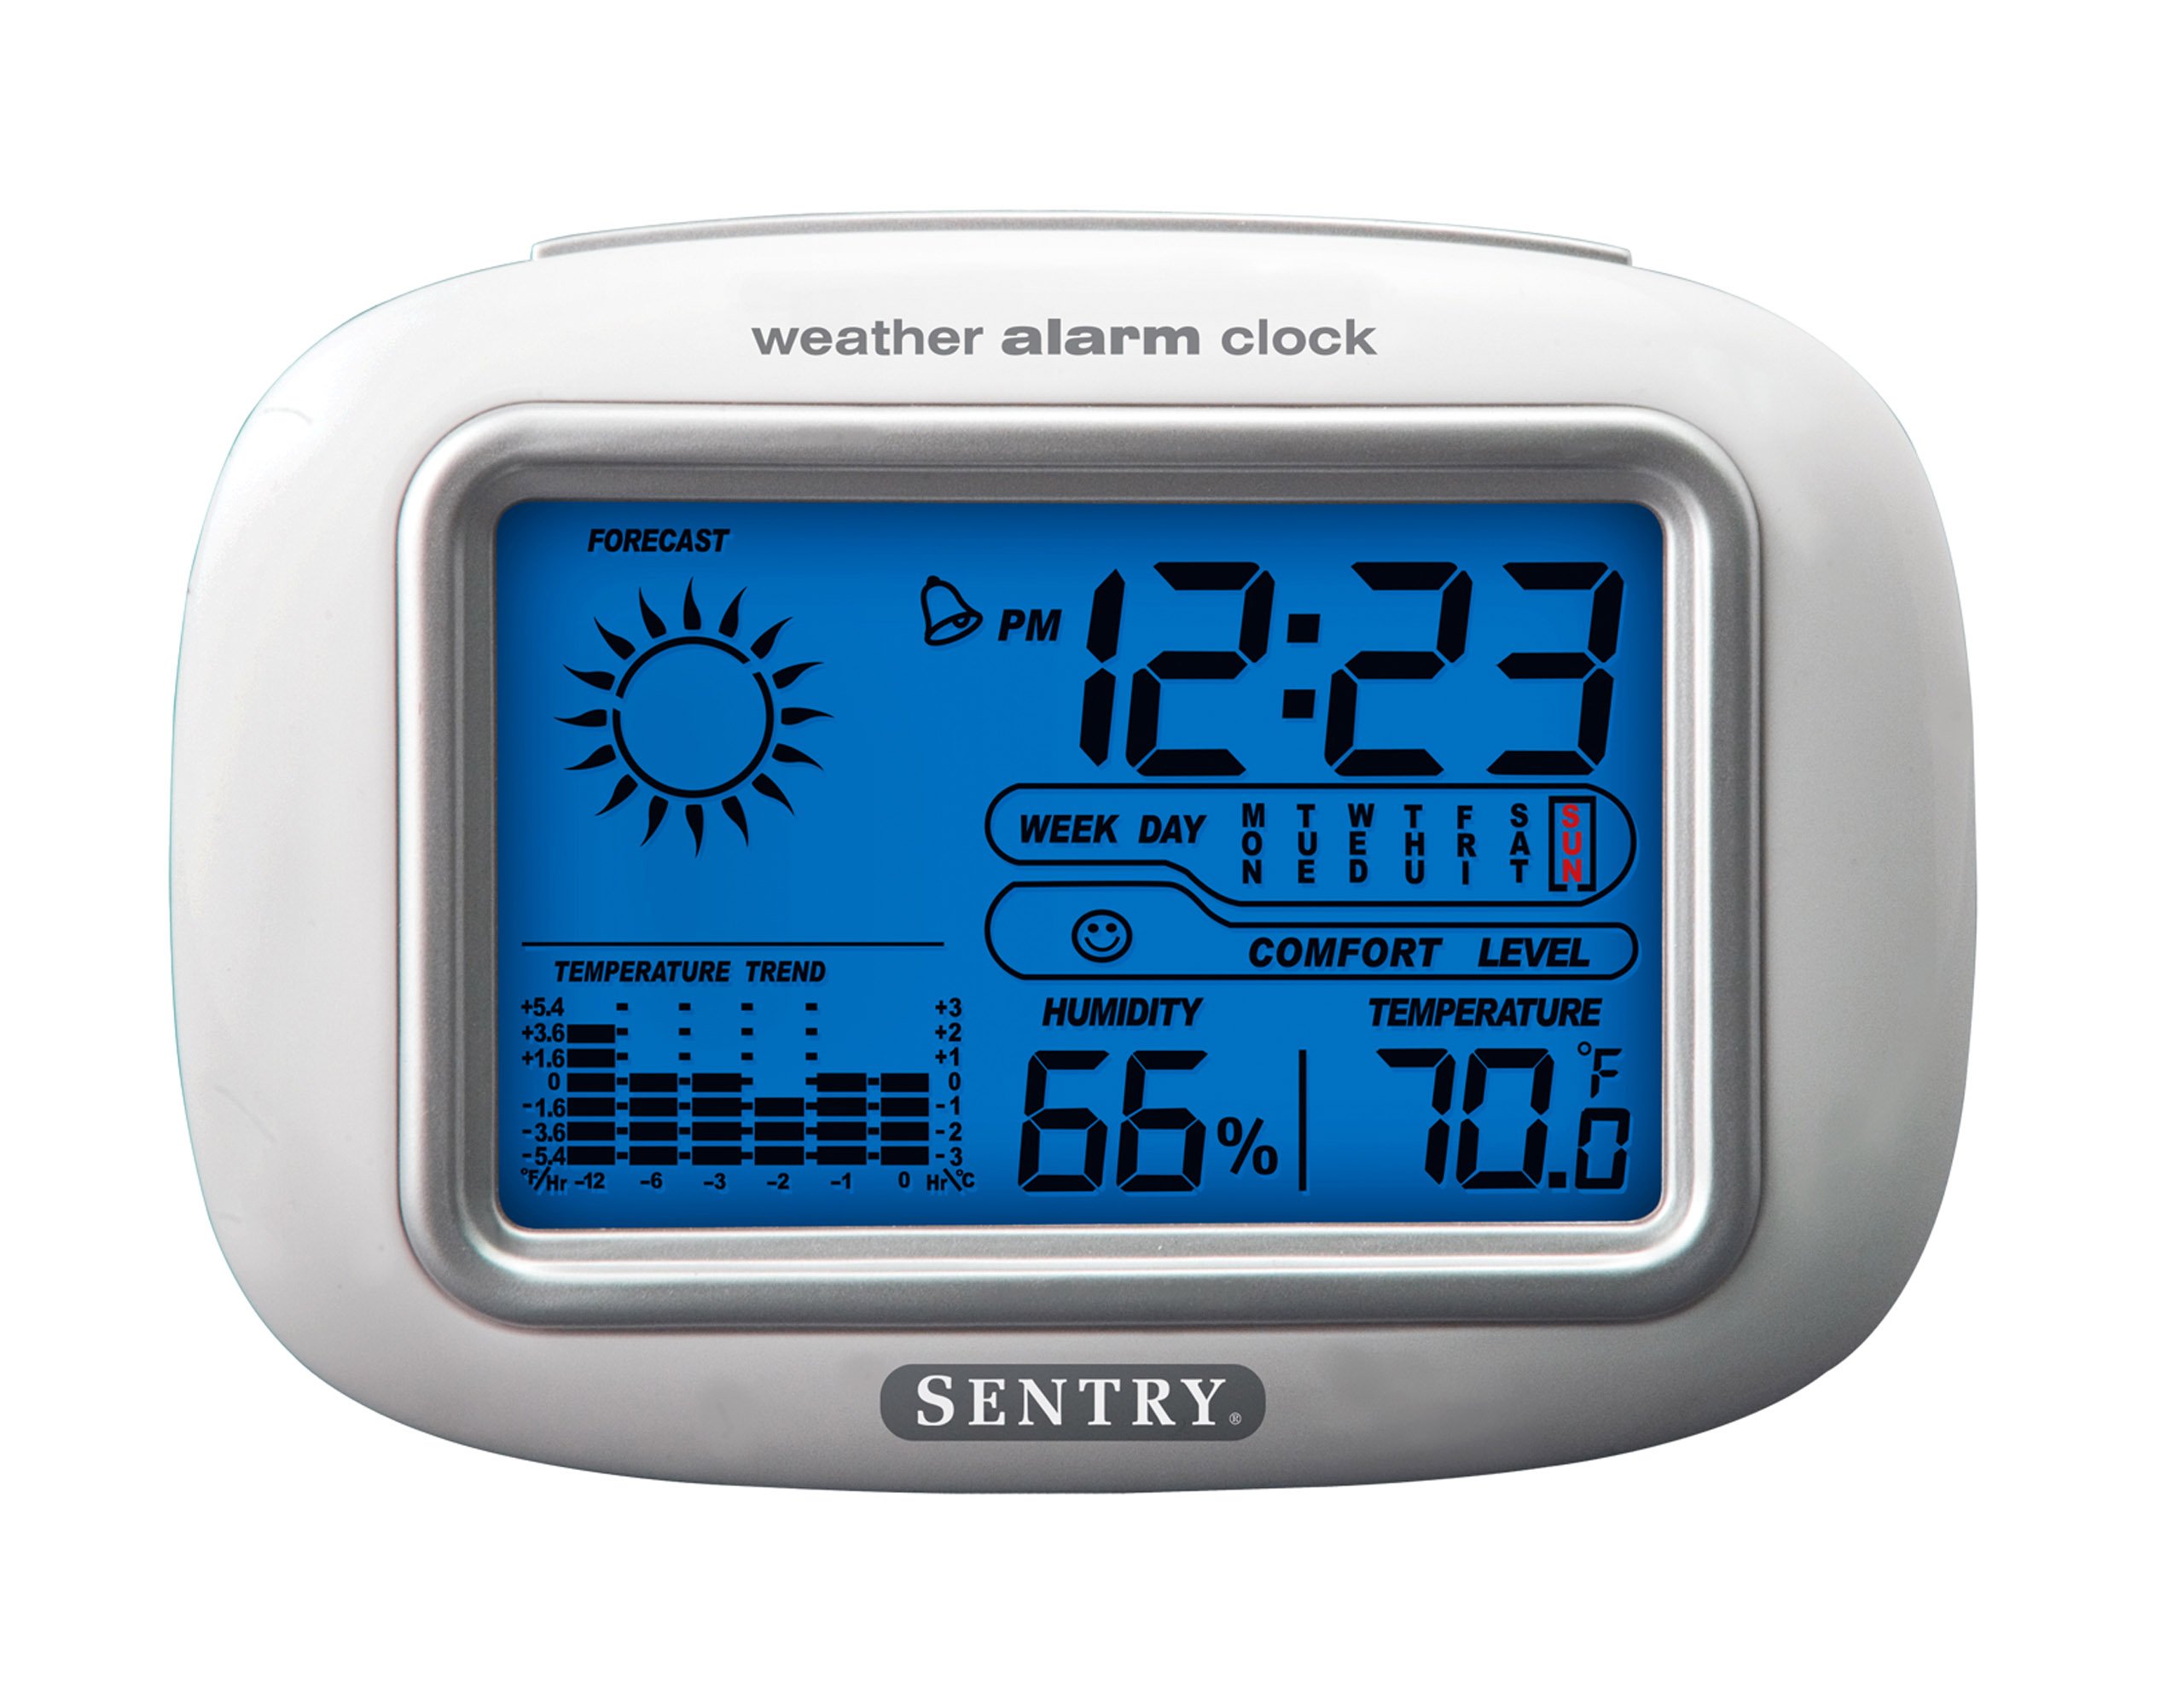
The SENTRY CL933 Big Screen Weather Alarm Clock displayed in its retail packaging, showing the clock face with time, weather forecast, humidity, and temperature readings.
Elementos de visualización:
- Visualización de la hora: Shows current time (12/24 hour format).
- Fecha y día de la semana: Displays the current date and day.
- Weather Forecast Icon: Indicates predicted weather conditions (e.g., sunny, cloudy, rainy).
- Moon Phase Icon: Muestra la fase lunar actual.
- Pantalla de temperatura: Muestra la temperatura interior en grados Celsius o Fahrenheit.
- Pantalla de humedad: Shows indoor humidity percentage.
- Icono de nivel de comodidad: Indicates the comfort level based on temperature and humidity.
- Indicador de tendencia de temperatura: Shows if the temperature is rising, falling, or stable over the last 12 hours.
- Icono de alarma: Indicates when the alarm is set.
Control Buttons (typically on the back or sides):
- MODE/SET Button: Used to switch between display modes and enter setting mode.
- Botones ARRIBA/ABAJO: Used to adjust values during setting and sometimes to toggle display options.
- Botón de alarma: Used to set or activate/deactivate the alarm.
- Botón SNOOZE/LIGHT: Activates the backlight and functions as the snooze button when the alarm sounds.
- Botón °C/°F: Alterna entre la visualización de temperatura en Celsius y Fahrenheit.
Configuración
1. Instalación de la batería
- Localice la tapa del compartimiento de la batería en la parte posterior de la unidad.
- Retire la cubierta deslizándola o levantándola.
- Insert two (2) new AAA batteries (not included) according to the polarity indicators (+ and -) inside the compartment.
- Vuelva a colocar la tapa del compartimiento de la batería de forma segura.
- El reloj se encenderá y la pantalla se activará.
2. Colocación inicial
Place the alarm clock on a stable, flat surface away from direct heat sources, strong vibrations, or areas with extreme temperature fluctuations for accurate readings.
Instrucciones de funcionamiento
1. Configuración de hora y fecha
- Mantenga pulsado el MODO/AJUSTE Mantenga pulsado el botón durante aproximadamente 3 segundos para acceder al modo de ajuste de la hora. El dígito de la hora empezará a parpadear.
- Utilice el UP or ABAJO Botones para ajustar la hora.
- Prensa MODO/AJUSTE nuevamente para confirmar la hora y pasar al ajuste de los minutos.
- Repita los pasos 2 y 3 para los minutos, el año, el mes y el día.
- Después de configurar el día, presione MODO/AJUSTE una última vez para salir del modo de configuración.
- Para cambiar entre el formato de hora de 12 horas y 24 horas, presione el botón UP Botón mientras la hora parpadea durante la configuración de la hora.
2. Configuración de la alarma
- Presione el ALARMA Presione el botón una vez para mostrar la hora de alarma actual.
- Mantenga pulsado el ALARMA button for approximately 3 seconds. The alarm hour digit will start flashing.
- Utilice el UP or ABAJO Botones para ajustar la hora de la alarma.
- Prensa ALARMA again to confirm the hour and move to the alarm minute setting.
- Utilice el UP or ABAJO Botones para ajustar los minutos de la alarma.
- Prensa ALARMA una última vez para confirmar y salir del modo de configuración de alarma.
- Para activar o desactivar la alarma, presione el botón ALARMA button briefly when the current time is displayed. An alarm icon will appear on the display when the alarm is active.
3. Función de repetición y luz de fondo
- Cuando suene la alarma, presione el DORMITOR / LUZ button to activate the snooze function. The alarm will temporarily stop and sound again after a few minutes (typically 5-10 minutes).
- Para apagar la alarma por completo, presione cualquier otro botón (por ejemplo, ALARMA, MODO/AJUSTE) when the alarm is sounding.
- Presione el DORMITOR / LUZ button at any time to activate the backlight for a few seconds, illuminating the display for easy viewing in low light conditions. The backlight is not designed to stay on continuously to conserve battery life.
4. Selección de la unidad de temperatura (°C/°F)
Presione el ° C / ° F button (usually located on the back or side) to toggle the temperature display between Celsius and Fahrenheit.
5. Understanding Weather and Environmental Displays
- Pronóstico del tiempo: The icon (e.g., sun, clouds, rain) represents a prediction of the weather for the next 12-24 hours based on atmospheric pressure changes detected by the internal sensor. This is an estimate and may not always match official weather reports.
- Humedad: Displays the current indoor relative humidity percentage.
- Nivel de comodidad: An icon (e.g., smiley face, neutral face, frowny face) indicates the indoor comfort level based on the combination of temperature and humidity.
- Tendencia de la temperatura: The arrow indicator shows if the indoor temperature has been rising, falling, or remaining stable over the past 12 hours.
- Fase lunar: The moon icon changes to reflect the current phase of the moon.
Mantenimiento
- Limpieza: Limpie la unidad con un paño suave, ligeramenteamp paño. No utilice productos químicos agresivos ni materiales abrasivos.
- Reemplazo de batería: When the display becomes dim or functions become erratic, replace the two AAA batteries. Ensure correct polarity.
- Almacenamiento: Si va a guardar el reloj durante un período prolongado, retire las pilas para evitar fugas.
Solución de problemas
| Problema | Posible causa / solución |
|---|---|
| La pantalla está en blanco o tenue. | Batteries are low or incorrectly installed. Replace with new AAA batteries, ensuring correct polarity. |
| No se puede configurar la hora/fecha. | Asegúrese de mantener presionado el MODO/AJUSTE durante 3 segundos para ingresar al modo de configuración. |
| La alarma no suena. | The alarm may not be activated. Press the ALARMA button briefly to ensure the alarm icon is displayed. Check alarm time setting. |
| Temperatura/humedad inexacta. | The unit may be placed near a heat source, vent, or in direct sunlight. Move the clock to a more stable environment. Readings are for indoor conditions only. |
| El pronóstico del tiempo parece incorrecto. | The weather forecast is an estimate based on internal barometric pressure changes and may not always align with local weather reports. It is a general trend indicator. |
Presupuesto
- Modelo: CL933
- Marca: CENTINELA
- Tipo de pantalla: LCD digital con retroiluminación
- Fuente de energía: Funciona con pilas
- Pilas necesarias: 2 x AAA (no incluido)
- Dimensiones: 6.5 x 2.25 x 4.25 pulgadas (16.5 x 5.7 x 10.8 cm)
- Peso: 6.2 onzas (176 gramos)
- Características: Time, Date, Day of Week, Alarm, Snooze, Indoor Temperature (°C/°F), Indoor Humidity, Weather Forecast Icons, Moon Phase, Comfort Level Indicator, 12-hour Temperature Trend.
- Tipo de montaje: Superficie de la mesa
Garantía y soporte
SENTRY products are designed for reliability and performance. For any questions, technical support, or warranty inquiries, please refer to the contact information provided with your purchase or visit the official SENTRY webSitio web. Conserve su comprobante de compra para reclamaciones de garantía.