Introducción
Thank you for choosing the Oster Rechargeable and Cordless Electric Wine Opener. This device is designed for effortless cork removal and includes a thermal wine chiller and a foil cutter for a complete wine experience. Please read this manual thoroughly before use to ensure proper operation and maintenance.
Medidas de seguridad importantes
Al utilizar aparatos eléctricos, siempre se deben seguir precauciones básicas de seguridad para reducir el riesgo de incendio, descarga eléctrica y/o lesiones a las personas, incluidas las siguientes:
- Lea todas las instrucciones antes de usar este producto.
- To protect against electrical hazards, do not immerse the charging base, power adapter, or electric wine opener in water or other liquids.
- Este aparato no está diseñado para ser utilizado por personas (incluidos niños) con capacidades físicas, sensoriales o mentales reducidas, o con falta de experiencia y conocimientos, a menos que hayan recibido supervisión o instrucciones sobre el uso del aparato por parte de una persona responsable de su seguridad.
- Es necesaria una supervisión estricta cuando un aparato es utilizado por niños o cerca de ellos. Los niños deben ser supervisados para asegurarse de que no jueguen con el aparato.
- Desconéctelo del tomacorriente cuando no esté en uso, antes de colocar o quitar piezas y antes de limpiarlo.
- Evite el contacto con piezas móviles.
- No opere ningún electrodoméstico con un cable o enchufe dañado, o después de que el electrodoméstico funcione mal o se haya caído o dañado de alguna manera. Devuelva el aparato al centro de servicio autorizado más cercano para su examen, reparación o ajuste eléctrico o mecánico.
- El uso de accesorios no recomendados o vendidos por el fabricante puede provocar incendios, descargas eléctricas o lesiones.
- No utilizar en exteriores.
- No deje que el cable cuelgue del borde de la mesa o mostrador, ni que toque superficies calientes.
- No lo coloque sobre o cerca de un quemador de gas o eléctrico caliente, ni dentro de un horno caliente.
- Siempre conecte primero el enchufe al aparato y luego el cable a la toma de corriente. Para desconectarlo, apague cualquier control y desenchúfelo de la toma de corriente.
- No utilice el aparato para ningún fin distinto del previsto.
- The foil cutter blades are sharp. Exercise caution when handling.
- The corkscrew is sharp. Keep fingers away from the corkscrew mechanism during operation.
Componentes del producto
The Oster Electric Wine Opener set includes the following components:
- Abridor de vino eléctrico
- Base de recarga
- Adaptador de corriente
- cortador de papel de aluminio
- Thermal Stainless Steel Wine Chiller

Imagen: The Oster Electric Wine Opener showing its power indicator light, soft grip handle, foil cutter, and compact recharging base.

Imagen: The complete Oster Electric Wine Opener set, including the opener, charging base, and thermal wine chiller.
Configuración y carga
- Place the recharging base on a flat, stable surface.
- Connect the power adapter to the recharging base and plug it into a standard electrical outlet.
- Place the electric wine opener onto the recharging base. Ensure it is seated correctly. The power indicator light on the opener will illuminate, indicating it is charging.
- Allow the wine opener to charge for at least 8-10 hours before its first use. A full charge can open up to 30 bottles.
Instrucciones de funcionamiento
Using the Foil Cutter
- Coloque el cortador de papel de aluminio encima de la botella de vino, sujetándola firmemente.
- Rotate the foil cutter around the bottle neck to cut and remove the foil seal.
- Carefully remove the foil.
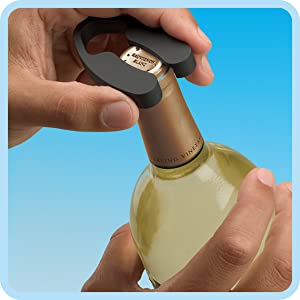
Imagen: The foil cutter being used to remove the seal from a wine bottle.
Using the Electric Wine Opener
- After removing the foil, place the electric wine opener vertically on top of the wine bottle, ensuring it is centered over the cork.
- Sujete firmemente la botella con una mano y el abridor de vino con la otra.
- Press and hold the "down" button. The corkscrew will automatically rotate to penetrate the cork and pull it out of the bottle. The opener will stop automatically once the cork is fully extracted.
- Lift the opener away from the bottle.
- To release the cork from the opener, press and hold the "up" button. The cork will be ejected.

Imagen: A three-step visual guide showing the foil cutter removing the seal, the opener penetrating the cork, and the cork being removed from the bottle.
Using the Thermal Stainless Steel Wine Chiller
The double-walled thermal wine chiller is designed to keep your wine cool for extended periods without the need for ice, preventing condensation and maintaining the bottle's label integrity.
- For best results, pre-chill the wine chiller in a refrigerator or freezer for at least 30 minutes before use.
- Place your pre-chilled wine bottle directly into the chiller.
- The double-wall insulation will help maintain the wine's temperature for hours.

Imagen: Un primer plano view of the double-walled, thermal stainless steel wine chiller.
Limpieza y mantenimiento
- Always unplug the charging base from the electrical outlet before cleaning.
- Wipe the exterior of the electric wine opener and charging base with a soft, damp cloth. Do not immerse them in water or any other liquid.
- The foil cutter can be rinsed under warm water. Ensure it is completely dry before storing.
- The thermal stainless steel wine chiller can be washed with warm, soapy water and rinsed thoroughly. Dry immediately to prevent water spots.
- No utilice limpiadores abrasivos ni estropajos, ya que pueden rayar las superficies.
- Guarde el aparato en un lugar seco cuando no esté en uso.
Solución de problemas
| Problema | Posible causa | Solución |
|---|---|---|
| Wine opener does not operate. | La batería no está cargada. | Place the opener on the charging base and allow it to charge for 8-10 hours. |
| Cork does not come out easily. | Opener not centered on the bottle; cork is synthetic or very tight. | Ensure the opener is perfectly vertical and centered. Apply gentle downward pressure while pressing the "down" button. For synthetic corks, the process might take slightly longer. |
| El corcho está atascado en el abridor. | Cork did not fully eject. | Press and hold the "up" button until the cork is fully released. If it remains stuck, gently pull it out manually. |
| Wine chiller does not keep wine cold. | Chiller was not pre-chilled; wine bottle was not pre-chilled. | Pre-chill the chiller and the wine bottle for optimal performance. The chiller is designed to maintain temperature, not rapidly cool warm wine. |
Presupuesto
- Marca: Oster
- Número de modelo: 004208-FFP-000
- Material: Acero inoxidable
- Color: Acero inoxidable
- Tipo de acabado: Cepillado
- Peso del artículo: 3.45 libras
- Dimensiones del producto: Opener: 10.25" H; Base: 2.25" W. Overall footprint: 5.9"L x 6.1"W.
- Código postal: 034264452923
- Componentes incluidos: Electric Wine Opener, Recharging Base, Power Adapter, Foil Cutter, Thermal Stainless Steel Wine Chiller
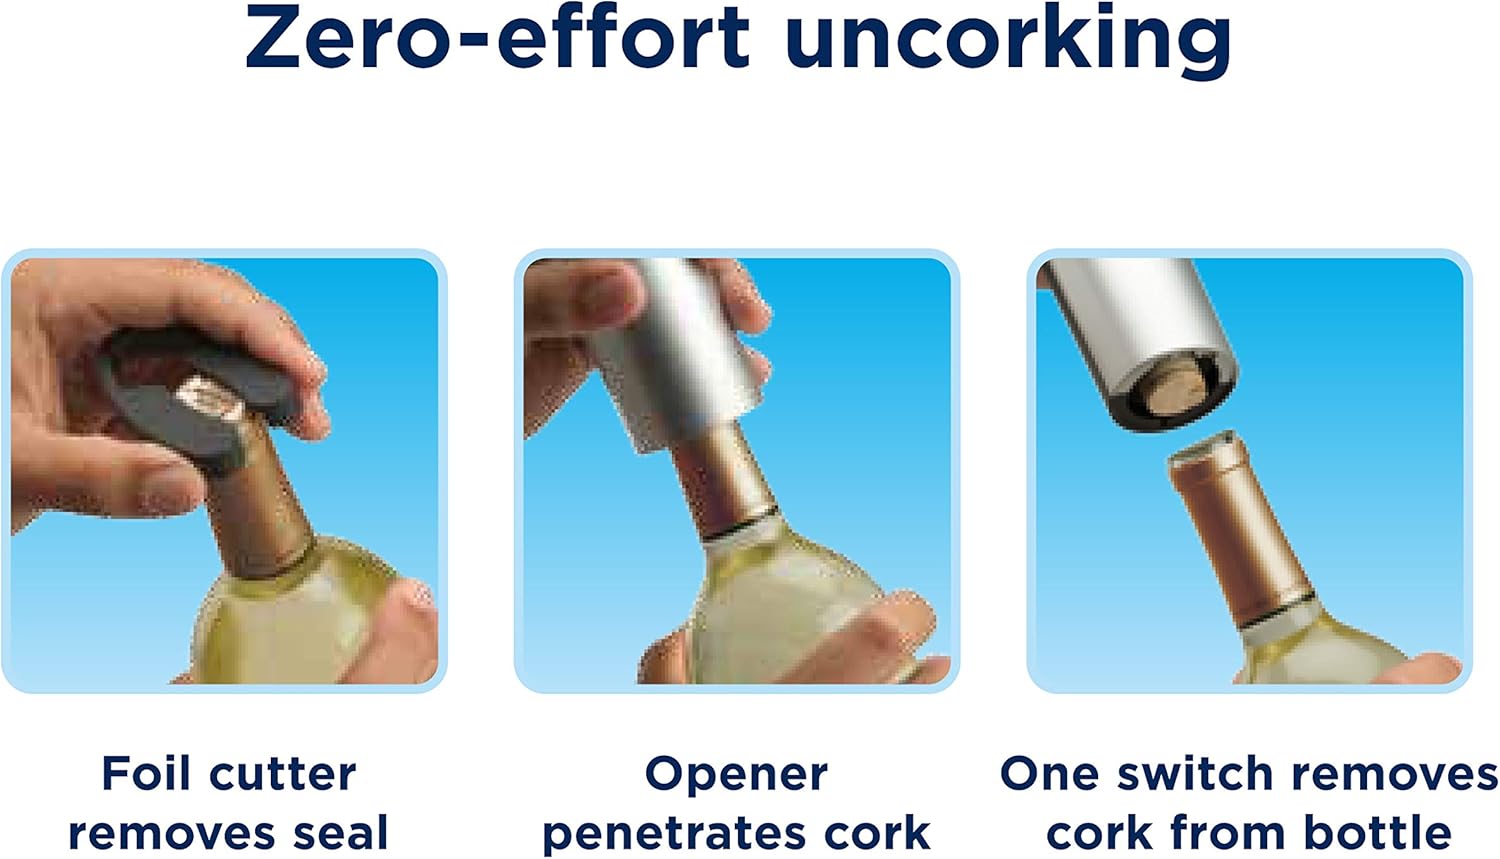
Imagen: The Oster Electric Wine Opener on its charging base, illustrating its approximate height of 10.25 inches and base width of 2.25 inches.
Garantía y soporte
This Oster product comes with a Garantía limitada de 1 años A partir de la fecha de compra. Esta garantía cubre defectos de fabricación en materiales y mano de obra en condiciones normales de uso.
For warranty claims, technical support, or product inquiries, please contact Oster customer service. Keep your purchase receipt as proof of purchase for warranty validation.
Please refer to the official Oster websitio o el embalaje de su producto para obtener la información de contacto más actualizada y los términos de garantía detallados.