1. Introducción
This manual provides essential information for the proper setup, operation, and maintenance of your Dual DAB 2 A DAB/DAB+ Radio Adapter. Please read these instructions carefully before using the device to ensure optimal performance and safety. The Dual DAB 2 A allows you to upgrade your existing stereo system with digital radio reception (DAB/DAB+) and traditional FM radio.
2. Información de seguridad
- Fuente de energía: Utilice únicamente el adaptador de corriente especificado. Asegúrese de que el voltage coincide con los requisitos del dispositivo.
- Agua y humedad: No exponga el dispositivo a la lluvia, la humedad ni a salpicaduras de líquidos. No coloque objetos con líquido, como jarrones, sobre el dispositivo.
- Ventilación: Asegúrese de que haya una ventilación adecuada. No bloquee las aberturas de ventilación.
- Calor: Mantenga el dispositivo alejado de fuentes de calor como radiadores, rejillas de calefacción, estufas u otros aparatos (incluidos ampificadores) que producen calor.
- Limpieza: Desconecte el dispositivo de la toma de corriente antes de limpiarlo. Utilice un paño suave y seco. No utilice limpiadores líquidos ni en aerosol.
- Servicio: No intente reparar este producto usted mismo. Refiera todo el servicio a personal de servicio calificado.
3. Contenido del paquete
Compruebe que todos los artículos enumerados a continuación estén incluidos en su paquete:
- Dual DAB 2 A Radio Adapter
- Adaptador de corriente
- External Antenna (wire with connector)
- Mando a distancia
- Manual de usuario (este documento)
4. Producto terminadoview
4.1 Panel frontal
The front panel features the main display and controls for operating the device.

Imagen 4.1: Frente view of the Dual DAB 2 A radio adapter. The display shows the current time (14:28) and the selected station ("Senderliste #Galaxy"). The "DAB+" logo is visible at the top left, and "Dual" is printed at the bottom center.

Imagen 4.2: Frente en ángulo view of the Dual DAB 2 A, providing a clearer look at the illuminated multi-line LCD display and the device's compact design.
4.2 Panel trasero y conexiones
The rear panel contains all necessary connection ports for power, antenna, and audio output.

Imagen 4.3: Trasero view of the Dual DAB 2 A. From left to right, the ports are: LINE OUT (3.5mm audio jack), CC 6.0 V = 0.5 A (power input), ANTENA (coaxial connector for external antenna), and FUERZA botón.

Imagen 4.4: Lado view of the Dual DAB 2 A, illustrating its compact and slightly curved profile.

Imagen 4.5: Lado en ángulo view showing the rear connections, including the Line Out, DC power input, and antenna port.
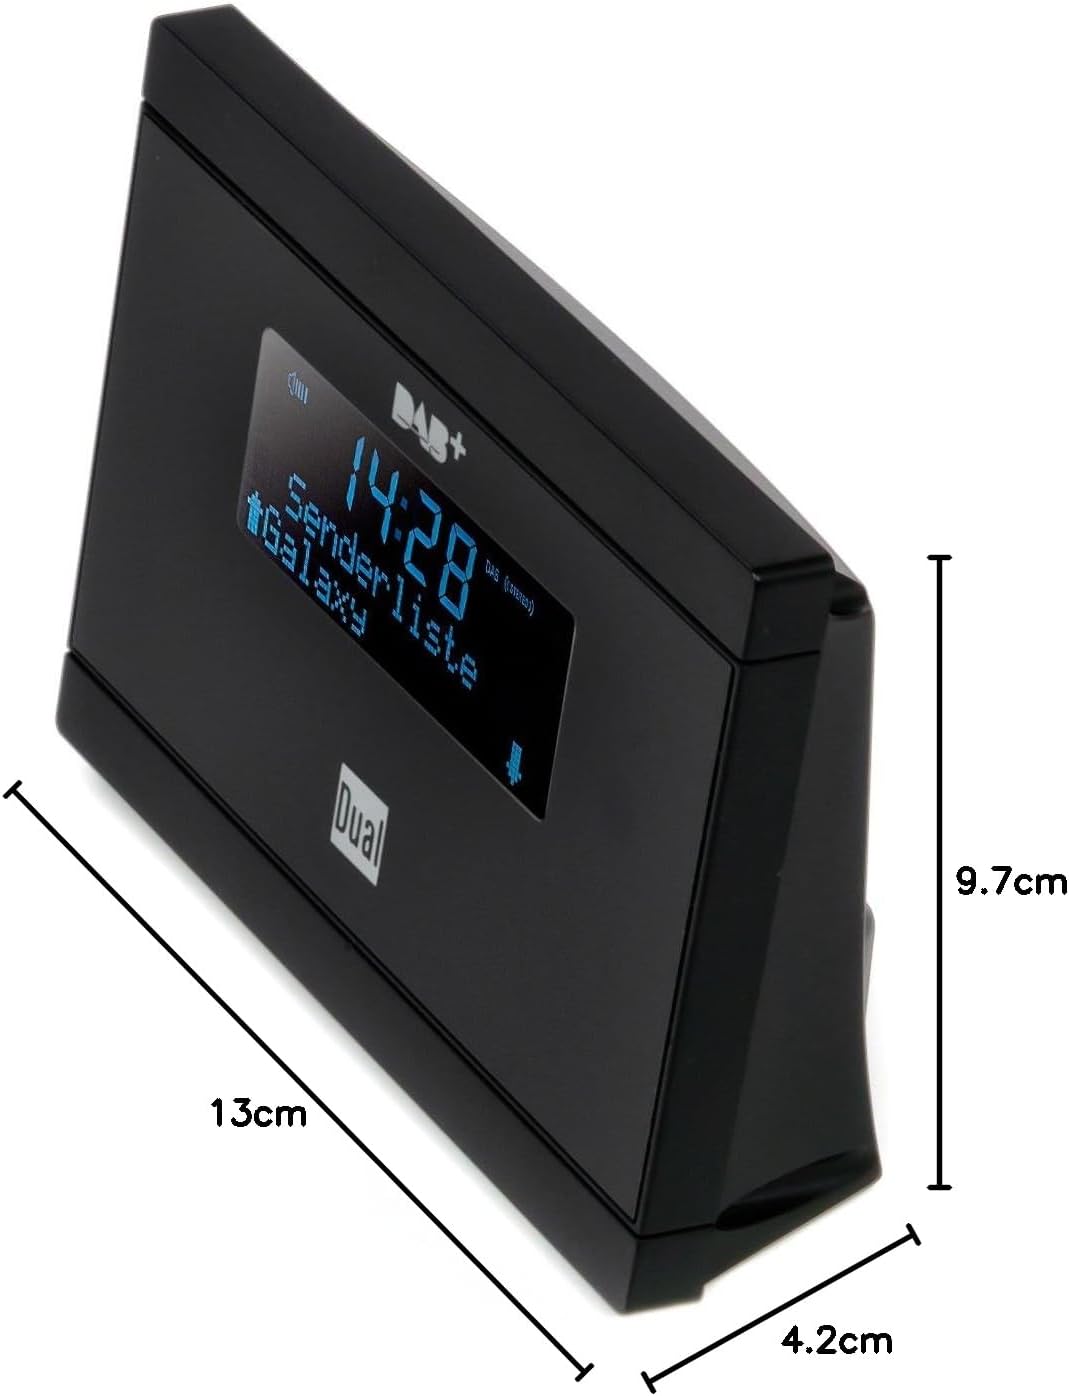
Imagen 4.6: Dimensions of the Dual DAB 2 A: 13 cm (length), 4.2 cm (width), and 9.7 cm (height).
5. Configuración
5.1 Conexión de la antena
- Localizar el ANTENA port on the rear of the DAB 2 A.
- Connect the supplied external wire antenna to this port.
- For optimal reception, position the antenna away from other electronic devices and metallic objects. You may also connect a commercially available external antenna for improved signal quality.
5.2 Connecting to your Stereo System
- Localizar el LINE OUT (3.5mm jack) on the rear of the DAB 2 A.
- Connect an audio cable (not supplied) from the LINE OUT of the DAB 2 A to an available audio input (e.g., AUX IN, LINE IN) on your existing stereo system or audio device.
5.3 Conexión de alimentación
- Conecte el adaptador de corriente suministrado a la CC 6.0 V = 0.5 A port on the rear of the DAB 2 A.
- Conecte el adaptador de corriente a una toma de pared adecuada.
6. Instrucciones de funcionamiento
6.1 Encendido / Apagado
Presione el FUERZA button on the rear of the device or on the remote control to turn the unit on or off.
6.2 Escaneo inicial (DAB/DAB+)
Upon first power-on, the device will automatically perform a scan for available DAB/DAB+ stations. This process may take a few minutes. Once complete, the first available station will begin playing.
6.3 Switching Between DAB/DAB+ and FM
Utilice el MODO button on the remote control or the device (if available) to switch between DAB/DAB+ and FM radio modes.
6.4 Sintonización y selección de emisoras
- DAB/DAB+: Utilice el ARRIBA/ABAJO arrow buttons on the remote control or device to navigate through the list of available digital stations.
- FM: En el modo FM, utilice el ARRIBA/ABAJO arrow buttons to manually tune frequencies or initiate an automatic scan for the next available station.
6.5 Almacenamiento y recuperación de ajustes preestablecidos
The DAB 2 A allows you to store up to 20 favorite stations (DAB/DAB+ and FM combined).
- Para almacenar: Sintonice la emisora deseada. Mantenga pulsado el botón PROGRAMAR button (or similar, refer to remote control layout) until the display shows a preset number. Use the arrow buttons to select a preset number (1-20) and confirm.
- Para recordar: Presione el PROGRAMAR button briefly, then use the arrow buttons to select the desired preset station.
6.6 Clock, Alarm, and Sleep Functions
The device features a clock, alarm, and sleep timer. Refer to the detailed instructions in the full manual for setting these functions. The alarm can be set to wake you with DAB, FM, or a buzzer sound.
7. Mantenimiento
- Limpieza: Always unplug the device before cleaning. Use a soft, dry, lint-free cloth to wipe the surfaces. Do not use abrasive cleaners, waxes, or solvents.
- Almacenamiento: Si no va a utilizarlo durante un período prolongado, desenchufe el dispositivo y guárdelo en un lugar fresco y seco.
8. Solución de problemas
| Problema | Posible causa | Solución |
|---|---|---|
| Sin poder | Adaptador de corriente no conectado o toma de corriente defectuosa. | Asegúrese de que el adaptador de corriente esté conectado de forma segura al dispositivo y a una toma de corriente que funcione. |
| Sin sonido | Audio cable not connected, incorrect input selected on stereo, or volume too low. | Check audio cable connection. Select the correct input on your stereo system. Increase volume on both the DAB 2 A and your stereo. |
| Poor DAB/DAB+ reception or no stations found | Weak signal, antenna not properly connected or positioned. | Ensure the antenna is securely connected and positioned for optimal reception. Try repositioning the antenna. Consider using a higher-gain external antenna. Perform a full scan for stations. |
| Recepción de FM deficiente | Weak signal, antenna not properly connected or positioned. | Extend and reposition the wire antenna. Try a different antenna if available. |
| El control remoto no funciona | Batteries are dead or incorrectly inserted, or line of sight is blocked. | Replace batteries with new ones, ensuring correct polarity. Remove any obstructions between the remote and the device. |
9. Especificaciones
| Característica | Detalle |
|---|---|
| Marca | Dual |
| Número de modelo | DAB 2 A |
| Color | Negro |
| Tecnología de conectividad | Auxiliar (salida de línea de 3.5 mm) |
| Características especiales | DAB/DAB+ Radio, FM Tuner, Clock, Alarm, Sleep Function |
| Dispositivos compatibles | Devices with 3.5 mm audio connector |
| Dimensiones del producto (L x An x Al) | 13 cm x 4.2 cm x 9.7 cm |
| Tecnología de ajuste | FM, DAB, DAB+ |
| Fuente de poder | Electric Cable (DC 6.0V=0.5A) |
| Bandas de radio compatibles | FM, DAB, DAB+ |
| Peso del artículo | 200 gramos |
10. Garantía y soporte
For warranty information and technical support, please refer to the documentation provided with your purchase or contact Dual customer service. Keep your proof of purchase for any warranty claims.