
1. Introducción
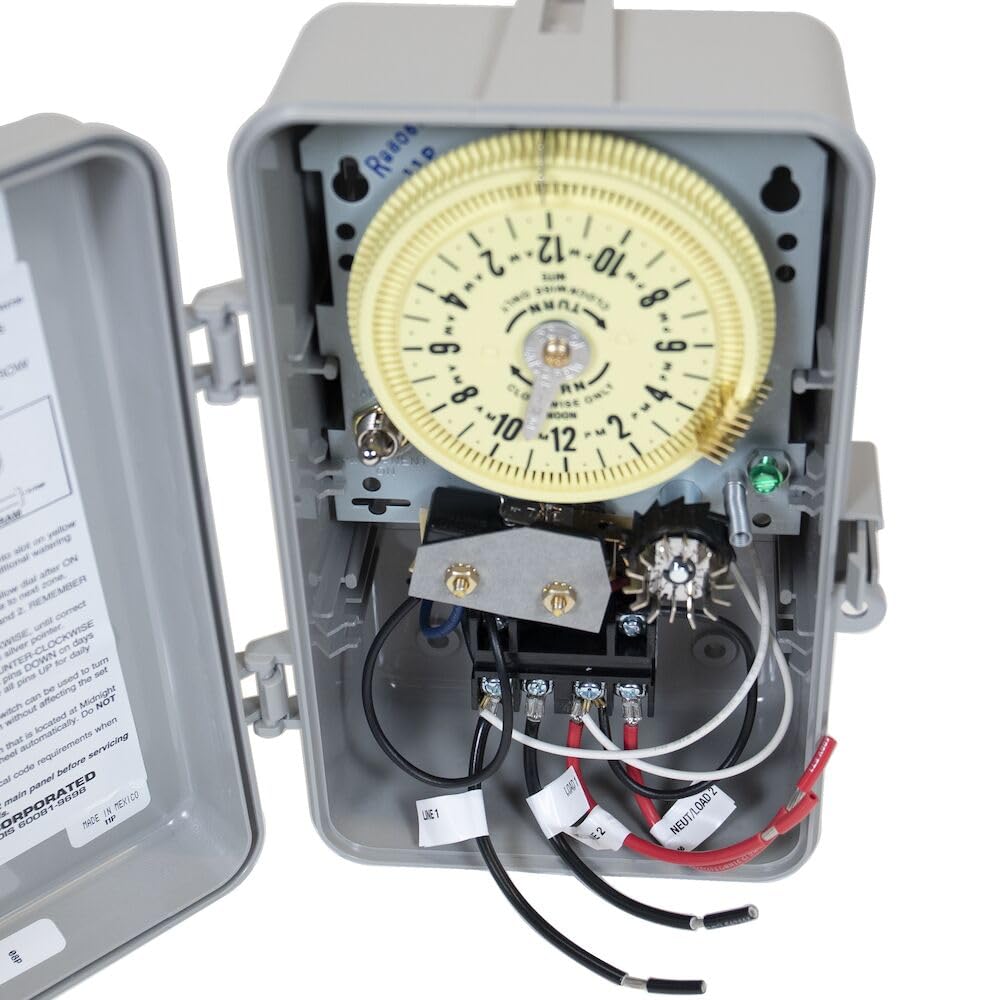
This manual provides instructions for the installation, operation, and maintenance of the Intermatic R8806P101C Sprinkler Irrigation Timer. This mechanical timer is designed for outdoor use with indexing irrigation valve systems, offering precise control over water usage.
The R8806P101C features a NEMA 3R Raintight Plastic housing, making it suitable for various outdoor environments. It operates at 208/277 Volts with an ampmedia de 25 Amps per pole (DPST switch type) and has a 2HP rating. The timer allows for up to 60 ON/OFF set points every 24 hours, providing flexible scheduling for your irrigation needs.
2. Información de seguridad
CAUTION - RISK OF ELECTRIC SHOCK
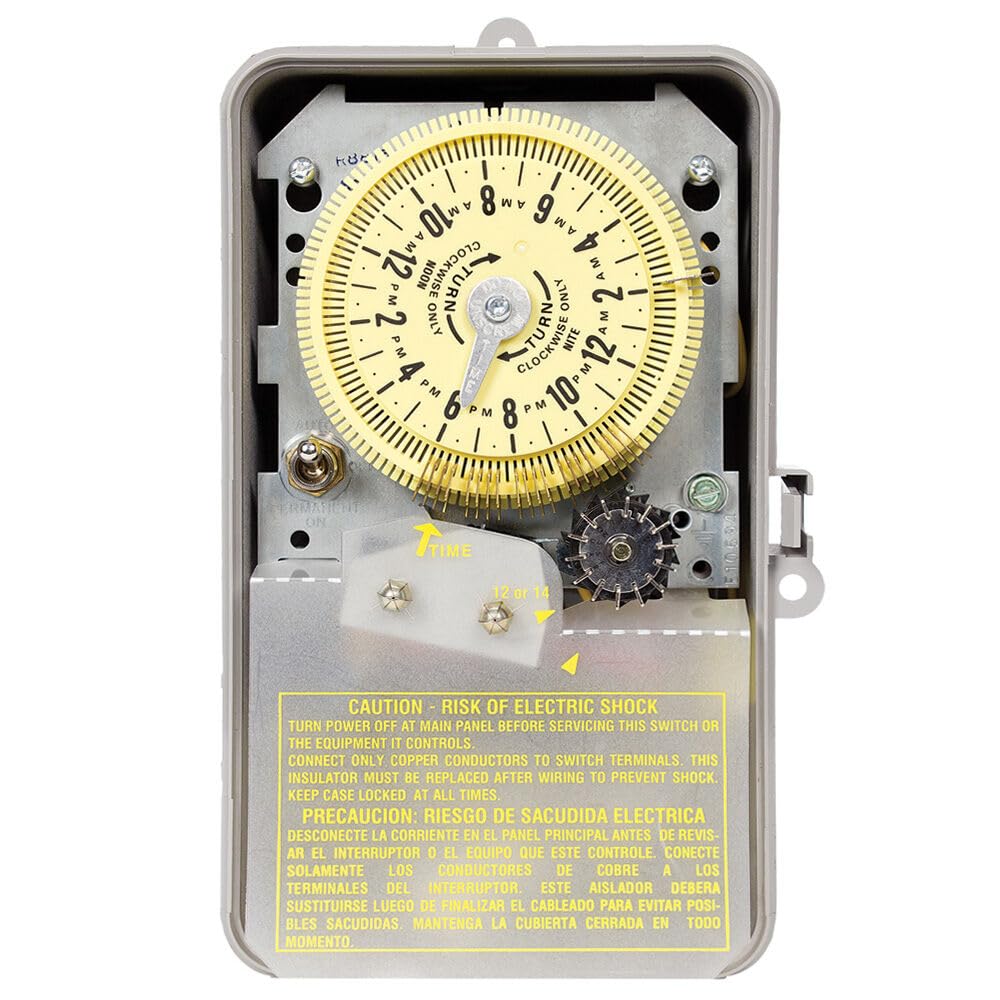
Turn power OFF at the main panel before servicing this switch or the equipment it controls. Connect only copper conductors to switch terminals. This insulator must be replaced after wiring to prevent shock. Keep case locked at all times.
PRECAUCIÓN: RIESGO DE SACUDIDA ELÉCTRICA
Desconecte la corriente en el panel principal antes de revisar el interruptor o el equipo que este controla. Conecte solamente los conductores de cobre a los terminales del interruptor. Este aislador deberá sustituirse luego de finalizar el cableado para evitar posibles sacudidas. Mantenga la cubierta cerrada en todo momento.
3. Configuración e instalación
The Intermatic R8806P101C timer is designed for easy installation. Ensure all local electrical codes are followed during installation. This timer is intended for use with indexing irrigation valve systems only.
3.1 Montaje del temporizador
Mount the timer securely in a location that allows for easy access and visibility. The NEMA 3R Raintight Plastic housing provides protection against outdoor elements.
3.2 Conexiones eléctricas
Before making any electrical connections, ensure the power supply is turned OFF at the main circuit breaker. The timer requires a 208/277 VAC power source and is rated for 25 Amps per pole (DPST switch type). Connect only copper conductors to the switch terminals.
4. Instrucciones de funcionamiento
The R8806P101C timer offers flexible scheduling options for your irrigation system.
4.1 Configuración de la hora actual
Rotate the dial clockwise until the current time aligns with the 'TIME' arrow indicator. Ensure AM/PM is correctly set (the dial typically indicates 'NITE' for PM hours).

4.2 Programación de ciclos de encendido y apagado
The timer supports up to 44 ON/OFF operations every 24 hours. Use the included trippers to set your desired watering schedule. Each tripper represents an ON or OFF event.
- EN Viajeros: These activate the irrigation system.
- Viajeros fuera de servicio: These deactivate the irrigation system.
Watering increments can be set from 12 minutes to 20 hours and 45 minutes. Additional trippers and pins are sold separately if more cycles are needed.

4.3 Skipper Options
The timer supports up to 14-day skipper options for tailored irrigation, allowing you to skip watering on specific days.
4.4 Interruptor de anulación manual
An on/off/automatic switch allows for manual control. Use this to temporarily shut down the system during rainy days or to extend watering during dry spells without altering your programmed schedule.
4.5 Rain Sensor Compatibility
The timer is compatible with rain sensors (sold separately). Integrating a rain sensor ensures automatic rain-triggered control, enhancing water conservation by preventing unnecessary watering during rainfall.
5. Mantenimiento
The Intermatic R8806P101C timer requires minimal maintenance. Periodically inspect the enclosure for any damage or signs of wear. Ensure the housing remains securely closed to maintain its raintight integrity.
Keep the internal components free from dust and debris. If cleaning is necessary, ensure the power is disconnected at the main panel and use a dry, soft cloth. Do not use liquid cleaners directly on the timer's mechanism.
6. Solución de problemas
If your Intermatic R8806P101C timer is not functioning as expected, consider the following common issues:
- Timer not running: Check the power supply at the main circuit breaker. Ensure all electrical connections are secure.
- Irrigation not turning ON/OFF at scheduled times: Verify that the ON and OFF trippers are correctly positioned on the dial. Ensure the current time is accurately set. Check the manual override switch is in the 'automatic' position.
- Riego inconsistente: Ensure the trippers are firmly attached and have not shifted. If a rain sensor is connected, check its functionality and ensure it is not preventing watering unnecessarily.
Si los problemas persisten, consulte a un electricista calificado o comuníquese con el servicio de atención al cliente de Intermatic.
7. Especificaciones
| Característica | Especificación |
|---|---|
| Número de modelo | R8806P101C |
| Marca | Intermático |
| Volumentage | 208 / 277 VAC |
| Ampanhelo | 25 Amps por polo |
| Clasificación HP | 2 CV |
| Tipo de interruptor | DPST |
| Alojamiento | NEMA 3R Raintight Plastic |
| Puntos de ajuste | Up to 60 ON/OFF per 24 hours |
| Watering Increments | 12 minutos a 20 horas 45 minutos |
| Skipper Options | Up to 14-day |
| Dimensiones (D x W x H) | 3.75" x 5.5" x 9.38" |
| Peso del artículo | 2.8 libras |
| Certificaciones | CSA Listed Certified |
8. Garantía y soporte
For warranty information and customer support, please refer to the official Intermatic webSitio web o contacte con el departamento de atención al cliente. Conserve el recibo de compra para reclamaciones de garantía.
Información de contacto de Intermatic:
- Websitio: www.intermatic.com
- Refer to product packaging or the official website for specific contact numbers and support hours.