1. Introducción
This manual provides detailed instructions for the installation, operation, and maintenance of your SpeaKa Professional DL-1117 In-Wall/Ceiling Speaker. Please read this manual thoroughly before installation and use to ensure proper function and safety. Keep this manual for future reference.
2. Producto terminadoview
The SpeaKa Professional DL-1117 is a high-quality in-wall/ceiling speaker designed for various audio applications in both residential and industrial environments. Its robust metallic construction ensures durability and reliable performance.

Figura 2.1: Frente view of the SpeaKa Professional DL-1117 In-Wall/Ceiling Speaker. This image shows the speaker's front grille and mounting frame.
Características principales:
- Ideal for wall and ceiling mounting.
- Suitable for industrial and residential spaces.
- Solid metallic construction for enhanced durability.
3. Especificaciones
| Especificación | Valor |
|---|---|
| Marca | SpeaKa Professional |
| Nombre del modelo | DL-1117 |
| Número de modelo del artículo | SP-1207908 |
| Tipo de altavoz | In-Wall/Ceiling Speaker |
| Tamaño del altavoz | 8 Inches (77mm INWALL SPEAKER as per label) |
| Impedancia | 8 ohmios |
| Potencia (nominal) | 15 vatios |
| Potencia máxima de salida del altavoz | 25 vatios |
| Respuesta de frecuencia | 90Hz - 17,000Hz (as per label) |
| Tipo de montaje | Montaje en techo (también apto para montaje en pared) |
| Dimensiones del producto (L x An x Al) | 11 x 11 x 7 cm |
| Peso del artículo | 520 gramos |
| Color | Negro |
| Número de unidades | 1 unidad |
| Usos recomendados | For computer (audio output), general audio systems |
| Dispositivos compatibles | Desktop computer, Laptop (via amp(lificador/receptor) |

Figura 3.1: Dimensional drawing of the SpeaKa Professional DL-1117 speaker. This diagram illustrates the speaker's diameter (Ø100mm), depth (49mm), and cutout dimensions (Ø74mm, Ø81mm).
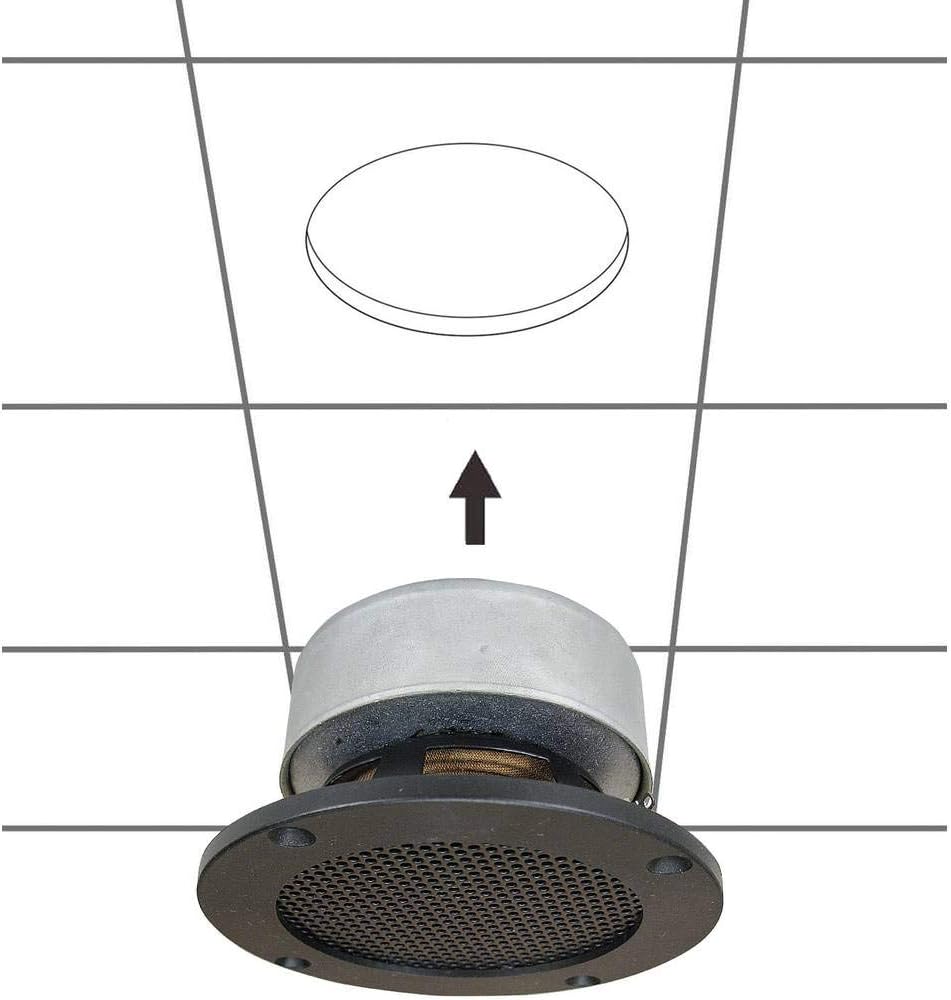
Figura 3.2: Atrás view of the SpeaKa Professional DL-1117 speaker, showing the product label with model number DL-1117BK8, frequency response, power rating, and impedance.
4. Instrucciones de seguridad
Tenga en cuenta las siguientes precauciones de seguridad para evitar lesiones o daños al producto:
- Seguridad eléctrica: Ensure all power to the audio system is disconnected before making any connections or performing installation. Incorrect wiring can cause damage to the speaker or ampmás duradero.
- Instalación: Installation should be performed by a qualified professional if you are unsure about electrical wiring or structural integrity. Ensure the mounting surface (wall or ceiling) can safely support the weight of the speaker.
- Ambiente: Do not expose the speaker to excessive moisture, extreme temperatures, or direct sunlight.
- Limpieza: Utilice un paño suave y seco para limpiar. No utilice limpiadores líquidos ni aerosoles.
- Desmontaje: No intente desmontar ni modificar el altavoz. Esto anulará la garantía y podría causar daños o lesiones.
5. Configuración e instalación
Follow these steps for proper installation of your in-wall/ceiling speaker:
5.1 Herramientas necesarias
- Perforar
- Hole saw (matching cutout diameter, approx. Ø74-81mm)
- Destornillador
- Pelacables
- Speaker wire (appropriate gauge for your amplifier and cable length)
5.2 Ubicación de montaje
Choose a suitable location in your wall or ceiling. Ensure there are no electrical wires, plumbing, or structural elements behind the chosen area. Use a stud finder if necessary.
5.3 Cortar la abertura
- Carefully mark the desired cutout diameter on the wall or ceiling. Refer to the dimensions in Figure 3.1.
- Using a hole saw, carefully cut the opening.
5.4 Cableado
- Pase el cable del altavoz desde su amplifier/receiver to the cutout opening.
- Strip approximately 1/2 inch (12mm) of insulation from the ends of the speaker wire.
- Connect the speaker wires to the terminals on the back of the DL-1117 speaker. Ensure correct polarity (+ to + and - to -) from the amplifier to the speaker. The terminals are typically screw-type or spring-loaded.
5.5 Installing the Speaker
- Inserte con cuidado el altavoz en la abertura recortada.
- Secure the speaker using the integrated mounting clips or screws, if applicable. For this model, the design suggests it is inserted and then secured from the front.

Figura 5.1: Diagram illustrating the installation process of the SpeaKa Professional DL-1117 speaker into a ceiling opening. The speaker is inserted from below into the pre-cut hole.
6. Instrucciones de funcionamiento
Once the speaker is correctly installed and wired to your amplificador o receptor:
- Asegúrese de que todas las conexiones sean seguras.
- Enciende tu amplevantador / receptor.
- Start playing audio through your connected source.
- Ajuste el volumen de su amplifier/receiver to a comfortable listening level. Avoid excessively high volumes that could distort the sound or damage the speaker.
7. Mantenimiento
The SpeaKa Professional DL-1117 speaker requires minimal maintenance:
- Limpieza: Periodically wipe the speaker grille and frame with a soft, dry cloth to remove dust. Do not use abrasive cleaners or solvents.
- Inspección: Occasionally check the speaker for any visible damage or loose connections.
8. Solución de problemas
Si tiene problemas con su altavoz, consulte los siguientes problemas y soluciones comunes:
| Problema | Posible causa | Solución |
|---|---|---|
| No hay sonido del altavoz | Cableado suelto o incorrecto Amplifier/receiver off or muted El dispositivo fuente no reproduce audio | Verifique que todas las conexiones de los cables de los altavoces tengan la polaridad y estén bien ajustadas. Asegurar amplifier/receiver is on and not muted, and volume is up. Verify audio is playing from the source device. |
| Sonido distorsionado | Volumen muy alto Fuente de audio de mala calidad Cable de altavoz dañado | Reduce el volumen de tu amplevantador / receptor. Pruebe con una fuente de audio diferente para descartar problemas con la fuente. Inspect speaker wires for fraying or damage and replace if necessary. |
| Sonido intermitente | Conexiones sueltas Defectuoso ampcanal elevador | Verifique y asegure todas las conexiones de los cables de los altavoces. Test the speaker with a different amplifier channel or a known working ampmás duradero. |
If the problem persists after trying these solutions, please contact SpeaKa Professional customer support.
9. Garantía y soporte
For warranty information and customer support, please refer to the documentation provided with your purchase or visit the official SpeaKa Professional webSitio. Conserve su comprobante de compra para reclamaciones de garantía.
Fabricante: SpeaKa Professional
ASIN: B00CS2V1AQ