
Phanteks PH-ES813P_BL
Phanteks Enthoo Series Primo Ultimate Full Tower Computer Case User Manual
Model: PH-ES813P_BL
Introducción
The Phanteks Enthoo Primo is a full tower computer case designed for enthusiasts seeking exceptional cooling possibilities and functional design. This manual provides detailed instructions for setting up, operating, maintaining, and troubleshooting your Enthoo Primo case, ensuring optimal performance and longevity.

Figure 1: Phanteks Enthoo Primo Ultimate Full Tower Computer Case (Black/Blue)
Configuración e instalación
Proper installation is crucial for the performance and stability of your system. Follow these steps carefully.
1. Instalación de la fuente de alimentación (PSU)
The Enthoo Primo features a unique thermally isolated PSU location at the rear of the case, promoting cooler temperatures and improved cable management.
- Locate the PSU compartment at the bottom rear of the case.
- Slide your PSU into the designated area.
- Asegure la fuente de alimentación con los tornillos provistos desde la parte trasera de la carcasa.
Video 1: Animated demonstration of internal case features, including PSU placement, HDD trays, and cable management. This video highlights the thermally isolated PSU location and hidden cable routing.

Figura 2: Posterior view of the Enthoo Primo case, showing the PSU mounting area at the bottom.
2. Drive Installation (HDD/SSD)
The case supports up to 6 HDDs with dual repositionable and removable HDD cages, and features Drop-n-Lock double stack SSD brackets.
- Access the hidden HDD trays by removing the side panel.
- Slide your 3.5" HDDs into the trays and secure them.
- For 2.5" SSDs, utilize the removable Drop-n-Lock brackets. These can be installed in three different locations within the case.
- Ensure all drives are securely fastened to prevent vibration.

Figura 3: Interior view of the Enthoo Primo, highlighting the hidden HDD trays and SSD mounting points.
3. Instalación de la placa base y los componentes
The Enthoo Primo supports ATX motherboards and offers ample space for various components.
- Install your ATX motherboard onto the standoffs.
- Install your CPU, RAM, and graphics cards as per their respective manuals.
- Utilize the pre-installed cable management tools behind the motherboard tray to route cables neatly.
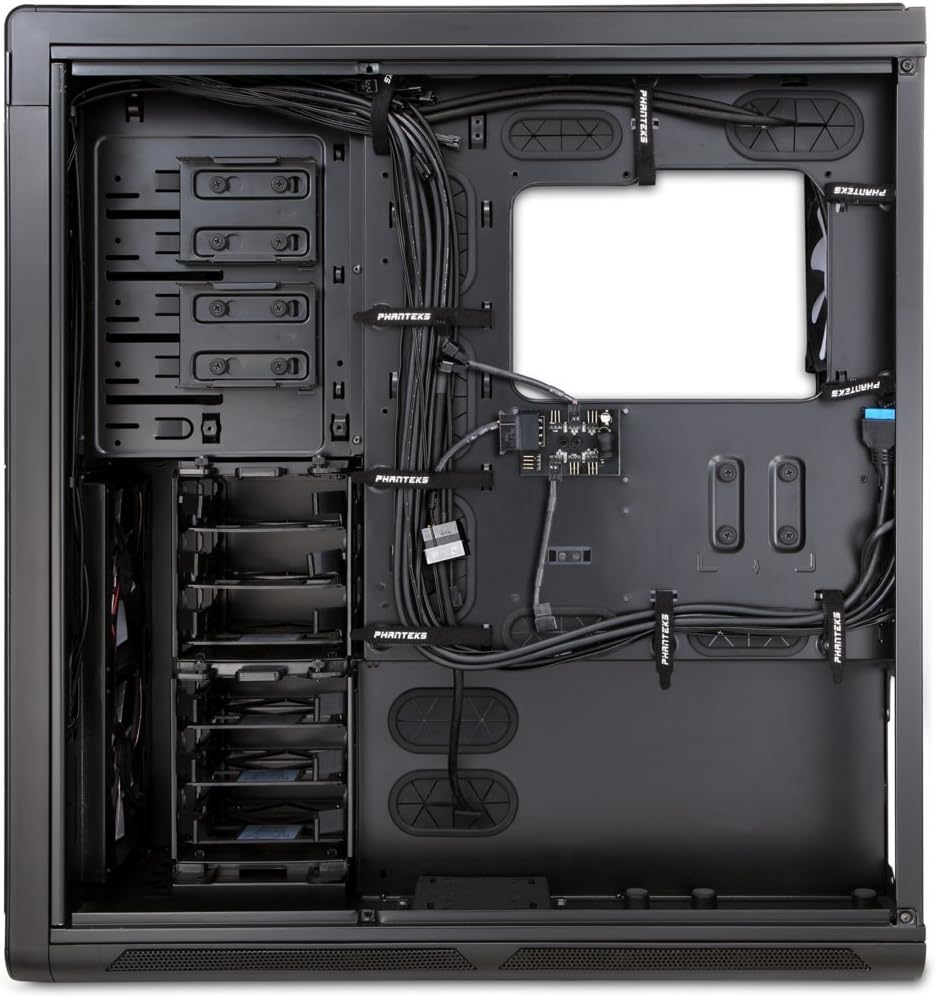
Figura 4: Interior view of the Enthoo Primo, showcasing the cable management features behind the motherboard tray.
Características de funcionamiento
The Enthoo Primo is designed with user convenience and optimal performance in mind.
E / S del panel frontal
The front I/O panel provides easy access to essential ports and controls:
- 2 puertos USB 3.0: Para transferencia de datos de alta velocidad.
- 2 puertos USB 2.0: For standard peripheral connections.
- Toma de micrófono: Para entrada de audio.
- Conector de audio de 3.5 mm: Para salida de audio.
- Interruptor LED: Controls the integrated LED lighting (LED strip & Fan LED).

Figure 5: Top angled view of the Enthoo Primo, illustrating the accessible front I/O panel.
Sistema de enfriamiento
The Enthoo Primo offers extensive cooling support for both air and liquid cooling configurations.
- Ventiladores preinstalados: Includes 1x 140mm fan on top, 2x 140mm LED fans in front, 1x 140mm fan in the rear, and 1x 140mm fan on the bottom. All are Phanteks' PH-F140SP fans.
- Refrigeración por aire: Supports up to 14x 120mm fans or 11x 140mm fans for comprehensive airflow.
- Refrigeración por agua: Provides up to 5 different installation areas for slim and thick radiators (120mm and 140mm form factors), including clearance for push-pull fan configurations. Innovative liquid cooling mounting systems include radiator brackets and a versatile reservoir/pump bracket.

Figura 6: Frente view of the Enthoo Primo, showcasing the clean design and intake areas.
Mantenimiento
Regular maintenance ensures optimal performance and extends the lifespan of your computer case.
- Filtros de polvo: The Enthoo Primo features removable dust filters located at the front, top, bottom (2x), and side panel (2x). Regularly remove and clean these filters to maintain optimal airflow and prevent dust buildup inside the case.
- Limpieza exterior: Utilice un paño suave y seco.amp cloth to wipe down the aluminum front and top panels. Avoid abrasive cleaners.
- Limpieza interior: Periodically use compressed air to clear dust from internal components and fan blades. Ensure the system is powered off and unplugged before cleaning.
Solución de problemas
Esta sección aborda problemas comunes que podrías encontrar.
- Sin energía:
- Ensure the PSU is properly seated and connected to the motherboard and wall outlet.
- Verifique que el cable del interruptor de encendido del panel frontal esté conectado correctamente al encabezado de la placa base.
- Fans Not Spinning / LED Not Lighting:
- Check fan connections to the motherboard or fan hub.
- Ensure the fan hub is powered (SATA connection).
- Verify the LED switch on the front panel is in the 'on' position.
- Los puertos USB no funcionan:
- Confirm that the USB 3.0 and USB 2.0 headers from the front panel are securely connected to the motherboard.
- Ruido excesivo:
- Compruebe que todos los ventiladores estén montados de forma segura y libres de obstrucciones.
- Ensure drive trays are properly secured to minimize vibration.
- Clean dust filters and fan blades if necessary.
Presupuesto
| Característica | Detalle |
|---|---|
| Nombre del modelo | PH-ES813P_BL |
| Tipo de caso | Torre llena |
| Compatibilidad de la placa base | ATX |
| Material | Aluminum Faceplates, Steel Chassis |
| Color | Negro/Azul |
| Dimensiones (LxAnxAl) | 23.62 x 9.84 x 25.59 pulgadas |
| Peso del artículo | 50 libras |
| Puertos USB 3.0 | 2 |
| Puertos USB 2.0 | 2 |
| Puertos de audio | 1x Microphone, 1x 3.5mm Audio Jack |
| Ranuras de expansión | 8 |
| Método de enfriamiento | Aire agua |
| Ventiladores preinstalados | 5x 140mm (1 top, 2 front LED, 1 rear, 1 bottom) |
| Máximo apoyo de los fans | 14 x 120 mm o 11 x 140 mm |
| Soporte del radiador | Up to 5 locations (120mm/140mm form factors) |
Garantía y soporte
Para obtener información sobre la garantía y soporte técnico, consulte el sitio web oficial de Phanteks. websitio o el manual de usuario completo.
You can download the complete user manual in PDF format here: Phanteks Enthoo Primo User Manual (PDF)
Ask a question about this manual
Ask about setup, troubleshooting, compatibility, parts, safety, or missing instructions. Manuals+ will review the question and use this page’s manual context to help answer it.