
1. Introducción y másview
This manual provides detailed instructions for the safe installation, operation, and maintenance of your ET2 Harmony E24506-91PC LED Pendant Light. Please read all instructions carefully before beginning installation and retain this manual for future reference.
The ET2 Harmony pendant light features multiple bubble glass balls, each illuminated by an integrated LED. The individual pendants are suspended by adjustable cables, allowing for customization of the fixture's overall design and drop height. The fixture is designed for indoor use and is fully dimmable.

Image 1.1: The ET2 Harmony E24506-91PC LED Pendant Light, showcasing its design with multiple bubble glass spheres.
2. Información de seguridad
WARNING: RISK OF ELECTRIC SHOCK. Ensure power is turned off at the circuit breaker or fuse box before installation, servicing, or changing any components. Consult a qualified electrician if you are unsure about the installation process.
- Este producto debe ser instalado de acuerdo con el código de instalación aplicable por una persona familiarizada con la construcción y el funcionamiento del producto y los peligros involucrados.
- Use only UL Listed wire connectors.
- No exceda el volumen especificadotage (120 voltios).
- No modifique el accesorio de ninguna manera.
- Mantenga los materiales combustibles lejos de la luminaria.
- Use gafas de seguridad y guantes durante la instalación.
3. Contenido del paquete
Carefully unpack the fixture and check that all components are present and undamaged. Retain all packaging materials until installation is complete.
- Pendant Light Fixture (Canopy with integrated LED pendants)
- Mounting Hardware (Mounting plate, screws, wire nuts)
- Manual de instrucciones (este documento)
4. Configuración e instalación
Installation should be performed by a qualified electrician or a person with experience in electrical wiring.
4.1 Herramientas necesarias (no incluidas)
- Destornillador Phillips
- Destornillador de punta plana
- Pelacables
- Cinta aisladora
- Escalera
4.2 pasos de instalación
- Apagar la energía: Localice el disyuntor o la caja de fusibles que controla la alimentación a la ubicación de la instalación y desconecte la alimentación. Verifique que la alimentación esté apagada usando un vol.tage probador.
- Preparar la superficie de montaje: Asegúrese de que la caja de conexiones esté montada de forma segura y sea capaz de soportar el peso del artefacto (aproximadamente 11.07 libras).
- Coloque la placa de montaje: Asegure la placa de montaje del accesorio a la caja de conexiones utilizando los tornillos provistos.
- Realice conexiones eléctricas:
- Connect the bare copper or green ground wire from the fixture to the ground wire from the junction box using a wire nut.
- Conecte el cable blanco (neutro) del artefacto al cable blanco (neutro) de la caja de conexiones usando una tuerca para cables.
- Conecte el cable negro (caliente) del artefacto al cable negro (caliente) de la caja de conexiones usando una tuerca para cables.
- Asegúrese de que todas las conexiones estén seguras y aisladas con cinta aisladora si es necesario.
- Secure Fixture Canopy: Carefully push the wired connections into the junction box. Align the fixture canopy with the mounting plate and secure it using the provided screws.
- Adjust Pendant Lengths: The individual pendant cables are adjustable. To adjust, gently push the cable into the canopy's cable grip and pull to the desired length. Ensure all pendants are securely set before proceeding.
- Install Glass Balls: The bubble glass balls are pre-installed with LED bulbs. Ensure they are securely attached to their respective pendant cables.
- Restaurar energía: Una vez completada la instalación y todas las conexiones estén seguras, restablezca la energía en el disyuntor.
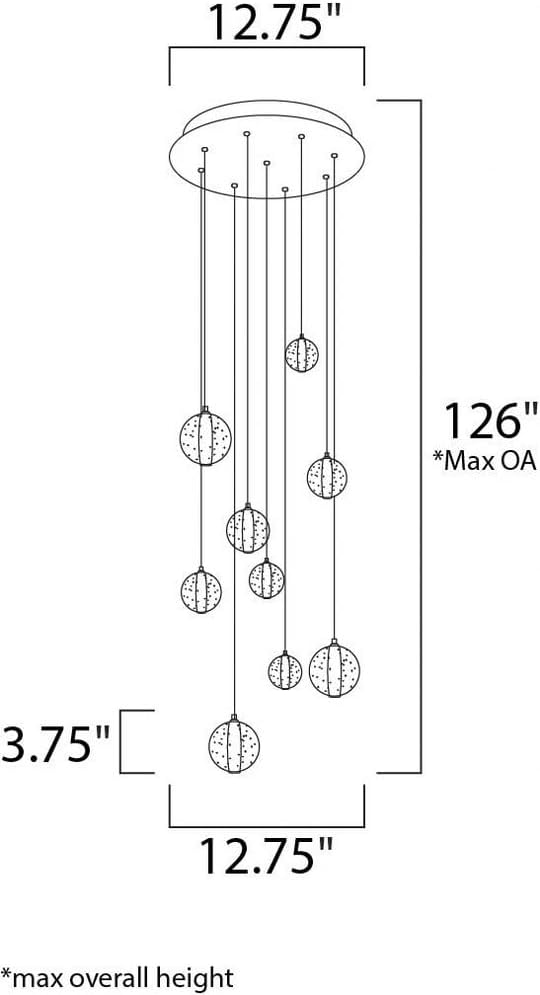
Image 4.1: Dimensional drawing of the ET2 Harmony E24506-91PC, indicating a 12.75-inch width and a maximum overall height of 126 inches.
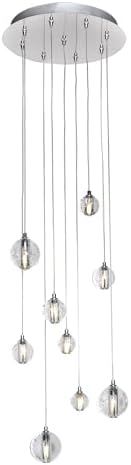
Image 4.2: Detail of the fixture's polished chrome canopy and the attachment points for the adjustable pendant cables.
5. Instrucciones de funcionamiento
The ET2 Harmony E24506-91PC LED Pendant Light is designed for simple operation.
- Encendido/apagado: Controle la luz mediante un interruptor de pared estándar conectado al circuito de la luminaria.
- Función de atenuación: This fixture is fully dimmable. For optimal performance, use with a compatible LED dimmer switch. Consult your electrician for dimmer compatibility.
6. Mantenimiento
El mantenimiento regular ayudará a preservar la apariencia y la funcionalidad de su lámpara colgante.
- Limpieza: Turn off power before cleaning. Use a soft, dry, or slightly damp cloth to wipe the polished chrome finish and glass spheres. Do not use abrasive cleaners, solvents, or polishes as they may damage the finish.
- Reemplazo de LED: The integrated LED bulbs are designed for long life. If replacement is ever needed, contact ET2 customer support for guidance on obtaining compatible replacement parts. Do not attempt to replace LEDs with standard bulbs.
7. Solución de problemas
If you experience issues with your pendant light, refer to the following troubleshooting guide:
| Problema | Posible causa | Solución |
|---|---|---|
| La luz no enciende | No hay energía para el dispositivo Conexión de cableado suelta Interruptor de pared defectuoso | Check circuit breaker/fuse. Ensure power is on. Verifique que todas las conexiones de cables estén seguras (con la energía apagada). Pruebe el interruptor de pared o reemplácelo si es necesario. |
| La luz parpadea o se atenúa incorrectamente | Interruptor de regulación incompatible Conexión de cableado suelta | Asegúrese de utilizar un interruptor de regulación de intensidad compatible con LED. Verifique todas las conexiones de cables (con la energía apagada). |
| Los colgantes no están nivelados | Cable lengths are uneven | Adjust individual pendant cable lengths as described in Section 4.2. |
If the problem persists after attempting these solutions, contact ET2 customer support.
8. Especificaciones
| Característica | Detalle |
|---|---|
| Marca | ET2 |
| Número de modelo | E24506-91PC |
| Dimensiones (L x An x Al) | 12.75" x 12.75" x 3.75" (Canopy) Max Overall Height: 126" |
| Peso del artículo | 11.07 libras |
| Material | Vidrio, acero |
| Tipo de acabado | Polished Chrome / Bubble Glass |
| Tipo de fuente de luz | CONDUJO |
| Número de fuentes de luz | 9 |
| Quétage | 13.5W (totales) |
| Volumentage | 120 voltios |
| Brillo | 945 lúmenes |
| Color claro | Blanco cálido (3000 K) |
| Índice de reproducción cromática (IRC) | 80+ |
| Tipo de instalación | Montaje semiempotrado / Montaje en techo |
| Característica especial | Dimmable, Adjustable Cables |
| Uso en interiores y exteriores | Interior |
| Proceso de dar un título | Listado por UL |
| Requiere ensamblaje | Sí |
9. Garantía y soporte
9.1 Información de garantía
This ET2 Harmony E24506-91PC LED Pendant Light is covered by a Garantía limitada del fabricante de 1 año Desde la fecha de compra. Esta garantía cubre defectos de materiales y mano de obra en condiciones normales de uso. No cubre daños causados por instalación incorrecta, accidentes, mal uso, abuso o modificaciones no autorizadas.
9.2 Atención al cliente
For technical assistance, warranty claims, or to order replacement parts, please contact ET2 customer support. Have your model number (E24506-91PC) and proof of purchase ready when contacting support.
You can find contact information for ET2 by visiting their official websitio o el minorista donde se compró el producto.