
1. Introducción
This manual provides essential information for the safe and efficient operation of your LD Systems Road LDRJ8 Portable PA System. Please read this manual thoroughly before using the device to ensure proper setup, operation, and maintenance. Keep this manual for future reference.
The LD Systems Road LDRJ8 is an 8-channel portable PA system designed for versatile audio applications. It features battery-powered operation for mobility and offers multiple connectivity options including XLR, Speakon, Auxiliary, and USB. The system is equipped with a 15-inch Faital Pro neodymium woofer and a 1.4-inch BMS compression driver, delivering a powerful 1400 Watts output. Advanced features include a 1ms predictive peak limiter for distortion-free sound, state-of-the-art analog/digital converters, and an 80-degree x 50-degree rotatable asymmetrical horn flare. Its robust steel construction and integrated wheels make it suitable for various portable sound reinforcement needs.

Figura 1: Frente view of the LD Systems Road LDRJ8 Portable PA System with its retractable handle extended, showcasing the main speaker grille and control panel.
2. Instrucciones de seguridad
- Fuente de energía: Connect the device only to the specified voltage and frequency. Ensure the power cord is not damaged.
- Ventilación: No obstruya las aberturas de ventilación. Asegúrese de que haya suficiente flujo de aire alrededor de la unidad para evitar el sobrecalentamiento.
- Humedad: Do not expose the device to rain or moisture. Avoid placing liquid-filled objects on the unit.
- Limpieza: Disconnect from power before cleaning. Use a dry cloth. Do not use liquid cleaners or aerosols.
- Servicio: Encargue cualquier reparación a personal técnico cualificado. No intente reparar la unidad usted mismo.
- Colocación: Place the unit on a stable, level surface. Avoid extreme temperatures, direct sunlight, and strong vibrations.
- Seguridad de la batería: The unit is battery-powered. Follow all instructions regarding battery charging and usage. Do not expose batteries to excessive heat.

Figure 2: Rear panel of the LD Systems Road LDRJ8, showing the power input, fuse compartment, voltage selector, and the "SOUNDSYSTEM BATTERY LEVEL" indicator with three LEDs.
3. Contenido del paquete
Compruebe el contenido del paquete inmediatamente después de desembalarlo para asegurarse de que todos los componentes estén presentes y sin daños.
- 1 x LD Systems Road LDRJ8 Portable PA System
- 1 x cable de alimentación
- 1 x Manual de usuario (este documento)
Nota: If any components are missing or damaged, please contact your dealer immediately.
4. Producto terminadoview
4.1. Panel de control

Figura 3: detallada view of the LDRJ8 control panel, featuring input channels (CH 1, CH 2, CH 3/AUX), level controls, EQ (LOW, HIGH), ECHO, MASTER VOL, MP3 player controls, and a display screen.
- CH 1 Input: XLR/TRS combo jack for microphone or line-level sources.
- CH 1 Level: Adjusts the input level for Channel 1.
- CH 2 Input: TRS/TS jack for instrument or line-level sources.
- CH 2 Level: Adjusts the input level for Channel 2.
- CH 3 / AUX Input: RCA stereo input for external audio devices.
- CH 3 / AUX Level: Adjusts the input level for Channel 3 / AUX.
- BAJO EQ: Bass frequency adjustment.
- EQ ALTO: Treble frequency adjustment.
- ECO: Controls the echo effect level.
- VOLUMEN MAESTRO: Control de volumen general del sistema.
- FUERZA: LED indicador de encendido.
- Sección de reproductor MP3:
- Mostrar: Shows track information and settings.
- MODO: Switches between MP3, AUX, Bluetooth, and SD card modes.
- ENTRADA USB: Puerto USB para reproducción multimedia.
- Ranura para tarjeta SD: Para reproducción de medios en tarjetas SD.
- Controles de reproducción: Reproducir/Pausa, Detener, Pista anterior/siguiente.
4.2. Panel trasero
Figure 4: Rear panel of the LDRJ8, detailing the power switch, AC input, fuse, voltage selector, and battery level indicators.
- Interruptor APAGADO/ENCENDIDO: Interruptor principal de alimentación de la unidad.
- Indicador de CARGA: LED que indica el estado de carga de la batería.
- Entrada de CA: Conector para el cable de alimentación.
- FUSIBLE: Portafusibles.
- VOLTAGE Selector: Switch to select between 115V and 230V operation.
- SOUNDSYSTEM BATTERY LEVEL: LED indicators for battery charge status (LOW, 1, 2, 3).
4.3. Características de portabilidad

Figura 5: Lado view of the LDRJ8, illustrating the retractable handle fully extended and the integrated wheels for easy transport.
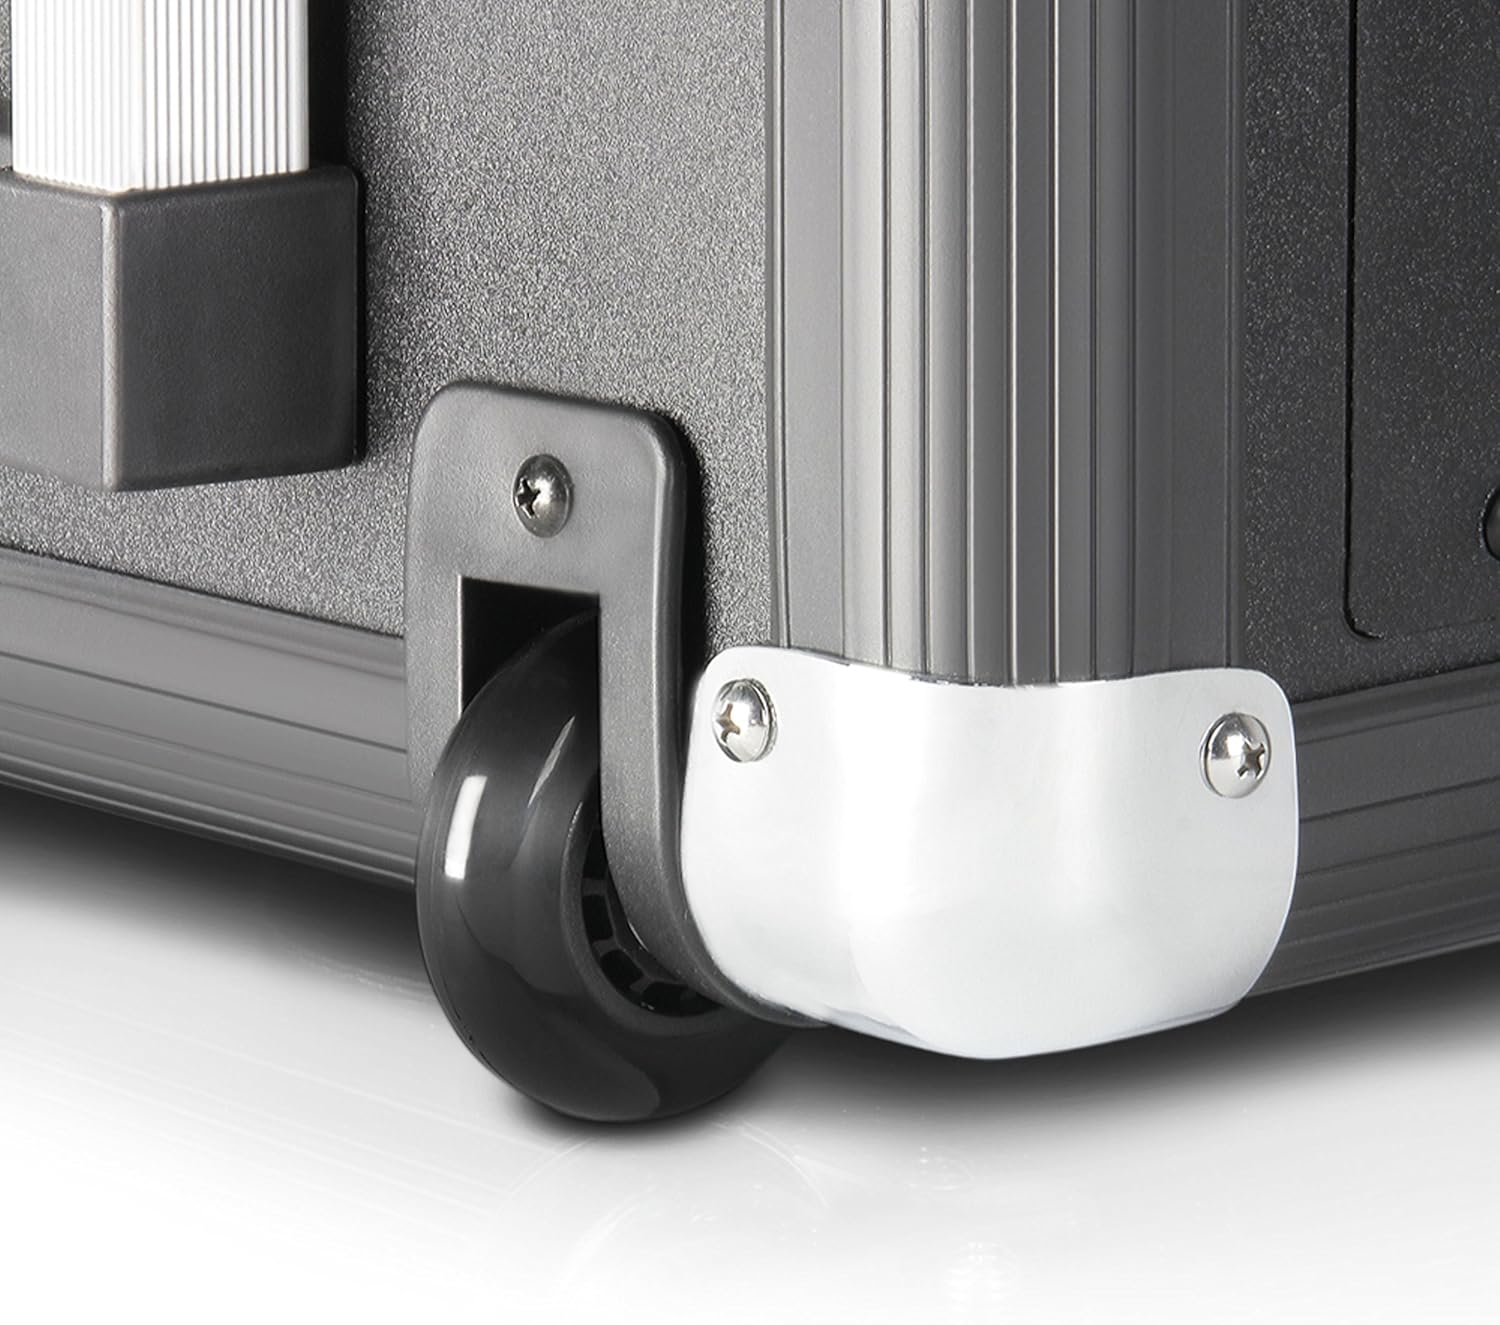
Figure 6: Close-up of one of the durable wheels and a metal corner protector, highlighting the robust construction designed for portability.
The LDRJ8 is designed for easy transport with integrated wheels and a retractable handle, similar to luggage. This allows for convenient movement of the system to various locations.
5. Configuración
5.1. Encendido inicial y carga
- Ensure the unit's power switch (OFF/ON) on the rear panel is in the APAGADO posición.
- Verificar el VOLTAGE selector on the rear panel matches your local power supply (115V or 230V).
- Connect the supplied power cable to the AC Input on the rear panel and then to a suitable power outlet.
- El CARGO indicator LED will illuminate, indicating the battery is charging. Allow sufficient time for a full charge before initial battery-powered use.
5.2. Conexión de fuentes de audio
- Micrófonos/Instrumentos: Connect microphones to CH 1 (XLR) and instruments to CH 2 (TRS/TS). Adjust the respective LEVEL knobs.
- External Audio Devices (e.g., CD Player, Mixer): Connect to CH 3 / AUX using RCA cables. Adjust the CH 3 / AUX LEVEL knob.
- Tarjeta USB / SD: Insert a USB drive into the USB IN port or an SD card into the SD Card Slot for media playback.
- Bluetooth: Refer to the "Operating" section for Bluetooth pairing instructions.
6. Operating the PA System
6.1. Funcionamiento básico
- After connecting your audio sources, switch the unit's power to ON. The POWER LED will illuminate.
- Slowly increase the MASTER VOL to a desired listening level.
- Adjust individual channel LEVEL knobs for a balanced mix.
- Use the LOW and HIGH EQ knobs to adjust the bass and treble frequencies of the overall mix.
- Apply ECHO effect as desired using the ECHO knob.
6.2. MP3 Player / Bluetooth Operation
- Presione el MODO button to cycle through available input modes: MP3 (USB/SD), AUX, Bluetooth.
- Reproducción USB/SD:
- Inserte una unidad USB o una tarjeta SD con MP3 files.
- Select MP3 mode. The display will show track information.
- Use the Play/Pause, Stop, Previous/Next Track buttons to control playback.
- Emparejamiento Bluetooth:
- Select Bluetooth mode. The display will indicate "BT" or "Pairing".
- En su teléfono inteligente o tableta, habilite Bluetooth y busque dispositivos disponibles.
- Select "LD Systems LDRJ8" (or similar) from the list to pair.
- Once paired, you can stream audio wirelessly to the PA system.
7. Mantenimiento
- Limpieza: Utilice un paño suave y seco para limpiar el exterior de la unidad. No utilice limpiadores abrasivos, disolventes ni ceras.
- Almacenamiento: Cuando no utilice la unidad durante períodos prolongados, guárdela en un lugar seco y fresco, lejos de la luz solar directa y de temperaturas extremas.
- Cuidado de la batería: For optimal battery life, avoid fully discharging the battery frequently. Recharge the battery regularly, even if the unit is not in use, to maintain its capacity.
- Reemplazo de fusibles: If the unit does not power on, check the fuse on the rear panel. Replace it only with a fuse of the identical type and rating (e.g., T 1 AL / 250V or T 500mA L / 250V).
8. Solución de problemas
| Problema | Posible causa | Solución |
|---|---|---|
| Sin poder |
|
|
| No hay salida de sonido |
|
|
| Bluetooth no emparejado |
|
|
| Sonido distorsionado |
|
|
9. Especificaciones
| Característica | Detalle |
|---|---|
| Modelo | LDRJ8 |
| Marca | Sistemas LD |
| Tipo de montaje | Piso de pie |
| Fuente de poder | Funciona con pilas |
| Tipos de conectores | XLR, Speakon, Auxiliary, USB |
| Material | Acero |
| Peso del artículo | 30 libras (aprox. 13.6 kg) |
| Número de canales | 8 |
| Entrada de audio | Various audio input devices |
| Salida Wattage | 1400 vatios (RMS) |
| Altavoz de graves | 15-inch Faital Pro neodymium |
| Controlador de compresión | 1.4-inch BMS |
| Dispersión | 80 Degree x 50 Degree (rotatable asymmetrical horn flare) |
| Dimensiones (L x An x Al) | 11 x 15 x 17 pulgadas (aprox. 27.9 x 38.1 x 43.2 cm) |
| Tecnología de conectividad | Various (including Bluetooth) |
| Dispositivos compatibles | Smartphone, Tablet, Microphones, Instruments |
| Características especiales | 1ms predictive peak limiter, State-of-the-art analog/digital converters |
10. Información de garantía
Specific warranty details for the LD Systems Road LDRJ8 Portable PA System are typically provided at the point of purchase or within separate documentation included with the product. Please refer to your purchase receipt or the official LD Systems webSitio para conocer los términos y condiciones de garantía más precisos y actualizados.
Generally, warranties cover manufacturing defects under normal use. Damage resulting from misuse, accidents, unauthorized modifications, or improper maintenance is usually not covered. Keep your proof of purchase for any warranty claims.
11. Soporte
For technical support, service, or further inquiries regarding your LD Systems Road LDRJ8 Portable PA System, please contact your authorized LD Systems dealer or visit the official LD Systems websitio.
- Recursos en línea: www.ld-systems.com
- Contacto del distribuidor: Refer to your purchase documentation for local dealer contact information.