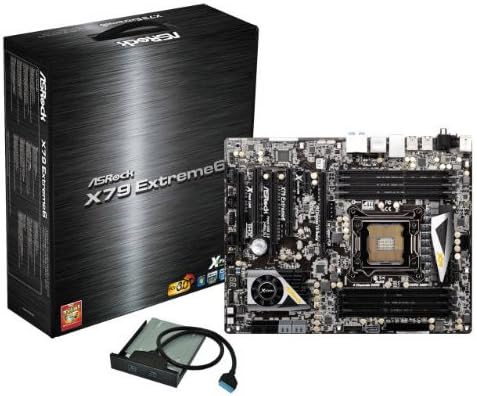
ASRock X79 EXTREME6
ASRock X79 EXTREME6 LGA2011/ Intel X79/ DDR3/ CrossFireX&SLI/ SATA3&USB3.0/ A&GbE/ ATX Motherboard User Manual
Modelo: X79 EXTREME6
Marca: ASRock
1. Introducción
The ASRock X79 EXTREME6 motherboard is engineered for high-performance computing, supporting Intel LGA2011 processors. It integrates the Intel X79 chipset, offering robust support for DDR3 memory and multiple expansion slots for advanced graphics configurations like AMD CrossFireX and NVIDIA SLI. This manual provides comprehensive instructions for the proper installation, configuration, operation, and maintenance of your ASRock X79 EXTREME6 motherboard, ensuring optimal performance and longevity.
2. Contenido del paquete
Please verify that all items listed below are present in your motherboard package. If any item is missing or damaged, contact your retailer immediately.
- 1 x ASRock SLI_Bridge_2S Card
- 1 x ASRock 3-Way SLI-2S1S Bridge Card
- Guía de instalación rápida
- CD de soporte
- I / O Shield
- Cables de datos 5 x SATA
- 1 x Front USB 3.0 Panel
- 4 x HDD Screws
- 6 x Chassis Screws
- 1 x Rear USB 3.1 Gen1 Bracket
3. Configuración
3.1 Requisitos del sistema
Before proceeding with installation, ensure your system meets the following specifications:
- Zócalo de CPU: LGA 2011
- Procesadores compatibles: Intel Core i7-3960X, Intel Core i7-3930K, Intel Core i7-3820, Intel Core i7-3970X, Intel Core i7-4960X, Intel Core i7-4930K, Intel Core i7-4820K, Intel Core i7-4970X
- Tecnología de memoria RAM: DDR3
- Velocidad del reloj de memoria: Hasta 2133 MHz
- Capacidad máxima de memoria: 64 GB
- Sistema operativo: Compatible with Windows 10 and earlier versions.
3.2 Guía de instalación
Follow these steps carefully to install your ASRock X79 EXTREME6 motherboard and its components.
3.2.1 Instalación de la placa base
- Prepare el chasis: Ensure your computer case is compatible with ATX motherboards and has sufficient space for components. Install the I/O shield into the chassis's rear opening.
- Instalar la CPU: Open the CPU socket retention mechanism. Carefully align the CPU with the socket, ensuring the triangular mark on the CPU matches the mark on the socket. Gently place the CPU into the socket and close the retention mechanism.
- Instalar el enfriador de la CPU: Apply thermal paste to the CPU (if not pre-applied on the cooler) and securely mount the CPU cooler according to its manufacturer's instructions. Connect the CPU fan cable to the designated header on the motherboard.
- Instalar módulos RAM: Open the DIMM slot clips. Align the memory modules with the slots, ensuring the notch on the module matches the key in the slot. Press down firmly on both ends of the module until the clips snap into place. Refer to the motherboard manual for recommended DIMM slot population order for optimal performance.
- Monte la placa base: Carefully place the motherboard into the chassis, aligning the screw holes with the standoffs. Secure the motherboard with the provided chassis screws.
- Conectar los cables de alimentación: Connect the 24-pin ATX power connector and the 8-pin (or 4-pin) CPU power connector from your power supply unit (PSU) to the corresponding ports on the motherboard.
3.2.2 Instalación de componentes
- Tarjeta gráfica (GPU): Insert your graphics card into the primary PCIe x16 slot. Secure it with a screw to the chassis. Connect any necessary PCIe power cables from the PSU to the GPU.
- Storage Devices (HDD/SSD): Connect SATA data cables from your storage drives to the SATA ports on the motherboard. Connect power cables from the PSU to the drives.
- Conectores del panel frontal: Connect the front panel cables (Power SW, Reset SW, HDD LED, Power LED, USB, Audio) from your chassis to the corresponding headers on the motherboard. Refer to the motherboard's detailed manual for exact pin layouts.
- Tarjetas de expansión: Install any additional PCIe expansion cards (e.g., sound cards, network cards) into available PCIe slots and secure them.
4. Instrucciones de funcionamiento
After completing the hardware installation, follow these steps to prepare your system for operation:
- Arranque inicial: Connect your monitor, keyboard, and mouse. Power on your system. The system should display the ASRock splash screen and enter the BIOS/UEFI setup utility.
- Configuración de BIOS/UEFI: In the BIOS/UEFI, set the correct date and time, configure boot order to prioritize your operating system installation media (USB drive or DVD), and adjust any other necessary settings. Save changes and exit.
- Instalación del sistema operativo: Insert your operating system installation media and follow the on-screen prompts to install your preferred OS.
- Instalación del controlador: After OS installation, install all necessary drivers from the included Support CD or download the latest drivers from the ASRock official website. This includes chipset drivers, audio drivers, LAN drivers, and any other specific drivers for your components.
- Actualizaciones del sistema: Perform all available operating system updates to ensure system stability and security.
5. Mantenimiento
El mantenimiento regular ayuda a garantizar la longevidad y el rendimiento estable de su placa base:
- Eliminación de polvo: Limpie periódicamente el polvo del interior de la caja de su computadora, especialmente de los ventiladores y disipadores de calor, con aire comprimido. Asegúrese de que el sistema esté apagado y desenchufado antes de limpiarlo.
- Actualizaciones de BIOS/UEFI: Comprueba el ASRock webSitio para obtener las últimas actualizaciones de BIOS/UEFI. Las actualizaciones pueden mejorar la compatibilidad, la estabilidad y el rendimiento. Siga atentamente las instrucciones de actualización para evitar dañar la placa base.
- Actualizaciones de controladores: Keep your system drivers updated. Visit the ASRock support page for the latest chipset, audio, LAN, and other relevant drivers.
- Sistema de organización de cables: Asegúrese de que los cables internos estén ordenados para mejorar el flujo de aire y evitar interferencias.
6. Solución de problemas
If you encounter issues with your ASRock X79 EXTREME6 motherboard, consider the following common troubleshooting steps:
| Problema | Posible causa / solución |
|---|---|
| El sistema no se enciende. |
|
| No hay visualización en el monitor. |
|
| System powers on but no POST (Power-On Self-Test) or beeps. |
|
| Sistema operativo no detectado. |
|
For more detailed troubleshooting, consult the comprehensive user manual available on the ASRock support websitio o póngase en contacto con el soporte técnico de ASRock.
7. Especificaciones
Key technical specifications for the ASRock X79 EXTREME6 Motherboard:
| Característica | Detalle |
|---|---|
| Fabricante | ASRock |
| Número de modelo | X79 EXTREME6 |
| Zócalo de CPU | LGA 2011 |
| Tipo de chipset | Intel X79 Express |
| Tecnología de memoria RAM | DDR3 |
| Velocidad del reloj de memoria | 2133 MHz |
| Capacidad de almacenamiento de memoria (máx.) | 64 GB |
| Procesadores compatibles | Intel Core i7-3960X, Intel Core i7-3930K, Intel Core i7-3820, Intel Core i7-3970X, Intel Core i7-4960X, Intel Core i7-4930K, Intel Core i7-4820K, Intel Core i7-4970X |
| Dispositivos compatibles | Ordenador personal |
| Plataforma | Ventanas 10 |
| Tipo de conector de alimentación principal | 24 pines |
| Peso del artículo | 5 libras |
| ASIN | B00LS35OMC |
| Fecha de primera disponibilidad | 14 de julio de 2014 |
8. Garantía y soporte
For warranty information and technical support regarding your ASRock X79 EXTREME6 motherboard, please refer to the official ASRock website or contact your authorized retailer. ASRock typically offers a 1-year warranty service through its authorized distributors. It is recommended to retain your proof of purchase for warranty claims.
Puede encontrar más información y recursos de apoyo en ASRock Store page or by visiting the official ASRock support websitio directamente.
Ask a question about this manual
Ask about setup, troubleshooting, compatibility, parts, safety, or missing instructions. Manuals+ will review the question and use this page’s manual context to help answer it.