
1. Introducción
Gracias por la compraasing the Masterbuilt GS30D Propane 2-Door Smoker. This 30-inch propane smoker is designed to provide a convenient and efficient way to infuse your food with rich, smoky flavor. Featuring a robust construction and user-friendly controls, this manual will guide you through the safe assembly, operation, and maintenance of your smoker to ensure years of enjoyable use.
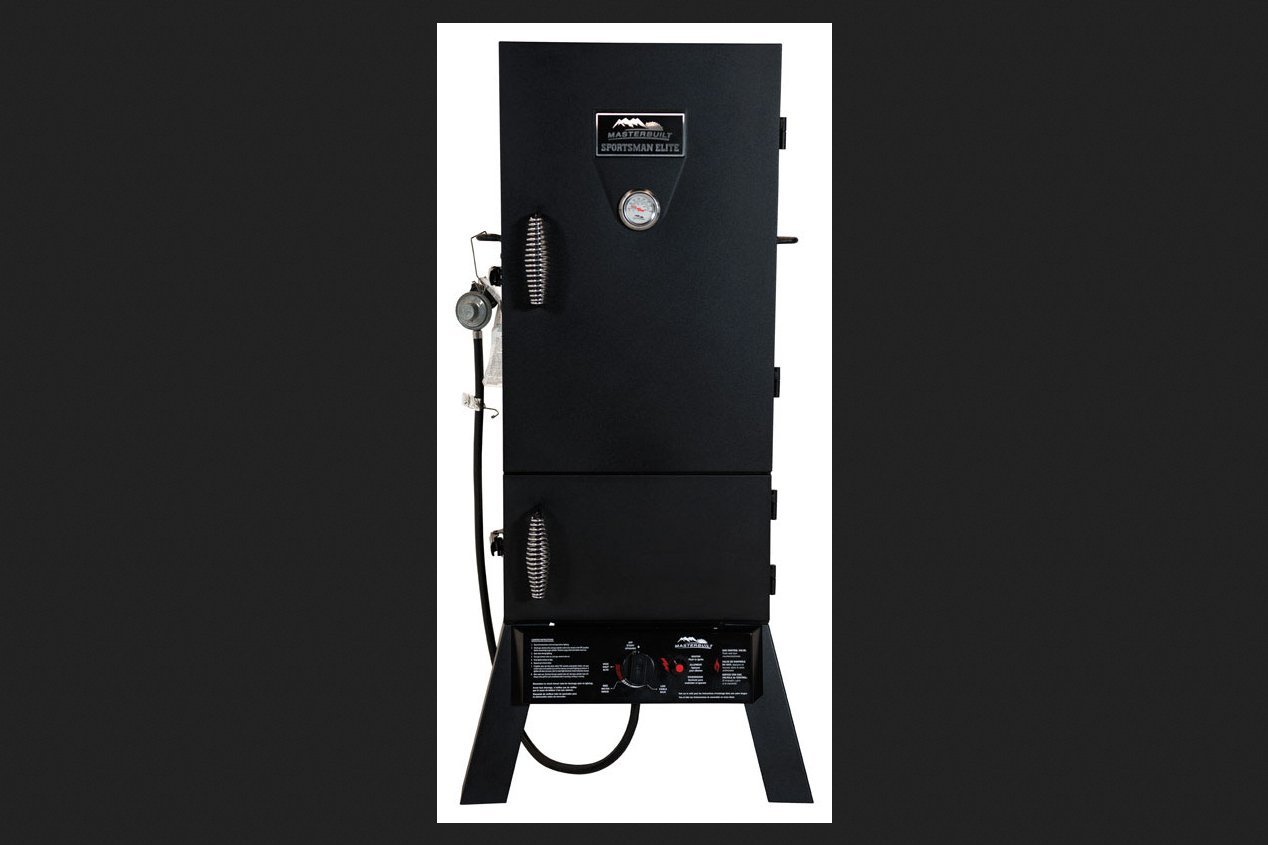
Figura 1.1: Frente view of the Masterbuilt GS30D Propane 2-Door Smoker, showcasing its black finish, two doors, propane hose connection, and control knob.
2. Información de seguridad
ADVERTENCIA: Si no se siguen estas instrucciones se podría producir un incendio, una explosión o quemaduras, lo que podría causar daños a la propiedad, lesiones personales o la muerte.
- This smoker is for outdoor use only. Do not operate indoors or in an enclosed area.
- Utilice siempre el ahumador sobre una superficie nivelada y no combustible.
- Maintain a minimum distance of 10 feet (3 meters) from any combustible materials, walls, or structures.
- Mantenga a los niños y las mascotas alejados del ahumador en todo momento.
- No almacene ni utilice gasolina u otros líquidos o vapores inflamables cerca de este o cualquier otro aparato.
- Always check for gas leaks before each use. Use a soapy water solution to check connections. Bubbles indicate a leak.
- Use only a 20 lb (9 kg) propane cylinder (LP gas) with a Type 1 connection.
- Nunca deje el ahumador desatendido mientras esté en uso.
- Use guantes protectores al manipular superficies calientes.
3. Instrucciones de montaje
The Masterbuilt GS30D Smoker requires assembly. Please refer to the separate detailed assembly guide included in your product packaging for step-by-step instructions. Ensure all parts are present and undamaged before beginning assembly. A Phillips head screwdriver and an adjustable wrench are typically required.
- Desembale todos los componentes y compruébelos con la lista de piezas.
- Assemble the legs and base structure securely.
- Attach the main body and doors.
- Install the burner assembly, control knob, and propane hose/regulator.
- Place the cooking racks, water pan, and wood chip tray into position.
4. Instrucciones de funcionamiento
4.1 Pre-Seasoning Your Smoker
Before the first use, it is essential to pre-season your smoker to remove manufacturing oils and prepare the interior surfaces. This process helps prevent rust and imparts a better flavor to your food.
- Ensure the water pan is empty and the wood chip tray is clean.
- Connect the propane tank (see Section 4.2).
- Light the burner (see Section 4.3) and set the temperature to 275°F (135°C).
- Allow the smoker to run for 3 hours.
- Turn off the burner and let the smoker cool completely.
4.2 Conexión del tanque de propano
- Ensure the smoker's control knob is in the 'OFF' position.
- Conecte el regulador a la válvula del tanque de propano. Apriételo firmemente con la mano.
- Open the propane tank valve slowly, checking for leaks with soapy water.
4.3 Lighting the Smoker
- Asegúrese de que el tanque de propano esté conectado y su válvula esté abierta.
- Abra la puerta del ahumador.
- Push in and slowly turn the control knob to the 'HIGH' position.
- Press the electronic push-button igniter repeatedly until the burner lights. You should hear a 'click' and see a flame.
- Si el quemador no se enciende en 5 segundos, gire la perilla a “OFF”, espere 5 minutos y repita el proceso.
- Once lit, close the door and adjust the control knob to your desired temperature.
4.4 Adding Wood Chips and Water
The Masterbuilt GS30D features a porcelain-coated wood chip tray and water pan, both removable for easy use and cleaning.
- Astillas de madera: Place dry or pre-soaked wood chips in the wood chip tray. Do not overfill. Replenish as needed during smoking for continuous smoke flavor.
- Bandeja de agua: Fill the water pan with water, juice, or other liquids to add moisture and flavor to your food. This also helps regulate temperature.
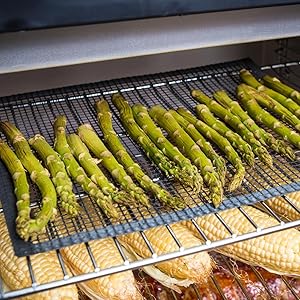
Figura 4.1: Interior view of the smoker showing multiple racks loaded with various foods, including vegetables and meats, with the water pan and wood chip tray visible at the bottom.
4.5 Temperature Control and Air Damper
The built-in temperature gauge on the door allows you to monitor the internal temperature of the smoker. The air damper, located on the top of the smoker, can be adjusted to control smoke intensity and airflow. Close it partially for more intense smoke, or open it more for better airflow and heat regulation.
5. Mantenimiento y limpieza
Regular cleaning and maintenance will extend the life of your Masterbuilt smoker.
- Después de cada uso: Allow the smoker to cool completely. Remove and clean the porcelain-coated wood chip tray and water pan with warm, soapy water.
- Parrillas de cocina: The chrome cooking racks can be cleaned with warm, soapy water and a brush.
- Interior: Wipe down the interior walls with a damp paño. Para la grasa rebelde, utilice un desengrasante suave.
- Exterior: Limpiar el exterior con adamp paño. Evite limpiadores abrasivos que puedan dañar el acabado.
- Almacenamiento: Store the smoker in a dry, protected area. If storing outdoors, use a weather-resistant cover.

Figure 5.1: A Masterbuilt smoker protected by a black, branded cover, suitable for outdoor storage.
6. Solución de problemas
| Problema | Posible causa | Solución |
|---|---|---|
| El quemador no se enciende | No propane flow; clogged burner; faulty igniter | Check propane tank connection and level; clean burner ports; check igniter wire connection. |
| Temperatura demasiado baja/alta | Control knob setting; air damper adjustment; ambient temperature | Adjust control knob; adjust air damper; consider external factors like wind/cold. |
| Sin producción de humo | Insufficient wood chips; wood chips too wet; temperature too low | Add more wood chips; ensure wood chips are dry or pre-soaked appropriately; increase temperature. |
7. Especificaciones
- Modelo: GS30D
- Dimensiones: 21.1 x 21.4 x 43.5 pulgadas (largo x ancho x alto)
- Peso: 58.5 libras
- Espacio de cocina: 717 square inches (Four chrome smoking racks)
- Tipo de combustible: Gas licuado de petróleo (propano)
- Encendido: Push-button ignition
- Quemador: Quemador de acero inoxidable
- Regulador: Type 1 regulator and hose
- Material: Stainless Steel (Outer)
- Características: Porcelain-coated wood chip tray and water pan, locking door with built-in temperature gauge, cool touch wire handle.

Figure 7.1: The Masterbuilt GS30D smoker with its door open, revealing the four chrome cooking racks, water pan, and wood chip tray.
8. Garantía y soporte
For warranty information, product registration, or technical support, please visit the official Masterbuilt website or contact Masterbuilt customer service directly. Keep your purchase receipt and model number (GS30D) handy for any inquiries.
Masterbuilt Customer Service: Refer to your product packaging or the official Masterbuilt webSitio para obtener información de contacto actualizada.