
Gardena M282081
Gardena Irrigation Programmer M282081 Instruction Manual
1. Producto terminadoview
The Gardena Irrigation Programmer M282081 is designed for automatic control of various irrigation systems, including sprinklers, drip irrigation, and other garden watering solutions. This device simplifies garden maintenance by providing scheduled watering, ensuring your plants receive the right amount of water at optimal times.
Las características principales incluyen:
- 14 programas preestablecidos: Offers a selection of pre-configured watering schedules for easy setup and immediate use.
- Removable Control Panel: The programming unit can be detached from the main body for convenient setup and adjustment.
- Indicador de batería baja: An indicator on the screen alerts you when the battery level is low, ensuring uninterrupted operation.
- Conexión de sensores: Compatible with Gardena soil moisture sensors or rain sensors for water-saving irrigation, optimizing water usage based on actual plant needs and weather conditions.

Figura 1: Primer plano view of the Gardena Irrigation Programmer M282081 display, showing current time, programmed watering duration, frequency, and active status.
2. Instrucciones de configuración
2.1 Instalación de la batería
- Localice el compartimiento de la batería en la parte posterior del panel de control.
- Abra la tapa del compartimento.
- Inserte una batería alcalina nueva de 9 V, asegurándose de la polaridad correcta (+/-).
- Cierre bien la tapa del compartimento de la batería.
- Note: Always use a new, high-quality battery for reliable operation. A weak or old battery can lead to malfunctions or premature power loss.
2.2 Attaching to the Faucet
- Asegúrese de que el grifo exterior esté cerrado.
- Screw the Gardena Irrigation Programmer onto the faucet outlet. Hand-tighten only to prevent damage.
- Connect your garden hose or irrigation system to the outlet of the programmer.
- Slowly turn on the faucet to allow water flow to the programmer.
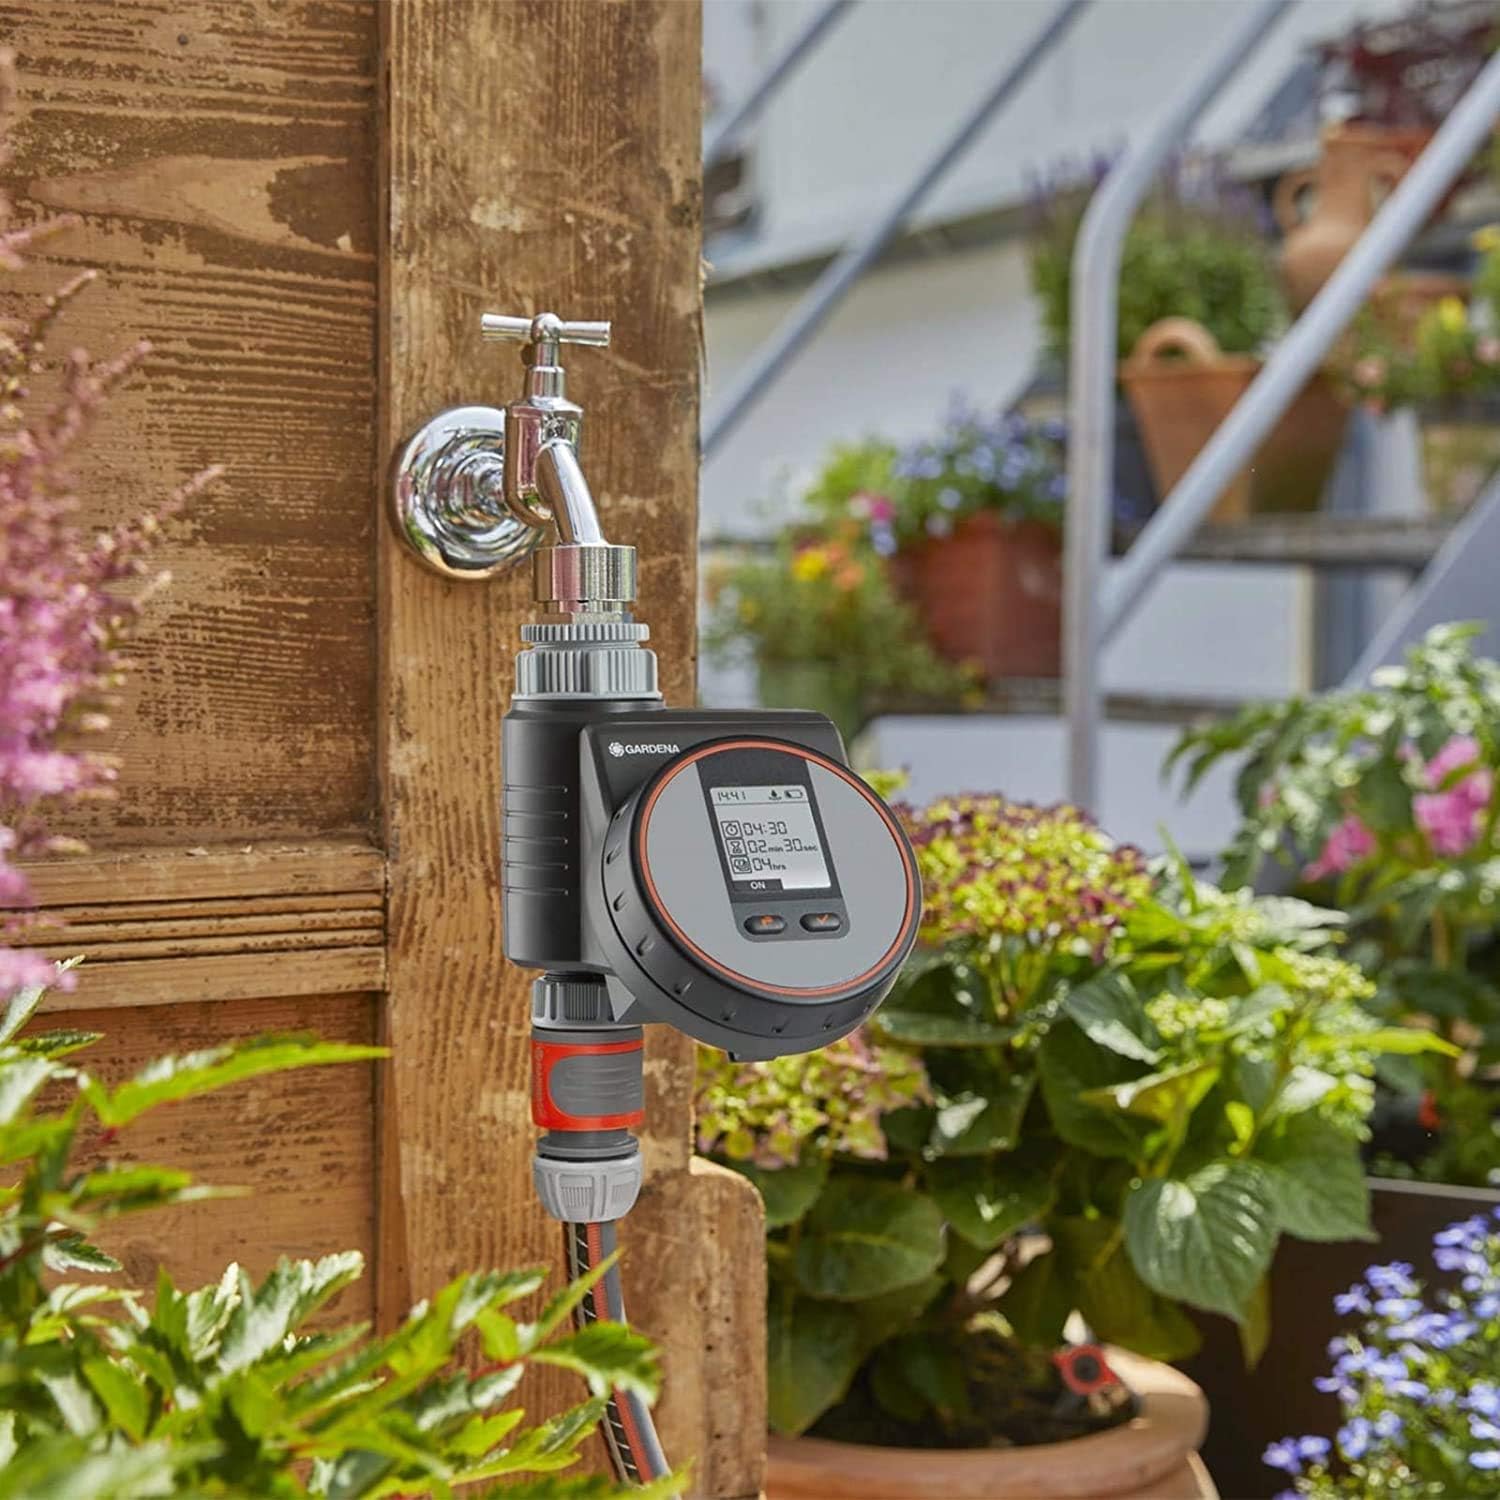
Figure 2: The Gardena Irrigation Programmer M282081 securely attached to an outdoor faucet, ready for hose connection.
2.3 Detaching the Control Panel
For easier programming, the control panel can be detached from the main unit. Simply press the release button or slide the panel upwards/outwards as indicated on the device, then pull it away from the base unit.

Figure 3: Detaching the control panel for convenient programming away from the faucet.
3. Operating the Irrigation Programmer
3.1 Programación básica
The Gardena Irrigation Programmer features an intuitive interface, often involving a rotary dial and selection buttons. Use the dial to navigate through settings such as current time, start time, watering duration, and frequency.
- Establecer hora actual: Rotate the dial to the 'Time' setting and adjust the hour and minute using the selection buttons.
- Seleccionar programa: Choose from the 14 preset programs or create a custom schedule. Preset programs are designed for common watering needs.
- Establecer hora de inicio: Define when the watering cycle should begin.
- Establecer duración del riego: Specify how long the irrigation should run (e.g., 2 minutes, 30 seconds as seen on the display).
- Establecer frecuencia: Determine how often the watering cycle repeats (e.g., every 4 hours, daily, every other day).
- Activar programa: Confirm your settings to activate the chosen irrigation program. The display will typically show 'ON' when active.

Figure 4: Adjusting program settings using the rotary dial and buttons on the control panel.
3.2 Sensor Integration (Optional)
To optimize water usage, connect a Gardena soil moisture sensor or rain sensor (sold separately) to the designated port on the programmer. When connected, the programmer will automatically adjust or suspend watering based on soil moisture levels or rainfall, preventing overwatering and conserving water.

Figure 5: The irrigation programmer in action, providing water to plants through a connected hose.
4. Mantenimiento
- Reemplazo de batería: Replace the 9V battery annually or when the low battery indicator appears on the display. Always use a fresh, high-quality alkaline battery.
- Limpieza: Periodically wipe the exterior of the programmer with a damp Paño para eliminar la suciedad y los residuos. No utilice limpiadores abrasivos ni sumerja la unidad en agua.
- Almacenamiento de invierno: Before the first frost, disconnect the programmer from the faucet and drain any remaining water. Store the unit indoors in a dry, frost-free location to prevent damage.
- Limpieza de filtros: Check the integrated filter (if present, typically at the inlet) for debris and clean it as needed to ensure unobstructed water flow.
5. Solución de problemas
| Problema | Posible causa | Solución |
|---|---|---|
| Programmer not turning on / Display blank | Dead or weak battery; Incorrect battery installation. | Replace with a new 9V alkaline battery. Ensure correct polarity. |
| El agua no fluye | Faucet is off; Hose kinked; Filter clogged; Programmer not activated or programmed correctly. | Ensure faucet is fully open. Check hose for kinks. Clean inlet filter. Verify program settings and activation. |
| Watering at incorrect times/duration | Incorrect program settings; Sensor interference. | Review and adjust program settings (start time, duration, frequency). Check sensor connection and functionality if applicable. |
| Low battery warning appears frequently | Battery is old or low quality; High usage. | Replace with a fresh, high-quality alkaline battery. Consider replacing batteries annually. |
6. Especificaciones técnicas
- Modelo: M282081
- Número de pieza: 1823-32
- Marca: Jardín
- Material: Plástico
- Tipo de pantalla: Pantalla LCD
- Color: Negro, gris, naranja
- Fuente de energía: Batería alcalina de 9 V (no incluida)
- Conexión: Compatible with Gardena soil moisture and rain sensors
- GTIN (Número de identificación comercial global): 04078500003520
7. Garantía y soporte
For specific warranty information, please refer to the documentation included with your purchase or visit the official Gardena webLos productos Gardena suelen venir con una garantía del fabricante que cubre defectos de materiales y mano de obra.
For technical support, spare parts, or further assistance, please contact Gardena customer service or visit the official Gardena store online:
Ask a question about this manual
Ask about setup, troubleshooting, compatibility, parts, safety, or missing instructions. Manuals+ will review the question and use this page’s manual context to help answer it.