
Introducción
Gracias por la compraasing the STOGA Ubox STV040 Dual Lens Car DVR Camera. This manual provides detailed instructions for the proper installation, operation, and maintenance of your device. Please read this manual thoroughly before using the product to ensure optimal performance and safety.
Contenido del paquete
Por favor, revise el contenido del paquete al abrirlo. Si falta algún artículo o está dañado, contacte con su vendedor.
- 1 x STOGA Ubox STV040 Car DVR Camera
- 1 x cargador de coche
- 1 x soporte para coche
- 1 x External GPS Module
- 1 x Manual de usuario
Producto terminadoview
Familiarize yourself with the components and features of your STOGA Ubox STV040 Car DVR Camera.

Figura 1: Frente view of the DVR camera with the display screen active.

Figura 2: Frente view detailing the dual wide-angle lenses and surrounding controls.
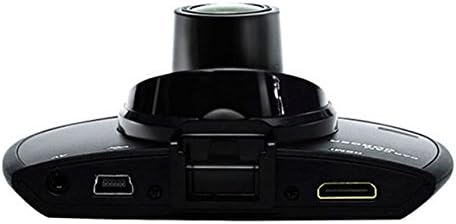
Figura 3: Arriba view illustrating the connectivity ports (HDMI, USB, AV).
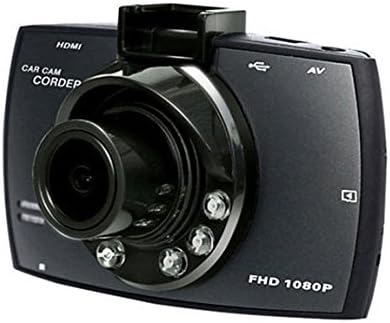
Figura 4: Angled perspective of the DVR camera, showing its compact design.
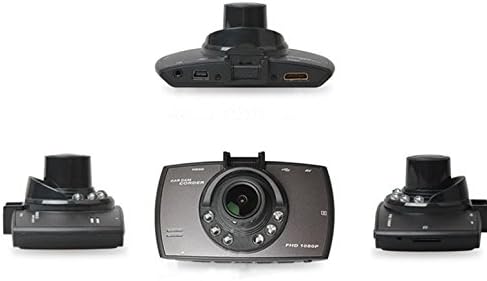
Figura 5: Integral view of the DVR camera from various angles.
Configuración
1. Instalación de la tarjeta Micro SD
Insert a Micro SD card (Class 6 or higher, 4GB-32GB) into the designated slot on the DVR camera. Ensure the card is inserted correctly until it clicks into place. The device supports continuous loop recording and emergency event recording.
2. Montaje de la cámara
- Attach the car mount to the windshield in a position that does not obstruct your view.
- Securely attach the DVR camera to the car mount.
- Adjust the camera angle to ensure both lenses capture the desired view (front and interior/side). The dual lenses are 180-degree rotatable.
3. Conexión de alimentación
Connect the car charger to the DVR camera's power input and plug the other end into your vehicle's 12V power outlet (cigarette lighter socket). The camera will typically power on automatically when the vehicle starts and power off when the vehicle is turned off.
4. Conexión del módulo GPS (opcional)
Connect the external GPS module to the designated GPS port on the DVR camera. This enables GPS logging, recording location data along with video footage.
Instrucciones de funcionamiento
Encendido/apagado
- Automático: The camera powers on and starts recording automatically when the car engine starts. It powers off automatically when the engine is turned off.
- Manual: Mantenga presionado el botón de encendido para encender o apagar manualmente el dispositivo.
Modos de grabación
- Grabación en bucle: The camera continuously records video in segments. When the memory card is full, it automatically overwrites the oldest unlocked footage.
- Grabación de emergencia (sensor G): The built-in G-Sensor detects sudden impacts or collisions. In such an event, the current video segment is automatically locked and protected from being overwritten.
Navegación de menú
Use the control buttons located on the device to navigate through the menu options on the 2.0" TFT LCD screen. Adjust settings such as video resolution, date/time stamp, language (English, Chinese, Japanese, Russian), and G-Sensor sensitivity.
Reproducción
- Stop recording if currently active.
- Ingrese al modo de reproducción a través del menú.
- Seleccione el vídeo deseado file for playback on the device screen.
- Alternatively, remove the Micro SD card and insert it into a computer to view files.
Protección con contraseña
The device supports password protection to prevent unauthorized access to recordings. Refer to the on-screen menu for setting up and managing this feature.
Mantenimiento
- Limpieza: Utilice un paño suave y seco para limpiar las lentes y la pantalla de la cámara. Evite limpiadores abrasivos o disolventes.
- Tarjeta micro SD: Format the Micro SD card regularly (e.g., once a month) to ensure optimal performance and prevent data corruption. Back up important files antes de formatear.
- Temperatura: Evite exponer el dispositivo a temperaturas extremas, luz solar directa durante períodos prolongados o alta humedad.
- Actualizaciones de firmware: Verifique el fabricante webVisite el sitio periódicamente para conocer las actualizaciones de firmware disponibles para mejorar el rendimiento y agregar funciones.
Solución de problemas
| Problema | Posible causa / solución |
|---|---|
| La cámara no se enciende. |
|
| La grabación se detiene inesperadamente. |
|
| Mala calidad de vídeo. |
|
| El GPS no funciona. |
|
| La batería no retiene la carga. |
|
Presupuesto
| Característica | Detalle |
|---|---|
| Número de modelo | Ubox STV040 |
| Mostrar | 2.0" TFT LCD (960 x 240 pixels) |
| Lentes | Dual 140-degree A+ wide-angle, 180-degree rotatable |
| Sensor | CMOS |
| Resolución de vídeo | 1280 x 480 @ 30 fps, 640 x 480 @ 30 fps |
| Formato de vídeo | Avión |
| Formato de imagen | M-JPG |
| Visión nocturna | Función de visión nocturna por infrarrojos |
| Almacenamiento | Micro TF (SD HC) card, 4GB-32GB, Class 6 and above |
| GPS | Supports external GPS module |
| Sensor G | Integrated, supports emergency event recording lock |
| Micrófono/altavoz | Integrado |
| Producción | CVBS (Video Output) |
| Batería | 3.7V 700mA Lithium-Polymer battery |
| Compatibilidad del sistema operativo | Windows 2000/XP/Vista/Windows 7 |
| Idiomas compatibles | English, Chinese, Japanese, Russian |
Garantía y soporte
For warranty information and technical support, please refer to the documentation provided with your purchase or contact your retailer. Keep your purchase receipt as proof of purchase for warranty claims.
For further assistance, you may also visit the official STOGA websitio (si está disponible) o comuníquese con su departamento de atención al cliente.