1. Introducción
This manual provides essential information for the safe and efficient operation, installation, and maintenance of your Everbilt 1-1/2 Hp Thermoplastic Sprinkler Pump. This high-capacity pump is engineered to boost water pressure from city water sources or draw water from lakes and streams for various sprinkling and irrigation applications. It features a robust 1-1/2 HP dual voltage motor and a corrosion-resistant thermoplastic construction, ensuring durability and reliable performance. The pump is self-priming after its initial fill with water, simplifying setup.
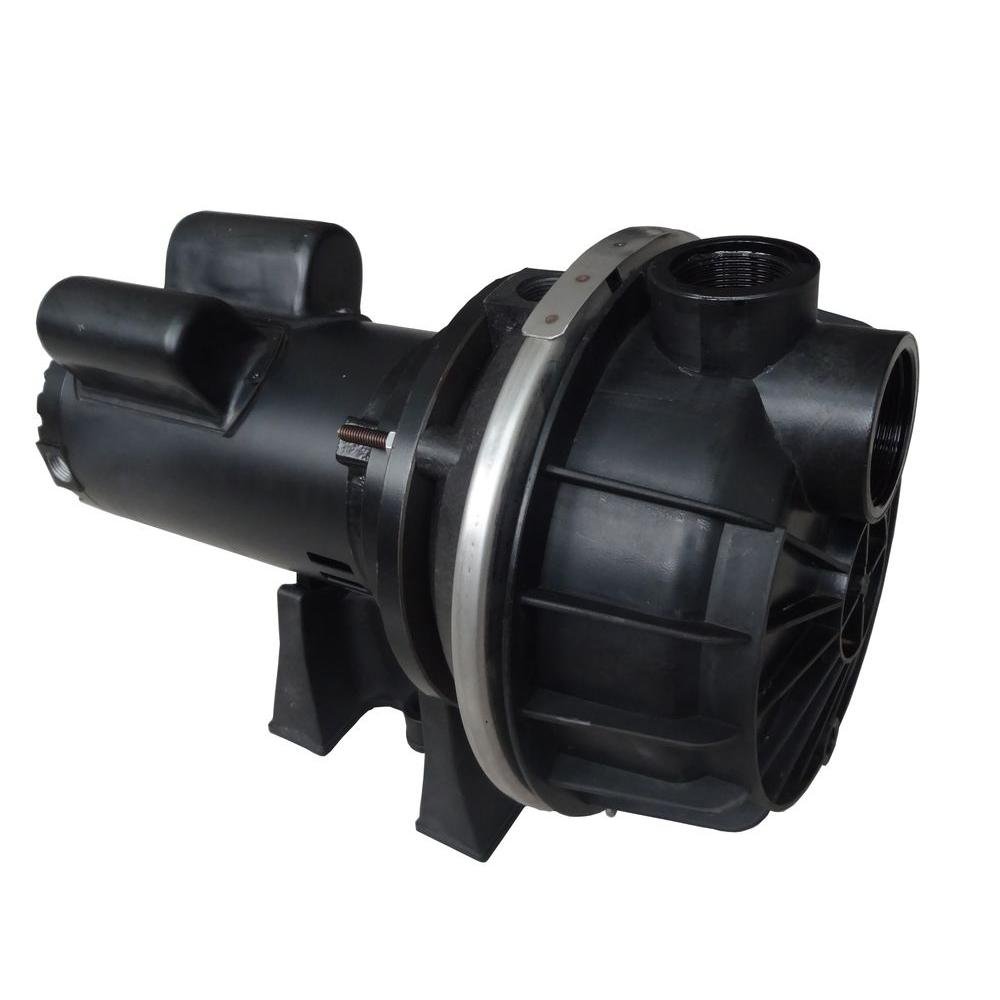
Image 1.1: The Everbilt 1-1/2 Hp Thermoplastic Sprinkler Pump, showcasing its compact design and durable thermoplastic housing.
2. Información de seguridad
Lea y comprenda todas las advertencias e instrucciones de seguridad antes de instalar o utilizar esta bomba. El incumplimiento de estas instrucciones puede provocar descargas eléctricas, incendios, lesiones graves o la muerte.
- Seguridad eléctrica: Always disconnect power before servicing the pump. Ensure the pump is properly grounded. All electrical wiring should be performed by a qualified electrician and comply with local codes. Do not operate the pump with a damaged cord or plug.
- Seguridad del agua: Never run the pump dry, as this can cause severe damage. Protect the pump and plumbing from freezing temperatures to prevent cracking and leaks.
- Seguridad general: Wear safety glasses when working with the pump. Keep children and unauthorized persons away from the operating area. Do not use this pump for flammable or corrosive liquids.
3. Contenido del paquete
Upon unpacking, verify that all components are present and undamaged. The package should contain:
- Everbilt 1-1/2 Hp Thermoplastic Sprinkler Pump (1 unit)
- Manual de usuario (este documento)
4. Configuración
La instalación adecuada es crucial para el rendimiento y la longevidad de la bomba.
4.1 Ubicación
- Install the pump on a firm, level surface to minimize vibration.
- Choose a location that is protected from direct sunlight, rain, and freezing temperatures.
- Ensure adequate ventilation around the motor for cooling.
4.2 Conexiones de tuberías
- Use appropriate pipe sizes for the inlet and outlet to ensure optimal flow and prevent cavitation.
- Apply thread sealant to all pipe connections to prevent air leaks, especially on the suction side.
- Install a foot valve with a strainer on the end of the suction line if drawing water from a lake or stream to prevent debris from entering the pump and to maintain prime.
- Install a check valve on the discharge side if necessary to prevent backflow.
4.3 Conexión eléctrica
- The pump features a dual voltage motor (115V or 230V). Ensure the motor is wired for the correct voltage supply available. Refer to the motor's wiring diagram for specific instructions.
- Conecte la bomba a un circuito eléctrico dedicado y con los fusibles adecuados.
- Ensure the pump is properly grounded to prevent electrical shock hazards.
4.4 Cebado de la bomba
Antes de la puesta en funcionamiento inicial, la bomba debe cebarse:
- Remove the priming plug located on top of the pump casing.
- Llene la bomba casing completamente con agua hasta que rebose.
- Vuelva a colocar el tapón de cebado de forma segura.
- Asegúrese de que todas las válvulas de las líneas de succión y descarga estén abiertas.
5. Instrucciones de funcionamiento
Una vez instalada y cebada, la bomba está lista para funcionar.
5.1 Puesta en marcha de la bomba
- Verify that all connections are tight and there are no visible leaks.
- Ensure the suction line is submerged in water (if drawing from a source) and the discharge line is open.
- Turn on the electrical power to the pump. The pump should start and begin moving water.
- Monitor the pump for the first few minutes of operation for any unusual noises or vibrations.
5.2 Detención de la bomba
Para detener la bomba, simplemente apague el suministro de energía eléctrica.
6. Mantenimiento
El mantenimiento regular garantiza un rendimiento óptimo y prolonga la vida útil de su bomba.
6.1 Controles periódicos
- Periodically inspect the pump and piping for any signs of leaks, corrosion, or damage.
- Clean any debris from the suction strainer (if applicable) to maintain proper flow.
- Ensure the motor's ventilation openings are clear of obstructions.
6.2 Preparación para el invierno (para climas fríos)
If the pump will be exposed to freezing temperatures, it must be drained to prevent damage:
- Desconecte la alimentación de la bomba.
- Retire el tapón(es) de drenaje de la bomba casing and any low points in the piping system.
- Deje que toda el agua se drene completamente.
- Store the pump in a dry, protected area if possible, or ensure all plugs are reinstalled loosely to allow for air circulation.
7. Solución de problemas
Esta sección proporciona soluciones a problemas comunes que puede encontrar.
| Problema | Posible causa | Solución |
|---|---|---|
| La bomba no arranca | No power; tripped circuit breaker; incorrect wiring; motor issue. | Check power supply and circuit breaker. Verify wiring. Consult a qualified electrician if motor issues are suspected. |
| Bajo flujo o presión de agua | Pump not primed; air leak in suction line; clogged strainer/impeller; incorrect pipe size. | Re-prime the pump. Check all suction line connections for leaks. Clean strainer and impeller. Ensure appropriate pipe sizing. |
| La bomba funciona pero no pasa agua | Pump not primed; suction line not submerged; air lock. | Ensure pump is fully primed. Verify suction line is adequately submerged. Bleed air from the system if an air lock is suspected. |
| Ruido o vibración excesivos | Air in system; loose mounting; worn bearings; cavitation. | Check for air leaks and re-prime. Tighten mounting bolts. If bearings are worn, professional service may be required. Ensure adequate water supply to prevent cavitation. |
| Fugas en la bomba | Loose connections; damaged seals/gaskets; cracked casing. | Tighten all pipe connections. Inspect and replace damaged seals or gaskets. If casing está agrietado, es posible que sea necesario reemplazar la bomba. |
8. Especificaciones
Technical details for the Everbilt 1-1/2 Hp Thermoplastic Sprinkler Pump.
- Fabricante: Everbilt
- Número de modelo: EFLS15-HD
- Número de pieza: EFLS15-HD
- Color: Negro
- Estilo: Por encima del suelo
- Material: Plástico, polipropileno (PP)
- Tipo de fuente de energía: AC/DC
- Volumentage: 115 Volts (AC) / 230 Volts (AC) (Dual Voltage)
- Caballos de fuerza: 1-1 / 2 HP
- Capacidad de bombeo: Hasta 4020 GPH (galones por hora)
- Maximum Lifting Height (Suction Depth): Hasta 20 pies
- Cantidad de artículos del paquete: 1
- Peso del artículo: 19.5 kilogramos
- Dimensiones del producto: 76.2 x 40.64 x 40.64 cm (Largo x Ancho x Alto)
- Código postal: 856594003961
- Fecha de primera disponibilidad: 22 de junio de 2015
9. Garantía y soporte
For warranty information, technical support, or replacement parts, please contact Everbilt customer service. Keep your purchase receipt as proof of purchase for any warranty claims. Detailed contact information can typically be found on the product packaging or the official Everbilt websitio.