1. Instrucciones de seguridad importantes
Lea atentamente todas las instrucciones antes de utilizar este aparato. Conserve este manual para futuras consultas.
- No toque superficies calientes. Utilice asas o perillas.
- Para protegerse contra incendios, descargas eléctricas y lesiones personales, no sumerja el cable, los enchufes ni el aparato en agua ni en ningún otro líquido.
- Es necesaria una estrecha supervisión cuando cualquier aparato sea utilizado por niños o cerca de ellos.
- Desenchufe el aparato del tomacorriente cuando no lo utilice y antes de limpiarlo. Deje que se enfríe antes de colocar o quitar piezas y antes de limpiarlo.
- No utilice ningún aparato con el cable o el enchufe dañados, ni después de que presente algún fallo o daño. Contacte con el servicio de atención al cliente para su revisión, reparación o ajuste.
- El uso de accesorios no recomendados por el fabricante del aparato puede provocar incendios, descargas eléctricas o lesiones a las personas.
- No utilizar en exteriores.
- No deje que el cable cuelgue del borde de la mesa o mostrador, ni que toque superficies calientes.
- No lo coloque sobre o cerca de un quemador de gas o eléctrico caliente, ni dentro de un horno caliente.
- Siempre conecte primero el enchufe al aparato y luego enchufe el cable a la toma de corriente. Para desconectarlo, apague cualquier control y luego desenchufe el aparato de la toma de corriente.
- No utilice el aparato para otro uso que no sea el doméstico previsto.
- Se pueden producir quemaduras si se quita la tapa durante el ciclo de preparación.
- La jarra de vidrio está diseñada exclusivamente para este electrodoméstico. Nunca debe usarse sobre una estufa.
- No coloque una jarra caliente sobre una superficie fría o húmeda.
- No utilice una jarra agrietada o que tenga el asa suelta o debilitada.
- No limpie la jarra con limpiadores, estropajos de acero ni otros materiales abrasivos.
2. Producto terminadoview y componentes
Familiarize yourself with the parts of your SOGO Drip Coffee Maker.
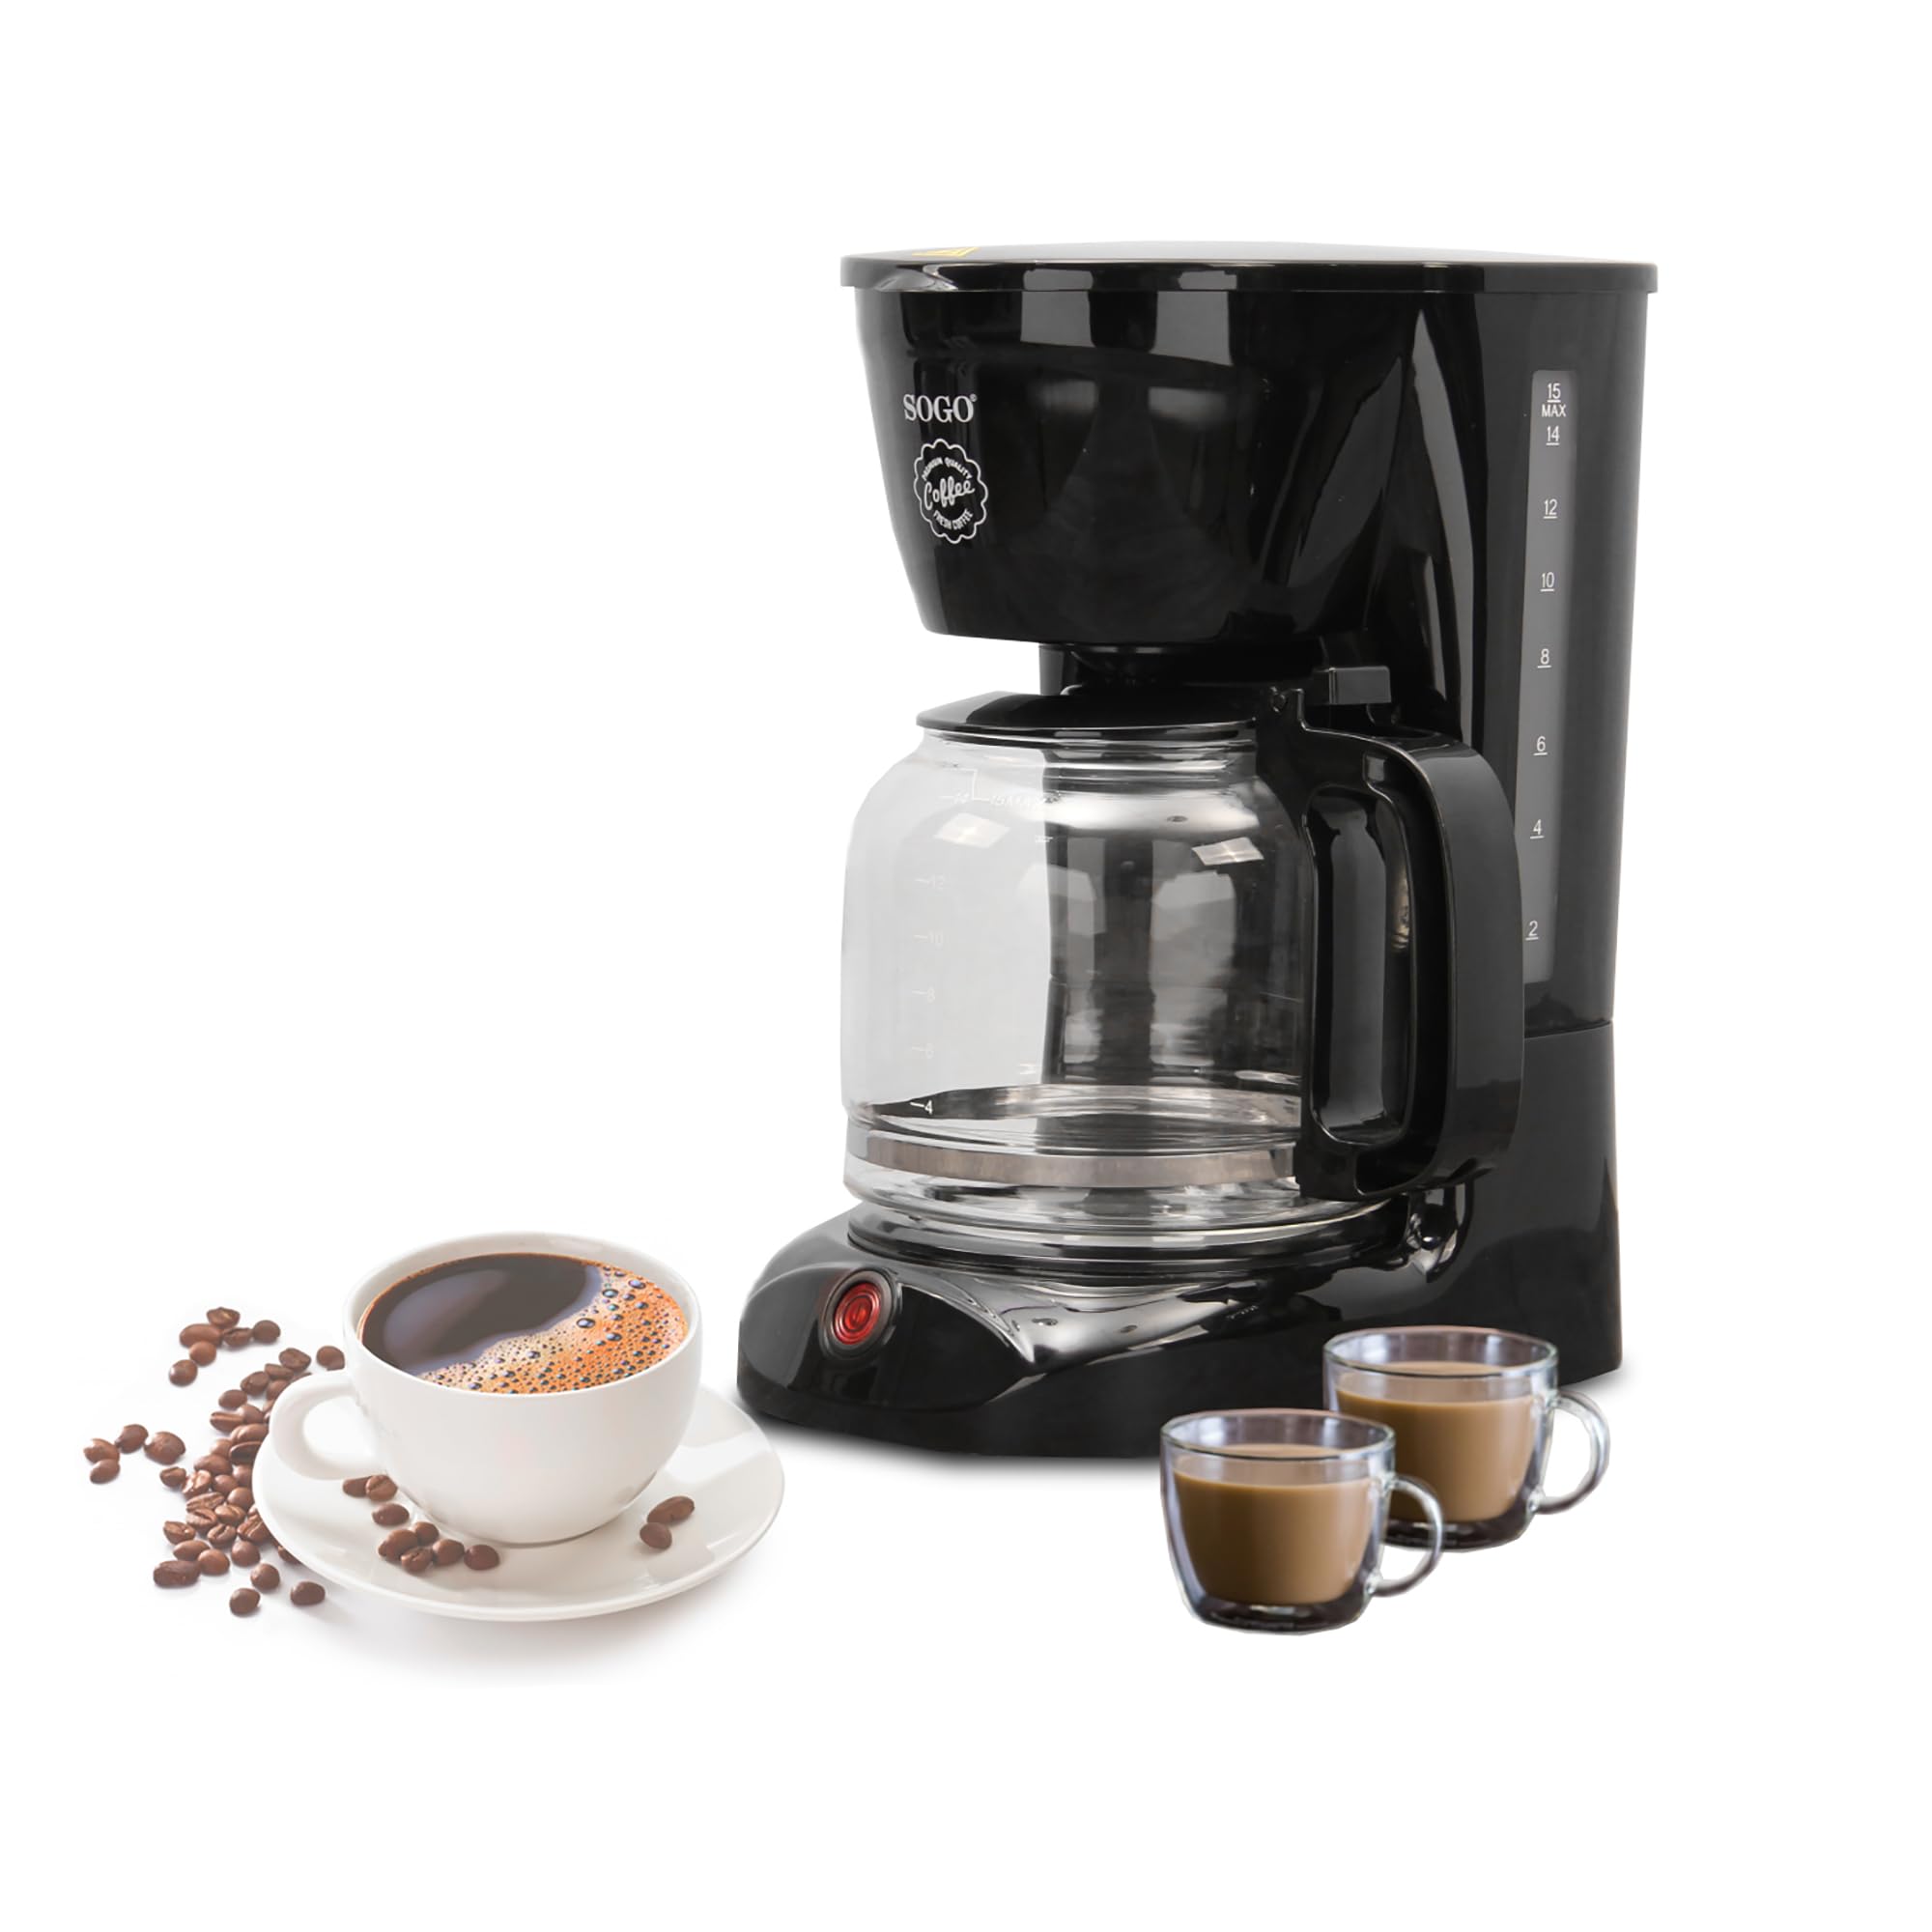
Imagen: Explotada view of the SOGO Drip Coffee Maker, displaying the main unit, glass carafe, filter basket, permanent filter, and coffee scoop.
- Unidad principal: Alberga el elemento calefactor, el depósito de agua y el panel de control.
- Tapa: Cubre el área del depósito de agua y la cesta del filtro.
- Reserva de agua: Contiene agua para preparar cerveza.
- Cesta de filtro: Holds the permanent filter and ground coffee.
- Filtro permanente: Filtro reutilizable para café molido.
- Jarra de vidrio: Collects brewed coffee. Features a handle and measurement markings.
- Plato calefactor: Mantiene caliente el café recién preparado.
- Interruptor de alimentación: On/Off button with indicator light.
- Cuchara de café: Para medir café molido.
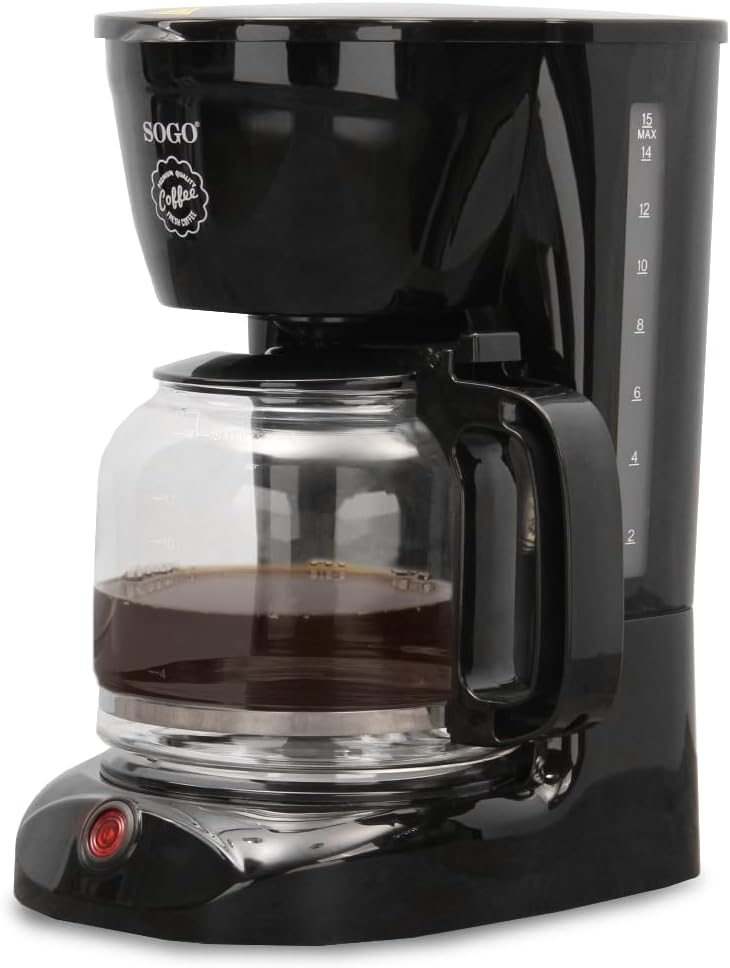
Imagen: Un primer plano view of the reusable permanent filter, designed to hold ground coffee during the brewing process.
3. Antes del primer uso
Before using your coffee maker for the first time, it is recommended to clean all removable parts and run a brewing cycle with water only.
- Wash the glass carafe, lid, filter basket, and permanent filter in warm, soapy water. Rinse thoroughly and dry.
- Place the filter basket into its housing in the main unit. Insert the permanent filter into the filter basket.
- Fill the water reservoir with fresh cold water up to the 1.8L (15 cup) mark. Do not add coffee grounds.
- Coloque la jarra de vidrio con su tapa sobre la placa calentadora.
- Conecte el cable de alimentación a una toma eléctrica estándar.
- Press the power switch to turn on the appliance. The indicator light will illuminate.
- Deje que se complete el ciclo. Deseche el agua caliente de la jarra.
- Desenchufe el aparato y deje que se enfríe. Su cafetera ya está lista para usar.
4. Operation: Making Coffee
Follow these steps to brew a fresh pot of coffee.

Image: The SOGO Drip Coffee Maker fully assembled with the glass carafe in place, ready to brew coffee.
- Asegúrese de que la cafetera esté desenchufada y fría.
- Fill the water reservoir with fresh, cold water to the desired level, using the markings on the reservoir or carafe as a guide. Do not exceed the “MAX” line.
- Coloque el filtro permanente en la cesta del filtro.
- Add the desired amount of ground coffee to the permanent filter. A general guideline is one level scoop (approximately 7g) of ground coffee per cup (150ml) of water. Adjust to your taste.
- Cierre bien la tapa.
- Place the empty glass carafe with its lid onto the warming plate. Ensure it is properly seated to activate the drip-stop mechanism.
- Conecte el cable de alimentación a una toma eléctrica estándar.
- Press the power switch. The indicator light will turn on, and brewing will begin.
- The brewing process will take several minutes. Do not open the lid during brewing as scalding may occur.
- Once brewing is complete, the coffee maker will automatically switch to a “keep warm” function. The warming plate will keep the coffee hot.
- To serve, carefully remove the carafe from the warming plate.
- After serving, return the carafe to the warming plate to keep the remaining coffee warm.
- To turn off the appliance, press the power switch again. The indicator light will turn off.
- Unplug the coffee maker from the outlet when not in use or when the warming function is no longer needed.
5. Limpieza y mantenimiento
La limpieza regular garantiza un rendimiento óptimo y prolonga la vida útil de su cafetera.
- Desenchufe siempre la cafetera y déjela enfriar completamente antes de limpiarla.
- Remove the glass carafe, filter basket, and permanent filter. Discard used coffee grounds.
- Wash the carafe, lid, filter basket, and permanent filter in warm, soapy water. These parts can also be rinsed under running water.
- Limpie el exterior de la cafetera con un paño suave yamp tela. No utilice limpiadores abrasivos ni estropajos.
- Nunca sumerja la unidad principal, el cable de alimentación o el enchufe en agua ni en ningún otro líquido.
- To clean the warming plate, wipe it with a damp paño. No utilice materiales abrasivos.
- For descaling (mineral deposit removal), fill the water reservoir with a mixture of white vinegar and water (1:2 ratio). Run a brewing cycle without coffee grounds. Repeat if necessary. Then, run two cycles with fresh water to rinse thoroughly. Descale every 2-4 weeks depending on water hardness.
- Asegúrese de que todas las piezas estén completamente secas antes de volver a montar y guardar el aparato.
6. Solución de problemas
Si tiene problemas con su cafetera, consulte los siguientes problemas y soluciones comunes.
| Problema | Posible causa | Solución |
|---|---|---|
| El café no sale. | Appliance not plugged in; Power switch not turned on; No water in reservoir. | Ensure plug is securely in outlet; Press power switch; Fill water reservoir. |
| El café está demasiado débil. | Not enough coffee grounds; Water-to-coffee ratio incorrect; Coarse grind. | Add more coffee grounds; Adjust ratio; Use a finer grind. |
| El café se desborda del filtro. | Demasiados posos de café; Canasta de filtro no colocada correctamente; Filtro obstruido. | Reduce coffee grounds; Ensure filter basket is properly in place; Clean permanent filter or descale appliance. |
| La elaboración es lenta. | Mineral deposits (scale) in the appliance. | Descale the coffee maker as described in the Cleaning and Maintenance section. |
| El café no está lo suficientemente caliente. | Warming plate not functioning; Appliance needs descaling. | Ensure warming plate is on; Descale the coffee maker. |
7. Especificaciones
Technical details for the SOGO Drip Coffee Maker Model CAF-SS-5640.
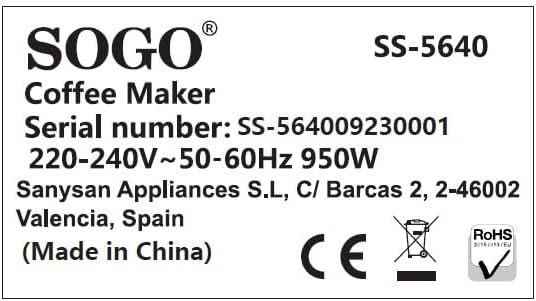
Image: Product label showing model number SS-5640, serial number, power requirements (220-240V~ 50-60Hz 950W), and manufacturer details.
| Característica | Detalle |
|---|---|
| Marca | SOGO |
| Número de modelo | CAF-SS-5640 |
| Color | Negro |
| Dimensiones (L x An x Al) | 23.5 x 17.5 x 30.5 cm |
| Capacidad | 1.8 litros (aprox. 15 tazas) |
| Fuerza | 950 vatios |
| Material | Glass (carafe) |
| Característica especial | Filtro permanente |
| Peso del artículo | 1.39 kilogramos |
| Componentes incluidos | Jarra |
8. Garantía y soporte
Information regarding spare parts availability is not provided in the product details. For warranty claims or further support, please refer to the retailer or manufacturer's official webSitio donde se compró el producto.