Introducción
This manual provides comprehensive instructions for the setup, operation, and maintenance of your GPX Digital AM/FM Clock Radio, model C224B. Please read this manual thoroughly before using the device to ensure proper functionality and to maximize your user experience. Keep this manual for future reference.
Producto terminadoview
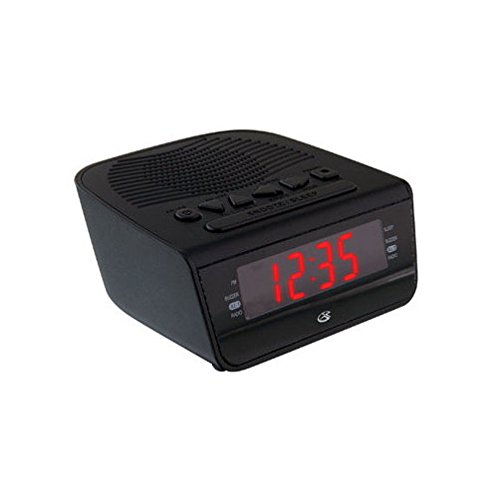
Figura 1: Frente view of the GPX Digital AM/FM Clock Radio. This image shows the compact black unit with its digital display and control buttons.
The GPX Digital AM/FM Clock Radio (C224B) is designed for reliable timekeeping and audio entertainment. Key features include a clear multi-display clock, AM/FM radio tuner, dual alarm functionality, and a battery backup option to ensure continuous operation during power interruptions. Its compact and modern design makes it suitable for various indoor settings.
Configuración
1. Desembalaje
Carefully remove the clock radio from its packaging. Ensure all components are present: the clock radio unit and the power adapter.
2. Conexión de alimentación
- Plug the power adapter into the DC input jack located on the back of the clock radio.
- Plug the other end of the power adapter into a standard wall outlet (AC 120V, 60Hz).
- The display will illuminate, indicating the unit is receiving power.
3. Instalación de batería de respaldo (opcional)
Para energía de respaldo durante nuestratages, install batteries (not included).
- Localice el compartimiento de la batería en la parte inferior de la unidad.
- Abra la tapa del compartimiento de la batería.
- Insert the required batteries (e.g., 2 x AAA, check unit for specific type) according to the polarity markings (+ and -).
- Cierre bien la tapa del compartimento de la batería.
Nota: Batteries are for backup only and will not power the display or radio functions continuously. They preserve time and alarm settings during a power interruption.
Instrucciones de funcionamiento
1. Configuración de la hora
- Mantenga pulsado el TIEMPO ESTABLECIDO botón hasta que la pantalla parpadee.
- Utilice el HORA y MINUTO Botones para ajustar la hora.
- Prensa TIEMPO ESTABLECIDO nuevamente para confirmar y salir del modo de configuración de la hora.
2. Configuración de alarmas (Alarma 1 y Alarma 2)
This unit features dual alarms, allowing you to set two independent wake-up times.
- Mantenga pulsado el ALARMA 1 CONFIGURACIÓN (o ALARMA 2 CONFIGURACIÓN) hasta que parpadee la hora de la alarma.
- Utilice el HORA y MINUTO Botones para ajustar la hora de alarma deseada.
- Prensa ALARMA 1 CONFIGURACIÓN (o ALARMA 2 CONFIGURACIÓN) again to confirm the time.
- Immediately after confirming the time, use the MODO ALARMA button to select the alarm source: BUZZER or RADIO.
- The alarm icon (e.g., AL1 or AL2) will appear on the display, indicating the alarm is active.
To turn off an alarm, press the corresponding ALARMA 1 ENCENDIDA/APAGADA (o ALARMA 2 ENCENDIDA/APAGADA) button. The alarm icon will disappear.
3. Funcionamiento de la radio AM/FM
- Presione el ENCENDIDO/APAGADO DE RADIO Botón para encender la radio.
- Presione el BANDA Botón para cambiar entre las bandas AM y FM.
- Utilice el SINTONIZAR + or SINTONIZAR - Botones para sintonizar manualmente una estación deseada.
- To automatically scan for the next available station, press and hold SINTONIZAR + or SINTONIZAR - por unos segundos.
- Ajuste el volumen con el VOLUMEN + or VOLUMEN - botones.
- Para apagar la radio, presione el botón ENCENDIDO/APAGADO DE RADIO botón de nuevo.
4. Función de repetición
Cuando suene una alarma, presione el DORMITAR Botón para silenciar la alarma temporalmente durante aproximadamente 9 minutos. La alarma sonará de nuevo después del periodo de repetición.
5. Función de sueño
La función de suspensión permite que la radio funcione durante un tiempo determinado antes de apagarse automáticamente.
- Mientras la radio esté sonando, presione el botón DORMIR Presione el botón repetidamente para recorrer los tiempos de suspensión disponibles (por ejemplo, 90, 60, 30, 15 minutos, APAGADO).
- La radio se apagará automáticamente después del tiempo seleccionado.
Mantenimiento
1. Limpieza
To clean the unit, wipe the exterior with a soft, slightly damp cloth. Do not use abrasive cleaners or solvents, as these may damage the finish. Ensure the unit is unplugged before cleaning.
2. Reemplazo de la batería
If the battery backup function is not working, or if the unit loses time during a power outage, the backup batteries may need replacement. Follow the "Battery Backup Installation" steps in the Setup section to replace them.
Solución de problemas
| Problema | Posible causa | Solución |
|---|---|---|
| La unidad no se enciende. | Adaptador de corriente no conectado o toma de corriente defectuosa. | Asegúrese de que el adaptador de corriente esté bien enchufado a la unidad y a una toma de corriente que funcione. Pruebe con otra toma. |
| La alarma no suena. | Alarma no configurada, volumen de alarma demasiado bajo o alarma desactivada. | Verify alarm time and source (buzzer/radio) are set correctly. Ensure alarm is activated (icon visible). Increase radio volume if alarm source is radio. |
| Mala recepción de radio. | Señal débil o interferencia. | Adjust the position of the unit or the antenna (if external). Move away from other electronic devices that may cause interference. |
| Se perdió la hora y la configuración después de un corte de energíatage. | Las baterías de respaldo están agotadas o no están instaladas. | Install fresh backup batteries or replace existing ones. |
Presupuesto
- Modelo: C224B
- Fuente de energía: AC 120V, 60Hz (main); Battery Powered (backup)
- Tipo de pantalla: Pantalla digital LED
- Bandas de radio: Radio AM/FM
- Dimensiones (Aprox.): 5.12" de ancho x 5.12" de alto
- Peso aproximado.): 3 libras
- Color: Negro
- Material: Plástico
Garantía y soporte
Para obtener información sobre la garantía o asistencia técnica, consulte la tarjeta de garantía incluida con su producto o visite el sitio web oficial de GPX. website. Do not attempt to repair this unit yourself, as this may void your warranty.
GPX Oficial Websitio: www.gpx.com