
REY KB2407-1-B2-ECO
Manual del usuario del calentador de garaje KING KB2407-1-B2-ECO ECO2S de 7500 W
Modelo: KB2407-1-B2-ECO
1. Introducción
This manual provides essential instructions for the safe installation, operation, and maintenance of your KING KB2407-1-B2-ECO ECO2S 7500W Garage Heater. Please read this manual thoroughly before installation and use, and retain it for future reference. Proper installation and adherence to these instructions are crucial for optimal performance and safety.
2. Información importante de seguridad
ADVERTENCIA: Riesgo de incendio, descarga eléctrica o lesiones a personas.
- Lea todas las instrucciones antes de instalar o utilizar este calentador.
- Este calefactor se calienta al usarlo. Para evitar quemaduras, evite el contacto directo con superficies calientes. Mantenga los materiales combustibles, como muebles, almohadas, ropa de cama, papeles, ropa y cortinas, al menos a 0.9 cm (3 pies) de la parte frontal del calefactor y alejados de los laterales y la parte trasera.
- Se requiere mucho cuidado cuando cualquier calentador sea utilizado por o cerca de niños o personas discapacitadas y siempre que el calentador se deje en funcionamiento y sin supervisión.
- No utilice ningún calentador con el cable o enchufe dañado, ni después de que presente un mal funcionamiento, se haya caído o haya sufrido algún daño. Deseche el calentador o devuélvalo a un centro de servicio autorizado para su revisión o reparación.
- No utilizar en exteriores.
- Este calentador no está diseñado para usarse en baños, áreas de lavandería y lugares interiores similares. Nunca coloque el calentador donde pueda caer en una bañera u otro recipiente de agua.
- No coloque el cable debajo de alfombras. No cubra el cable con tapetes, alfombras o cobertores similares. Coloque el cable lejos del área de tránsito y en un lugar donde nadie pueda tropezar con él.
- Para desconectar el calentador, apague los controles y luego retire el enchufe del tomacorriente.
- No inserte ni permita que objetos extraños entren en ninguna abertura de ventilación o escape ya que esto puede provocar una descarga eléctrica o un incendio, o dañar el calentador.
- Para evitar un posible incendio, no bloquee las entradas ni los escapes de aire de ninguna manera. No lo utilice en superficies blandas, como una cama, donde las aberturas pueden bloquearse.
- Un calentador tiene partes calientes que generan arcos eléctricos o chispas en su interior. No lo use en áreas donde se usen o almacenen gasolina, pintura o vapores o líquidos inflamables.
- Utilice este calentador únicamente como se describe en este manual. Cualquier otro uso no recomendado por el fabricante puede provocar incendios, descargas eléctricas o lesiones personales.
- Enchufe siempre los calentadores directamente a un tomacorriente de pared. Nunca los utilice con un cable de extensión o una toma de corriente reubicable (tomacorriente o regleta).
- This heater is for 240V applications only.
3. Contenido del paquete
Verify that all components are present and undamaged. If any items are missing or damaged, contact your retailer.
- KING KB2407-1-B2-ECO ECO2S Garage Heater (7500W / 240V)
- Soporte universal para montaje en pared o techo
- Mando a distancia
- Manual de usuario (este documento)

Image 3.1: The KING KB2407-1-B2-ECO ECO2S Garage Heater, showing the main unit, the universal mounting bracket, and the remote control.
4. Configuración e instalación
La instalación debe ser realizada por un electricista calificado de acuerdo con todos los códigos eléctricos locales y nacionales.
4.1 Ubicación de montaje
- Select a location where the heater is protected from water spray, dripping water, and excessive dust.
- Ensure adequate clearance from combustible materials (minimum 3 feet from front, sides, and rear).
- Mount the heater securely to a structural member (stud, joist) capable of supporting its weight (approximately 33.5 lbs).
- The universal bracket allows for wall or ceiling mounting.
4.2 Montaje del calentador
- Attach the universal mounting bracket to a sturdy wall stud or ceiling joist using appropriate fasteners (not included). Ensure the bracket is level and securely fastened.
- Lift the heater and align the hanging hooks on top of the heater with the slots on the mounting bracket.
- Slide the heater onto the bracket until it is securely seated.
- Adjust the heater's angle as desired and secure it using the provided hardware to prevent accidental movement.
4.3 Cableado eléctrico
DANGER: Disconnect power at the main service panel before attempting any wiring to prevent electric shock.
- This heater requires a dedicated 240V circuit.
- The heater is rated for 7500W, drawing approximately 31.25 Amps. A circuit breaker and wiring sized appropriately for this load are required (e.g., 40 Amp breaker with 8-gauge wire, consult local codes).
- Access the internal wiring compartment by removing the appropriate cover plate on the heater.
- Connect the 240V supply wires to the heater's terminals as indicated in the wiring diagram inside the heater's compartment. Ensure proper grounding.
- Secure all wiring connections and replace the cover plate.

Imagen 4.1: Trasera view of the heater, illustrating the fan and location of electrical warning labels. Ensure all wiring is done by a qualified professional.
5. Operación
Once properly installed and powered, the heater can be operated using its integrated control panel or the remote control.
5.1 Panel de control terminadoview

Imagen 5.1: Frente view of the heater, highlighting the digital display and control buttons for direct operation.
El panel de control cuenta con una pantalla digital y varios botones:
- Pantalla digital: Shows current temperature, set temperature, and mode indicators.
- Botón de encendido: Enciende y apaga el calentador.
- Botón MODE: Cycles through heating modes (ECO, HIGH, FAN ONLY).
- Flechas ARRIBA/ABAJO: Ajusta la temperatura establecida.
- Botón TEMPORIZADOR: Activa o ajusta la función del temporizador.
5.2 control remoto
El control remoto incluido proporciona acceso cómodo a todas las funciones del calentador a distancia.
- Asegúrese de que las pilas estén instaladas correctamente en el control remoto.
- Point the remote control towards the heater's control panel for optimal signal reception.
- Buttons on the remote mirror the functions of the control panel (Power, Mode, Up/Down Temperature, Timer).
Modos de funcionamiento de 5.3
- Modo ecologico: The heater automatically selects the lowest wattage needed to maintain the set temperature, optimizing energy consumption.
- HIGH Heat Mode: The heater operates at full wattage (7500W) to quickly reach and maintain the set temperature.
- FAN ONLY Mode: The fan operates without engaging the heating elements, providing air circulation.
5.4 Configuración de la temperatura
- Press the POWER button to turn the heater on.
- Use the UP or DOWN arrow buttons to set your desired temperature. The display will show the set temperature, then revert to the ambient temperature.
- El calentador se encenderá y apagará automáticamente para mantener la temperatura establecida.
5.5 Función de temporizador
The timer allows you to set a duration for the heater to operate before automatically turning off.
- With the heater on, press the TIMER button.
- Use the UP or DOWN arrow buttons to set the desired operating time (e.g., 1-12 hours).
- The heater will operate for the set duration and then power off.
6. Mantenimiento
WARNING: Always disconnect power to the heater at the main service panel before performing any maintenance or cleaning.
- Limpieza: Limpie periódicamente el exterior del calentador con un paño suave.amp Paño. No utilice limpiadores abrasivos ni disolventes.
- Eliminación de polvo: Use a vacuum cleaner with a brush attachment to remove dust from the grilles and internal components. Ensure the fan blades are free of obstructions.
- Inspección: Regularly inspect the power cord and plug for any signs of damage. If damage is found, discontinue use and contact a qualified electrician for repair.
- No se requiere lubricación para el motor.
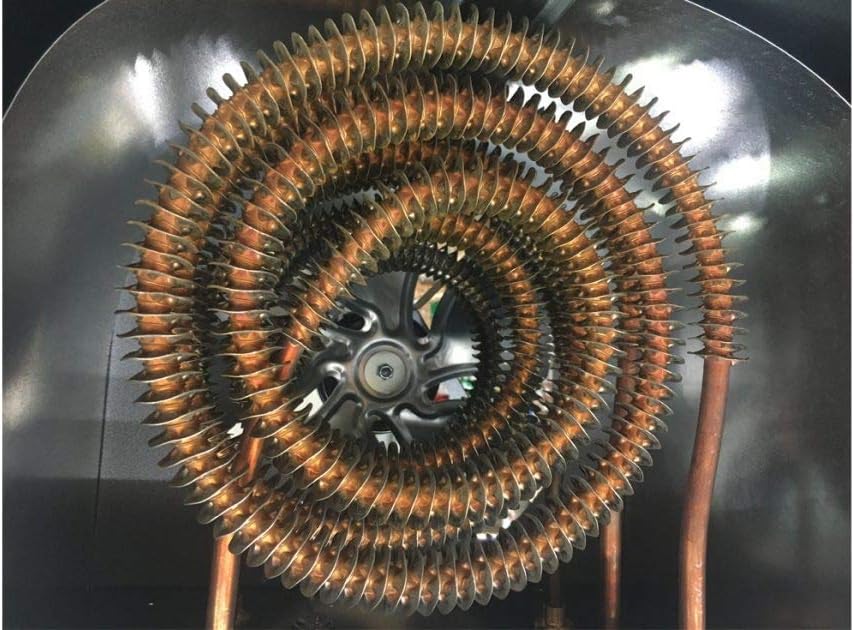
Image 6.1: Close-up of the spiral steel heating elements. Regular cleaning helps maintain efficiency and prolong heater life.
7. Solución de problemas
Si su calentador no funciona correctamente, consulte la siguiente tabla antes de ponerse en contacto con el servicio de atención al cliente.
| Problema | Posible causa | Solución |
|---|---|---|
| El calentador no enciende. | No hay suministro de energía. Se disparó el disyuntor. Protección contra sobrecalentamiento activada. | Ensure heater is properly wired and connected to 240V supply. Verifique y reinicie el disyuntor. Turn off heater, allow to cool for 30 minutes, then restart. Clear any obstructions. |
| El calentador produce calor insuficiente. | Modo incorrecto seleccionado. La temperatura establecida es demasiado baja. El tamaño de la habitación excede la capacidad de calefacción. | Ensure HIGH or ECO mode is selected, not FAN ONLY. Aumente la temperatura establecida. Verify the heater's coverage area (700 sq ft for 7500W) is appropriate for your space. |
| El ventilador funciona pero no calienta. | FAN ONLY mode selected. Heating elements malfunction. | Switch to ECO or HIGH heat mode. Si el problema persiste, póngase en contacto con un técnico calificado. |
| El control remoto no funciona. | Baterías agotadas. Obstrucción entre el control remoto y el calentador. | Reemplace las baterías del control remoto. Ensure a clear line of sight to the heater's control panel. |

Image 7.1: Heating coverage chart for various KING garage heater wattages. The 7500W model covers up to 750 sq ft.
8. Especificaciones
| Característica | Detalle |
|---|---|
| Modelo | KB2407-1-B2-ECO |
| Marca | REY |
| Quétage | 7500 vatios |
| Volumentage | 240 voltios |
| Ampanhelo | 31.25 Amps |
| Cobertura de calefacción | Up to 700 ft² (based on 8 ft ceiling height and FHA standard insulation values) |
| Características especiales | Remote Control, Built-In Fan Delay, Summer Fan Only & Timer Modes, ECO2S Electronic Thermostat |
| Tipo de montaje | Universal Wall/Ceiling Bracket |
| Dimensiones del producto | 13.5 x 15 x 16.5 pulgadas |
| Peso del artículo | 33.5 libras |
| Código Postal | 093319220405 |
9. Garantía y soporte
Para obtener información sobre la garantía o asistencia técnica, consulte la tarjeta de garantía incluida con su producto o visite el sitio web oficial del fabricante. webSitio. Conserve su recibo de compra como comprobante para reclamaciones de garantía.
Fabricante: King Electric
For further assistance, contact King Electric customer service.
Ask a question about this manual
Ask about setup, troubleshooting, compatibility, parts, safety, or missing instructions. Manuals+ will review the question and use this page’s manual context to help answer it.