AirTies AIR-4920
Manual del usuario del extensor de Wi-Fi inteligente Airties AT&T Air 4920
Model: AIR-4920 | Brand: AirTies
1. Introducción y másview
The AT&T Air 4920 Airties Smart Wi-Fi Extender is designed to expand the coverage and improve the signal strength of your existing Wi-Fi network. It creates a seamless mesh network, allowing your devices to automatically connect to the strongest Wi-Fi signal as you move around your home or office. This manual provides detailed instructions for setting up, operating, maintaining, and troubleshooting your Wi-Fi extender.

Figura 1: Frente view of the AT&T Air 4920 Airties Smart Wi-Fi Extender.
2. Contenido del paquete
Por favor verifique que todos los artículos estén presentes en su paquete:
- AT&T Air 4920 Airties Smart Wi-Fi Extender Unit
- Adaptador de corriente
- Guía de inicio rápido (este manual sirve como guía completa)
3. Características y componentes del producto
Familiarize yourself with the various ports, buttons, and indicator lights on your Wi-Fi Extender.

Figura 2: Parte delantera y trasera view of the Wi-Fi Extender with labeled components.
- Indicador de Wi-Fi de 5 GHz: Muestra el estado de la banda Wi-Fi de 5 GHz.
- Indicador de Wi-Fi de 2.4 GHz: Muestra el estado de la banda Wi-Fi de 2.4 GHz.
- Power Indicator / On/Off Button: Indicates power status. Can also be used to turn the device on/off.
- Botón WPS: Used for Wi-Fi Protected Setup to quickly connect to your router.
- Gigabit Ethernet Ports (1 & 2): Para conexiones por cable a dispositivos como computadoras, consolas de juegos o televisores inteligentes.
- Interruptor de encendido/apagado: A physical switch to turn the device completely off or on.
- Entrada de alimentación de CC (12 V): Conecte aquí el adaptador de corriente proporcionado.
- Botón de reinicio: Used to restore the device to factory default settings. (Requires a paperclip or similar pointed object).
4. Guía de configuración
Follow these steps to set up your AT&T Air 4920 Wi-Fi Extender:
4.1 Colocación inicial
For initial setup, place the Wi-Fi Extender near your AT&T gateway (router). Once paired, you can move it to a more central location in your home where Wi-Fi signal is weak.
4.2 Conexión de alimentación
- Connect the provided power adapter to the DC Power Input (7) on the back of the extender.
- Conecte el adaptador de corriente a una toma de pared.
- Ensure the Power On/Off Switch (6) is in the 'On' position. The Power Indicator (3) should light up.
4.3 Pairing with Your AT&T Gateway (Router)
There are two primary methods for pairing:
Method A: Using WPS (Wi-Fi Protected Setup) - Recommended
- Mantenga pulsado el WPS Button (4) on the front of the Wi-Fi Extender for 2-3 seconds until the indicator lights start blinking.
- Dentro de dos minutos, presione el Botón WPS on your AT&T gateway (router). Refer to your gateway's manual for the exact location of its WPS button.
- Wait for the indicator lights on the extender (1, 2, and 3) to turn solid green, indicating a successful connection. This may take a few minutes as the extender updates its firmware and synchronizes with your gateway.
Method B: Using an Ethernet Cable (If WPS fails or is not preferred)
- Connect one end of an Ethernet cable (not included) to one of the Gigabit Ethernet Ports (5) on the back of the extender.
- Connect the other end of the Ethernet cable to an available LAN port on your AT&T gateway (router).
- The extender will automatically detect the connection and begin pairing. Wait for the indicator lights (1, 2, and 3) to turn solid green.
- Once paired, you can disconnect the Ethernet cable if you wish to use the extender wirelessly.
4.4 Colocación óptima
After successful pairing, unplug the extender and move it to a location roughly halfway between your AT&T gateway and the area where you need improved Wi-Fi coverage. Ensure the extender is placed in an open area, away from large metal objects, concrete walls, or other electronic devices that might cause interference. Plug it back into a power outlet. The indicator lights should turn solid green again, confirming a good connection.

Figure 3: The Wi-Fi Extender connected to its power adapter.
5. Operating Your Wi-Fi Extender
Once set up, the AT&T Air 4920 operates automatically to extend your Wi-Fi network. Your devices will seamlessly connect to the strongest signal, whether from your gateway or the extender, using your existing Wi-Fi network name (SSID) and password.
Estado de la luz indicadora:
- Verde sólido: Excellent connection and operation.
- Ámbar/naranja sólido: Fair connection. Consider repositioning the extender closer to your gateway.
- Rojo sólido: No connection or poor signal. Reposition the extender or check connections.
- Parpadeo: During WPS pairing or firmware update.
- Apagado: El dispositivo está apagado o no recibe energía.
Conexiones cableadas:
You can connect wired devices (e.g., desktop computers, smart TVs, gaming consoles) to the Gigabit Ethernet Ports (5) on the back of the extender for a stable, high-speed connection.
6. Mantenimiento
To ensure optimal performance and longevity of your Wi-Fi Extender:
- Limpieza: Limpie suavemente el exterior con un paño suave y seco. No utilice limpiadores líquidos ni aerosoles.
- Ventilación: Asegúrese de que las ranuras de ventilación no estén bloqueadas para evitar el sobrecalentamiento.
- Actualizaciones de firmware: The extender typically receives automatic firmware updates from AT&T. Ensure it remains connected to power and your network for these updates to occur.
- Ciclo de energía: If you experience minor issues, try unplugging the extender from the power outlet for 10 seconds and then plugging it back in.
7. Solución de problemas
If you encounter issues with your Wi-Fi Extender, refer to the following common problems and solutions:
| Problema | Posible causa | Solución |
|---|---|---|
| Extender lights are off. | Sin energía. | Ensure the power adapter is securely connected and plugged into a working outlet. Check the Power On/Off Switch (6). |
| Indicator lights are red or amber. | Poor or no connection to the gateway. |
|
| Wi-Fi signal is still weak in extended areas. | Suboptimal placement. | Move the extender to a more central location between your gateway and the weak signal area. Avoid placing it in corners or behind furniture. |
| Devices not connecting to the extender. | Extender not properly paired or network issues. |
|
| Need to reset to factory settings. | Configuration issues or preparing for new setup. | With the extender powered on, use a paperclip or similar pointed object to press and hold the Botón de reinicio (8) for about 10 seconds until the lights flash. The extender will restart with factory defaults. |
8. Especificaciones
| Característica | Detalle |
|---|---|
| Número de modelo | AIRE-4920 |
| Dimensiones del producto (alto x ancho x profundidad) | 3.94 x 4.27 x 1.63 pulgadas (aprox.) |
| Peso del artículo | 15 onzas |
| Estándar de comunicación inalámbrica | 802.11ac |
| Velocidad de transferencia de datos | Hasta 1000 megabits por segundo |
| Tipo de conector | RJ45 (Ethernet) |
| Color | Blanco |
| Fabricante | Lazos aéreos |
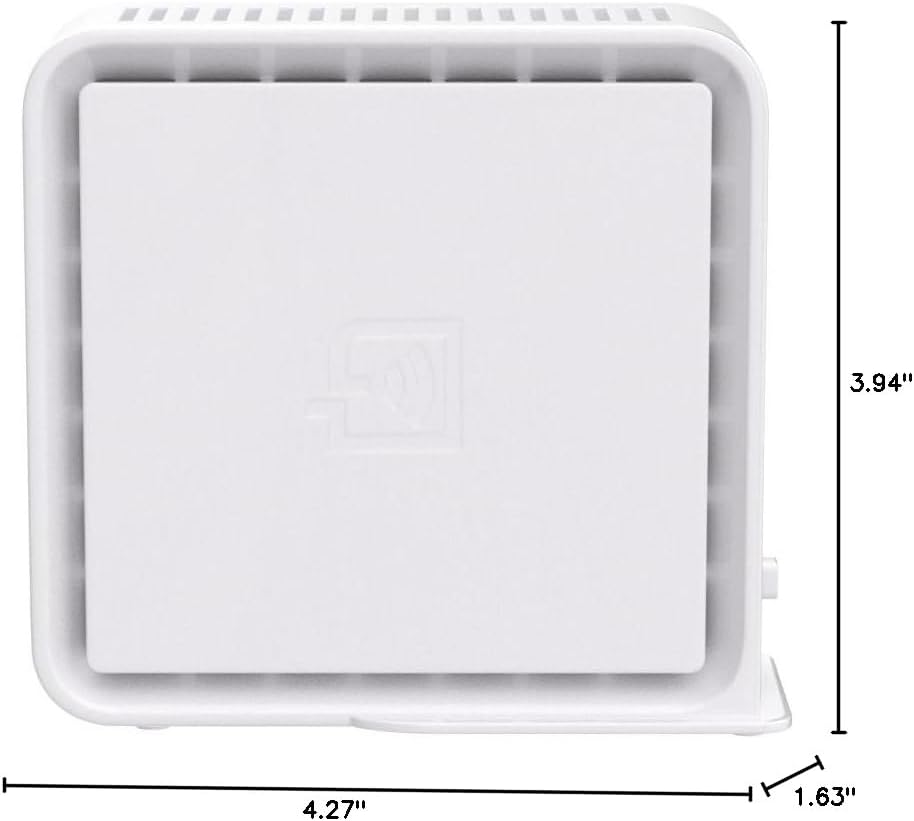
Figure 4: Approximate dimensions of the Wi-Fi Extender.
Ask a question about this manual
Ask about setup, troubleshooting, compatibility, parts, safety, or missing instructions. Manuals+ will review the question and use this page’s manual context to help answer it.