Carvin 39263105 / 39263020R
Manual del usuario de los filtros de arena con válvula multipuerto de 7 vías Carvin
Models: 39263105 / 39263020R
Introducción
This manual provides essential information for the installation, operation, and maintenance of your Carvin 7-Way Multi-Port Valve. This valve is designed for use with Carvin and Jacuzzi Laser sand filters, specifically models L192, L225, and L250. Proper use and maintenance will ensure efficient and long-lasting performance of your pool filtration system.
Información importante de seguridad
Always follow basic safety precautions when installing and operating this product. Failure to do so could result in serious injury or property damage.
- Lea todas las instrucciones antes de la instalación y operación.
- Ensure all power to the pump is disconnected before performing any service or maintenance.
- Do not operate the valve under pressure. Always turn off the pump before changing valve positions.
- Consult a qualified pool professional for any installation or service beyond the scope of this manual.
Componentes del producto
The Carvin 7-Way Multi-Port Valve includes the main valve body, a handle for mode selection, and various ports for connection to your pool's plumbing system.

Frente view of the Carvin 7-Way Multi-Port Valve, showing the handle and main body. This image highlights the overall design and the "Do Not Overtighten" label.

Arriba view of the valve, clearly displaying the seven operational modes: Test, Backwash, Drain, Filtration, Rinse, Whirlpool, and Winterize.
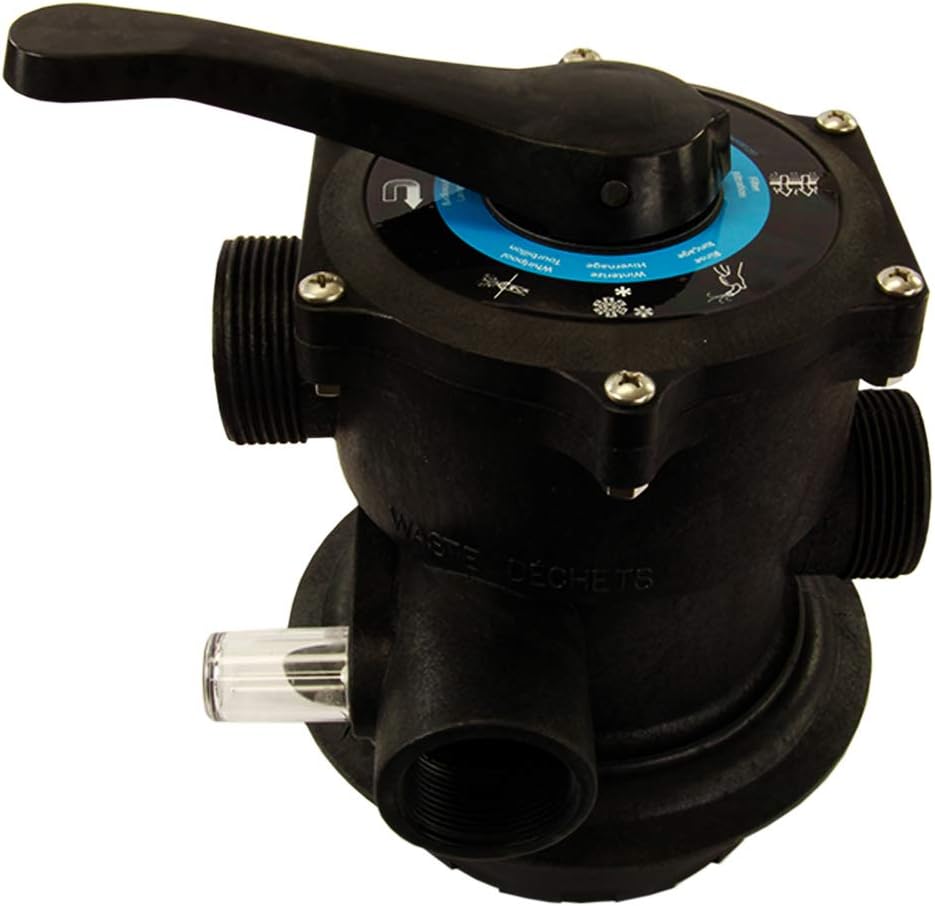
Lado view of the valve, showing the clear sight glass, which allows observation of water clarity during backwash and rinse cycles.

Otro lado view of the valve, providing a different angle of the port connections and the overall compact design.

A top-down perspective of the valve, emphasizing the circular dial and the robust handle mechanism.
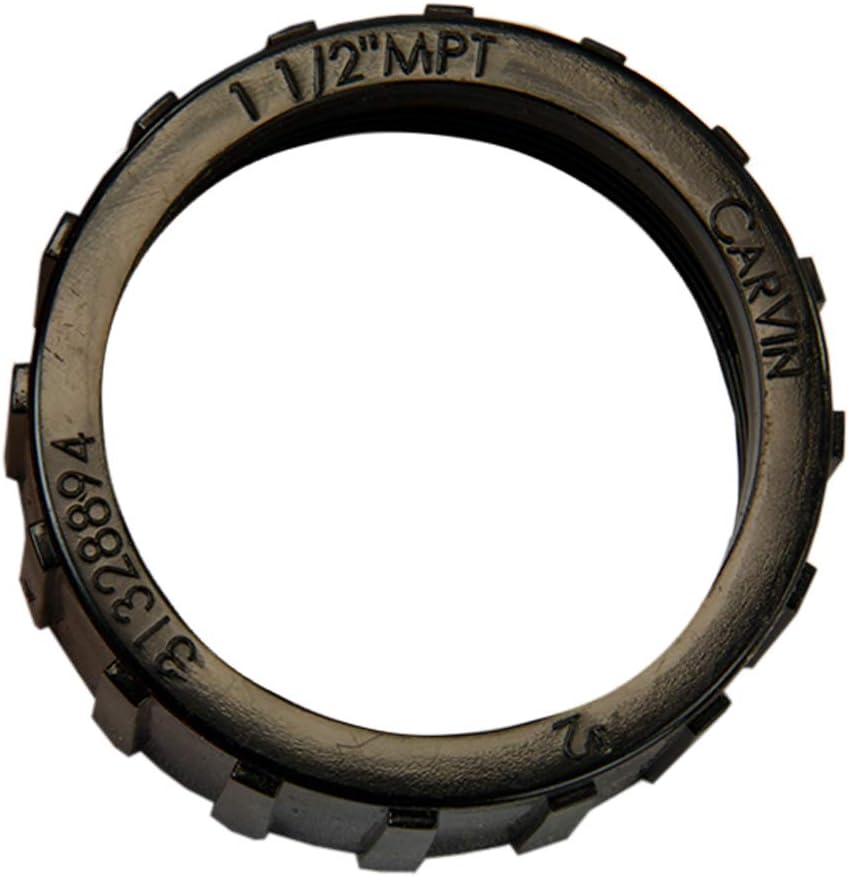
Close-up of a 1 1/2 inch MPT (Male Pipe Thread) fitting ring, indicating compatibility with standard plumbing connections.

Image of a Carvin pressure gauge, which is often used in conjunction with multi-port valves to monitor filter pressure.
Configuración e instalación
This section outlines the steps for properly installing your Carvin Multi-Port Valve. Ensure all necessary tools and materials are available before beginning.
Lista de verificación previa a la instalación:
- Verify compatibility with your sand filter model (Jacuzzi Laser, Carvin Laser L192, L225, L250).
- Ensure all plumbing connections are clean and free of debris.
- Have appropriate PVC cement and primer if solvent welding connections.
- Confirm power to the pool pump is OFF at the circuit breaker.
Pasos de instalación:
- Prepare el tanque del filtro: If replacing an old valve, remove it and clean the top opening of the filter tank. Ensure the standpipe inside the filter is intact and properly seated.
- Conecte la válvula: Carefully align the multi-port valve with the standpipe inside the filter tank. Lower the valve onto the tank, ensuring the standpipe slides into the valve's bottom opening.
- Asegure la válvula: Utilice el cl proporcionadoamp or bolts to secure the valve to the filter tank. Tighten evenly to create a watertight seal. Refer to the "Do Not Overtighten" label on the valve for guidance.
- Conectar fontanería: Connect the pool pump discharge line to the valve's "PUMP" port. Connect the return line to the pool to the valve's "RETURN" port. Connect the waste line to the valve's "WASTE" port. Use appropriate fittings and sealants (e.g., Teflon tape for threaded connections, PVC cement for solvent weld connections). The valve features 1.5-inch female threaded PVC inlet and outlet connections.
- Compruebe si hay fugas: After all connections are made, slowly turn on the pump and check for any leaks. Address any leaks immediately by tightening connections or re-sealing.
Instrucciones de funcionamiento
The Carvin 7-Way Multi-Port Valve offers seven operational modes. Always turn off the pool pump before changing the valve position to prevent damage to the valve or plumbing.
Valve Positions and Functions:
| Modo | Función | Descripción |
|---|---|---|
| FILTRAR | Filtración Normal | For daily filtering of pool water. Water flows through the filter media and returns to the pool. |
| RESACA | Limpieza de filtros | Reverses water flow through the filter to flush trapped debris out to the waste line. Perform when pressure gauge reads 8-10 PSI above normal clean pressure. |
| ENJUAGUE | Enjuague posterior al retrolavado | Used after backwashing to settle the filter media and flush any remaining dirty water to waste before returning to FILTER mode. Run for 30-60 seconds. |
| WHIRLPOOL | Circulate/Bypass Filter | Circulates water through the system without passing it through the filter media. Useful for chemical distribution or when filter is not needed. |
| DRENAR | Empty Pool/Lower Water Level | Drains water directly from the pool to the waste line, bypassing the filter. |
| PREPARAR PARA EL INVIERNO | Prepare for Winter | Positions the internal valve components to allow for proper draining and winterization of the filter system, preventing freeze damage. |
| PRUEBA | Prueba de presión | Allows for testing of system pressure without filtering. |
To Change Valve Position:
- Apague la bomba de la piscina.
- Press down on the valve handle and rotate it to the desired position.
- Release the handle, ensuring it locks into place.
- Reinicie la bomba de la piscina.
Mantenimiento
Regular maintenance of your multi-port valve ensures optimal performance and extends its lifespan.
- Lavado a contracorriente: Backwash your filter regularly, typically when the pressure gauge reads 8-10 PSI above its clean operating pressure.
- Enjuague: Always follow backwashing with a rinse cycle to prevent dirty water from returning to the pool.
- Lubricación de la junta tórica: Periodically inspect the valve's O-rings for cracks or wear. Lubricate with a silicone-based lubricant designed for pool equipment to maintain a good seal.
- Winterización: Follow the winterization procedure outlined in the operating instructions to protect the valve from freezing temperatures.
- Operación del mango: Ensure the handle moves freely and locks securely into each position. Do not force the handle.
Solución de problemas
This section provides solutions to common issues you might encounter with your multi-port valve.
| Problema | Posible causa | Solución |
|---|---|---|
| Fuga de agua desde la manija o la parte superior de la válvula. | Worn or damaged spider gasket/O-rings, loose bolts. | Inspect and replace spider gasket or O-rings. Tighten bolts evenly. |
| Water leaking from plumbing connections. | Improperly sealed connections, cracked fittings. | Re-tape or re-seal threaded connections. Replace cracked fittings. Ensure proper PVC cementing if applicable. |
| Valve handle is stiff or difficult to turn. | Lack of lubrication, debris under handle, worn internal components. | Lubricate handle shaft and O-rings. Disassemble and clean if debris is present. If persistent, internal components may need replacement. |
| Mala filtración o agua turbia. | Valve not fully in FILTER position, damaged internal components, filter media issues. | Ensure valve is securely in FILTER mode. Check for internal valve damage. Backwash and rinse filter. Inspect filter sand. |
Presupuesto
- Números de modelo: 39263105 / 39263020R
- Marca: Tallado
- Tipo de válvula: Válvula multipuerto de 7 vías
- Material: Plástico duradero
- Tamaño de la conexión de entrada: 1.5 pulgadas
- Tipo de conexión de entrada: Female Threaded PVC
- Tamaño de la conexión de salida: 1.5 pulgadas
- Tipo de conexión de salida: Female Threaded PVC
- Cantidad de puertos: 7
- Dimensiones del producto (L x An x Al): Aproximadamente 12 x 9 x 12 pulgadas
- Peso del artículo: Aproximadamente 5.35 libras
- Compatible Filter Models: Jacuzzi Laser, Carvin Laser L192, L225, L250
Información de garantía
Carvin products are manufactured to high standards and are backed by a manufacturer's warranty. For specific warranty terms and conditions, please refer to the warranty card included with your product or visit the official Carvin webSitio. Conserve su comprobante de compra para reclamaciones de garantía.
Atención al cliente
For technical assistance, replacement parts, or further inquiries, please contact Carvin customer support. You can typically find contact information on the manufacturer's websitio o en el embalaje del producto.
Recursos en línea: Visit the official Carvin webSitio para preguntas frecuentes, registro de productos y documentos de soporte adicionales. www.carvinpool.com