
1. Introducción
Welcome to the Philco Electronic Bread Maker user manual. This appliance is designed to simplify the bread-making process, allowing you to create a variety of delicious breads, cakes, jams, and more with minimal effort. Please read this manual carefully before using the appliance to ensure safe and efficient operation and to fully understand its features.
2. Instrucciones de seguridad importantes
Al utilizar aparatos eléctricos, siempre se deben seguir precauciones básicas de seguridad para reducir el riesgo de incendio, descarga eléctrica y lesiones a las personas, incluidas las siguientes:
- No toque superficies calientes. Utilice asas o perillas.
- Para protegerse contra descargas eléctricas, no sumerja el cable, los enchufes ni el aparato en agua ni en ningún otro líquido.
- Es necesaria una estrecha supervisión cuando cualquier aparato sea utilizado por niños o cerca de ellos.
- Desenchufe el aparato del tomacorriente cuando no lo utilice y antes de limpiarlo. Deje que se enfríe antes de colocar o quitar piezas.
- No opere ningún aparato con un cable o enchufe dañado o después de que el aparato funcione mal o haya sufrido algún daño.
- El uso de accesorios no recomendados por el fabricante del aparato puede provocar lesiones.
- No utilizar en exteriores.
- No deje que el cable cuelgue del borde de la mesa o mostrador ni que toque superficies calientes.
- No lo coloque sobre o cerca de un quemador de gas o eléctrico caliente, ni dentro de un horno caliente.
- Se debe tener mucho cuidado al mover un aparato que contenga aceite caliente u otros líquidos calientes.
- Para desconectar, gire cualquier control a la posición "apagado" y luego retire el enchufe del tomacorriente de pared.
- No utilice el aparato para ningún fin distinto del previsto.

Image: Safety certification logos (INMETRO OCP 0040 and SGS) indicating compliance with safety standards.
3. Producto terminadoview
Familiarize yourself with the components of your Philco Electronic Bread Maker.
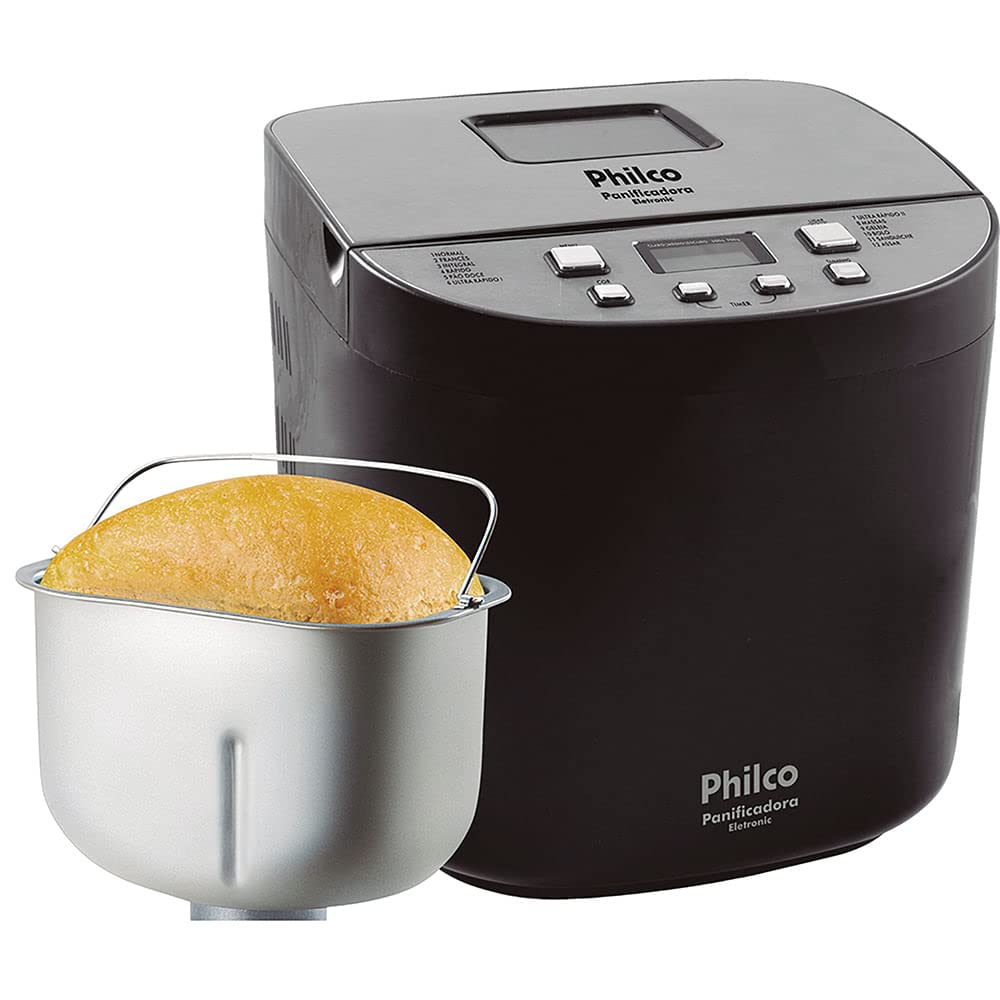
Imagen: Frente view of the Philco Electronic Bread Maker, showing the main unit, control panel, and viewventana de ing.
Panel de control
The control panel allows you to select programs, adjust settings, and start/stop the bread maker.
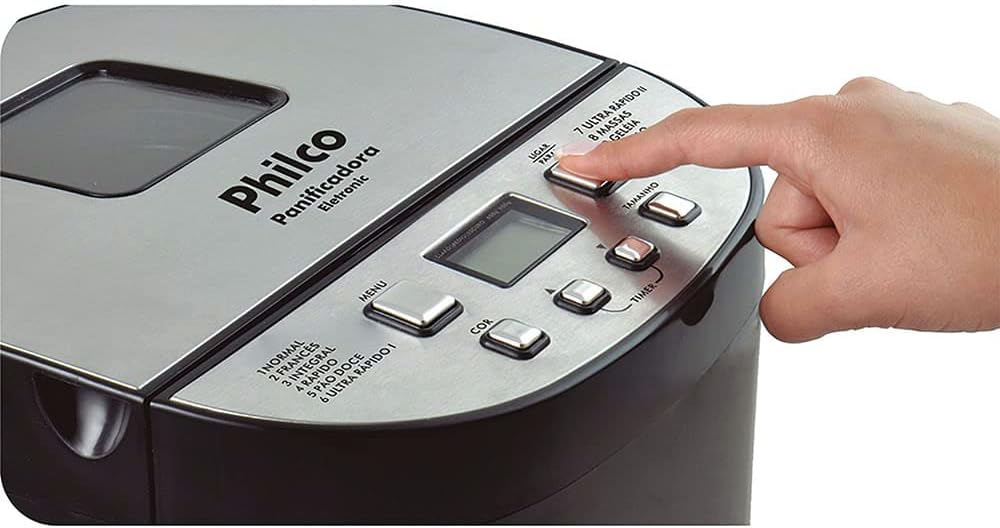
Image: Close-up of the bread maker's control panel, highlighting buttons for MENU, COLOR, TIMER, SIZE, and POWER, along with the digital display.
- Botón MENÚ: Selecciona uno de los 12 programas disponibles.
- Botón COLOR: Adjusts the crust color (Light, Medium, Dark).
- Botones del TEMPORIZADOR (+/-): Establece el temporizador de retardo para la cocción diferida.
- SIZE Button: Selects the loaf size (450g, 600g, 900g, 1200g).
- Botón de encendido: Starts or stops the selected program.
- Pantalla LCD: Shows program number, time remaining, and selected settings.
4. Configuración y primer uso
4.1 Desembalaje
Carefully remove the bread maker and all accessories from the packaging. Retain the packaging for future storage or transport. Check that all parts are present and undamaged.
4.2 Limpieza inicial
Before first use, clean the bread pan, kneading paddle, and measuring accessories with warm, soapy water. Rinse thoroughly and dry completely. Wipe the exterior of the appliance with a damp paño.
4.3 Colocación
Coloque la panificadora sobre una superficie estable, plana y resistente al calor, alejada de la luz solar directa y de fuentes de calor. Asegúrese de que haya suficiente ventilación alrededor del aparato.
5. Instrucciones de funcionamiento
5.1 Adición de ingredientes
Siempre agregue primero los ingredientes líquidos, seguidos de los secos. La levadura debe agregarse al final, en una pequeña hendidura sobre la harina, lejos de los líquidos y la sal.

Image: A hand pouring dry ingredients, likely flour, into the bread maker's non-stick pan.
5.2 Selección del programa
Presione el MENÚ button repeatedly to cycle through the 12 available programs. The selected program number will be displayed on the LCD screen.
Programas disponibles:
- NORMAL: For basic bread recipes.
- FRANCÉS: For light bread with a crispy crust.
- INTEGRAL: For whole wheat bread, typically requiring a longer kneading time.
- RÁPIDO: For quick bread baking, suitable for smaller loaves.
- PAN DULCE: Para panes con alto contenido de azúcar y grasa.
- ULTRA FAST I: For very quick baking of smaller loaves.
- ULTRA FAST II: For very quick baking of larger loaves.
- MASA: Prepara masa para panecillos, pizzas o pasteles sin hornear.
- MERMELADA: Para elaborar mermeladas y confituras caseras.
- PASTEL: Para hornear pasteles y panes rápidos.
- EMPAREDADO: Para un pan de sándwich ligero y esponjoso.
- HORNEAR: Para hornear masa preparada previamente o para tiempo de horneado adicional.
5.3 Crust Color Selection
Después de seleccionar un programa, presione el botón COLOR button to choose your desired crust color: Light, Medium, or Dark.
5.4 Loaf Size Selection
Presione el TAMAÑO button to select the desired loaf weight: 450g, 600g, 900g, or 1200g. Ensure your recipe quantities match the selected loaf size.
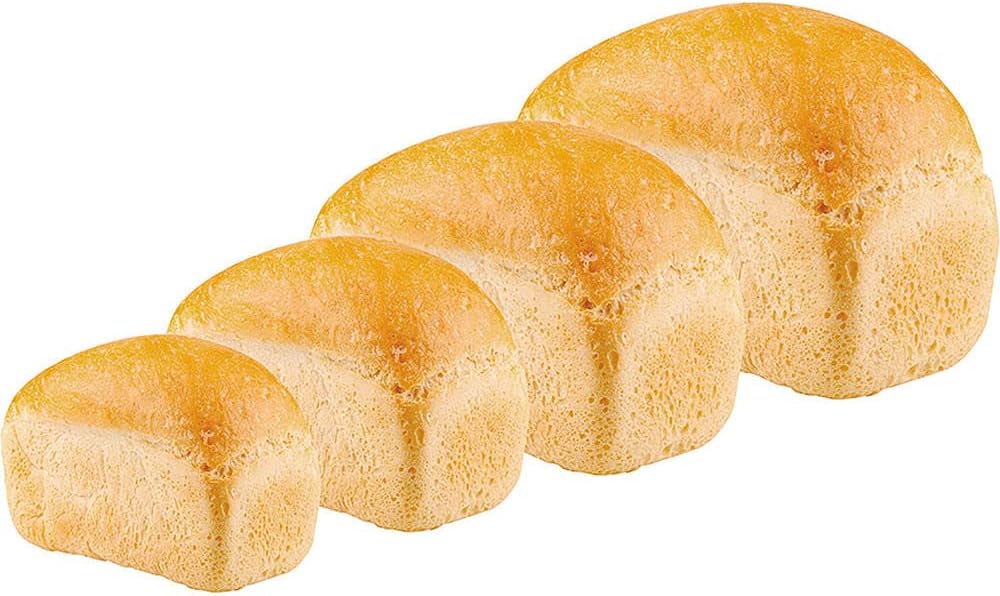
Image: Four baked loaves of bread, demonstrating the different size options available from the bread maker.
5.5 Función de temporizador de retardo
The timer function allows you to delay the start of the baking process by up to 13 hours. After selecting the program, crust color, and loaf size, use the MINUTERO buttons (+/-) to set the desired delay time. The display will show the total time until the bread is ready.
5.6 Función de mantener caliente
After the baking cycle is complete, the bread maker will automatically switch to a 60-minute keep-warm function. This keeps your bread warm until you are ready to remove it.
5.7 Iniciar y detener
Presione el FUERZA button to start the selected program. To stop a program, press and hold the FUERZA Botón durante unos segundos.
5.8 Retirada del pan
Once the program is complete and the keep-warm cycle has finished (or you have manually stopped it), unplug the appliance. Carefully remove the bread pan using oven mitts, as it will be hot. Invert the pan to release the bread. If the kneading paddle remains in the bread, remove it carefully with a non-metallic utensil.

Image: A hand carefully lifting a freshly baked loaf of bread out of the bread maker's non-stick pan using the pan's handle.
6. Cuidado y mantenimiento
6.1 Limpieza del molde para pan y la paleta amasadora
After each use, allow the bread pan and kneading paddle to cool completely. Fill the pan with warm, soapy water and let it soak for 10-15 minutes to loosen any stuck-on dough. Use a soft sponge or cloth to clean. Do not use abrasive cleaners or metal utensils, as this can damage the non-stick coating. Rinse and dry thoroughly.
6.2 Limpieza del exterior
Limpie el exterior de la panificadora con un paño suave y seco.amp cloth. Do not immerse the appliance in water or spray it with liquids. Ensure no water enters the ventilation openings.
6.3 Almacenamiento
Ensure the appliance is clean, dry, and completely cool before storing. Store it in a dry place, away from direct sunlight and out of reach of children.
7. Solución de problemas
Si tiene problemas con su panificadora, consulte los siguientes problemas y soluciones comunes:
| Problema | Posible causa | Solución |
|---|---|---|
| El pan no sube | Levadura caducada, temperatura del agua incorrecta, demasiada sal/azúcar. | Check yeast expiration, use lukewarm water, ensure correct ingredient measurements. |
| El pan es demasiado denso | Demasiada harina, poco líquido, programa incorrecto. | Measure ingredients precisely, ensure proper liquid-to-flour ratio, select appropriate program. |
| Paleta de amasar atascada en el pan | Ocurrencia común. | Deje que el pan se enfríe un poco y luego retire con cuidado la paleta con un utensilio no metálico. |
| El aparato no se enciende | No enchufado, sin energíatage, toma de corriente defectuosa. | Check power cord connection, test outlet with another appliance, ensure power supply. |
| Humo o olor a quemado | Food residue on heating element, internal malfunction. | Unplug immediately. Allow to cool and clean thoroughly. If problem persists, contact support. |
8. Especificaciones
| Característica | Especificación |
|---|---|
| Modelo | Eletronic 12 Programs 700W (Part No. 054301004) |
| Marca | FILCO |
| Fuerza | 700 W |
| Volumentage | 110 V |
| Número de programas | 12 |
| Tamaños de pan | 450 g, 600 g, 900 g, 1200 g |
| Colores de la corteza | Claro, Medio, Oscuro |
| Temporizador de retardo | Hasta 13 horas |
| Función de mantener caliente | 60 minutos |
| Material | Acero inoxidable (exterior) |
| Color | Negro |
| Peso del producto | 5.66 kg (5660 gramos) |
| ASIN | B076HVLX2G |
9. Garantía y soporte
Your Philco Electronic Bread Maker is covered by a manufacturer's warranty. Please refer to the warranty card included with your purchase for specific terms and conditions. For technical support, service, or replacement parts, please contact Philco customer service through their official websitio o la información de contacto proporcionada en la documentación de su producto.