
1. Introducción
Thank you for choosing the Car and Driver CDC-632 Dash Cam. This device is designed to record your journeys in high definition, providing security and peace of mind on the road. It features 2K Ultra HD video recording, built-in Wi-Fi, GPS tracking, and app connectivity for convenient operation and file gestión.
2. Contenido del paquete
Por favor, marque la casilla correspondiente a los siguientes artículos:
- Car and Driver CDC-632 Dash Cam
- Soporte de succión para parabrisas
- Adaptador para coche
- Tarjeta Micro-SD de 8 GB

Image: The retail packaging for the Car and Driver CDC-632 Dash Cam, highlighting key features like G-sensor, 1080P Full HD HDR, Wi-Fi, Loop Recording, and GPS Tracking. An 8GB memory card is also indicated as included.
3. Producto terminadoview
Familiarize yourself with the components of your dash cam.

Image: The Car and Driver CDC-632 Dash Cam attached to its suction mount. The 2.4-inch LCD screen is visible, displaying a road view with recording indicators, resolution (1920x1080 P60), and current date/time.
Frente View

Imagen: Un primer plano frontal view of the Car and Driver CDC-632 Dash Cam, highlighting the central camera lens and ventilation grilles on the sides.
Trasero View (Pantalla LCD)

Imagen: La parte trasera view of the Car and Driver CDC-632 Dash Cam, featuring the 2.4-inch LCD screen displaying a road scene with HDR indicator, exposure value, and battery status. Control buttons are visible below the screen.
4. Instalación
4.1 Montaje de la Dash Cam
- Limpie el área del parabrisas donde desea montar la cámara del tablero.
- Coloque el soporte de succión en la cámara del tablero.
- Presione la ventosa firmemente contra el parabrisas y gire la palanca para asegurarla.
- Ajuste el ángulo de la cámara del tablero para garantizar una visión clara. view del camino por delante.
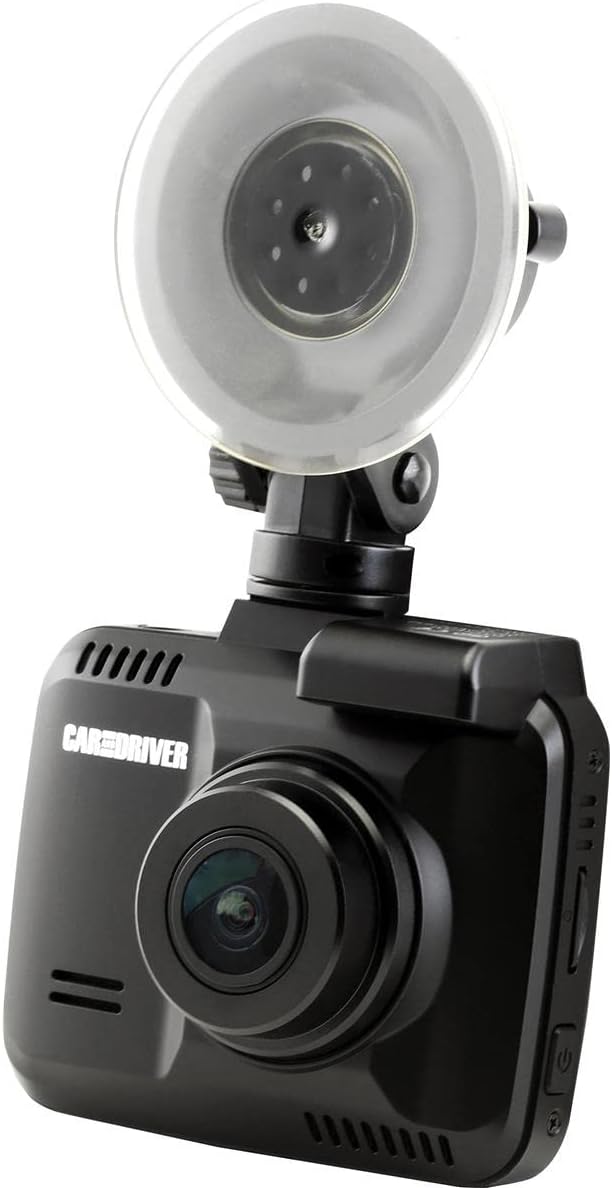
Image: The Car and Driver CDC-632 Dash Cam is shown mounted on a car's windshield using its suction cup. The camera is angled to capture the road ahead, with the power cable connected.
4.2 Encendido del dispositivo
- Connect the car adapter to the dash cam's power input port.
- Plug the car adapter into your vehicle's 12V power outlet (cigarette lighter socket).
- La cámara del tablero generalmente se encenderá automáticamente cuando se encienda el encendido del vehículo y comenzará a grabar.
5. Configuración inicial
5.1 Inserción de la tarjeta Micro-SD
The dash cam supports Micro-SD cards up to 64GB. An 8GB Micro-SD card is included.
- With the dash cam powered off, locate the Micro-SD card slot on the side of the device.
- Insert the Micro-SD card with the gold contacts facing the back of the dash cam until it clicks into place.
- Para quitarla, empuje suavemente la tarjeta hasta que salga.
5.2 Formatting the Micro-SD Card
It is recommended to format the Micro-SD card before first use and periodically thereafter to ensure optimal performance and prevent data corruption.
- Encienda la cámara del tablero.
- Navigate to the 'Settings' menu using the control buttons.
- Seleccione "Formatear tarjeta SD" y confirme la acción. Se borrarán todos los datos de la tarjeta.
5.3 Configuración de fecha y hora
Ensure the correct date and time are set for accurate timestamping de grabaciones.
- Access the 'Settings' menu.
- Locate 'Date/Time' settings.
- Ajuste el año, mes, día, hora y minutos utilizando los botones de navegación.
- Confirme sus selecciones.
6. Funcionamiento básico
6.1 Grabación automática
Once powered on, the dash cam will automatically begin recording in a continuous loop. The recording indicator (usually a red dot or icon) will appear on the screen.
6.2 Grabación en bucle
The dash cam records video in segments (e.g., 1, 3, or 5 minutes). When the Micro-SD card is full, the oldest unlocked fileLos archivos se sobrescribirán con nuevas grabaciones. Esto garantiza una grabación continua sin intervención manual.
6.3 G-Sensor Protection
The built-in G-sensor detects sudden impacts or collisions. When triggered, the current video segment will be automatically locked and saved to a protected folder, preventing it from being overwritten by loop recording. The sensitivity of the G-sensor can usually be adjusted in the settings menu.
6.4 NiteVision Recording
The dash cam features NiteVision technology with intelligent IR for enhanced recording clarity in low-light conditions or at night.
7. Funciones avanzadas
7.1 Conectividad Wi-Fi y control de aplicaciones
The dash cam features 802.11 B/G/N 2.4GHZ Wi-Fi connectivity, allowing you to connect your smartphone via the Car and Driver App.
- Download the Car and Driver App from your smartphone's app store.
- Enable Wi-Fi on your dash cam through the settings menu.
- En su teléfono inteligente, conéctese a la red Wi-Fi de la cámara del tablero (el SSID y la contraseña generalmente se muestran en la pantalla de la cámara del tablero).
- Open the Car and Driver App to access live view, reproducir grabaciones, descargar files y ajustar la configuración de forma remota.
7.2 Seguimiento GPS
The built-in GPS module accurately records your driving location and speed. This data can be viewed during video playback using the dedicated Car and Driver App or compatible desktop software, providing crucial information for incident analysis.
8. Reproducción y File Gestión
8.1 On-Device Playback
- Stop recording (if active).
- Enter playback mode via the menu buttons.
- Browse through recorded videos. Locked files are usually in a separate folder.
- Select a video to play it on the 2.4-inch LCD screen.
8.2 App Playback and Download
Using the Car and Driver App, you can wirelessly view, download, and manage recorded videos on your smartphone. This is the most convenient method for accessing files.
8.3 Reproducción por computadora
You can also remove the Micro-SD card and insert it into a computer's card reader to access files directly. Dedicated player software may be required to view GPS data alongside the video.
9. Mantenimiento
9.1 Limpieza de la Dash Cam
- Ensure the device is powered off and disconnected from power.
- Use a soft, dry cloth to wipe the dash cam body.
- Para la lente, utilice un paño y una solución de limpieza de lentes especializados para evitar rayones.
- No utilice productos químicos agresivos ni limpiadores abrasivos.
9.2 Micro-SD Card Care
- Periodically format the Micro-SD card (monthly is recommended) to maintain optimal performance and prevent file errores.
- Use high-quality, reputable brand Micro-SD cards designed for dash cam use (Class 10 or higher).
10. Solución de problemas
- La Dash Cam no se enciende: Ensure the car adapter is securely plugged into both the dash cam and the vehicle's 12V power outlet. Check if the vehicle's power outlet is functional.
- La grabación se detiene o se congela: Format the Micro-SD card. Ensure you are using a high-speed (Class 10 or higher) Micro-SD card. Try a different Micro-SD card.
- Mala calidad de video: Limpie la lente de la cámara. Asegúrese de haber retirado la película protectora. Verifique la configuración de resolución de video.
- Problemas de conexión Wi-Fi: Ensure Wi-Fi is enabled on the dash cam. Restart both the dash cam and your smartphone. Make sure you are within close proximity to the dash cam.
- El GPS no funciona: Asegúrese de que la cámara del tablero tenga una imagen clara view of the sky. It may take a few minutes for the GPS signal to be acquired after powering on.
- Botones que no responden: Try resetting the device (if a reset button is available, use a thin object to press it).
11. Especificaciones
| Característica | Detalle |
|---|---|
| Nombre del modelo | Cámara de tablero Ultra HD |
| Número de modelo | CDC-632 |
| Resolución de captura de video | 2K |
| Campo de View | 130 grados |
| Tamaño de pantalla | 2.4 pulgadas |
| Tecnología de conectividad | Wi-Fi (802.11 B/G/N 2.4GHZ) |
| Características especiales | Built-In WiFi, Night Vision (NiteVision), Built-in G-sensor, GPS Tracking |
| Tipo de montaje | Montaje de succión |
| Tipo de memoria flash | MicroSD (hasta 64 GB) |
| Velocidad de cuadros | 30 FPS |
| Método de control | Touch (via physical buttons) |
| Peso del artículo | 10.4 onzas |
12. Información de garantía
This Car and Driver CDC-632 Dash Cam comes with a Garantía del fabricante por 1 año from the date of purchase. Please retain your proof of purchase for warranty claims. The warranty covers defects in materials and workmanship under normal use. It does not cover damage caused by misuse, accidents, unauthorized modifications, or natural disasters.
13. Atención al cliente
If you encounter any issues or have questions not covered in this manual, please contact Car and Driver customer support. Refer to the product packaging or the official Car and Driver websitio para detalles de contacto.