1. Introducción
This manual provides essential information for the safe and efficient installation, operation, and maintenance of your Dieffematic Euro 230 M1 VDS E102 Gate Control Unit. This unit is designed to manage various gate automation systems, including sliding gates, barriers, and overhead doors, offering precise control and robust performance. Please read these instructions carefully before proceeding with installation or operation.
2. Información de seguridad
ADVERTENCIA: La instalación o el uso incorrectos pueden provocar lesiones o daños graves. Siga siempre estas normas de seguridad:
- La instalación debe ser realizada por personal calificado de conformidad con las normas eléctricas y de seguridad locales.
- Desconecte la alimentación antes de realizar cualquier procedimiento de mantenimiento o instalación.
- Asegúrese de que todas las conexiones de cableado estén seguras y adecuadamente aisladas.
- Mantenga a los niños y las mascotas alejados del área de la puerta durante el funcionamiento.
- Do not attempt to repair the control unit yourself. Contact qualified service personnel.
- Asegúrese de que los dispositivos de seguridad (por ejemplo, fotocélulas, bordes de seguridad) estén correctamente instalados y funcionando.
3. Producto terminadoview
3.1. Características principales
- Control versátil: Efficiently manages sliding gates, barriers, and overhead doors.
- Rapid Auto-learning: Integrated receiver with auto-learning capability, supporting both rolling code and fixed code for enhanced security and flexibility.
- Advanced Precision: Enables precise management of electric limit switches, offering slowdown functions and pedestrian opening for safe and controlled use.
- Fuente de alimentación robusta: Operates on 230VAC, ensuring stable and reliable performance for all automation systems, even under demanding conditions.
- Amplia compatibilidad: Designed for seamless integration with Dieffematic systems.
3.2. Componentes
The Dieffematic Euro 230 M1 VDS E102 control unit typically includes:
- Placa de control principal
- Receptor de radio integrado
- Terminal Blocks for Connections (Power, Motor, Safety Devices, Accessories)
- Enclosure (Housing the control board)
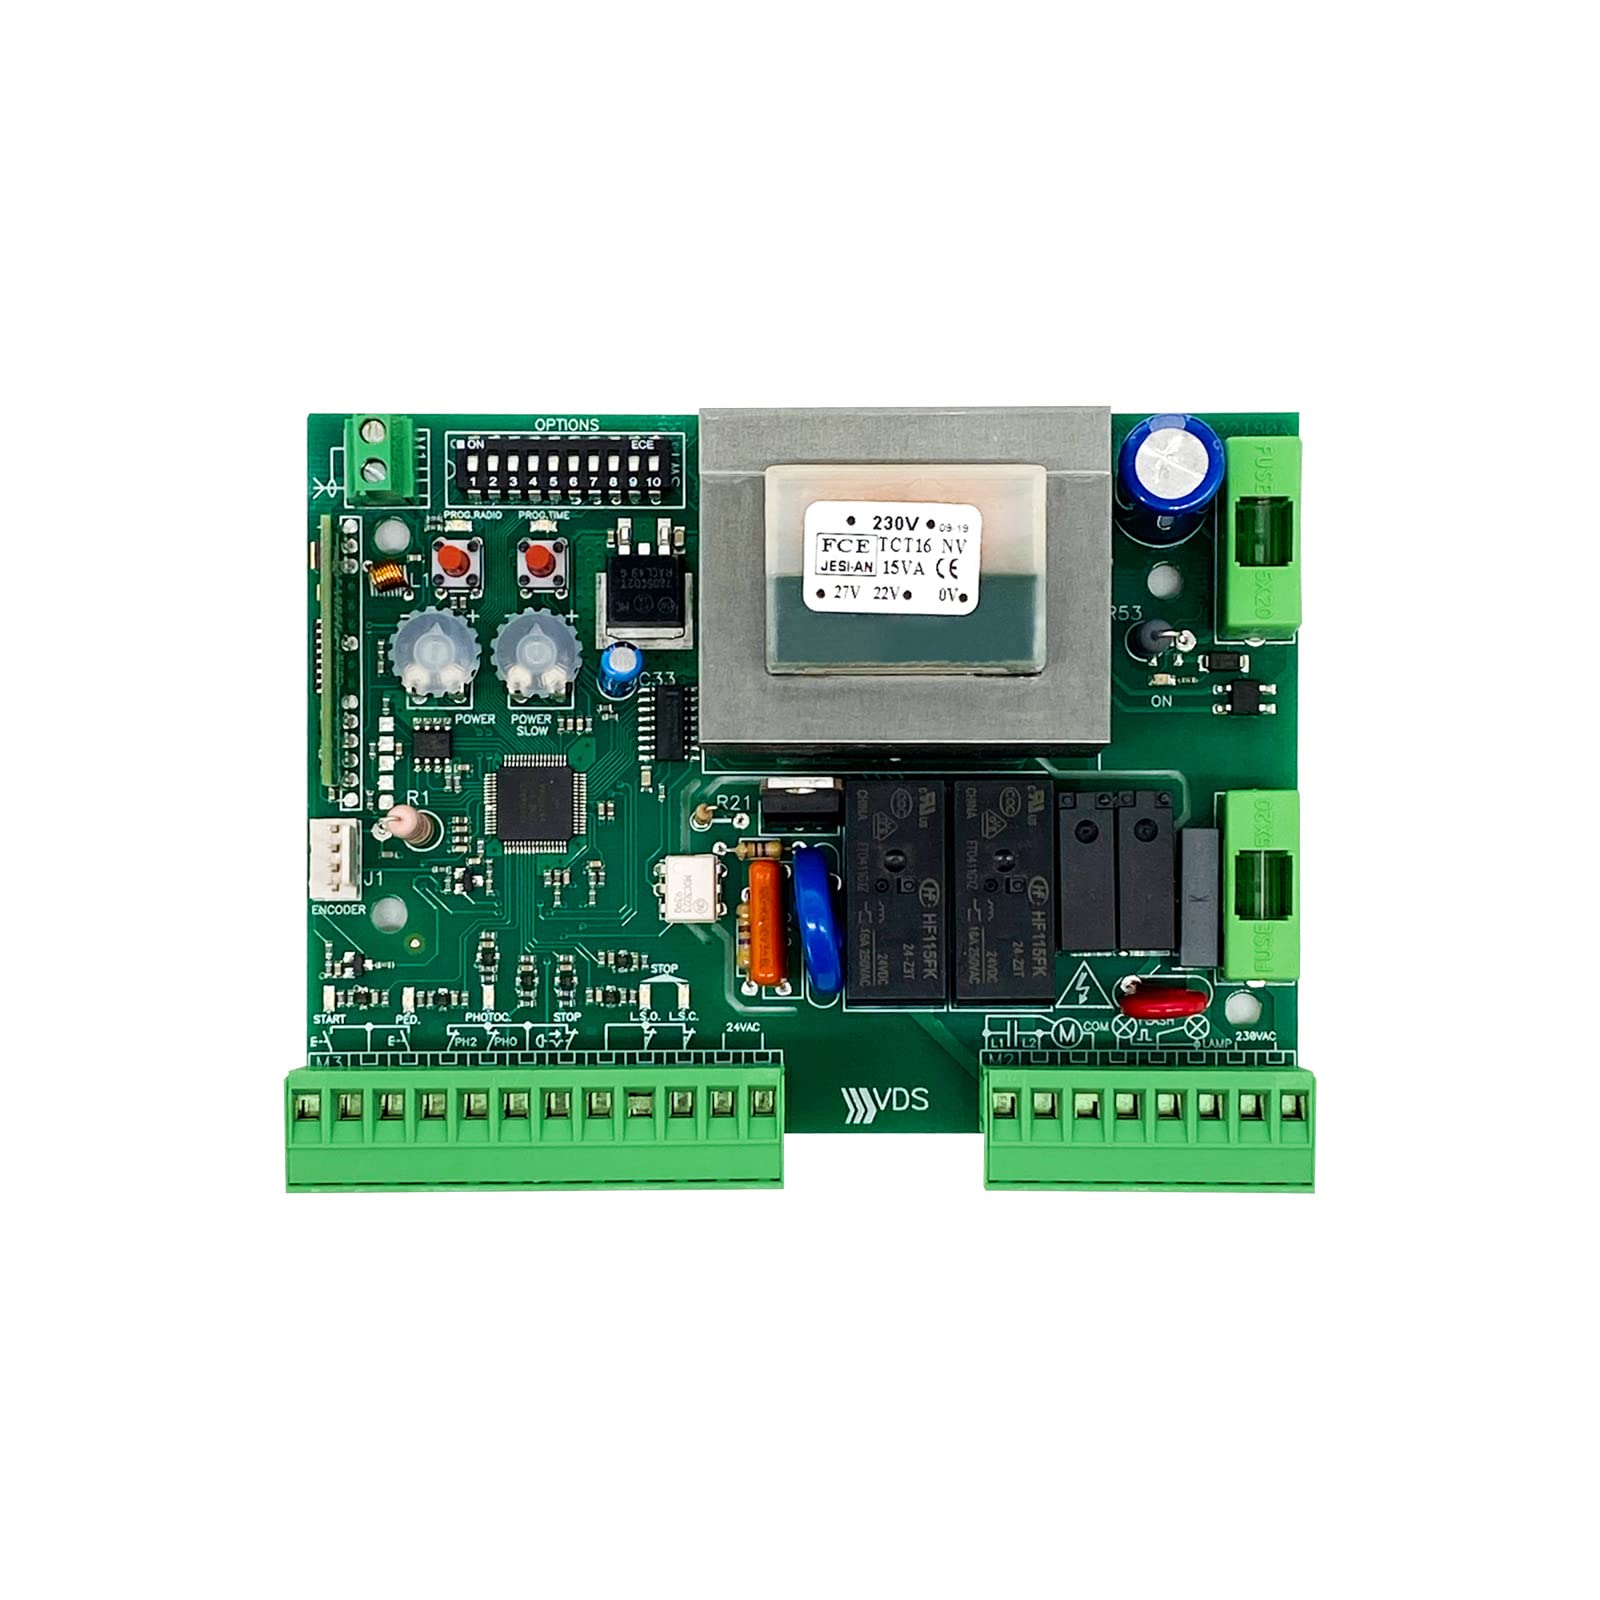
Figure 1: Dieffematic Euro 230 M1 VDS E102 Control Unit. This image shows the main control unit with its protective casing.
4. Configuración e instalación
4.1. Montaje de la unidad de control
- Choose a suitable location near the gate motor, protected from weather and direct sunlight.
- Mount the control unit securely using appropriate fasteners. Ensure it is level and easily accessible for wiring.
4.2. Conexiones eléctricas
IMPORTANTE: All electrical connections must be made with the main power supply disconnected. Refer to the wiring diagram for precise terminal identification.
- Fuente de alimentación principal: Connect the 230VAC power supply to the designated terminals (L, N, PE).
- Conexiones de motores: Connect the gate motor wires (common, open, close) to the motor output terminals.
- Dispositivos de seguridad: Connect photocells, safety edges, and other safety devices to their respective input terminals.
- Accesorios: Connect external command devices (e.g., push buttons, key switches) and flashing lights.
- Finales de carrera: Connect electric limit switches for precise gate positioning.

Figura 2: Example Wiring Diagram. This diagram illustrates typical connections for power, motor, and safety accessories. Consult the specific diagram provided with your unit.
4.3. Initial Configuration and Auto-learning
- After all connections are made, restore power to the unit.
- Initiate the auto-learning procedure as described in the unit's specific programming guide. This typically involves pressing a programming button and allowing the gate to complete a full open and close cycle to learn its travel limits.
- Program remote controls: Follow the instructions to pair your remote controls with the integrated receiver. The unit supports both rolling code and fixed code transmitters.
- Adjust parameters: Set desired slowdown points, pedestrian opening width, and other operational parameters using the control board's interface or dip switches, as per the detailed programming manual.
5. Instrucciones de funcionamiento
5.1. Operación estándar
- Mando a distancia: Press the designated button on your remote control to open or close the gate. A second press during operation will typically stop the gate. A third press will reverse its direction.
- External Push Button: If connected, pressing the external push button will cycle the gate (open-stop-close-stop).
5.2. Pedestrian Opening
If configured, a specific button on your remote control or an external input can activate the pedestrian opening function, opening the gate partially for foot traffic.
5.3. Liberación manual
In case of power failure or malfunction, the gate can be operated manually using the manual release mechanism on the gate motor. Refer to your gate motor's manual for specific instructions on how to engage the manual release.
6. Mantenimiento
Regular maintenance ensures the longevity and safe operation of your gate automation system.
- Mensual:
- Check the functionality of all safety devices (photocells, safety edges).
- Inspeccione el movimiento de la puerta para detectar obstrucciones o ruidos inusuales.
- Cada 6 meses:
- Inspect all wiring for signs of wear or damage.
- Clean the control unit enclosure and ensure ventilation openings are clear.
- Verify that all mounting screws are tight.
- Chequeo Profesional Anual: It is recommended to have a qualified technician inspect the entire gate automation system annually.
7. Solución de problemas
Antes de contactar con el soporte técnico, vuelva aview Los siguientes problemas comunes y soluciones:
| Problema | Posible causa | Solución |
|---|---|---|
| La puerta no responde al control remoto. |
|
|
| La puerta se abre pero no se cierra. |
|
|
| La puerta funciona de forma errática. |
|
|
8. Especificaciones
- Modelo: Dieffematic Euro 230 M1 VDS E102
- Fuente de alimentación: 230 V CA
- Salida del motor: Designed for 230VAC gate motors
- Receptor Tipo: Integrated, auto-learning (rolling code / fixed code)
- Entradas de seguridad: Multiple inputs for photocells, safety edges, etc.
- Temperatura de funcionamiento: Consult specific product datasheet for exact range.
- Clasificación de protección: Consult specific product datasheet.
9. Garantía y soporte
Dieffematic products are covered by a standard manufacturer's warranty against defects in materials and workmanship. The specific terms and duration of the warranty may vary by region and product. Please retain your proof of purchase.
For technical assistance, troubleshooting beyond this manual, or warranty claims, please contact your authorized Dieffematic dealer or visit the official Dieffematic websitio para obtener información de contacto de soporte.