1. Introducción
The myTouchSmart In-Wall Push-Button Countdown Timer Switch (Model 40953) is designed to simplify your routine by providing convenient automation for indoor or outdoor lighting and various appliances. This timer replaces any standard single-pole light switch and offers preset countdown times to automatically turn off connected devices. It is compatible with LED, CFL, incandescent, and halogen bulbs.

The product packaging displays the in-wall digital countdown timer switch, highlighting its key features such as preset countdown times and compatibility with various bulb types.
2. Información de seguridad
Before beginning installation, read all instructions carefully. Improper installation can result in electrical shock or fire. Always consult a qualified electrician if you are unsure about any part of the installation process.
- APAGUE LA CORRIENTE at the circuit breaker or fuse box before wiring.
- Este dispositivo está diseñado para su instalación de acuerdo con el Código Eléctrico Nacional y las regulaciones locales.
- Utilice únicamente alambre de cobre.
- NEUTRAL WIRE REQUIRED para la operación.
3. Instalación
3.1 Herramientas necesarias
- Destornillador (Phillips y de punta plana)
- Pelacables
- Cinta aisladora
- Volumentage Tester (recomendado)
3.2 Instrucciones de cableado
- Apagar la energía to the switch location at the circuit breaker or fuse box. Verify power is off using a voltage probador.
- Retire la placa de pared existente y el interruptor de la caja de pared.
- Carefully disconnect the wires from the old switch. Identify and label the LINE (hot), LOAD, NEUTRAL, and GROUND wires. The timer requires a neutral wire for proper operation.
- Connect the wires to the myTouchSmart timer using the screw terminals:
- Conectar el LÍNEA (hot) wire to the terminal labeled 'LINE'.
- Conectar el CARGA wire (to the light/appliance) to the terminal labeled 'LOAD'.
- Conectar el NEUTRAL wire (typically white) to the terminal labeled 'NEUTRAL'.
- Conectar el SUELO wire (typically bare copper or green) to the terminal labeled 'GROUND'.
- Asegúrese de que todas las conexiones de cables estén seguras.
- Carefully push the wired timer into the wall box.
- Mount the timer to the wall box using the provided screws.
- Attach the desired color faceplate (White or Light Almond included, wallplate not included).
- Restablezca la energía en el disyuntor.

La parte trasera view of the timer, displaying the screw terminals for Line, Load, Neutral, and Ground connections, essential for proper installation.

Un lado profesionalfile of the timer, showing its depth and how it fits into a standard electrical wall box, with wiring connections visible.
4. Instrucciones de funcionamiento
The myTouchSmart timer features an ON/OFF door panel that conceals preset buttons and LEDs when closed. Opening the door provides access to all countdown options.
4.1 Activating a Countdown
- Open the front door panel to reveal the preset buttons.
- Press the desired countdown button: 5 Min, 10 Min, 30 Min, 60 Min, 2 Hour, or 4 horas.
- A blue LED indicator light next to the selected button will illuminate, confirming the countdown is active. The connected device will turn on and remain on for the selected duration, then automatically turn off.
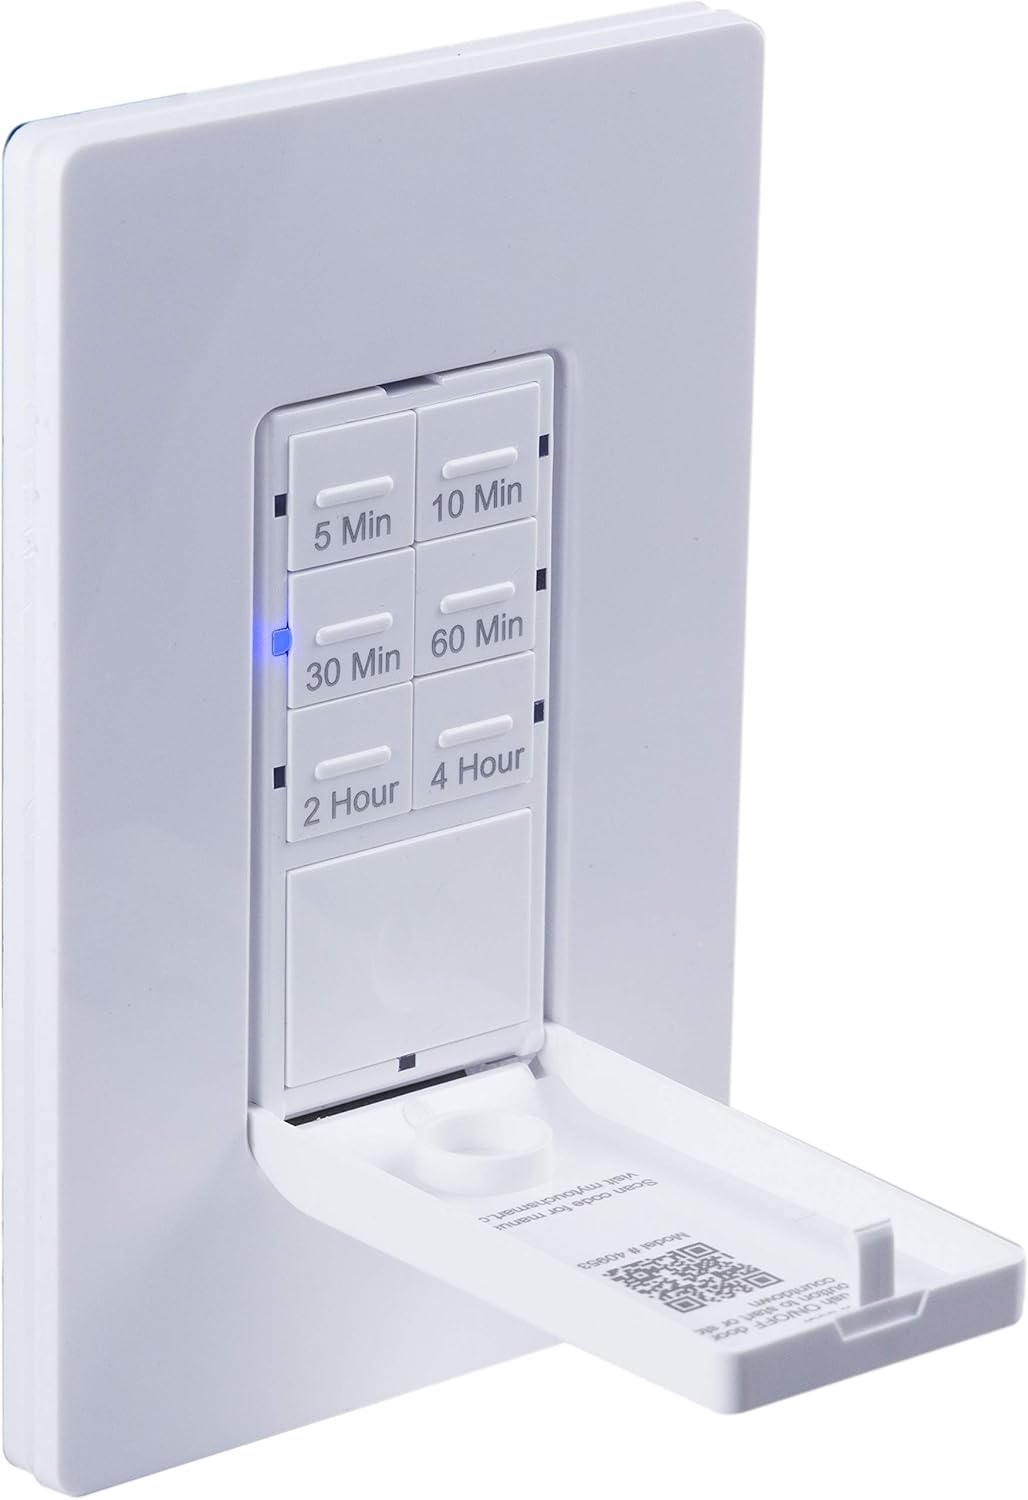
Un primer plano view of the timer with its front door panel open, exposing the six preset countdown buttons (5, 10, 30, 60 minutes, 2, and 4 hours) and the manual ON/OFF button.

The in-wall timer with its door open, showing the preset buttons and a blue LED illuminated next to the '30 Min' button, indicating an active countdown.

A hand pressing one of the preset countdown buttons on the timer, demonstrating user interaction.
4.2 Anulación manual de encendido y apagado
- To manually turn the connected device ON or OFF at any time, press the large ON/OFF button located at the bottom of the timer (this button is also the door panel when closed).
- Pressing this button will override any active countdown. If no countdown is active, it functions as a standard ON/OFF switch.
4.3 Aplicaciones
This timer is suitable for a variety of applications, including:
- Iluminación interior y exterior
- Ventiladores de extracción
- Calentadores
- Other compatible appliances

An image illustrating various applications for the timer, including controlling indoor/outdoor lights, ceiling fans, and exhaust fans.
5. Mantenimiento
The myTouchSmart timer requires minimal maintenance. Follow these guidelines:
- Limpieza: Disconnect power at the circuit breaker before cleaning. Wipe the surface with a soft, damp paño. No utilice productos químicos agresivos ni limpiadores abrasivos.
- Inspección: Periodically check for any loose connections or damage to the switch. If any damage is observed, discontinue use and consult a qualified electrician.
6. Solución de problemas
If you experience issues with your myTouchSmart timer, refer to the following common problems and solutions:
| Problema | Posible causa | Solución |
|---|---|---|
| El temporizador no se enciende ni se apaga. | No power to the switch; Incorrect wiring (Line/Load reversed); Loose connections. | Check circuit breaker. Verify wiring connections (Line to Line, Load to Load, Neutral, Ground). Ensure all wires are securely fastened. |
| Countdown does not activate. | Button not fully pressed; Faulty unit. | Ensure the desired countdown button is pressed firmly until the blue LED illuminates. If issue persists, contact customer support. |
| Los indicadores LED no funcionan. | Sin energía; Mal funcionamiento de la unidad. | Check power supply. If the timer functions but LEDs do not, contact customer support. |
| Operación intermitente. | Loose wiring; Overload. | Check all wiring connections for tightness. Ensure the connected load does not exceed the timer's electrical ratings. |
Si los pasos de solución de problemas no resuelven el problema, comuníquese con el servicio de atención al cliente.
7. Especificaciones
| Característica | Especificación |
|---|---|
| Número de modelo | 40953 |
| Modo de operación | Automatically, Off, Push Button |
| Calificación actual | 15 Amps |
| Vol de funcionamientotage | 120 VAC, 60 Hz |
| Carga resistente | 15A |
| Carga de tungsteno | 1200 W |
| Clasificación del motor | 1 / 2 HP |
| Bombillas compatibles | LED, CFL, Incandescente, Halógeno |
| Tipo de montaje | Montaje en pared |
| Dimensiones (L x An x Al) | 2.75 x 4.85 x 6.85 pulgadas |
| Peso del artículo | 5.9 onzas |
| Cable neutro | Requerido |
| Componentes incluidos | In-Wall Timer, White/Light Almond Door Panels |
8. Garantía y soporte
Para obtener información sobre la garantía y soporte técnico, consulte el sitio web oficial del fabricante. webSitio web o contacte con el departamento de atención al cliente. Conserve su recibo de compra como comprobante.
Fabricante: miTouchSmart
Código postal: 030878409537
Websitio: www.mytouchsmart.com (Por favor, consulte la información oficial) website for the most current support information.)