
1. Producto terminadoview
The MEAN WELL HDR-150-24 is a 150W Ultra Slim Step Shape DIN Rail Power Supply designed for industrial control applications. It provides a stable +24V DC output at 6.25 Amps, converting AC input power efficiently. Its compact design allows for easy integration into control cabinets and systems.

Figura 1: Frente view of the HDR-150-24 DIN Rail Power Supply.
2. Especificaciones
| Característica | Descripción |
|---|---|
| Número de modelo | HDR-150-24 |
| Vol de entradatage | 100-240 V CA (50/60 Hz) |
| Vol de salidatage | 24 V CC |
| Corriente de salida | 6.25 Amps |
| Potencia de salida | 150 W |
| Dimensiones | 4 x 5 x 4 pulgadas (aproximadamente) |
| Peso | 0.31 kilogramos |
| Montaje | Carril DIN |
| Enfriamiento | Passive (vented enclosure) |
| Indicadores | LED CC correcto |
| Ajustabilidad | Vol de salidatage adjustable via potentiometer |
3. Información de seguridad
Please read and understand all safety instructions before installing or operating the power supply. Failure to follow these instructions may result in electric shock, fire, or serious injury.
- Personal calificado: La instalación y el mantenimiento sólo deben ser realizados por personal calificado.
- Ambiente controlado: This device is intended for use in a controlled environment.
- Desconexión de energía: Desconecte siempre la alimentación antes de realizar cualquier instalación, cableado o mantenimiento.
- Puesta a tierra adecuada: Asegúrese de que la fuente de alimentación esté correctamente conectada a tierra para evitar descargas eléctricas.
- Ventilación: Maintain adequate clearance around the unit for proper passive cooling. Do not block ventilation holes.
- Par de torsión terminal: Ensure all terminal screws are tightened to the specified torque (typically 3.0 Lb-In for input/output terminals) to prevent loose connections and overheating.
4. Configuración
4.1 Montaje
The HDR-150-24 is designed for mounting on a standard DIN rail. Locate the DIN rail clip on the back of the unit. To mount, hook the top edge of the power supply onto the DIN rail, then push the bottom edge firmly until it clicks into place. To remove, pull down the release lever at the bottom of the clip and lift the unit off the rail.
4.2 Cableado
Refer to the wiring diagram below for proper connection of input and output terminals. Ensure all wires are stripped to the appropriate length and securely inserted into the screw terminals before tightening.
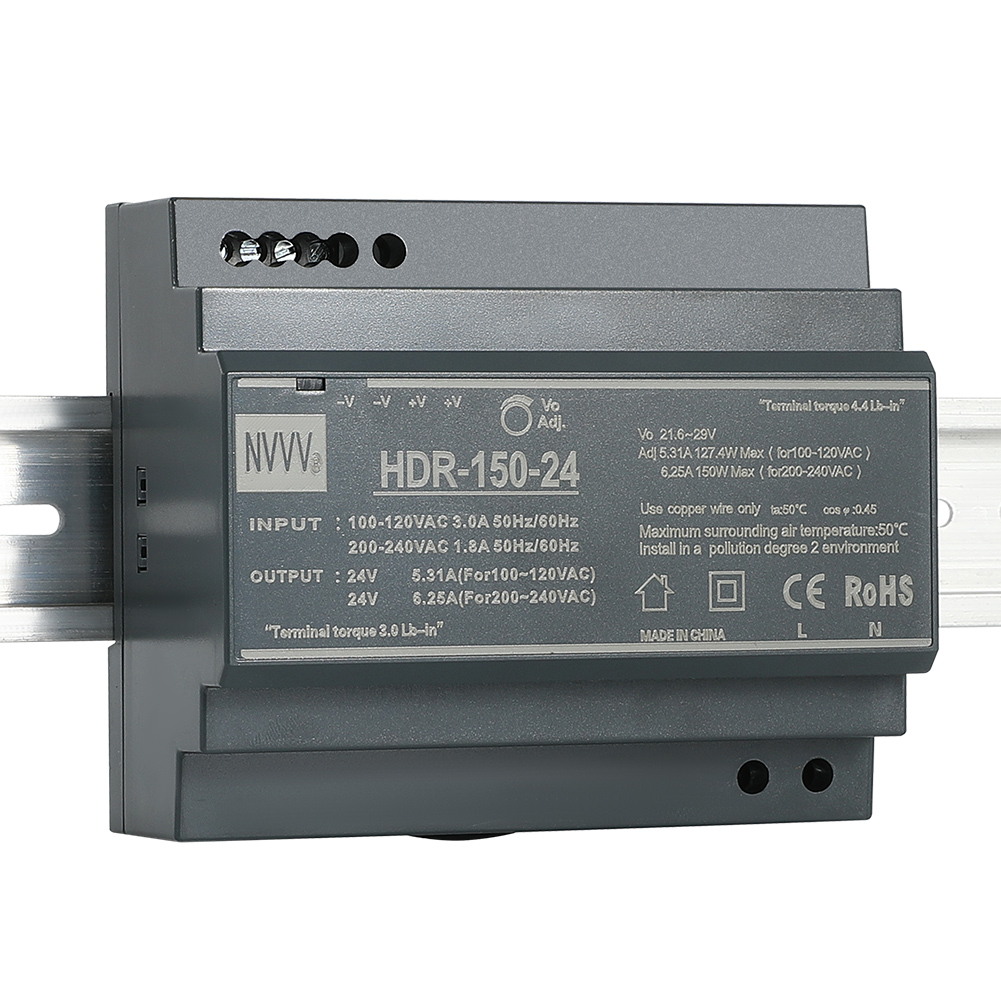
Figure 2: Wiring Diagram for HDR-150-24. Input terminals (L, N, PE) are at the bottom, and output terminals (+V, -V) are at the top. An adjustable potentiometer is also visible.
- Conexiones de entrada: Connect the AC Line (L), Neutral (N), and Protective Earth (PE) wires to the corresponding input terminals.
- Conexiones de salida: Connect the positive (+V) and negative (-V) DC load wires to the corresponding output terminals. The unit provides multiple output terminals for convenience.
4.3 volumen de salidatagy Ajuste
El volumen de salidatage can be finely adjusted using the potentiometer located on the front panel. Use a small screwdriver to turn the potentiometer clockwise to increase the voltage or counter-clockwise to decrease it. Always verify the output voltage with a multimeter after adjustment.
Video 1: This video demonstrates the physical features, unboxing, and basic wiring of the HDR-150-24 DIN Rail Power Supply, including the terminal connections and voltage ajuste.
5. Instrucciones de funcionamiento
Una vez instalada y cableada correctamente, la fuente de alimentación está lista para funcionar.
- Encendido: Apply AC input power to the L and N terminals.
- DC OK Indicator: Observe the 'DC OK' LED on the front panel. A green light indicates that the output voltage está dentro del rango operativo normal.
- Apagado: Disconnect the AC input power to shut down the unit.
6. Mantenimiento
To ensure optimal performance and longevity of your HDR-150-24 power supply, follow these maintenance guidelines:
- Inspección regular: Inspeccione periódicamente la unidad para detectar cualquier signo de daño, conexiones sueltas o acumulación excesiva de polvo.
- Limpieza: If dust accumulates, gently clean the ventilation holes and the unit's surface with a soft, dry cloth or compressed air. Ensure power is disconnected before cleaning.
- Condiciones ambientales: Asegúrese de que el entorno operativo permanezca dentro de los rangos de temperatura y humedad especificados para evitar fallas prematuras.
7. Solución de problemas
If you encounter issues with your power supply, refer to the following troubleshooting steps:
- No Power / No DC OK LED:
- Check the AC input power source and connections.
- Verifique que el volumen de entradatage está dentro del rango especificado (100-240 VCA).
- Inspect for any tripped circuit breakers or blown fuses in the input line.
- Sin volumen de salidatage / DC OK LED Off:
- Check the output connections for shorts or open circuits.
- Ensure the load connected does not exceed the power supply's maximum output current (6.25A) or power (150W). Overload protection may have activated.
- If the unit has been overloaded, disconnect the load, power cycle the unit, and re-test with a reduced load.
- Volumen de salida incorrectotage:
- Utilice un multímetro para medir el volumen de salida.tage.
- Ajuste el volumen de salidatage potentiometer as described in Section 4.3.
8. Garantía y soporte
The MEAN WELL HDR-150-24 power supply comes with a standard manufacturer's warranty. For warranty claims, technical support, or service inquiries, please contact your authorized MEAN WELL distributor or visit the official MEAN WELL websitio para información de contacto.
9. Recursos adicionales
Video 2: This video provides a comprehensive full view of the product, highlighting its design and features.