PUTORSEN GSMT-262P
PUTORSEN Dual Monitor Arm GSMT-262P Instruction Manual
Model: GSMT-262P
Introducción
Thank you for choosing the PUTORSEN Dual Monitor Arm GSMT-262P. This premium aluminum articulated gas spring arm is designed to enhance your workspace ergonomics by providing flexible positioning for two monitors. This manual provides essential information for safe installation, operation, and maintenance of your monitor arm.
Información de seguridad
- Lea atentamente todas las instrucciones antes de la instalación y el uso.
- Asegúrese de que la superficie de su escritorio sea lo suficientemente resistente para soportar el peso combinado del brazo del monitor y los dos monitores.
- No exceda la capacidad máxima de peso de 8 kg (17.6 lbs) por brazo.
- Utilice únicamente el hardware proporcionado. Si alguna pieza falta o está dañada, contacte con atención al cliente.
- Mantenga a los niños y a las mascotas alejados durante la instalación.
- Una instalación incorrecta puede provocar daños a la propiedad o lesiones personales.
Contenido del paquete
Verifique que todos los componentes estén presentes antes de comenzar la instalación.
- Conjunto de brazo para dos monitores
- Escritorio Clamp (C-clamp)
- Herrajes para montaje con ojal
- VESA Mounting Screws (various sizes)
- Llaves hexagonales para ajuste
- Accesorios para la gestión de cables
- Manual de instrucciones
Presupuesto
| Número de modelo | GSMT-262P |
| Material | Aluminio de primera calidad |
| Color | Gris plateado |
| Compatibilidad de tamaño de pantalla | 17 - 32 pulgadas |
| Capacidad de peso por brazo | 3.3 - 17.6 libras (1.5 - 8 kg) |
| Compatibilidad VESA | 75 x 75 mm, 100 x 100 mm |
| Rango de inclinación | De +45° a -45° |
| Rango giratorio | ±90° |
| Rotación | 360° |
| Grosor del escritorio (C-clamp) | 10 mm - 85 mm |
| Grosor del escritorio (ojal) | 10 mm - 85 mm |

Figure 1: Universal Display Compatibility. This image illustrates the compatible screen sizes (17-32 inches), VESA mounting patterns (75x75mm and 100x100mm), and the weight capacity per arm (3.3-17.6 lbs).

Figure 2: Product Dimensions. This diagram provides detailed measurements of the monitor arm, including arm length, height adjustment range, and mounting base dimensions. Please review these dimensions carefully before purchase to ensure compatibility with your setup.
Configuración (Instalación)
The PUTORSEN Dual Monitor Arm offers two installation methods: C-clamp and Grommet Hole. Choose the method best suited for your desk.
1. Elija su método de montaje

Figure 3: Installation Flexibility. This image illustrates the two available mounting options: Grommet Hole and C-clamp, along with their respective compatible desk thickness ranges (10mm-85mm).
- C-clamp Instalación: Ideal for desks without a pre-drilled grommet hole. Securely attach the C-clamp to the edge of your desk. Ensure the desk thickness is between 10mm and 85mm.
- Grommet Hole Installation: Use this method if your desk has a grommet hole (or if you can drill one). Ensure the hole diameter and desk thickness are compatible (10mm-85mm).
2. Assemble the Monitor Arm Base
Follow the specific instructions provided in the package for assembling the main pole and base according to your chosen mounting method.
3. Fije las placas VESA a los monitores
- Coloque con cuidado el monitor boca abajo sobre una superficie suave y limpia.
- Attach the VESA plate to the back of your monitor using the appropriate screws from the hardware kit. Ensure a secure fit.
4. Montar los monitores en los brazos
- Slide the monitor (with VESA plate attached) onto the end of each arm.
- Secure the monitor to the arm using the provided locking mechanism or screw.
Operación (Ajustes)
The PUTORSEN Dual Monitor Arm allows for extensive adjustments to achieve an optimal ergonomic viewExperiencia de aprendizaje.
Posicionamiento del monitor
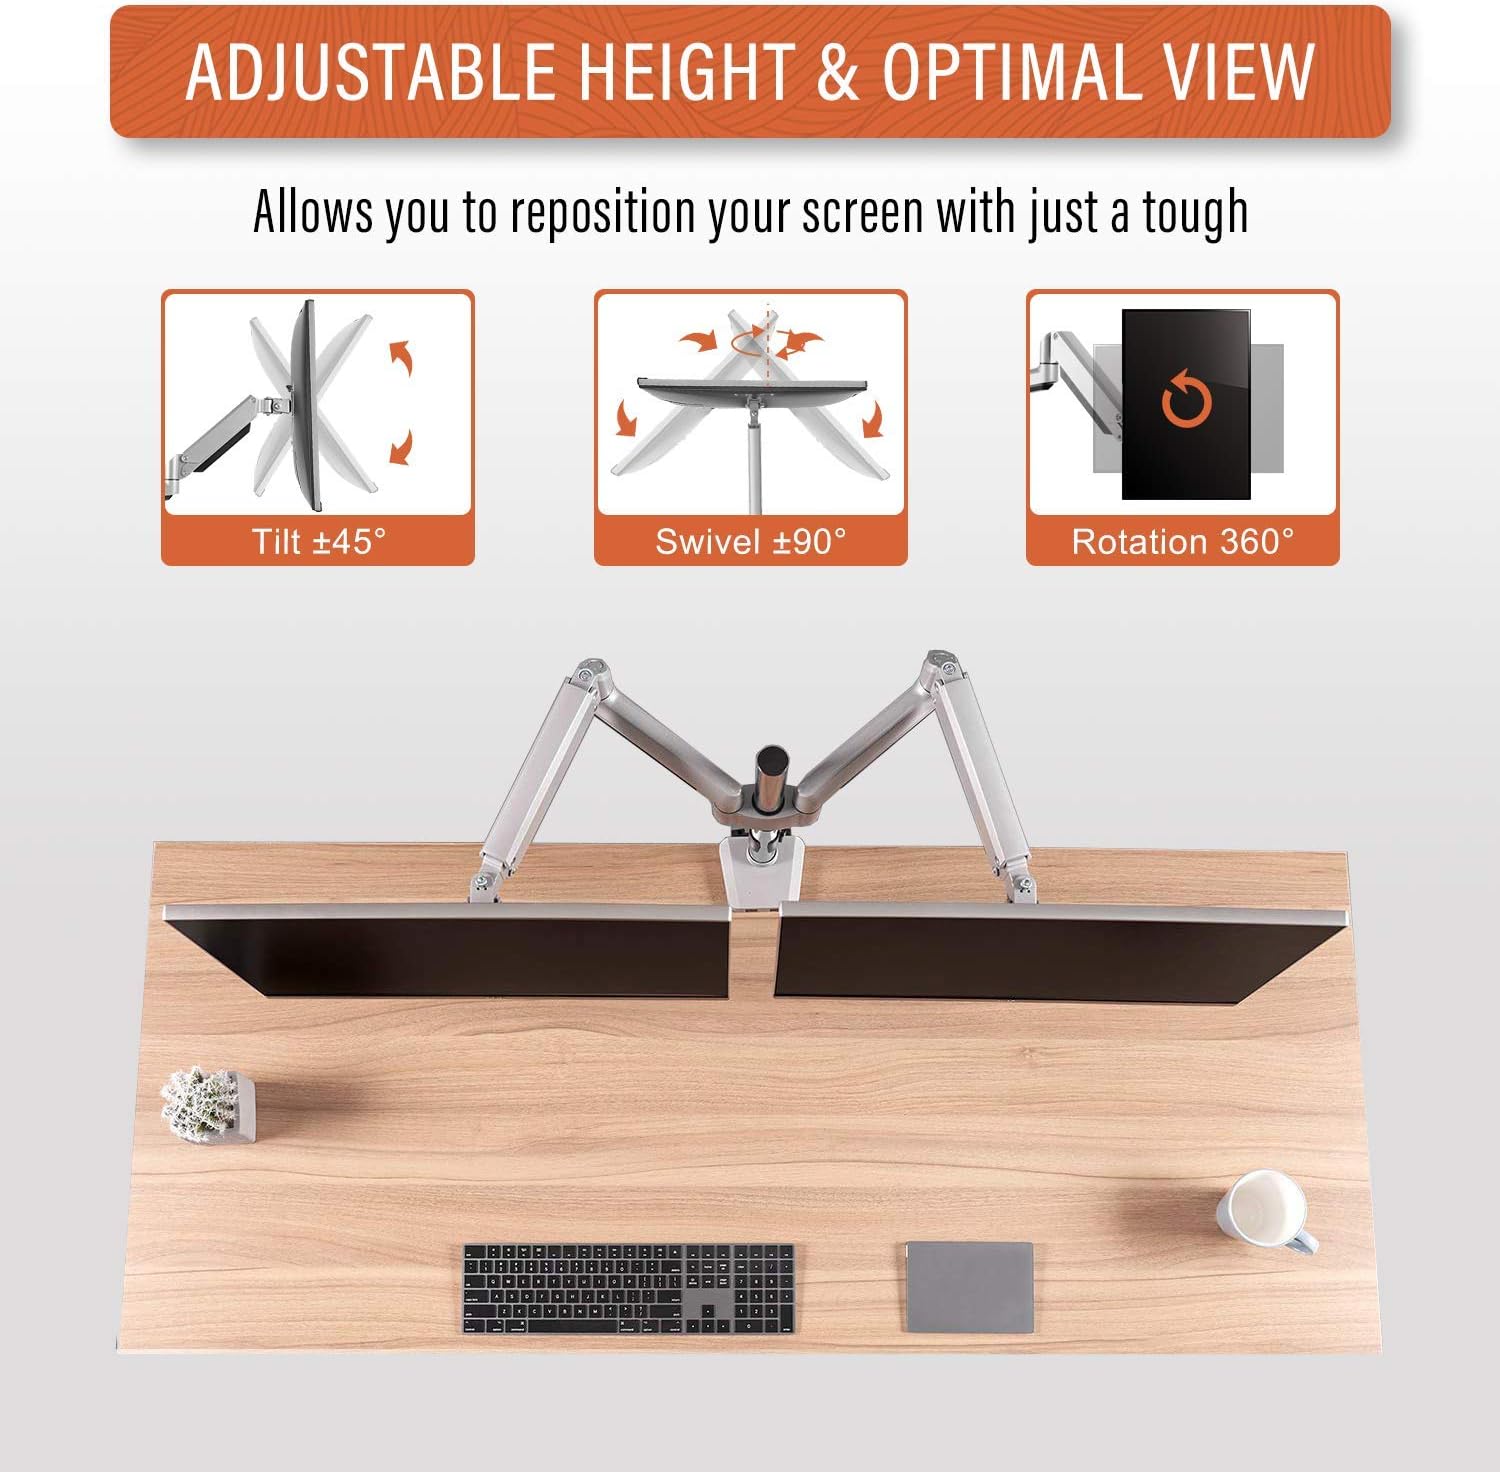
Figure 4: Adjustable Height & Optimal View. This image demonstrates the arm's flexibility, allowing for ±45° tilt, ±90° swivel, and 360° rotation to achieve your preferred viewángulo de ing.
- Ajuste de altura: The gas spring mechanism allows for smooth vertical movement. Gently push or pull the monitor to the desired height.
- Inclinación: Ajuste la pantalla del monitor verticalmente de +45° a -45° para reducir el reflejo y optimizar viewángulos de ing.
- Girar: Pivot the monitor horizontally up to ±90° to share your screen or change viewdirección de avance.
- Rotación: Gire el monitor 360° para cambiar entre orientación horizontal y vertical.
Ajuste de tensión del resorte de gas

Figure 5: Tension Adjustment for Up & Down Arm. This image highlights the adjustment screw for the gas spring tension. Turn clockwise to reduce tension for lighter monitors, and counter-clockwise to increase tension for heavier monitors, ensuring the arm holds its position.
If your monitor does not stay at the desired height or drifts, you may need to adjust the gas spring tension:
- Localice el tornillo de ajuste de tensión en el brazo (consulte la Figura 5).
- Use the provided hex key to turn:
- Dextrorso: To reduce tension for lighter monitors.
- En sentido anti-horario: To increase tension for heavier monitors.
- Adjust gradually and test the arm's movement until the monitor holds its position securely.
Gestión de cables
Utilize the integrated cable management clips or channels on the arm to route and organize your monitor cables, maintaining a tidy workspace.
Mantenimiento
- Revise periódicamente todos los tornillos y conexiones para asegurarse de que estén bien apretados y seguros.
- Limpie el brazo del monitor con un paño suave.amp Paño. Evite limpiadores abrasivos o disolventes.
- Periodically re-adjust the gas spring tension if you change monitors or notice the arm not holding its position correctly.
Solución de problemas
- El monitor se hunde o no permanece a la altura deseada:
- Solución: Increase the gas spring tension by turning the adjustment screw counter-clockwise (refer to Figure 5).
- Monitor is too stiff to move up/down:
- Solución: Decrease the gas spring tension by turning the adjustment screw clockwise (refer to Figure 5).
- Monitor wobbles or feels unstable:
- Solución: Ensure all mounting screws (VESA plate, desk clamp/grommet) are securely tightened. Check that the desk surface is stable.
- Monitor does not fit VESA plate:
- Solución: Verify your monitor's VESA pattern (75x75mm or 100x100mm) matches the arm's compatibility. Ensure you are using the correct VESA screws.
Garantía y soporte
The PUTORSEN Dual Monitor Arm GSMT-262P comes with a Garantía de por vida.
For technical support, warranty claims, or any questions regarding your product, please contact PUTORSEN customer service through the retailer where you purchased the product or visit the official PUTORSEN websitio para información de contacto.
Ask a question about this manual
Ask about setup, troubleshooting, compatibility, parts, safety, or missing instructions. Manuals+ will review the question and use this page’s manual context to help answer it.