
1. Introducción
This manual provides essential instructions for the safe and effective use of your Hohem iSteady Pro2 3-Axis Gimbal Stabilizer Kit. Please read it thoroughly before operation and retain it for future reference.
2. Contenido del paquete
Verifique que todos los artículos enumerados a continuación estén incluidos en su paquete:
- iSteady Pro2 Gimbal Stabilizer x 1
- Smartphone Holder Clip x 1
- Monopod Extension Rod x 1
- Charging USB Cable x 1
- Action Cam Micro USB Cable x 1
- Cable USB-C x 1
- Estuche de transporte x 1
- Mini trípode x 1
- Manual de usuario x 1
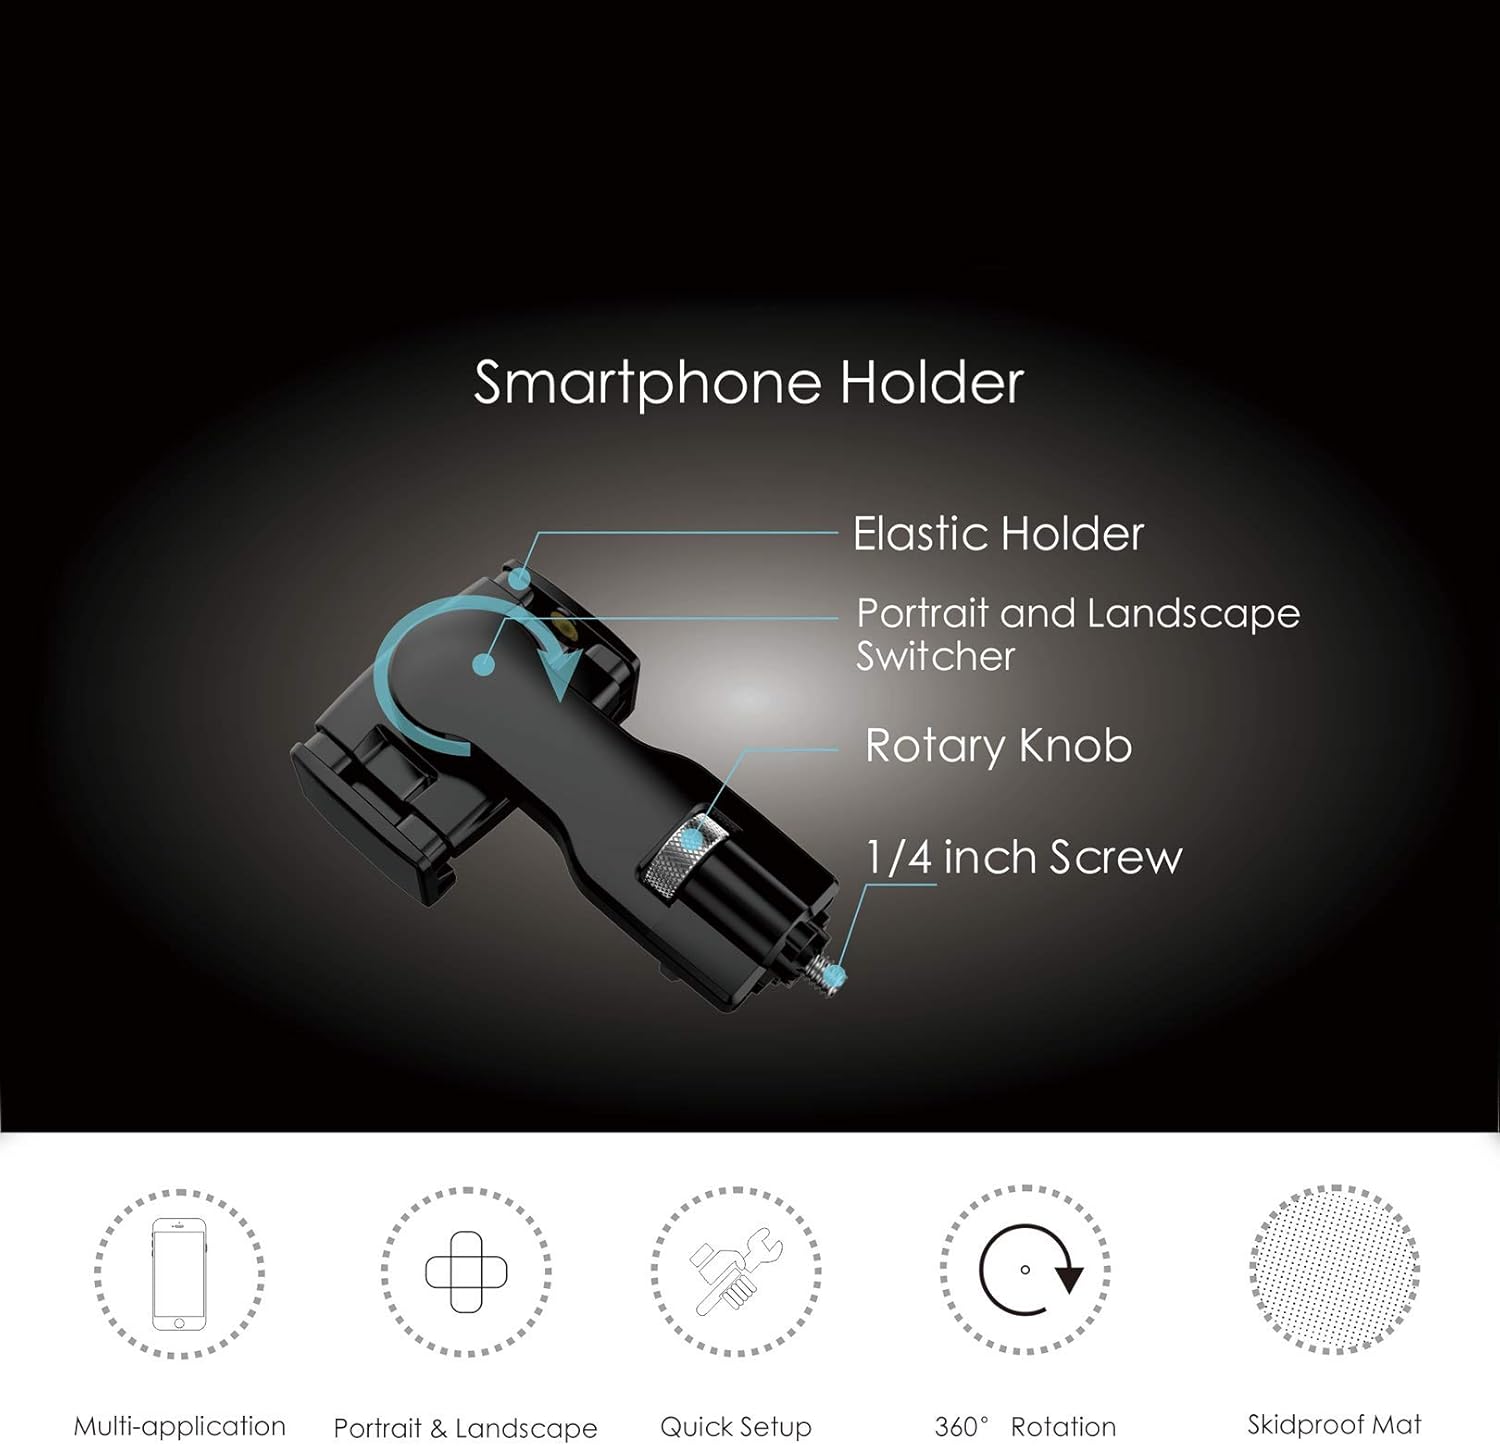
Image: All components included in the Hohem iSteady Pro2 Kit package.
3. Configuración
3.1 Carga inicial
For first use, fully recharge the iSteady Pro2 gimbal battery for 2 to 3 hours. A universal USB adapter (not included) can be used for charging.
3.2 Montaje y equilibrio de la cámara
The iSteady Pro2 is compatible with GoPro Hero series (7/6/5/4/3), DJI Osmo Action, SJ cam, and similar size action cameras. SONY RX0 series is also supported. Note that GoPro Max or Session are NOT supported.
- Before powering on the gimbal, carefully mount your action camera onto the gimbal.
- Ensure the camera is balanced well. Improper balancing can cause the gimbal to vibrate and may lead to damage.
Video: Tutorial on unboxing and mounting the camera on the Hohem iSteady Pro2 Gimbal Stabilizer.
3.3 Smartphone Holder Installation (Optional)
The smartphone holder clip allows you to attach your smartphone for monitoring or additional control.
- Locate the 1/4 inch screw mount on the side of the gimbal handle.
- Attach the smartphone holder clip to this mount and tighten the rotary knob to secure it.
- Place your smartphone into the elastic holder. The holder supports both portrait and landscape orientations.

Imagen: Detallada view of the smartphone holder components.
3.4 Monopod Extension Rod Installation (Optional)
The monopod extension rod can be attached to the bottom of the gimbal for extended reach.
- Locate the screw thread at the bottom of the gimbal handle.
- Screw the monopod extension rod into this thread until secure.
- Extend the rod to your desired length.
4. Instrucciones de funcionamiento
4.1 Encendido y apagado
Long press the power button for 3 seconds to turn on or turn off the gimbal. The indicator light will quickly flash twice upon power on.
4.2 Controles básicos
- Palanca de mando: Controls panning (left/right) and tilting (up/down) of the camera.
- Control deslizante: Adjusts the roll axis angle for precise framing.
- Botón de disparo: Press and hold for Sport Mode for quick scene transitions. Double-tap to re-center the gimbal.

Image: Demonstrates the Sport Mode and trigger button functionality.
4.3 modos de trabajo
The iSteady Pro2 offers various work modes for different shooting scenarios:
- PF (Pan Following): Default mode. Tilt and roll axes are locked. The camera moves left or right smoothly with your hand movements.
- PTF (Pan/Tilt Following): Roll axis is locked. The camera moves left/right and tilts up/down with your hand movements.
- AL (All Locked): All axes are locked. The camera stays in its current orientation.
- All Following & Inception: Tilt axis, roll axis, and pan axis all follow your movements. This mode also enables the Inception effect for cinematic shots.

Image: The gimbal performing a 600-degree rotation, showcasing su flexibilidad.
Video: A tutorial demonstrating various gimbal modes and features, including Inception mode and splash-proof capabilities.
4.4 Control de aplicaciones
The "Hohem Gimbal" app enhances interaction with the gimbal, allowing for remote control and advanced features like motion timelapse and hyperlapse.
- Download and install the "Hohem Gimbal" app on your smartphone.
- Asegúrese de que Bluetooth esté habilitado en su teléfono inteligente.
- Open the app and select the "iSteady Pro2" icon to connect.
- Use the app interface to remotely control the gimbal, adjust settings, and access advanced shooting modes.
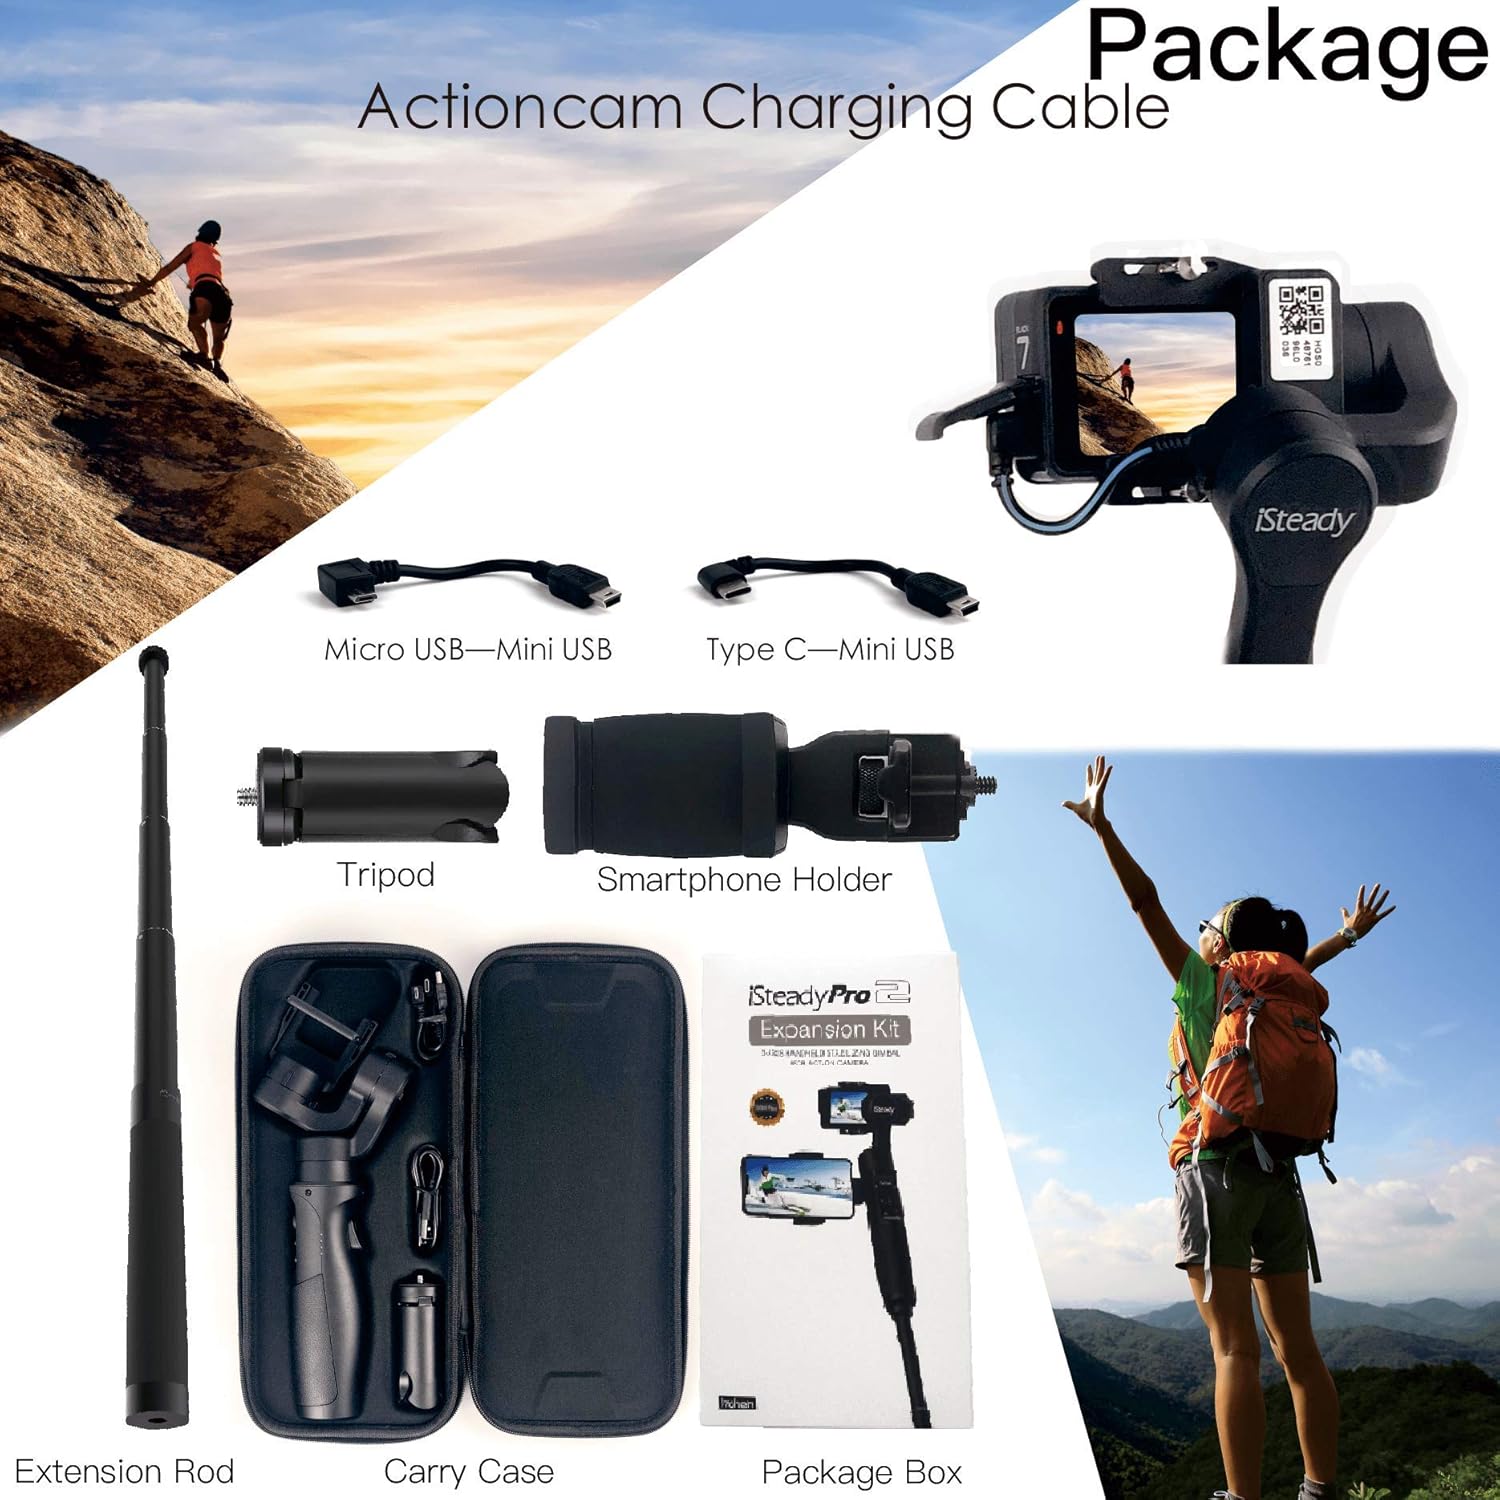
Image: The Hohem iSteady Pro2 Gimbal with a smartphone displaying the control app interface.
5. Mantenimiento
5.1 Limpieza
Wipe the gimbal with a soft, dry cloth. Do not use harsh chemicals or abrasive materials. Ensure no moisture enters the device.
5.2 Almacenamiento
Store the gimbal in its carry case in a cool, dry place away from direct sunlight and extreme temperatures. Remove the camera and any accessories before storage.
5.3 Resistencia al agua
The iSteady Pro2 kit is IP64 splash-proof. This means it can withstand splashes of water but should NOT be exposed to heavy rain, salt water, or sea water environments. Avoid submerging the device.
Video: Demonstrates the splash-proof feature of the Hohem iSteady Pro2 Gimbal.
6. Solución de problemas
- Gimbal Vibrates: Ensure the action camera is properly mounted and balanced before powering on the gimbal.
- No se puede conectar a través de Bluetooth: Verify Bluetooth is enabled on your smartphone and that you have selected "iSteady Pro2" within the "Hohem Gimbal" app.
- El cardán no responde: Ensure the battery is sufficiently charged. Try restarting the gimbal.
7. Especificaciones
| Característica | Detalle |
|---|---|
| Dimensiones del paquete | 12.4 x 7.2 x 2.2 pulgadas |
| Peso del artículo | 1.9 libras |
| ASIN | B07VQ8RCC5 |
| Número de modelo del artículo | Pro2+Phone Holder+ExtensionRod |
| Fabricante | hohem technology |
| Color | Negro |
| Dispositivos compatibles | Cámara |
| Código Postal | 778197858604 |
| Modelos de videocámaras compatibles | GoPro HERO7 Black, DJI OSMO ACTION |
8. Garantía y soporte
8.1 Información de garantía
Please refer to the warranty card included in your product packaging for detailed warranty terms and conditions. Retain your proof of purchase for warranty claims.
8.2 Atención al cliente
For technical assistance, troubleshooting, or other inquiries, please contact Hohem customer support through their official websitio o la información de contacto proporcionada en la documentación de su producto.