1. Instrucciones de seguridad importantes
When using electrical appliances, basic safety precautions should always be followed to reduce the risk of fire, electric shock, and injury to persons. Read all instructions carefully before operating this oven.
- Do not touch hot surfaces. Always use oven mitts or pot holders when handling hot items.
- Para protegerse contra descargas eléctricas, no sumerja el cable, los enchufes ni el aparato en agua ni en ningún otro líquido.
- Es necesaria una estrecha supervisión cuando cualquier aparato sea utilizado por niños o cerca de ellos.
- Desenchufe el aparato del tomacorriente cuando no lo utilice y antes de limpiarlo. Deje que se enfríe antes de colocar o quitar piezas.
- No opere ningún aparato con un cable o enchufe dañado, o después de que el aparato funcione mal o haya sufrido algún daño de cualquier tipo.
- No utilizar en exteriores.
- No deje que el cable cuelgue del borde de la mesa o mostrador, ni que toque superficies calientes.
- No lo coloque sobre o cerca de un quemador de gas o eléctrico caliente, ni dentro de un horno caliente.
- Se debe tener mucho cuidado al mover un aparato que contenga aceite caliente u otros líquidos calientes.
- No utilice el aparato para ningún otro fin que el previsto.
- Siempre conecte primero el enchufe al aparato y luego el cable a la toma de corriente. Para desconectarlo, gire cualquier control a la posición de apagado y desenchufe el cable de la toma de corriente.
2. Producto terminadoview
The PowerPac PPT45 Electric Oven is a versatile kitchen appliance designed for cooking, grilling, toasting, and baking. It features a 50-liter capacity, convection function, rotisserie, and an internal light for monitoring cooking progress.
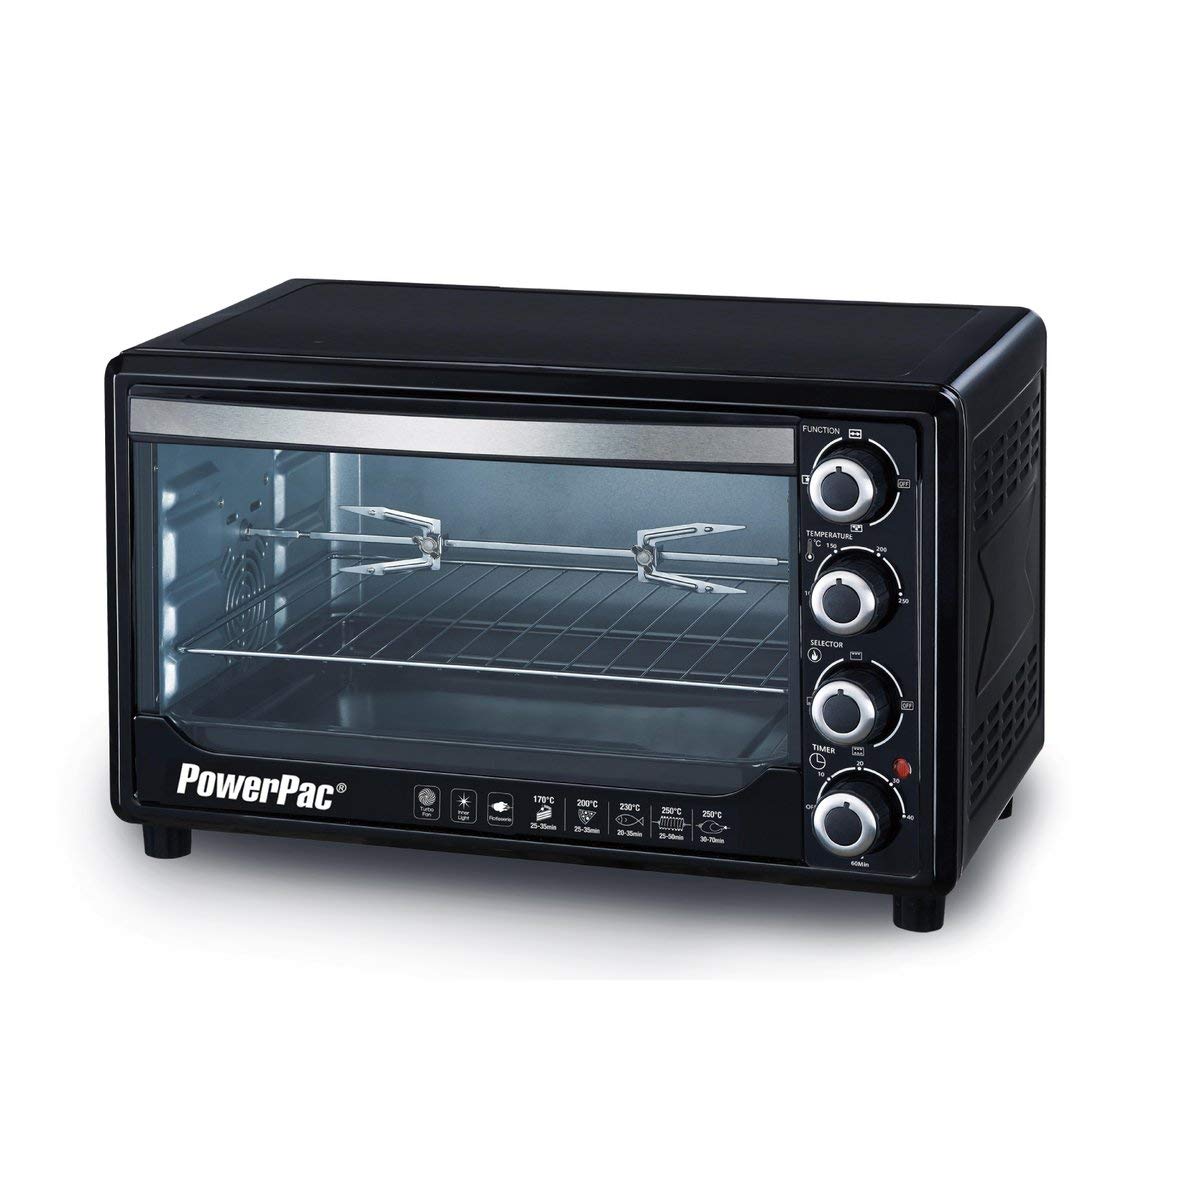
Imagen: Frente view of the PowerPac PPT45 Electric Oven, showcasing its control knobs, glass door, and internal racks.
Características principales:
- Funcionalidad 4 en 1: Cook, Grill, Toast, and Bake.
- Función de convección: Integrated turbo fan for even heat distribution.
- Asador: Includes a rotisserie fork for grilling poultry and roasts.
- Control de temperatura: Adjustable temperature from 100°C to 250°C.
- Temporizador de 60 minutos: With an automatic shut-off and bell signal.
- Luz interna: For easy monitoring of cooking status.
- Accesorios: Comes with 2 baking trays and 2 grill racks.
- Elemento calefactor de acero inoxidable: Durable and efficient heating.
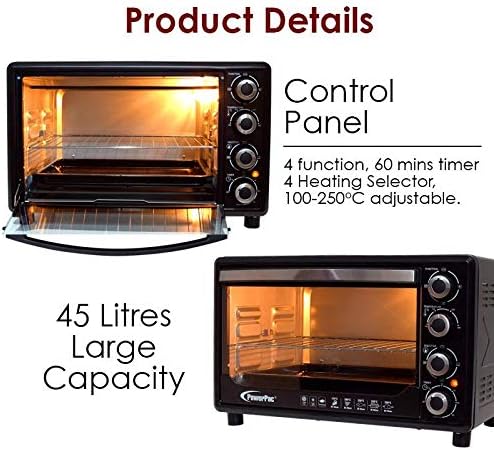
Imagen: Detallada view of the oven's control panel with four knobs for function, temperature, selector, and timer, alongside an indication of its 45-liter capacity.
Componentes:
- Unidad de horno
- Baking Tray (2 pcs)
- Grill Rack (2 pcs)
- Juego de tenedor asador
- Asa de bandeja
- Bandeja recogemigas (extraíble)
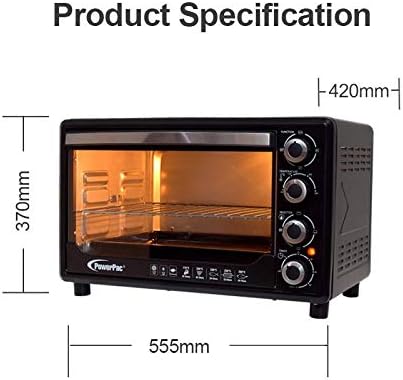
Image: Two black baking trays and two wire grill racks, illustrating the included accessories for the oven.
3. Configuración y primer uso
Desembalaje:
- Retire con cuidado el horno y todos los accesorios del embalaje.
- Retire todos los materiales de embalaje, pegatinas o etiquetas del horno.
- Compruebe si el dispositivo ha sufrido algún daño durante el transporte. Si presenta algún daño, no lo utilice y póngase en contacto con atención al cliente.
Colocación:
- Coloque el horno sobre una superficie estable, resistente al calor y nivelada.
- Ensure there is adequate ventilation around the oven (at least 10-15 cm clearance on all sides).
- No coloque el horno cerca de materiales inflamables o fuentes de calor.
Limpieza inicial:
- Limpie el interior y exterior del horno con un anuncio.amp paño.
- Wash all accessories (baking trays, grill racks, rotisserie fork) in warm, soapy water, rinse thoroughly, and dry completely.
Primer uso (quemado):
Before cooking food, operate the oven for approximately 15 minutes to burn off any manufacturing residues and odors.
- Enchufe el horno a una toma eléctrica con conexión a tierra.
- Ajuste la perilla de temperatura a 250°C.
- Set the function knob to 'Bake' (top and bottom heating elements).
- Ajuste la perilla del temporizador a 15 minutos.
- Es posible que se perciba un ligero olor o humo; esto es normal. Asegúrese de que el área esté bien ventilada.
- Once the timer rings, turn all knobs to 'OFF' and unplug the oven. Allow it to cool completely.
4. Instrucciones de funcionamiento
Familiarize yourself with the control knobs before operation:
- Perilla de función: Selects the cooking mode (e.g., Bake, Grill, Convection).
- Perilla de temperatura: Ajusta la temperatura de cocción (100°C – 250°C).
- Perilla selectora: Chooses heating elements (top, bottom, or both) and activates convection/rotisserie.
- Perilla del temporizador: Sets the cooking duration (up to 60 minutes).
Operación general:
- Place food on the baking tray or grill rack, then insert into the desired rack position inside the oven.
- Cierre bien la puerta del horno.
- Establecer el Perilla de función to the desired cooking mode (e.g., Bake, Grill).
- Establecer el Perilla de temperatura a la temperatura requerida.
- Establecer el Perilla selectora to activate the appropriate heating elements (top, bottom, or both) and convection fan if desired.
- Establecer el Perilla del temporizador to the desired cooking time. The oven will start heating. The indicator light will illuminate.
- When the set time elapses, the timer will ring, and the oven will automatically turn off.
- Retire con cuidado los alimentos cocinados utilizando guantes de horno.
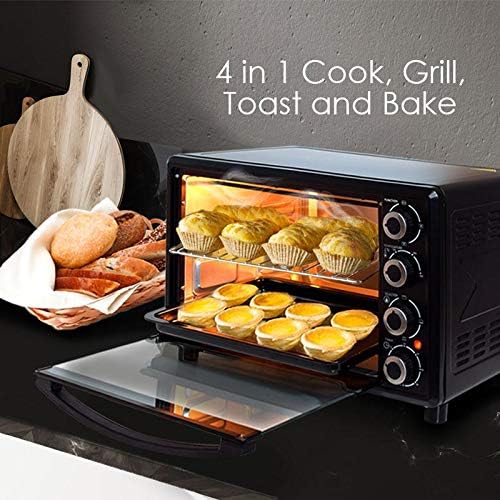
Image: The oven in use, showing baked goods on a tray, illustrating its baking and toasting capabilities.
Uso de la función de asador:
- Prepare the food (e.g., chicken) and secure it onto the rotisserie fork.
- Inserte el tenedor para asar en las ranuras designadas dentro del horno.
- Establecer el Perilla de función a 'Rotisserie'.
- Establecer el Perilla de temperatura a la temperatura deseada.
- Establecer el Perilla selectora to activate the rotisserie motor and heating elements (usually top or both).
- Establecer el Perilla del temporizador for the required cooking duration.
- Monitor cooking through the tempered glass window and internal light.
- Once cooking is complete, use the rotisserie handle to carefully remove the hot food.

Image: A whole chicken rotating on the rotisserie spit inside the oven, demonstrating the rotisserie and convection features.
5. Mantenimiento y limpieza
La limpieza y el mantenimiento regulares garantizarán la longevidad y el rendimiento óptimo de su horno.
Antes de limpiar:
- Desenchufe siempre el horno de la toma de corriente.
- Deje que el horno se enfríe completamente antes de limpiar cualquier pieza.
Limpieza del interior:
- Remove the baking trays, grill racks, and crumb tray. Wash them in warm, soapy water. For stubborn stains, soak them before cleaning.
- Limpia las paredes interiores con un anuncio.amp paño y una solución de limpieza suave, no abrasiva.
- Do not use abrasive cleaners, scouring pads, or metal utensils on the interior surfaces as they can damage the finish.
- Asegúrese de que el interior esté completamente seco antes del próximo uso.
Limpieza del exterior:
- Limpie las superficies exteriores con un paño suave, damp paño.
- No utilice productos químicos agresivos ni limpiadores abrasivos.
- Asegúrese de que no entre agua ni solución de limpieza en el área del panel de control.
Puerta de vidrio:
- Limpie la puerta de vidrio templado con un limpiador de vidrios o adamp paño.
- Avoid scratching the glass surface.
6. Solución de problemas
Si tiene problemas con su horno, consulte los siguientes problemas y soluciones comunes:
| Problema | Posible causa | Solución |
|---|---|---|
| El horno no enciende. | No enchufado; sin energíatage; temporizador no configurado. | Ensure plug is securely in outlet; check household circuit breaker; set the timer knob. |
| Los alimentos no se cocinan de manera uniforme. | Incorrect rack position; oven overloaded; convection fan not activated. | Adjust rack position; avoid overcrowding; ensure convection fan is selected for even cooking. |
| Humo u olor durante el funcionamiento. | Food residue; initial burn-in; excessive grease. | Clean oven interior and accessories; ensure proper ventilation during first use; clean up grease spills immediately. |
| El asador no gira. | Food too heavy or unbalanced; rotisserie not properly installed; function not selected. | Ensure food is balanced and within weight limits; re-install rotisserie fork correctly; select 'Rotisserie' function. |
If the problem persists after trying these solutions, please contact PowerPac customer support.
7. Especificaciones
| Marca: | Powerpac |
| Modelo: | PPT45 |
| Capacidad: | 50 litros |
| Fuente de energía: | Eléctrico |
| Volumentage/Frecuencia: | 220-240V ~ 50Hz (Standard for Singapore) |
| Dimensiones (Ancho x Alto x Profundidad): | 555 mm x 370 mm x 420 mm (aprox.) |
| Características especiales: | Temperature Control, Convection, Rotisserie, Internal Light, 60-Minute Timer, 4 Heat Selector |
| Elemento calefactor: | Acero inoxidable |
| Componentes incluidos: | 2 Baking Trays, 2 Grill Racks, Rotisserie Fork Set, Tray Handle, Crumb Tray |
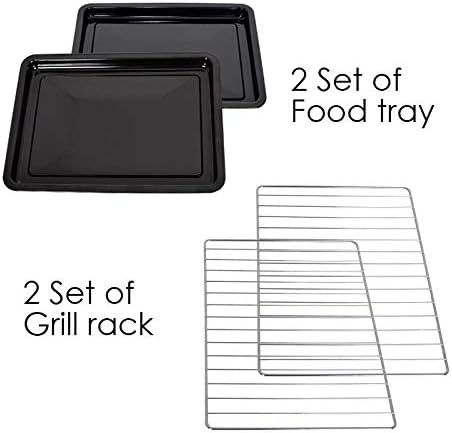
Image: Diagram showing the approximate dimensions of the PowerPac PPT45 Electric Oven: 555mm width, 370mm height, and 420mm depth.
8. Garantía y soporte
Información de garantía:
This PowerPac PPT45 Electric Oven comes with a 24 Months Local Manufacturer WarrantyConserve su comprobante de compra para reclamaciones de garantía.

Image: Graphics indicating 'Singapore Trusted Brand (22 Years)', '24 Months Local Manufacturer Warranty', and 'ISO 9001 Qualified Certification'.
Atención al cliente:
For technical assistance, warranty claims, or spare parts, please contact PowerPac customer service. You can find more information and contact details by visiting the official PowerPac store:


