
1. Introducción
Gracias por la compraasing the Nobsound Mini EL34 Tube Integrated Amplifier. This Class A, single-ended Hi-Fi amplifier is designed to deliver warm and rich audio performance. This manual provides essential information for the safe and optimal use of your amplificador, incluida la configuración, el funcionamiento, el mantenimiento y la resolución de problemas.
2. Instrucciones de seguridad
- Fuente de alimentación: Asegúrese de que amplifier is connected to a 100V AC power supply. Using an incorrect voltagPuede dañar la unidad y anular la garantía.
- Ventilación: Do not block the ventilation holes on the amplifier. Ensure adequate airflow around the unit to prevent overheating.
- Humedad: Mantener el ampMantener alejado del agua, la humedad y ambientes con alta humedad.
- Fuentes de calor: Evite colocar el ampNo coloque el ventilador cerca de fuentes de calor como radiadores, rejillas de calefacción, estufas u otros aparatos que produzcan calor.
- Manipulación de tubos: Vacuum tubes can become very hot during operation. Avoid touching them directly. Allow sufficient time for tubes to cool before handling or replacing.
- Servicio: No intente reparar este producto usted mismo. Refiera todo el servicio a personal de servicio calificado.
- Limpieza: Desconecte el cable de alimentación antes de limpiarlo. Utilice un paño suave y seco. No utilice limpiadores líquidos ni en aerosol.
3. Contenido del paquete
Verifique que todos los artículos estén presentes en el paquete:
- Nobsound Mini EL34 Tube Integrated Ampmás vital (x1)
- Cable de alimentación (x1)
- Vacuum Tubes: 5Z2P (x1), EL34 (x2), 6N1 (x1)

Description: This image displays the Nobsound Mini EL34 Tube Integrated Amplifier along with its accessories. The amplifier unit is shown with its dimensions (260W x 230D x 175H mm). Also included are the power cord and the four vacuum tubes (one 5Z2P, two EL34, and one 6N1) that come with the ampmás duradero.
4. Producto terminadoview
4.1 Panel frontal
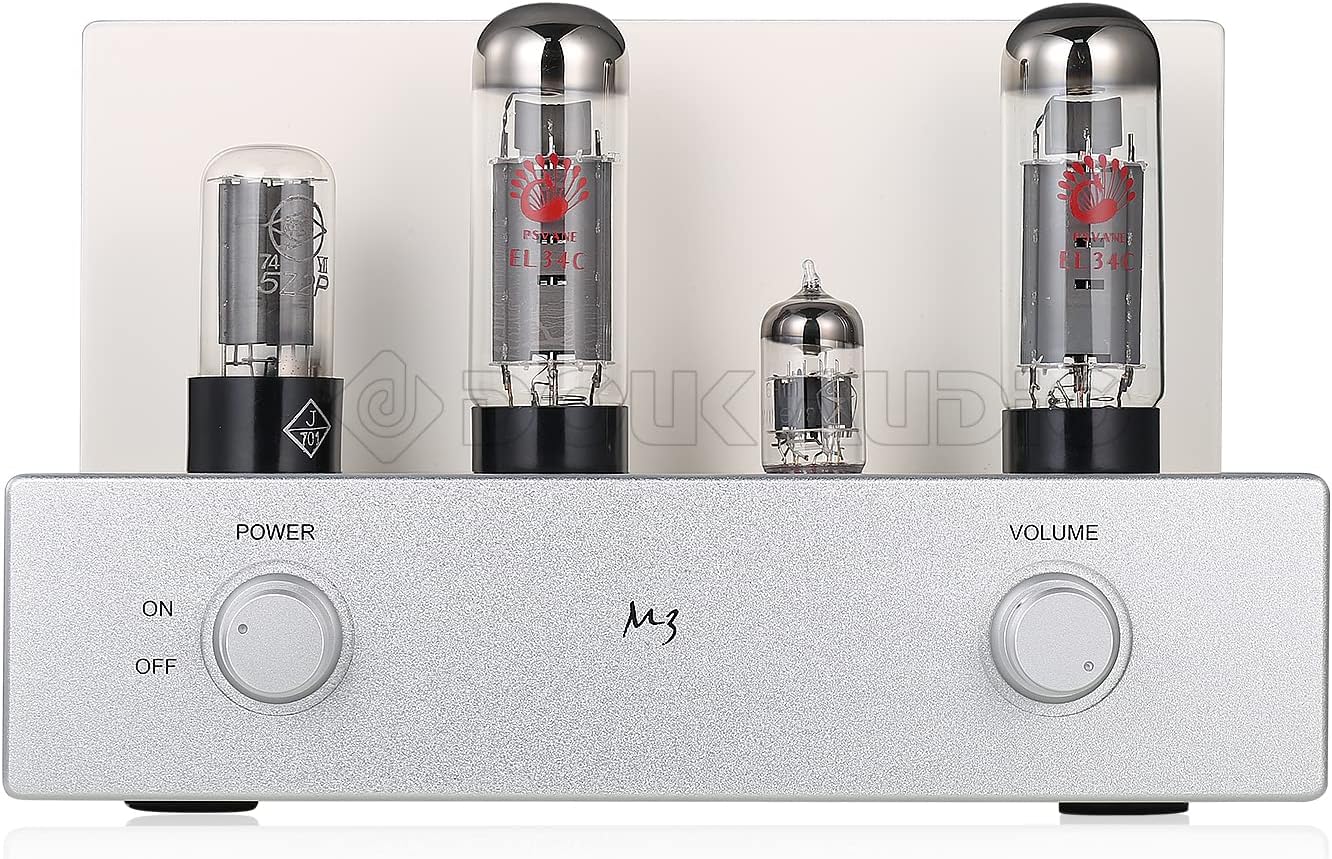
Description: This image shows the front panel of the Nobsound Mini EL34 Tube Integrated Amplifier. On the left, there is a rotary power switch with 'ON' and 'OFF' positions. On the right, a rotary volume control knob is visible. The vacuum tubes are prominently displayed on top of the unit.
- Interruptor de alimentación: Gira el amplificador ON u OFF.
- Control de volumen: Ajusta el volumen de salida general.
4.2 Panel trasero

Description: This image displays the rear panel of the Nobsound Mini EL34 Tube Integrated Amplifier. From left to right, it features two sets of RCA audio inputs labeled 'PC' and 'CD', with a selector switch to choose between them. To the right are the speaker output terminals, supporting both 4Ω and 8Ω impedance connections via banana plugs or bare wire. On the far right is the AC power input socket.
- PC Input (RCA L/R): Audio input for connecting devices like computers.
- CD Input (RCA L/R): Audio input for connecting devices like CD players.
- Interruptor selector de entrada: Toggles between PC and CD audio inputs.
- Terminales de salida del altavoz: Connect your passive speakers. Supports 4Ω and 8Ω impedance.
- Entrada de energía: Conecte aquí el cable de alimentación suministrado.
5. Configuración
5.1 Tube Installation (if not pre-installed)
If the vacuum tubes are not pre-installed, follow these steps:
- Carefully remove the tubes from their packaging.
- Identify the correct sockets for each tube type (5Z2P, EL34, 6N1). Refer to the markings on the ampchasis elevador.
- Align the pins of each tube with the corresponding holes in the socket. Gently push the tube straight down until it is firmly seated. Do not force it.

Descripción: Esta imagen proporciona un primer plano view of the four vacuum tubes used in the Nobsound Mini EL34 Tube Integrated Amplifier. From left to right, they are one 5Z2P rectifier tube, two EL34 power tubes, and one 6N1 pre-amplifier tube.
5.2 Conexión de altavoces
- Asegúrese de que ampEl ificador está apagado y desenchufado de la toma de corriente.
- Connect your passive speakers to the speaker output terminals on the rear panel.
- Match the speaker impedance (4Ω or 8Ω) to the corresponding terminals on the ampmás duradero.
- Conecte el terminal positivo (+) del altavoz al terminal positivo (+) del amplificador, y el terminal negativo (-) del altavoz al terminal negativo (-) del amplifier. Ensure secure connections.
5.3 Conexión de fuentes de audio
- Connect your audio source (e.g., CD player, PC, streamer) to either the 'CD' or 'PC' RCA input jacks on the rear panel using appropriate RCA cables.
- Ensure left (L) and right (R) channels are correctly connected.
5.4 Conexión de alimentación
- After all audio and speaker connections are made, connect the supplied power cord to the power input socket on the rear panel.
- Conecte el otro extremo del cable de alimentación a una toma de corriente CA de 100 V.
6. Instrucciones de funcionamiento
- Encendido: Turn the Power Switch on the front panel to the 'ON' position. The tubes will begin to glow, indicating the amplifier is warming up. Allow a few moments for the tubes to stabilize before playing audio.
- Seleccionar entrada: Use the Input Selector Switch on the rear panel to choose between the 'PC' or 'CD' audio input, corresponding to your connected source.
- Ajustar el volumen: Start with the Volume Control knob at its minimum setting. Begin playing audio from your source, then slowly turn the Volume Control clockwise to achieve your desired listening level.
- Apagado: Para apagar el amplifier, turn the Power Switch to the 'OFF' position.
7. Mantenimiento
- Limpieza: Limpie regularmente el amplifier's exterior with a soft, dry cloth to remove dust. Do not use abrasive cleaners or solvents.
- Reemplazo de tubo: Vacuum tubes have a finite lifespan. If you notice a degradation in sound quality or a tube fails, it may need replacement. Ensure the amplifier is OFF and unplugged, and the tubes have cooled completely before attempting replacement. Gently pull the old tube straight out and insert the new tube, aligning the pins carefully.
- Ventilación: Ensure the ventilation holes remain unobstructed to prevent overheating.
8. Solución de problemas
| Problema | Posible causa | Solución |
|---|---|---|
| No hay salida de sonido |
|
|
| Sonido distorsionado |
|
|
| Ruido de zumbido o zumbido |
|
|
9. Especificaciones
- Tipo: Tubo de vacío integrado Ampmás vivaz
- Modelo: Single-ended Class A
- Canales: 2.0
- Sensibilidad de entrada: 550mV
- Potencia de salida: 2 × 8W (Ultralinear connection)
- Relación señal/ruido: 85 dB
- Impedancia de entrada: 100 kΩ
- Impedancia de salida: 4 Ω, 8 Ω
- Fuente de alimentación: 100 V CA
- Consumo de energía: 76 W
- Respuesta de frecuencia: 30Hz ~ 38KHz
- Tubos de vacio: 5Z2P (x1), EL34 (x2), 6N1 (x1)
- Entrada de audio: Stereo L/R RCA (CD / AUX, PC)
- Salida de audio: Tomas de altavoz tipo banana
- Dimensiones (An. × Pr. × Al.): 260 mm × 230 mm × 175 mm
- Peso: 7.5 kilos
10. Garantía y soporte
Nobsound products are designed for reliability and performance. For warranty information or technical support, please refer to the documentation provided with your purchase or contact your retailer. Keep your purchase receipt as proof of purchase.
For further assistance, you may visit the official Nobsound websitio o comuníquese con su departamento de servicio al cliente.