Introducción
This manual provides detailed instructions for the installation, operation, and maintenance of your ESX VN1015-MA-DAB-1DIN 1-DIN Touchscreen Navigation System. This advanced car multimedia unit features a 10.1-inch multi-angle touchscreen, Android operating system, DAB+ digital radio, Bluetooth hands-free and audio streaming, GPS navigation, and extensive media connectivity. Please read this manual thoroughly before using the device to ensure proper operation and to maximize your user experience.
Configuración e instalación
Proper installation is crucial for the optimal performance of your ESX navigation system. It is recommended that installation be performed by a qualified professional.
1. Desembalaje e inspección
- Retire con cuidado todos los componentes del embalaje.
- Verifique que todos los accesorios enumerados estén presentes.
- Inspeccione la unidad para detectar cualquier signo de daño.
2. Conexiones de cableado
Refer to the wiring diagram for detailed connections. Ensure all connections are secure to prevent malfunctions.
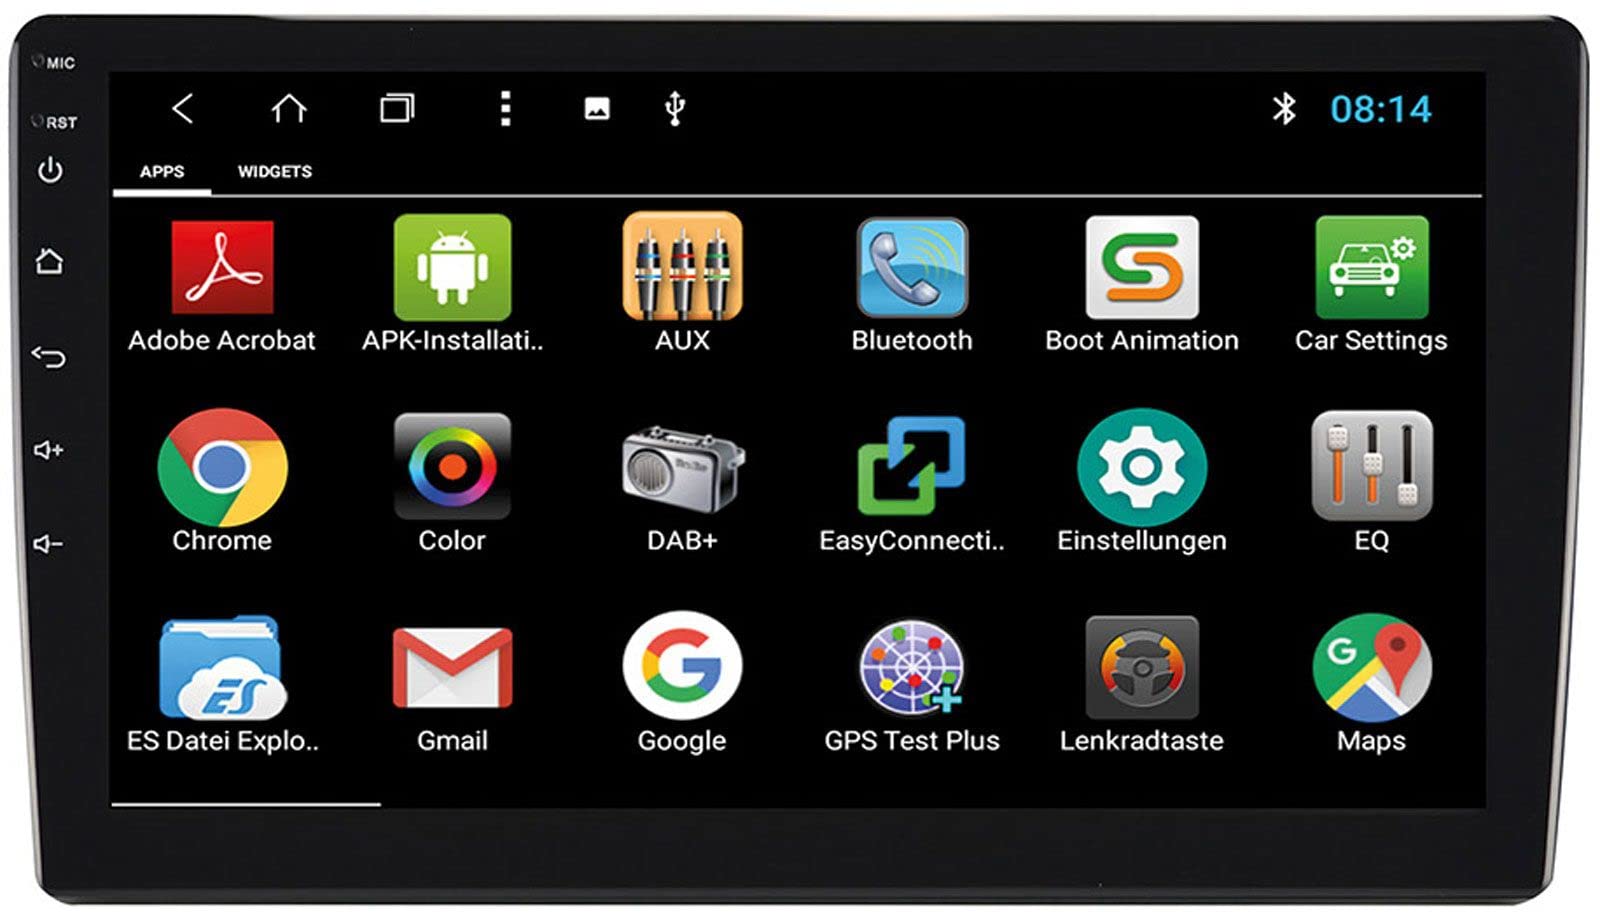
Image: Rear Connection Ports. This image displays the rear panel of the ESX VN1015-MA-DAB-1DIN unit, highlighting the various input and output ports. Key connections visible include GPS antenna input, WiFi antenna input, microphone input, USB ports, AV inputs, and the main power/speaker harness connector. A DAB+ antenna input is also present, along with a "PASSED" quality control sticker.
- Conexión de energía: Connect the main power harness to your vehicle's power supply (constant 12V, ignition 12V, and ground).
- Conexiones de altavoz: Conecte los cables de los altavoces a los altavoces de su vehículo, asegurándose de que la polaridad sea correcta.
- Antena GPS: Connect the GPS antenna to the dedicated GPS input. Position the antenna in a location with a clear view del cielo para una recepción óptima de la señal.
- Antena DAB+: Connect the included DAB+ antenna to the DAB+ input. Ensure proper placement for best digital radio reception.
- Antena WiFi: Connect the WiFi antenna for internet connectivity via a mobile hotspot.
- Puertos USB: Conecte dispositivos USB para reproducción de medios o carga de teléfonos inteligentes.
- Micrófono: Connect the internal microphone or an optional external microphone (VNA-MIC-AND) for Bluetooth hands-free calling.
- AUX/Video Input: Conecte fuentes de audio/video externas.
- Entrada de cámara: Conecte una parte traseraview camera to the camera input. The system supports adjustable parking lines.
- Pre-amp Salidas: Conectar externo ampificadores para canales frontales, traseros y subwoofer.
- Control del volante: If your vehicle supports steering wheel controls, an optional adapter may be required. Connect the steering wheel control wires as per the adapter's instructions.
3. Montaje de la unidad
- Install the 1-DIN chassis into your vehicle's dashboard opening.
- Attach the 10.1-inch touchscreen display to the chassis. The display is multi-angle adjustable (height and viewing angle) for optimal visibility.
- Secure the unit firmly to prevent movement during driving.
4. Encendido inicial
- After all connections are made, turn on your vehicle's ignition.
- The unit should power on and display the ESX logo.
- Siga las instrucciones en pantalla para la configuración inicial, como la selección de idioma y zona horaria.
Instrucciones de funcionamiento
Your ESX navigation system runs on an Android operating system, offering a familiar and intuitive user interface.
1. Interfaz de pantalla táctil
The 10.1-inch high-resolution touchscreen allows for easy control of all functions. Tap, swipe, and pinch-to-zoom gestures are supported.
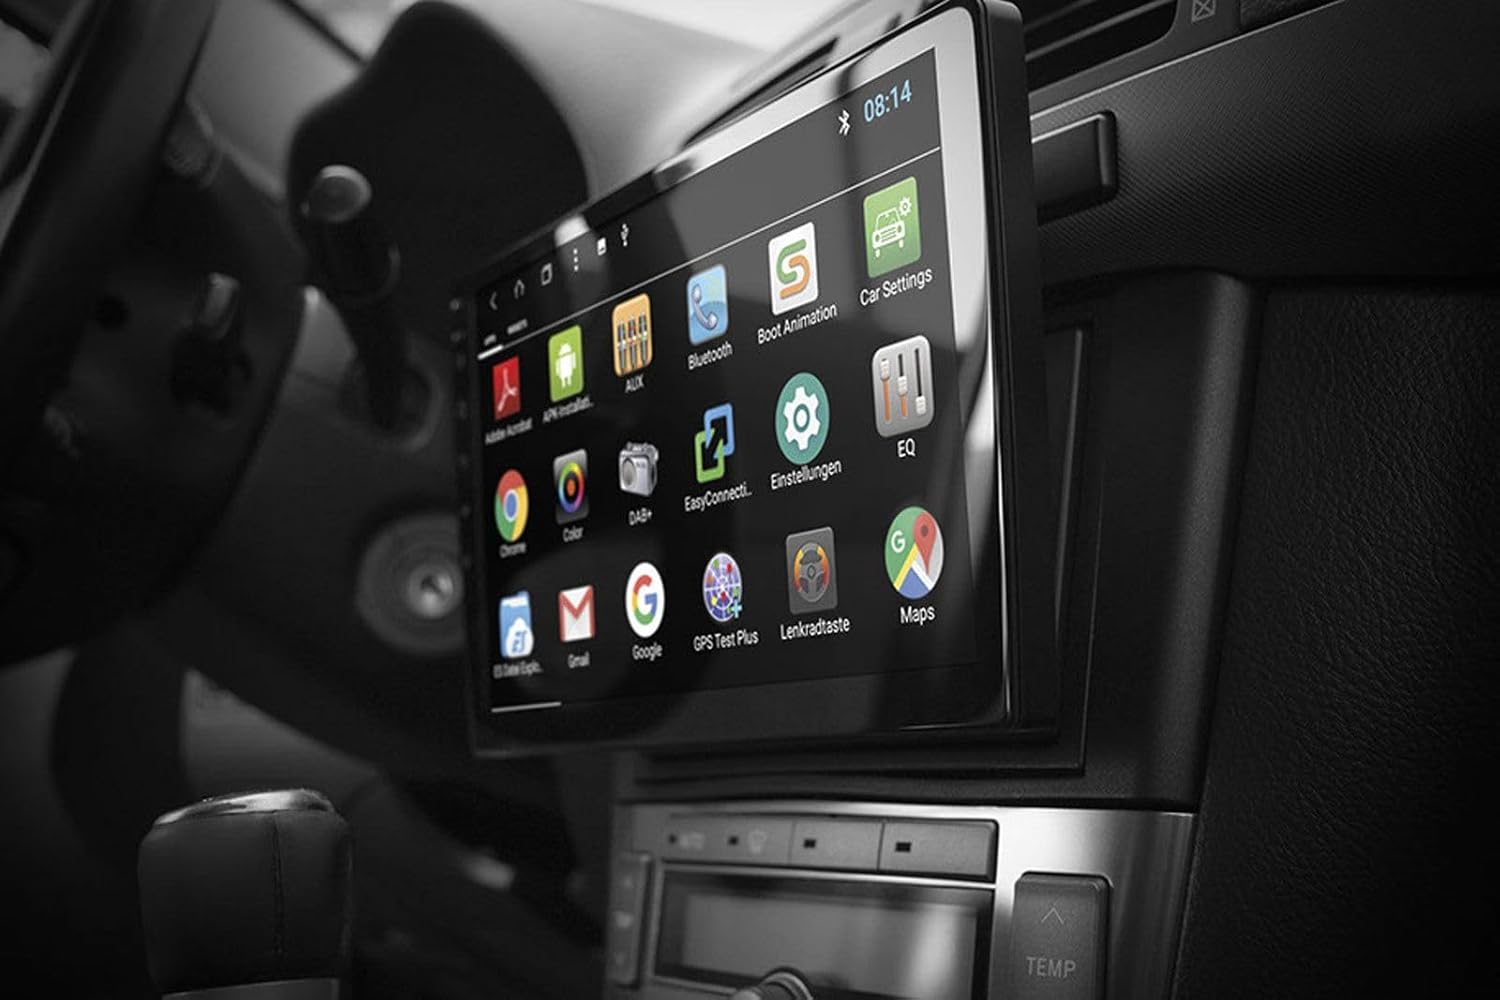
Image: Android App Interface. This image shows the ESX VN1015-MA-DAB-1DIN unit installed in a car, with its screen displaying a grid of Android application icons. Visible apps include Bluetooth, DAB+, EQ, Google, Maps, and various system settings, indicating the unit's smart functionality.
2. Navegación (GPS)
- The system uses Google Maps for navigation, supporting both online and offline modes.
- Asegúrese de que la antena GPS esté conectada y colocada correctamente.
- For offline maps, download the required map data via a WiFi connection.
- To start navigation, open the Maps application and enter your destination.

Image: Navigation Display. This image illustrates the ESX VN1015-MA-DAB-1DIN unit's screen showing a detailed navigation map. The map displays street names and routes, indicating active GPS guidance within a vehicle's interior.
3. Radio Functions (DAB+/AM/FM)
- Radio digital DAB+: Access high-quality digital radio broadcasts. The system displays station logos. Ensure the DAB+ antenna is connected.
- Radio AM/FM: Tune into analog radio stations. RDS (Radio Data System) functionality provides station information.
- To switch between radio modes, select the appropriate option in the radio application.
- Scan for stations and save your favorites for quick access.

Image: Radio Interface. This image shows the ESX VN1015-MA-DAB-1DIN unit's screen displaying the FM radio interface. It features a frequency tuner, station presets, and controls for functions like REG, TA, AF, and PTY, indicating comprehensive radio capabilities.
4. Conectividad Bluetooth
- Emparejamiento: Go to the Bluetooth settings on the unit and your smartphone. Buscar available devices and select "ESX VN1015-MA-DAB-1DIN" (or similar). Enter the PIN if prompted (usually 0000 or 1234).
- Llamadas manos libres: Once paired, you can make and receive calls directly from the unit. Use the internal microphone or an optional external microphone for clear communication.
- Transmisión de audio (A2DP): Stream music from your smartphone to the unit wirelessly.
5. Reproducción multimedia
- USB/MicroSD: Insert USB drives or MicroSD cards containing audio or video files into the respective ports. The system will automatically detect and allow playback through the media player application.
- Entrada auxiliar: Connect external audio/video devices via the AUX input.
- Conexión de teléfono inteligente: Connect Android or iPhone devices via USB for charging. Some Android devices may support mirroring or data transfer depending on the phone and app.
6. Configuración del sistema
- Access the Android settings menu to customize various aspects of the unit, including display, sound, network, and system information.
- You can adjust display brightness, sound equalizer settings, and connect to a WiFi hotspot for internet access.
- Customize boot logos and background images from the settings.
Mantenimiento
Regular maintenance ensures the longevity and optimal performance of your ESX navigation system.
- Limpieza de la pantalla: Utilice un paño suave y sin pelusa para limpiar suavemente la pantalla táctil. Para manchas difíciles, limpie ligeramenteampEnjuague el paño con agua o un limpiador de pantallas. Evite productos químicos agresivos o materiales abrasivos.
- Actualizaciones de software: Compruebe periódicamente si hay actualizaciones de software del fabricante. website or through the unit's system settings (if available). Updates can improve performance and add new features.
- Cuidado general: Evite exponer la unidad a temperaturas extremas, luz solar directa durante períodos prolongados o humedad excesiva. Asegúrese de que haya una ventilación adecuada alrededor de la unidad.
Solución de problemas
If you encounter issues with your ESX navigation system, refer to the following common problems and solutions.
| Problema | Posible solución |
|---|---|
| La unidad no se enciende. | Check all power connections (constant 12V, ignition 12V, ground). Verify the vehicle's fuse box and the unit's inline fuse. Ensure the ignition is on. |
| No hay sonido. | Check speaker connections. Ensure volume is not muted or set too low. Verify ampConexiones del ificador si es externo amplifiers are used. Check audio source selection. |
| La señal GPS es débil o no está disponible. | Asegúrese de que la antena GPS esté conectada de forma segura y colocada en un lugar con una vista despejada. view of the sky (e.g., dashboard, under windshield). Avoid obstructions. |
| Bluetooth no se conecta o es inestable. | Ensure Bluetooth is enabled on both the unit and your smartphone. Delete previous pairings and try re-pairing. Move the phone closer to the unit. Restart both devices. |
| La recepción de radio DAB+ es mala. | Check the DAB+ antenna connection and its placement. Ensure you are in an area with DAB+ coverage. Rescan for stations. |
| La pantalla táctil no responde. | Perform a soft reset of the unit (refer to the system settings for a reset option, or press and hold the power button if available). Ensure the screen is clean and free of debris. |
Presupuesto
Key technical specifications for the ESX VN1015-MA-DAB-1DIN navigation system:
- Mostrar: 10.1-inch high-resolution multi-angle LCD touchscreen
- Sistema operativo: Androide
- Navegación: Google Maps (online and offline)
- Conectividad: WiFi Hotspot (requires compatible smartphone), Bluetooth (hands-free, audio streaming), USB (2 ports), MicroSD card slot (for navigation and media), AUX/Video input, AUX/Audio input
- Radio: DAB+ Digital Radio (with station logos, DAB antenna included), AM/FM Radio (with RDS function)
- Salidas de audio: Front/Rear/Subwoofer pre-amp Salidas
- Entradas: 1 Camera input (adjustable lines), 1 AUX/Video input, 1 AUX/Audio input
- Características especiales: Adjustable boot logos and background images, Internal microphone, Connector for optional external microphone (VNA-MIC-AND), Steering wheel control support (optional adapter required)
- Método de control: Pantalla táctil
- Tipo de servicio del vehículo: Auto
- Fabricante: ESX
- País natal: Porcelana
Información de garantía
The ESX VN1015-MA-DAB-1DIN unit includes a Certificate of Authenticity. For specific warranty terms and conditions, please refer to the documentation provided with your purchase or contact your retailer. Information regarding spare parts availability and guaranteed software updates is not explicitly provided.
Atención al cliente
If you require further assistance or have questions not covered in this manual, please contact your authorized ESX dealer or the retailer from whom you purchased the product. They can provide specialized support and service.