
1. Producto terminadoview
The Jectse TCP/IP 8-Channel Relay Controller is a versatile module designed for remote control applications. It features an RJ45 Ethernet port for TCP/IP communication, allowing web-based access and control of its 8 independent relay channels. This module supports external control outputs and provides status feedback for each relay. It is suitable for various automation and security systems.

Image 1.1: The Jectse TCP/IP 8-Channel Relay Controller.
2. Características
- RJ45 TCP/IP Ethernet Port: Allows network connectivity with configurable IP address.
- Web Server Control: Enables remote access and individual relay control via a web navegador.
- 8 Independent Relay Channels: Each channel rated for 250V/AC 10A.
- 8 External Control Outputs: Active low level outputs for connecting switches or sensors.
- Remote Access Protocol: Provides a protocol for re-engineering, allowing control via Android, tablet, or Windows systems when connected to a router.
- Comentarios sobre el estado: Displays the current operational status of each relay.
- Función de reinicio: Short press for module reset; long press to restore factory settings.
- 485 Network Support: Compatible with 485 networks.
- Internal Circuit Protection: Features an optocoupler to prevent damage from external voltage surge.

Image 2.1: The controller features internal circuit protection with an optocoupler.
3. Especificaciones
| Atributo | Valor |
|---|---|
| Marca | Inyección |
| Número de modelo | Jectses23f6yobwg-02 |
| Vol de funcionamientotage | 9 V ~ 40 V CC |
| Load Capacity (per channel) | 250 V/CA 10 A |
| Dimensiones | 145 x 90 x 40 mm (5.7 x 3.54 x 1.57 pulgadas) |
| Peso del artículo | 240 gramos |
| Fabricante | Inyección |
| País natal | Porcelana |

Image 3.1: Dimensions of the Jectse TCP/IP 8-Channel Relay Controller.
4. Configuración
- Desembalaje: Carefully remove the relay controller and its protective case from the packaging.
- Montaje: The module can be mounted using the integrated clips on the bottom. Ensure a stable and secure installation location.

Imagen 4.1: Abajo view showing mounting clips.
- Conexión de energía: Connect a DC power supply (9V to 40V) to the designated power input terminals (labeled '12v' or similar). Ensure correct polarity to avoid damage.
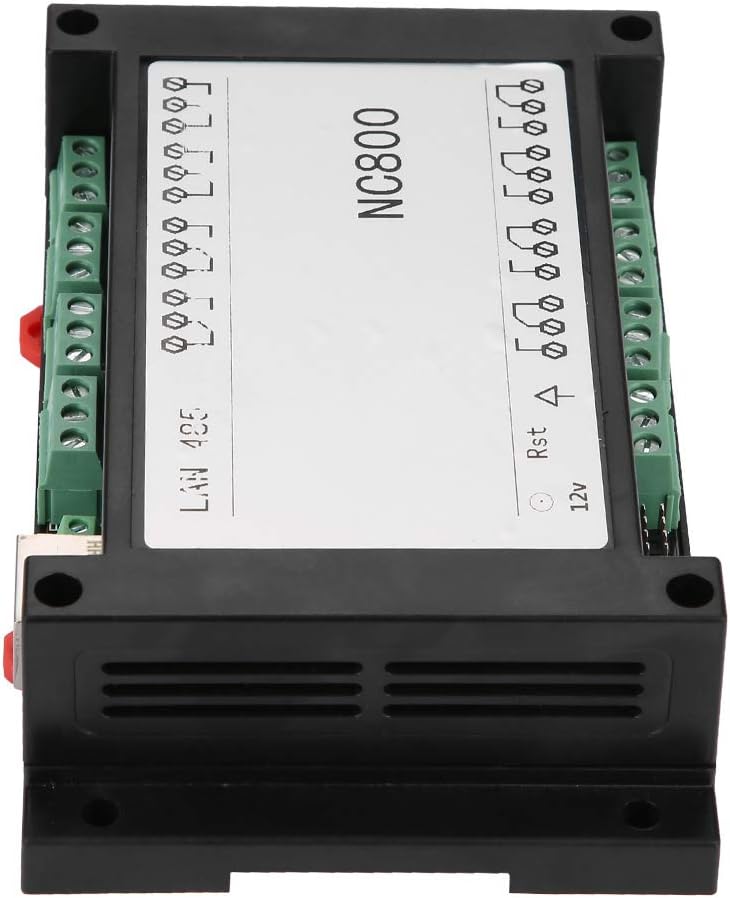
Imagen 4.2: Arriba view showing power input and other connections.
- Conexión Ethernet: Connect a standard RJ45 Ethernet cable from your network router or switch to the Ethernet port on the module.
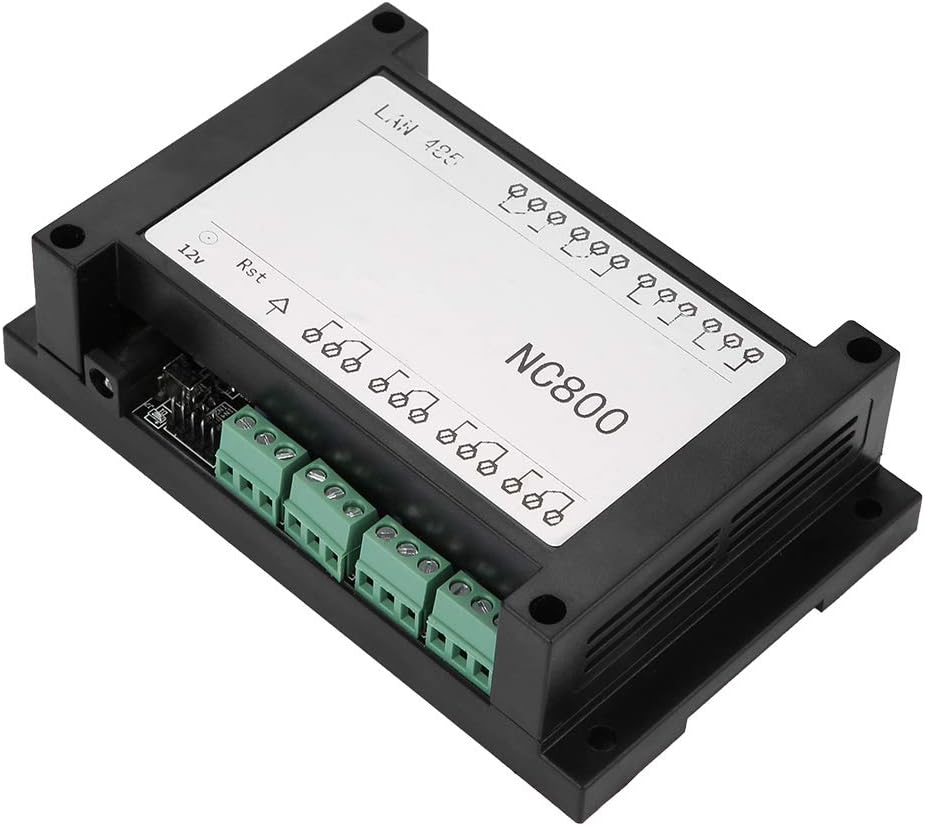
Imagen 4.3: En ángulo view showing Ethernet port and relay terminals.
- Conexiones de relé: Connect the devices you wish to control to the 8 relay output channels. Each channel supports loads up to 250V/AC 10A. Refer to the module's labeling for specific common (COM), normally open (NO), and normally closed (NC) terminals for each relay.
- External Control Outputs: If utilizing external switches or sensors, connect them to the 8 external control output terminals. These outputs operate with an active low level.
- 485 Conexión de red: If integrating into a 485 network, connect the appropriate data cables to the dedicated 485 terminals.
5. Instrucciones de funcionamiento
- Acceso inicial: Once powered and connected to the network, the module can be accessed via its built-in web server. The default IP address may need to be discovered using network scanning tools or by consulting the device's specific documentation.
- Web Interfaz: Abrir una web browser on a computer or mobile device connected to the same network and enter the module's IP address. The web interface will allow you to monitor the status of each relay and control them individually.
- Configuración IP: The IP address of the module can be modified through the web interface to suit your network requirements.
- Mando a distancia: For remote access outside your local network, configure your router to forward the necessary ports to the module's IP address. A protocol is provided for re-engineering, enabling control via Android, tablet, or Windows systems from anywhere with network access.
- Comentarios sobre el estado: El web interface provides real-time status feedback, indicating the current state (on/off) of each relay.
- Función de reinicio:
- Prensa breve: Briefly press the reset button to restart the module.
- Pulsación larga: Press and hold the reset button to restore the module to its factory default settings.
6. Mantenimiento
- Keep the device clean and free from dust accumulation. Use a soft, dry cloth for cleaning.
- Periodically check all cable connections (power, Ethernet, relay, external controls) to ensure they are secure and free from damage.
- Ensure proper ventilation around the module to prevent overheating, especially during continuous operation.
7. Solución de problemas
- Sin energía:
- Check the DC power supply connection and ensure it is within the specified 9V-40V range.
- Verifique que el adaptador de corriente esté funcionando correctamente.
- Sin conexión de red:
- Verify the Ethernet cable connection to both the module and your network device (router/switch).
- Check your router and network settings. Ensure the module's IP address is correct and not conflicting with other devices on your network.
- Try restarting your router and the relay module.
- El relé no conmuta:
- Confirm that the load connected to the relay channel does not exceed the specified capacity of 250V/AC 10A.
- Check the wiring to the controlled device for any loose connections or incorrect wiring.
- Verify that control commands are being sent correctly from the web interface or your custom application.
- Advertencia de seguridad: It is strongly suggested to use the intranet for control instead of external control, as external access may compromise security if not properly secured.
8. Información de seguridad
- Always ensure the power supply is disconnected before making any wiring changes or performing maintenance on the module.
- Do not exceed the specified load capacity of 250V/AC 10A per relay channel to prevent damage to the module and connected devices.
- The module operates with DC voltage (9V-40V) and controls AC loads. Exercise extreme caution when handling electrical connections to avoid electric shock.
- While the internal circuit protection with optocoupler helps prevent external voltage surges, proper grounding and additional surge protection for your overall system are highly recommended.
- Install the device in a dry environment, away from moisture, direct sunlight, and extreme temperatures.
9. Soporte y garantía
For technical support or any inquiries regarding the Jectse TCP/IP 8-Channel Relay Controller, please contact Jectse customer service through their official websitio o el minorista al que le compró el producto.
Warranty information is not explicitly provided in the product details. Please refer to your purchase documentation, the product packaging, or contact the seller directly for specific warranty terms and conditions.