
Ripack 3000
Manual del usuario de la pistola de calor Ripack 3000
Brand: Ripack
Modelo: 3000
1. Introducción
The Ripack 3000 Heat Gun is designed for heavy-duty shrink-wrapping applications, capable of handling up to 100 pallets per day. It is suitable for various sectors including manufacturing, construction, agri-food, and transport/logistics. This manual provides essential information for the safe and efficient operation, maintenance, and troubleshooting of your Ripack 3000 Heat Gun.
The Ripack 3000 features a unique Securipack system, ensuring a high level of safety by automatically detecting gas bottle pressure to prevent overheating. Its stainless steel heat diffuser remains cool during prolonged use, minimizing burn risks. The Securipack system also controls gas hose pressure, automatically cutting off gas flow if the hose is broken. The design prevents air inlet blockages, ensuring optimal safety conditions.
2. Información de seguridad
Always read and understand all safety warnings and instructions before operating the Ripack 3000 Heat Gun. Failure to follow these instructions may result in fire, explosion, electric shock, or serious injury.
- Asegúrese de que haya una ventilación adecuada al utilizar la pistola de calor.
- No apunte la pistola de calor hacia personas, animales o materiales inflamables.
- Use equipo de protección personal (EPP) adecuado, incluidos guantes resistentes al calor y protección para los ojos.
- Regularly inspect the gas hose and connections for leaks or damage. Replace damaged components immediately.
- Do not modify the heat gun or its components. Use only genuine Ripack replacement parts.
- Store the heat gun and propane cylinder in a cool, dry, well-ventilated area, away from direct sunlight and ignition sources.
- Familiarize yourself with the Securipack system's safety features, including automatic pressure detection and gas cut-off.
3. ¿Qué hay en la caja?
Your Ripack 3000 Heat Gun kit includes the following components:
- Ripack 3000 Heat Gun with back-up ignitor
- 26-foot propane hose
- Securipack - combined fail-safe regulator
- High impact plastic case
- Wrench for tightening fittings
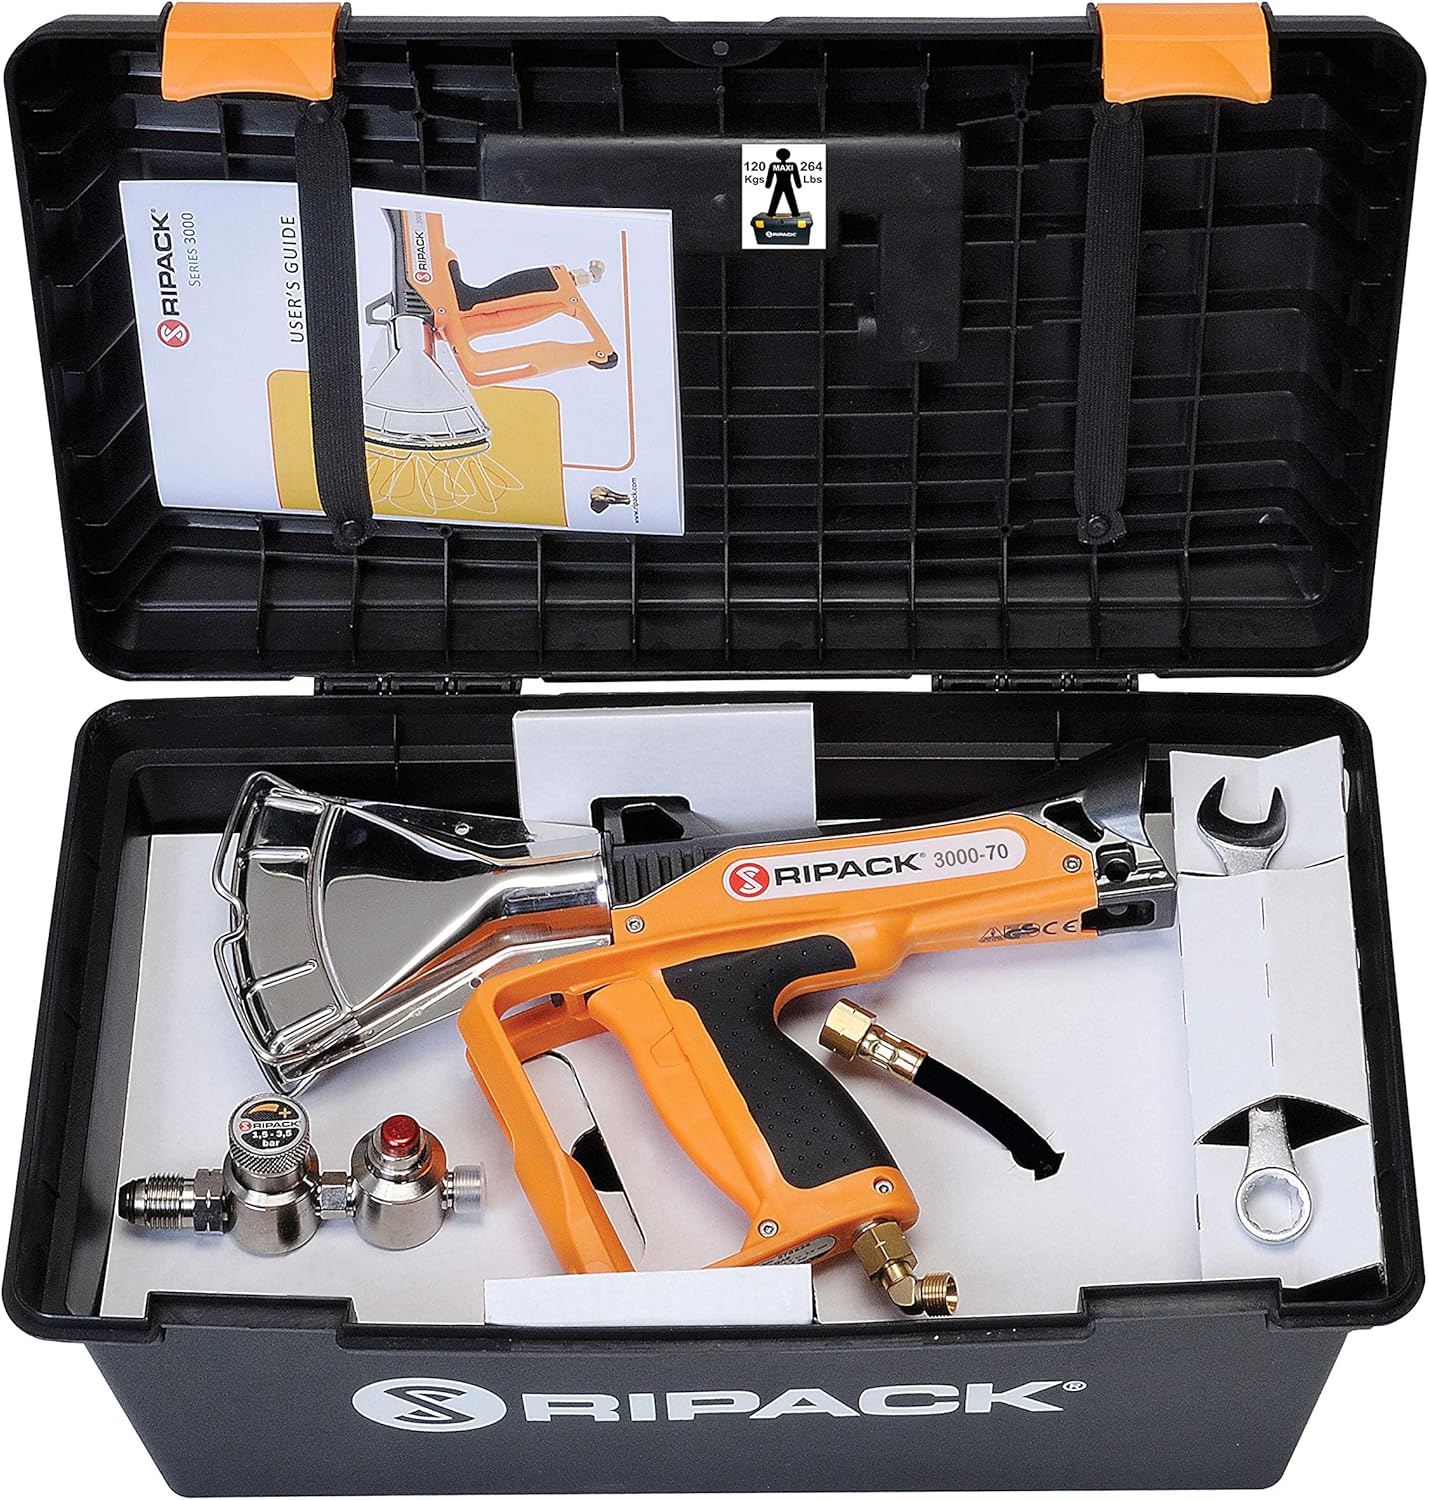
Image: The Ripack 3000 Heat Gun kit, neatly organized within its durable black plastic carrying case. The image displays the heat gun, propane hose, regulator, and wrench, along with the user guide.
4. Configuración
- Desempaquetar componentes: Carefully remove all items from the high impact plastic case.
- Connect Regulator to Propane Cylinder: Attach the Securipack regulator to your propane gas cylinder. Ensure the connection is tight and secure using the provided wrench.
- Connect Hose to Regulator and Heat Gun: Connect one end of the 26-foot propane hose to the regulator and the other end to the inlet on the Ripack 3000 Heat Gun. Tighten all connections firmly with the wrench to prevent gas leaks.
- Compruebe si hay fugas: Before opening the gas cylinder valve, ensure all connections are secure. Once connected, slowly open the propane cylinder valve. Apply a leak detection solution (soapy water) to all connections. Bubbles indicate a leak. If a leak is detected, close the gas valve immediately, tighten the connection, and re-test. Do not operate the heat gun if a leak is present.
5. Instrucciones de funcionamiento

Image: The Ripack 3000 Heat Gun, showcasing its ergonomic design and the prominent stainless steel heat diffuser. The tool is primarily orange and black, with the Ripack logo visible on the side.
- Encendido: With the propane cylinder valve open, press the ignition button on the heat gun. The ignitor will spark, and the flame will ignite. If the gun does not ignite, release the button, wait a few seconds, and try again.
- Ajuste de la llama: The Ripack 3000 is designed for optimal performance. The flame intensity is regulated by the Securipack system. Do not attempt to manually adjust the flame beyond its intended operation.
- Shrink-Wrapping Technique:
- Hold the heat gun approximately 12-18 inches (30-45 cm) from the shrink film.
- Move the heat gun in a steady, sweeping motion across the surface of the film.
- Work from the bottom of the pallet upwards, ensuring even heat distribution.
- The 360° rotating nozzle allows for flexible positioning and access to all sides of the pallet.
- Observe the film as it shrinks, ensuring a tight, wrinkle-free finish. Avoid overheating any single area.
- Apagando: When finished, close the valve on the propane gas cylinder first. Allow the heat gun to burn off any remaining gas in the hose until the flame extinguishes. Then, release the ignition button.
- Enfriarse: Allow the heat gun to cool completely before storing. The stainless steel heat diffuser is designed to stay cool, but the nozzle area will still be hot immediately after use.
6. Mantenimiento
Regular maintenance ensures the longevity and safe operation of your Ripack 3000 Heat Gun.
- Limpieza: Keep the heat gun clean and free from dust and debris. Use a dry cloth to wipe down the exterior. Do not use abrasive cleaners or solvents.
- Inspección de mangueras y reguladores: Before each use, inspect the propane hose and regulator for any signs of wear, cracks, cuts, or damage. Replace immediately if any damage is found.
- Inspección de boquillas: Periodically check the nozzle for any blockages or carbon buildup. Ensure the air inlets are clear to maintain proper combustion and safety.
- Almacenamiento: Store the heat gun in its original high impact plastic case in a cool, dry, well-ventilated area, away from direct sunlight, extreme temperatures, and ignition sources. Disconnect the propane cylinder when storing for extended periods.
7. Solución de problemas
| Problema | Posible causa | Solución |
|---|---|---|
| Heat gun does not ignite. |
|
|
| Llama débil o inconsistente. |
|
|
| Gas leak detected (hissing sound, smell of gas). |
|
|
8. Especificaciones
| Característica | Detalle |
|---|---|
| Modelo | 3000 |
| Marca | Ripack |
| Fuente de poder | Alimentado por gas (propano) |
| Salida BTU | 260,000 BTU |
| Quétage (Equivalente) | 75480 vatios |
| Peso del artículo | 0.01 Ounces (Note: This seems to be a data entry error, actual weight is likely higher for a tool of this type) |
| Dimensiones del producto | 18 x 13 x 6 pulgadas |
| Material | Plastic (body), Stainless Steel (diffuser) |
| Color | Naranja |
| Nozzle Feature | 360° rotating nozzle |
| Sistema de seguridad | Securipack (automatic pressure detection, gas cut-off) |
9. Garantía y soporte
Ripack products are manufactured to high-quality standards and are designed for durability and performance. For specific warranty details, please refer to the warranty card included with your product or visit the official Ripack websitio.
For technical support, replacement parts, or any inquiries regarding your Ripack 3000 Heat Gun, please contact Ripack customer service. Contact information can typically be found on the product packaging, the official Ripack websitio, o a través de su distribuidor autorizado.
Cuando se comunique con el soporte técnico, tenga a mano el número de modelo del producto (3000) y la información de compra.
Ask a question about this manual
Ask about setup, troubleshooting, compatibility, parts, safety, or missing instructions. Manuals+ will review the question and use this page’s manual context to help answer it.