
1. Producto terminadoview
This manual provides instructions for the Ripack Heat Gun Swivel Connector, Part #148043. This component is designed to provide flexible movement for the heat gun hose connection, enhancing maneuverability during operation. It is compatible with Ripack heat gun models 2000, 2200, and 3000.
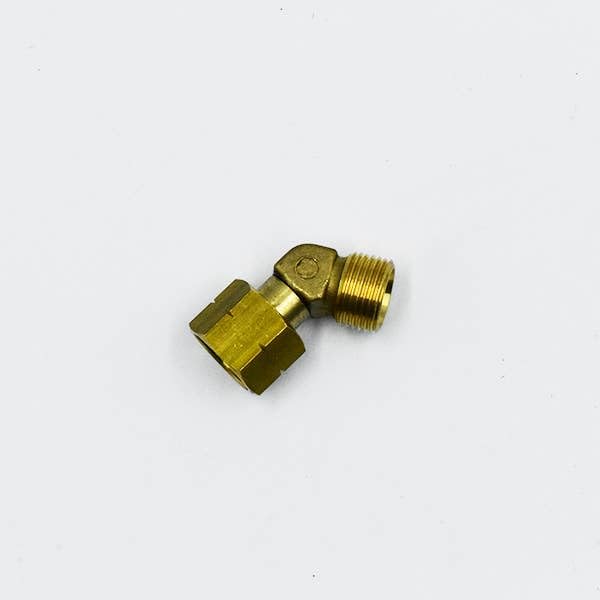
Figura 1: Ripack Heat Gun Swivel Connector (Part #148043). This image shows the brass swivel connector from a front-facing perspective, highlighting its threaded ends and central swivel joint.
2. Configuración e instalación
The swivel connector facilitates a flexible connection between the heat gun and its gas supply hose. Follow these steps for proper installation:
- Preparación: Ensure the heat gun is disconnected from its fuel source and has completely cooled down.
- Connect to Heat Gun: Thread one end of the swivel connector onto the heat gun's gas inlet. Hand-tighten first to ensure proper alignment.
- Conecte la manguera: Attach the gas supply hose to the other end of the swivel connector. Hand-tighten to start.
- Conexiones seguras: Use an appropriate wrench to securely tighten both connections. Do not overtighten, as this can damage threads or seals. The connections should be firm and leak-free.
- Comprobación de fugas: After installation, reconnect the gas supply and perform a leak check using a suitable leak detection solution (e.g., soapy water). Apply the solution to all connections. The presence of bubbles indicates a leak. If a leak is detected, immediately shut off the gas supply and re-tighten connections or replace faulty components.
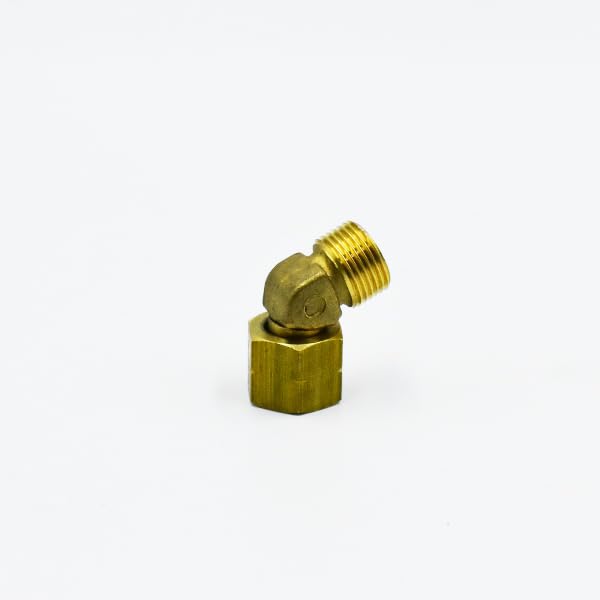
Figura 2: Swivel Connector, side view. This image displays the swivel connector from a side angle, showing the hexagonal nuts for wrench tightening and the articulation of the joint.
3. Operación
Once installed and checked for leaks, the swivel connector allows the heat gun to rotate freely at the connection point with the gas hose. This flexibility reduces hose kinking and improves the overall handling and maneuverability of the heat gun during operation. Ensure the swivel mechanism moves smoothly without obstruction during use.
4. Mantenimiento
Regular inspection and maintenance are crucial for the safe and efficient operation of your Ripack heat gun system:
- Inspección visual: Before each use, visually inspect the swivel connector for any signs of wear, corrosion, cracks, or other damage.
- Thread and Seal Check: Examine the threads and sealing surfaces for integrity. Ensure no debris is lodged in the mechanism.
- Función giratoria: Verify that the connector swivels freely and smoothly without excessive play or stiffness.
- Reemplazo: If any damage, excessive wear, or restricted movement is observed, replace the connector immediately with a genuine Ripack Part #148043 to ensure safe and reliable operation.
5. Solución de problemas
- Fuga de gas: If gas leakage is detected around the connector, immediately shut off the gas supply. Check that the connector is properly tightened and that any sealing washers (if applicable) are in good condition and correctly seated. If leakage persists after re-tightening, the connector may be faulty and requires replacement.
- Restricted Swivel Movement: If the connector does not swivel freely, inspect for any debris, dirt, or damage that might be impeding its movement. Do not attempt to force the swivel. If the issue cannot be resolved by cleaning, replacement may be necessary.
6. Especificaciones
- Dimensiones del producto: 2 x 1.5 x 0.75 pulgadas
- Número de modelo del artículo: Trabajo social-902-148043
- Fabricante: Ripack
- ASIN: B087H3VBKT
7. Parts Diagrams and Identification
The Ripack Swivel Connector, Part #148043, is an integral component of Ripack heat gun systems. Refer to the following diagrams for its location within the Ripack 2000 and Ripack 2200 models.

Figura 3: Ripack 2000 Heat Gun Exploded Diagram. Part #148043, the swivel connector, is located near the base of the handle, connecting to the gas hose.

Figura 4: Ripack 2200 Heat Gun Exploded Diagram. Part #148043, the swivel connector, is located near the base of the handle, connecting to the gas hose.
Parts List Reference
The following table provides a detailed list of parts, including the Swivel Connector (Part #148043).
| Code Article | Designación |
|---|---|
| 131003 | Piezo igniter for RIPACK 2200 without extension |
| 131072 | Encendedor piezoeléctrico para RIPACK 2200 con extensión |
| 132038 | Handle front block |
| 133132 | Llave inglesa 19 |
| 134046 | SECURIPACK- including adjustable pressure regulator and double safety, US-BS standard |
| 134050 | Half-handle, right |
| 134051 | Half-handle, left |
| 135045 | Trigger spacer |
| 137013 | Flute pin 3x6 for RIPACK 2200 before serial No. 09.197868 (week 04/09) |
| 137044 | Desencadenar |
| 140054 | O-RING on SECURIPACK US/BS |
| 140061 | O-ring - inside Ø 28.24 x Ø 2.62 UL |
| 143005 | Double connector 3/8 G |
| 145004 | Jet cover nut |
| 145005 | Jet cover nut special for natural gas |
| 148001 | Fan washer Ø 4 |
| 148043 | Conector giratorio |
| 148044 | Trigger return spring |
| 148082 | Stainless steel washer Ø 47.5 for air reducer for natural gas conversion kit |
| 148086 | Male mains connector 3/8 G 15/21 (1/2) for natural gas conversion kit |
| 150038 | Gas brass tube |
| 152001 | Stainless steel slotted screw TC M3x4 on RIPACK 2200 before serial No. 09.197868 (week 04/09) |
| 152032 | Slotted screw TC M4x8 |
| 152041 | Nylon setscrew M8x6 - Tap adjustment |
| 152052 | Tornillo CHc M4x16 |
| 152065 | Tornillo CHc M4x25 |
| 152066 | Tornillo CHc M4x30 |
| 152118 | Safety valve 3/8 5 kg/h for natural gas conversion kit |
| 152136 | Slotted screw TC M3x12 for 2200 after serial No. 09.197869 (week 05/09) |
| 232062 | Bujía |
8. Garantía y soporte
For warranty information or technical support regarding the Ripack Heat Gun Swivel Connector (Part #148043) or other Ripack products, please contact Ripack customer service or your authorized Ripack dealer. Refer to your heat gun's main instruction manual for complete warranty details and contact information.