BESDER ZX-X2-W/200W
BESDER Smart Home Security FULL HD 1080P IP WiFi Camera User Manual
Model: ZX-X2-W/200W
Introducción
Thank you for choosing the BESDER Smart Home Security Camera. This manual provides detailed instructions for setting up, operating, and maintaining your camera. Please read this manual carefully before use to ensure proper functionality and safety.
This camera offers Full HD 1080P resolution, Pan/Tilt functionality, Two-Way Audio, and IR Night Vision for comprehensive home surveillance. It supports both wired and WiFi connections, mobile monitoring via iOS and Android apps, and cloud services.
Contenido del paquete
Por favor, revise el contenido del paquete al abrirlo. Si falta algún artículo o está dañado, contacte con atención al cliente.
- 1 x BESDER IP Camera 1080P
- 1 x Manual de usuario
- 1 fuente de alimentación de 5 V CC.
- 1 x Soporte pequeño
- Tornillos de montaje y tacos de pared
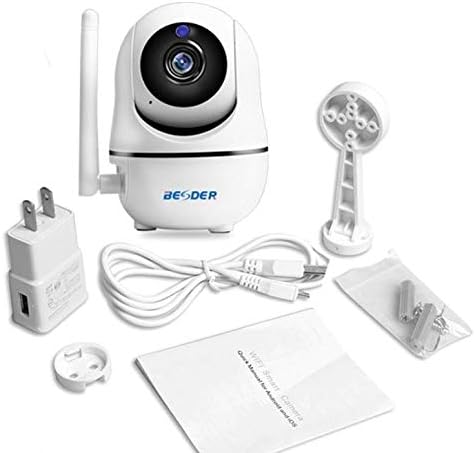
Figura 1: Package contents of the BESDER Smart Home Security Camera, showing the camera unit, power adapter, USB cable, mounting bracket, screws, and the user manual.
Producto terminadoview
Familiarize yourself with the various components of your BESDER Smart Home Security Camera.
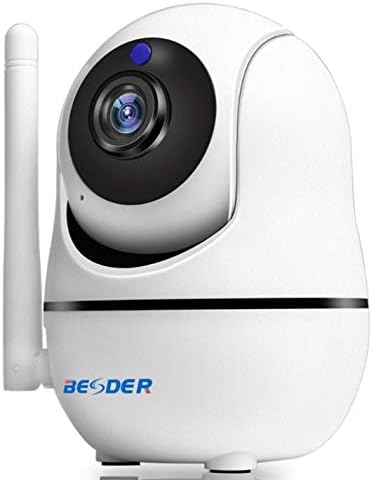
Figura 2: Frente view of the BESDER Smart Home Security Camera, highlighting the camera lens, infrared LEDs for night vision, and the status indicator light.

Figura 3: Trasero view of the BESDER Smart Home Security Camera, detailing the memory card slot (for microSD up to 128GB), reset button, built-in speaker, DC 5V power input, and the Ethernet network port for wired connection.
Componentes clave:
- Lente de la cámara: Captura vídeo footage.
- LED IR: Proporciona iluminación infrarroja para visión nocturna.
- Luz indicadora de estado: Indicates camera status (e.g., power on, network connection).
- Micrófono: For audio input and two-way audio communication.
- Vocero: For audio output and two-way audio communication.
- Ranura para tarjeta de memoria: Supports microSD cards up to 128GB for local storage.
- Botón de reinicio: Se utiliza para restaurar la configuración de fábrica.
- Entrada de energía DC 5V: Se conecta al adaptador de corriente proporcionado.
- Puerto de red (RJ45): Para conexión Ethernet por cable.
Configuración
1. Encendido
- Connect the DC 5V power adapter to the camera's power input port.
- Conecte el adaptador de corriente a una toma de pared.
- The camera will power on, and the status indicator light will illuminate. Wait for the camera to complete its self-test (it may pan and tilt).
2. Network Connection (Wired or Wireless)
The camera supports both wired (Ethernet) and wireless (Wi-Fi) connections.
Conexión por cable:
- Connect one end of an Ethernet cable (not included) to the camera's network port.
- Conecte el otro extremo del cable Ethernet a su enrutador o conmutador de red.
- La cámara se conectará automáticamente a la red.
Conexión inalámbrica (Wi-Fi):
- Download the recommended mobile application (e.g., XMEYE or iCsee) from your device's app store (iOS or Android).
- Registre una cuenta e inicie sesión.
- Follow the in-app instructions to add your camera. This typically involves scanning a QR code on the camera or using a Wi-Fi configuration method (e.g., AP mode, SmartLink).
- Ensure your mobile device is connected to the 2.4GHz Wi-Fi network you intend to connect the camera to.
- Enter your Wi-Fi password when prompted by the app.
- The camera will attempt to connect to your Wi-Fi network. Once connected, the status indicator light will change (refer to app or camera manual for specific light indications).
3. Instalación de la tarjeta MicroSD (opcional)
- Asegúrese de que la cámara esté apagada antes de insertar o quitar la tarjeta microSD.
- Locate the microSD card slot (refer to Figure 3).
- Inserte suavemente la tarjeta microSD en la ranura con los contactos dorados hacia abajo hasta que encaje en su lugar.
- Power on the camera. You may need to format the SD card via the mobile app settings for optimal performance.
Instrucciones de funcionamiento
1. Mobile Monitoring (iOS/Android)
- Open the XMEYE or iCsee app on your smartphone.
- Seleccione su cámara de la lista de dispositivos para view la transmisión en vivo.
- Use the on-screen controls to pan (horizontal rotation) and tilt (vertical rotation) the camera lens.
- Acceder a la reproducción de alimentos grabadostage stored on the microSD card or cloud service.
2. Audio bidireccional
- Mientras viewAl ver la transmisión en vivo en la aplicación, toque el ícono del micrófono para hablar a través del altavoz de la cámara.
- Toque el icono del altavoz para escuchar el audio del micrófono de la cámara.
3. Visión nocturna por infrarrojos
- The camera automatically switches to IR night vision mode in low-light conditions.
- The IR LEDs will illuminate, providing clear black and white video up to 15 meters.
4. Detección de movimiento y alarmas
- Habilite la detección de movimiento en la configuración de la aplicación.
- Configure sensitivity levels and detection zones as needed.
- When motion is detected, the camera can send push notifications to your phone and/or record footage.
5. Servicio en la nube
- The camera supports cloud storage services (subscription may be required).
- Refer to the mobile app for details on activating and managing cloud storage.
Mantenimiento
- Limpieza: Utilice un paño suave y seco para limpiar la lente y el cuerpo de la cámara. No utilice limpiadores líquidos ni aerosoles.
- Actualizaciones de firmware: Regularly check for firmware updates via the mobile app to ensure optimal performance and security.
- Colocación: Ensure the camera is placed in a location where it is protected from direct water exposure and extreme temperatures.
- Gestión de tarjetas SD: Periodically check the status of your microSD card. If it becomes full, older recordings may be overwritten, or recording may stop.
Solución de problemas
| Problema | Posible causa | Solución |
|---|---|---|
| Cámara fuera de línea/No se puede conectar a Wi-Fi | Contraseña de Wi-Fi incorrecta; Cámara demasiado lejos del enrutador; Problemas con el enrutador; Red Wi-Fi de 5 GHz. |
|
| Sin imagen/pantalla negra | Power issue; Network issue; Lens obstruction. |
|
| El audio bidireccional no funciona | Micrófono/altavoz deshabilitados en la aplicación; volumen demasiado bajo; latencia de red. |
|
| La detección de movimiento no se activa | Detección de movimiento deshabilitada; Sensibilidad demasiado baja; Zona de detección incorrecta. |
|
| La tarjeta SD no graba | Tarjeta SD llena/dañada; Formato incorrecto; Tarjeta SD no insertada correctamente. |
|
Presupuesto
| Característica | Detalle |
|---|---|
| Nombre del modelo | BESDER Smart Home Security |
| Referencia del fabricante | ZX-X2-W/200W |
| Resolución de vídeo | Full HD 1080P (1920x1080) |
| Sensor | 1/2.8'' F22 CMOS sensor (for 1080P) |
| Compresión de vídeo | H.264, supports dual stream, 0.1 – 6 Mpbs |
| Lente | 3.6 mm G7 (default) |
| Distancia de visión nocturna por infrarrojos | Max 15 meters (6 IR LEDs) |
| Conectividad | Wi-Fi (2.4 GHz), Ethernet con cable |
| Almacenamiento | MicroSD card up to 128GB (not included), Cloud Service |
| Audio | Audio bidireccional (micrófono y altavoz integrados) |
| Monitoreo móvil | iOS, Android (APP: XMEYE or iCsee) |
| Fuente de alimentación | 5 V CC, 2 A |
| Temperatura de trabajo | -5 a 60 °C (23 - 140 °F) |
| Dimensiones | 6.39 x 4.33 x 3.11 cm (dimensiones aproximadas del paquete) |
Garantía y soporte
For warranty information and technical support, please refer to the contact details provided with your purchase or visit the official BESDER webSitio. Conserve su recibo de compra como comprobante de compra.
Fabricante: BESDER
Ask a question about this manual
Ask about setup, troubleshooting, compatibility, parts, safety, or missing instructions. Manuals+ will review the question and use this page’s manual context to help answer it.