
1. Producto terminadoview
This HOMCOM shoe cabinet is designed to provide an organized storage solution for your footwear. Its slim design makes it suitable for various spaces, including hallways and entryways, helping to keep your home tidy and shoes out of sight. The cabinet features three compartments, each with adjustable internal dividers, offering storage for up to 18 pairs of shoes.

Image 1.1: The HOMCOM shoe cabinet in a typical home environment, showcasing es delgado profile and modern design.
2. Información de seguridad
Please read all safety instructions before assembly and use. Failure to follow these instructions may result in injury or damage to the product.
- Peligro de vuelco: To prevent unintended tipping, it is strongly recommended to fix the furniture to the wall using the provided anti-tip hardware.
- Límite de peso: Do not exceed the maximum load capacity of 15 kg (33 lbs) for the entire unit. Overloading can compromise stability and safety.
- Asamblea: Monte la unidad sobre una superficie suave y limpia para evitar rayones. Asegúrese de que todos los tornillos y fijaciones estén bien apretados antes de usarla.
- Niños: Keep children away from the assembly area. Small parts can be a choking hazard. Do not allow children to climb on or play with the cabinet.
3. Contenido del paquete
Verifique que todos los componentes estén presentes antes de comenzar el ensamblaje. Si alguna pieza falta o está dañada, comuníquese con atención al cliente.
- Paneles del gabinete (superior, inferior, laterales, posterior)
- Drawer fronts and internal mechanisms
- Adjustable dividers
- Hardware pack (screws, dowels, cam locks, handles, protective pads, anti-tip kit)
- Instrucciones de montaje
4. Configuración y montaje
Follow these steps carefully for proper assembly. Two people are recommended for assembly.
- Desembalaje e identificación de las piezas: Lay out all components on a clean, soft surface. Refer to the parts list in the included assembly guide to identify each piece.
- Ensamblar el marco principal: Connect the side panels to the top and bottom panels using the provided hardware (e.g., cam locks and dowels). Ensure the back panel groove is correctly aligned.
- Instalar mecanismos de cajones: Attach the drawer runners and pivot mechanisms to the inside of the cabinet frame according to the instructions.
- Ensamblar cajones: Attach the internal dividers to the drawer fronts. The dividers have 3 adjustable positions to accommodate different shoe sizes.
- Coloque las almohadillas protectoras: Apply the protective pads to the bottom of the cabinet feet to prevent floor scratches.
- Fijar a la pared (recomendado): Position the cabinet in its desired location. Use the anti-tip kit to secure the cabinet to a wall stud. This is crucial for stability and safety.
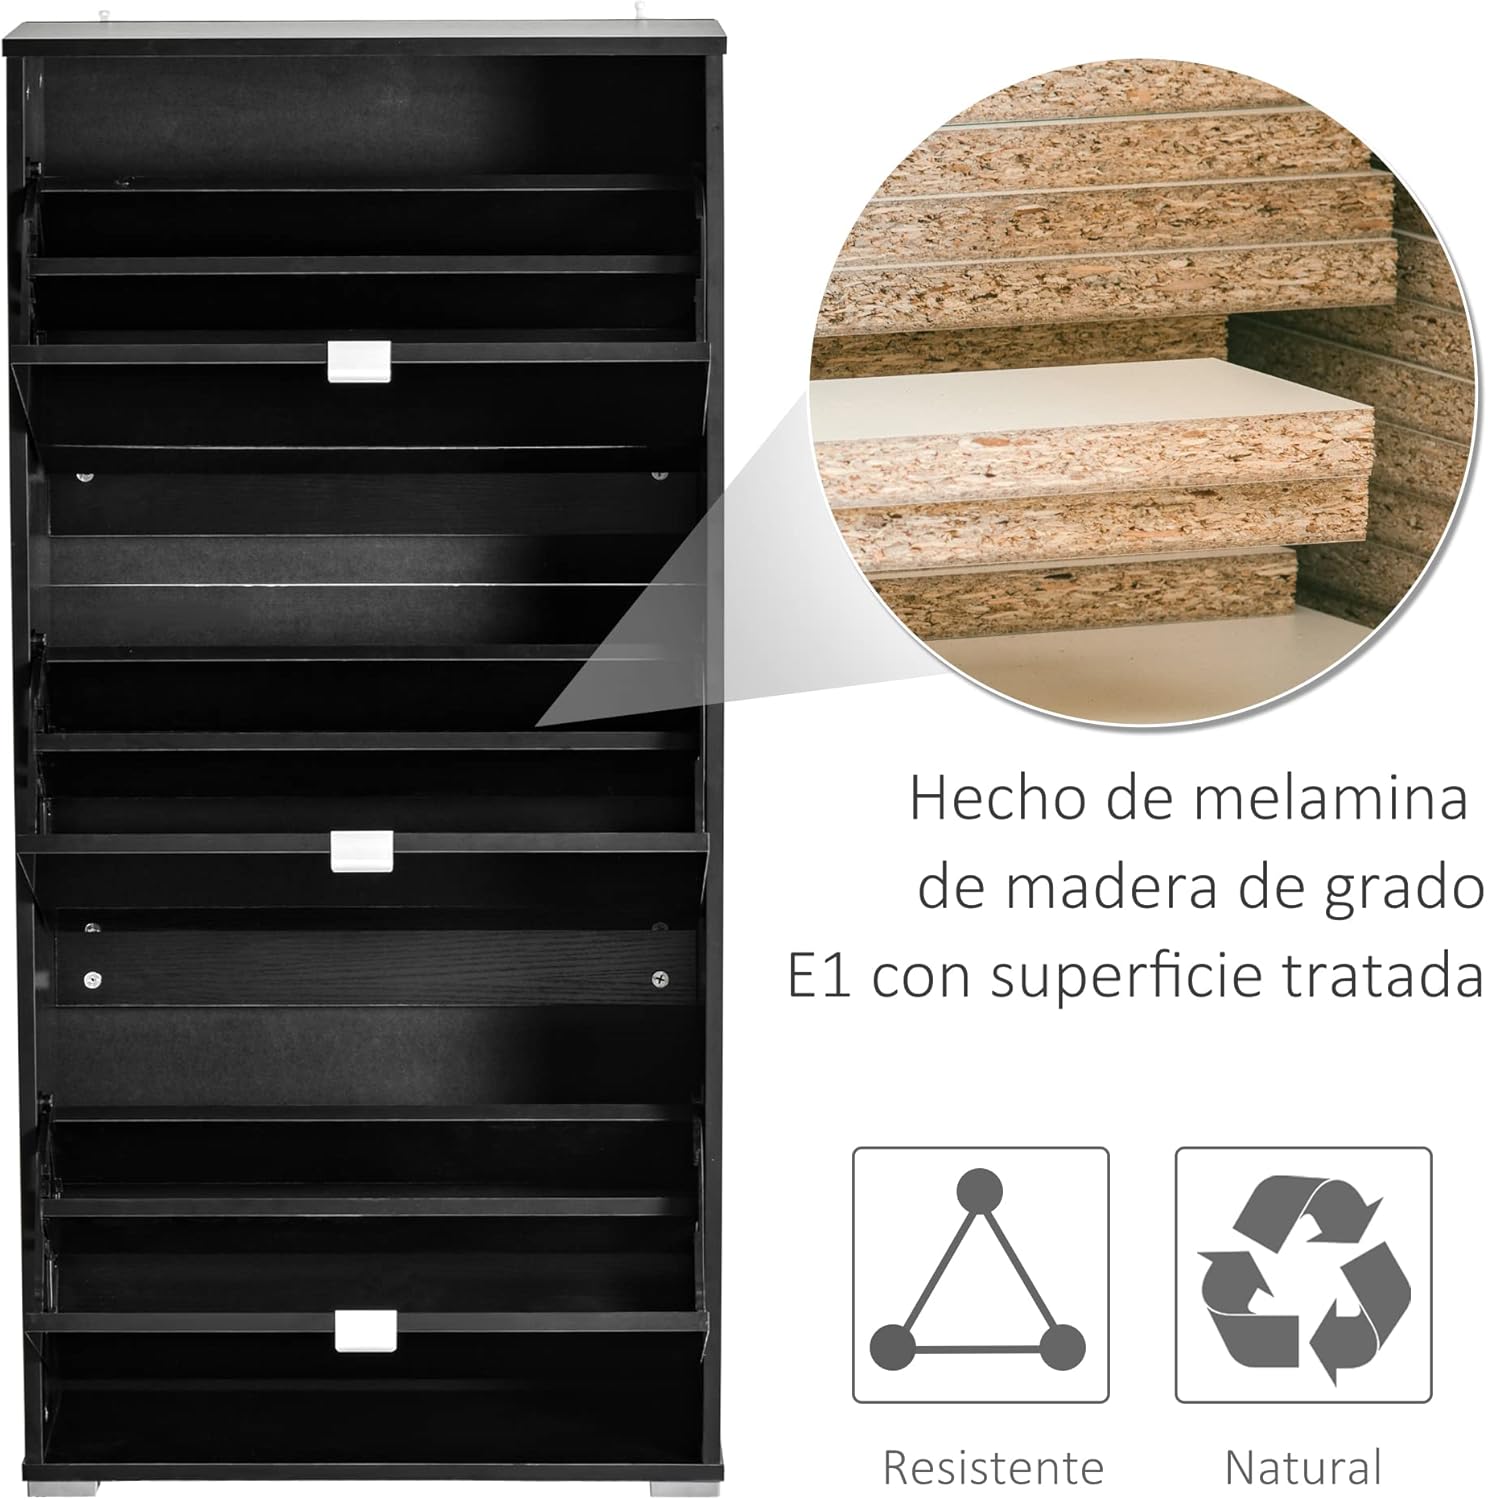
Imagen 4.1: Interior view of the cabinet, highlighting the E1 grade melamine wood material and adjustable shelf positions.
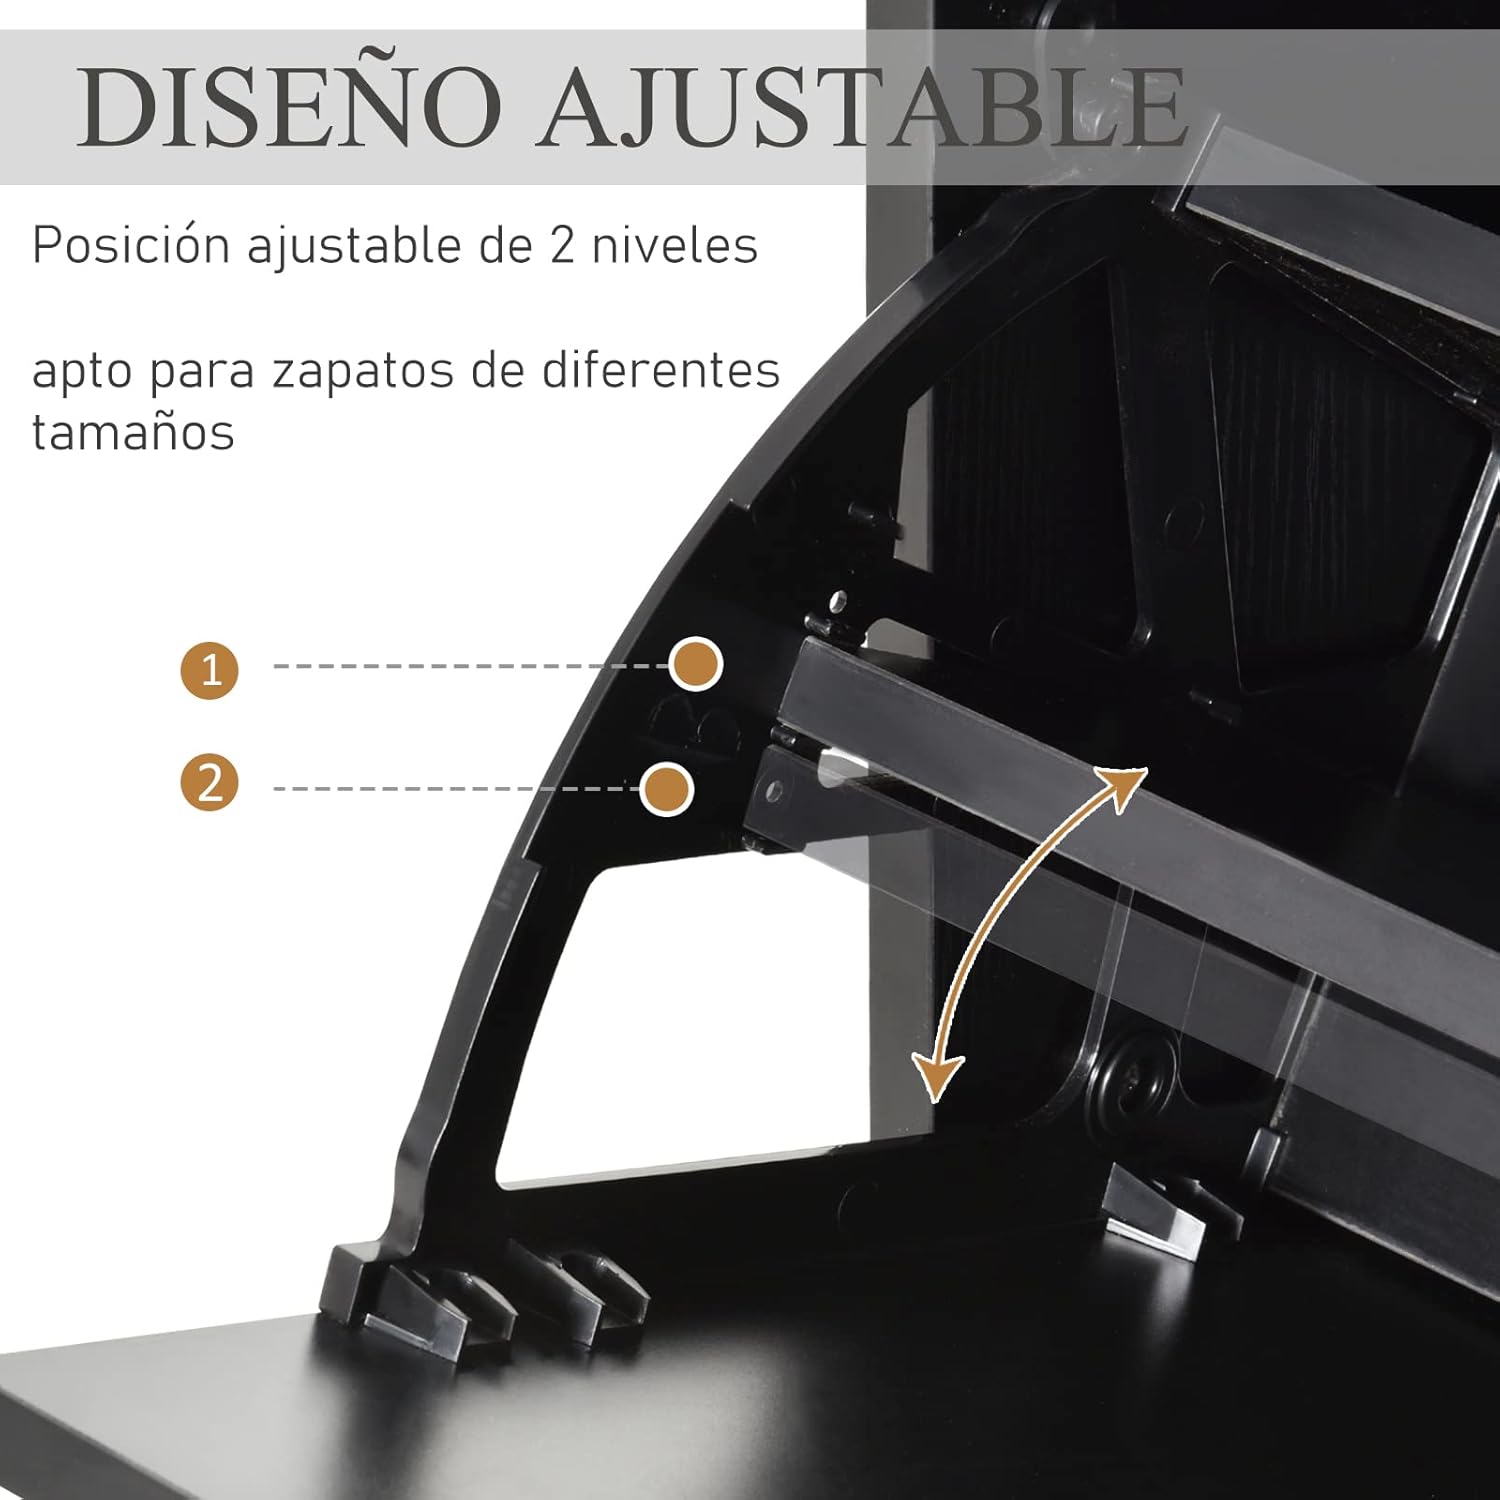
Image 4.2: Detail of the adjustable divider design, allowing customization for various shoe types and sizes.
5. Instrucciones de funcionamiento
The HOMCOM shoe cabinet is designed for simple and efficient use.
- Apertura de cajones: Gently pull the handle on each drawer front to open the compartment. The drawers pivot outwards.
- Almacenamiento de zapatos: Place shoes on the internal dividers. Each compartment can hold multiple pairs depending on shoe size and the divider's position. The double-level design maximizes storage.
- Ajuste de divisores: To adjust the height of the internal dividers, carefully remove them and reinsert them into one of the 3 available slots to best fit your footwear.
- Cerrar cajones: Push the drawer front back into the cabinet until it is flush with the main frame.

Image 5.1: The shoe cabinet with a drawer open, demonstrating how shoes are stored on the internal divider.
6. Mantenimiento
Regular maintenance will help prolong the life and appearance of your shoe cabinet.
- Limpieza: Limpie las superficies del gabinete con un paño suave y seco.amp paño. Evite utilizar productos químicos fuertes o limpiadores abrasivos, ya que pueden dañar el acabado.
- Limpiar el polvo: Quite el polvo periódicamente con un paño seco y suave.
- Comprobación del hardware: Revise periódicamente todos los tornillos y fijaciones para asegurarse de que estén bien apretados. Vuelva a apretarlos si es necesario.
- Evite la humedad: Do not expose the cabinet to excessive moisture or direct sunlight, which can cause warping or fading.
7. Solución de problemas
Si tiene algún problema con su zapatero, consulte las siguientes soluciones comunes:
- Los cajones no cierran correctamente:
- Check for obstructions inside the drawer or along the closing mechanism.
- Ensure shoes are not overhanging the dividers, preventing the drawer from closing flush.
- Verify that the drawer mechanisms are correctly installed and not damaged.
- El gabinete se siente inestable:
- Asegúrese de que todos los tornillos de montaje estén bien apretados.
- Confirm the cabinet is placed on a level surface.
- Verifique que el kit antivuelco esté correctamente instalado y fijado a la pared.
- Arañazos en el suelo:
- Ensure the protective pads are correctly attached to all feet of the cabinet.
8. Especificaciones
| Característica | Detalle |
|---|---|
| Marca | HOMCOM |
| Número de modelo | 837-060BK |
| Color | Negro |
| Material | Engineered Wood (E1 grade melamine) |
| Dimensiones generales (LxWxH) | 60 x 26 x 124 cm (23.6 x 10.2 x 48.8 pulgadas) |
| Capacidad de peso | 15 kg (33 libras) |
| Numero de cajones | 3 |
| Capacidad del zapato | Up to 18 pairs (depending on shoe size) |
| Características especiales | Adjustable Dividers, Slim Design, Anti-tip Mechanism |
| Tipo de montaje | Floor Mount (Wall-mountable for safety) |
| Uso recomendado | Shoe storage in entryways, hallways, living rooms |

Image 8.1: Dimensional drawing of the shoe cabinet.
9. Garantía y soporte
For warranty information or customer support, please refer to the documentation included with your purchase or contact the retailer where the product was acquired. Please have your model number (837-060BK) and purchase date available when contacting support.