1. Introducción
Thank you for choosing the ASD 2x2 LED Flat Panel Light Standard Series. This manual provides essential information for the safe installation, operation, and maintenance of your new LED panel light. Please read this manual thoroughly before installation and retain it for future reference.

Image 1.1: ASD 2x2 LED Flat Panel Light Standard Series, showing the product in its packaging.
2. Información de seguridad
Para reducir el riesgo de muerte, lesiones personales o daños a la propiedad por incendio, descarga eléctrica, caída de piezas, cortes/abrasiones y otros peligros, lea todas las advertencias e instrucciones incluidas en la caja del dispositivo y en todas las etiquetas del dispositivo.
- La instalación debe ser realizada por un electricista calificado de acuerdo con el Código Eléctrico Nacional y los códigos locales.
- Desconecte la energía en el fusible o disyuntor antes de realizar la instalación o el mantenimiento.
- Asegúrese de que el volumen de suministrotage es correcto comparándolo con la información de la etiqueta de la luminaria.
- Do not install in areas where the operating temperature exceeds the fixture's rated ambient temperature.
- Este accesorio es adecuado para damp locations. Do not use in direct contact with water.
- No manipule artefactos energizados con las manos mojadas.
3. Producto terminadoview y especificaciones
The ASD 2x2 LED Flat Panel Light is designed for efficient and uniform illumination in commercial and indoor settings. It features a durable construction and advanced LED technology.
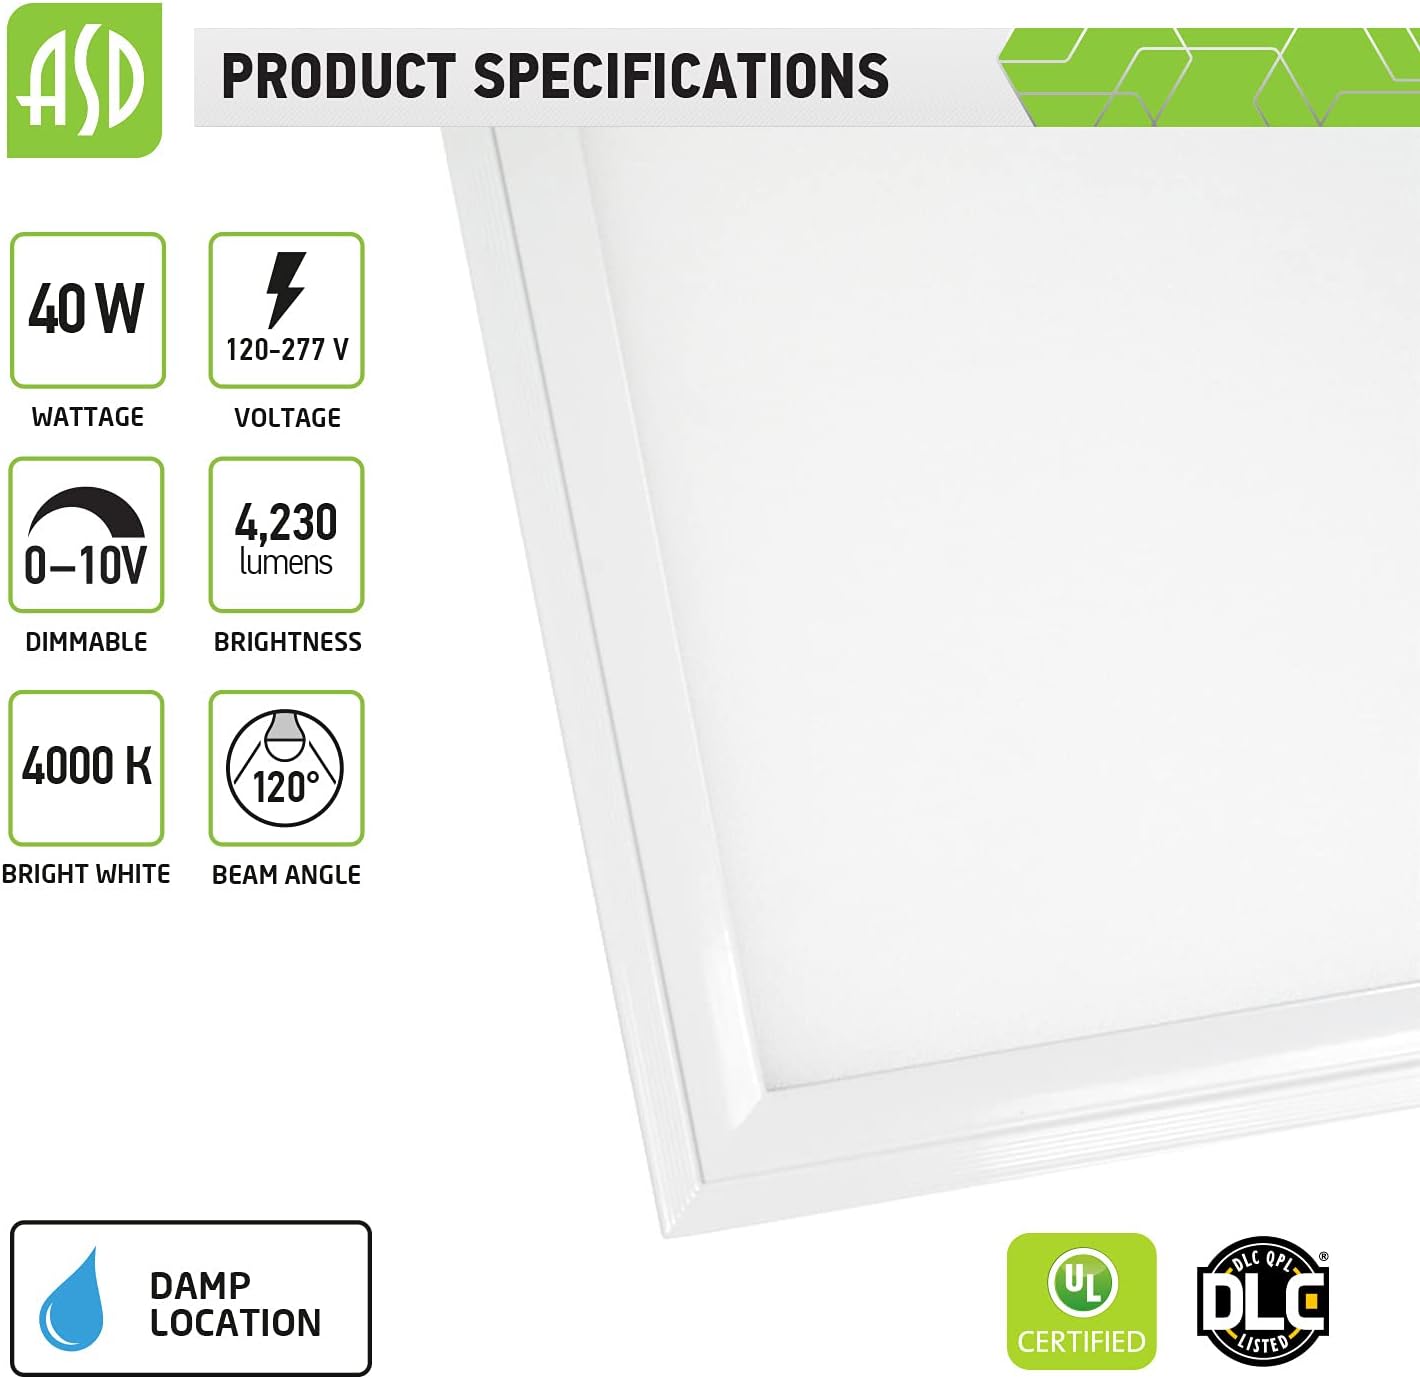
Image 3.1: Detailed product specifications including wattagmi, volumentage, lumens, and color temperature.
3.1. Especificaciones técnicas
| Especificación | Valor |
|---|---|
| Quétage | 40 W |
| Volumentage | 120-277 V |
| Salida de lúmenes | 4230 lúmenes |
| Temperatura de color | 4000K (blanco brillante) |
| Regulable | 0-10 V |
| Ángulo del haz | 120° |
| Certificaciones | cULus Listed, DLC Certified |
| Calificación de la ubicación | Damp Ubicación |
3.2. Dimensiones
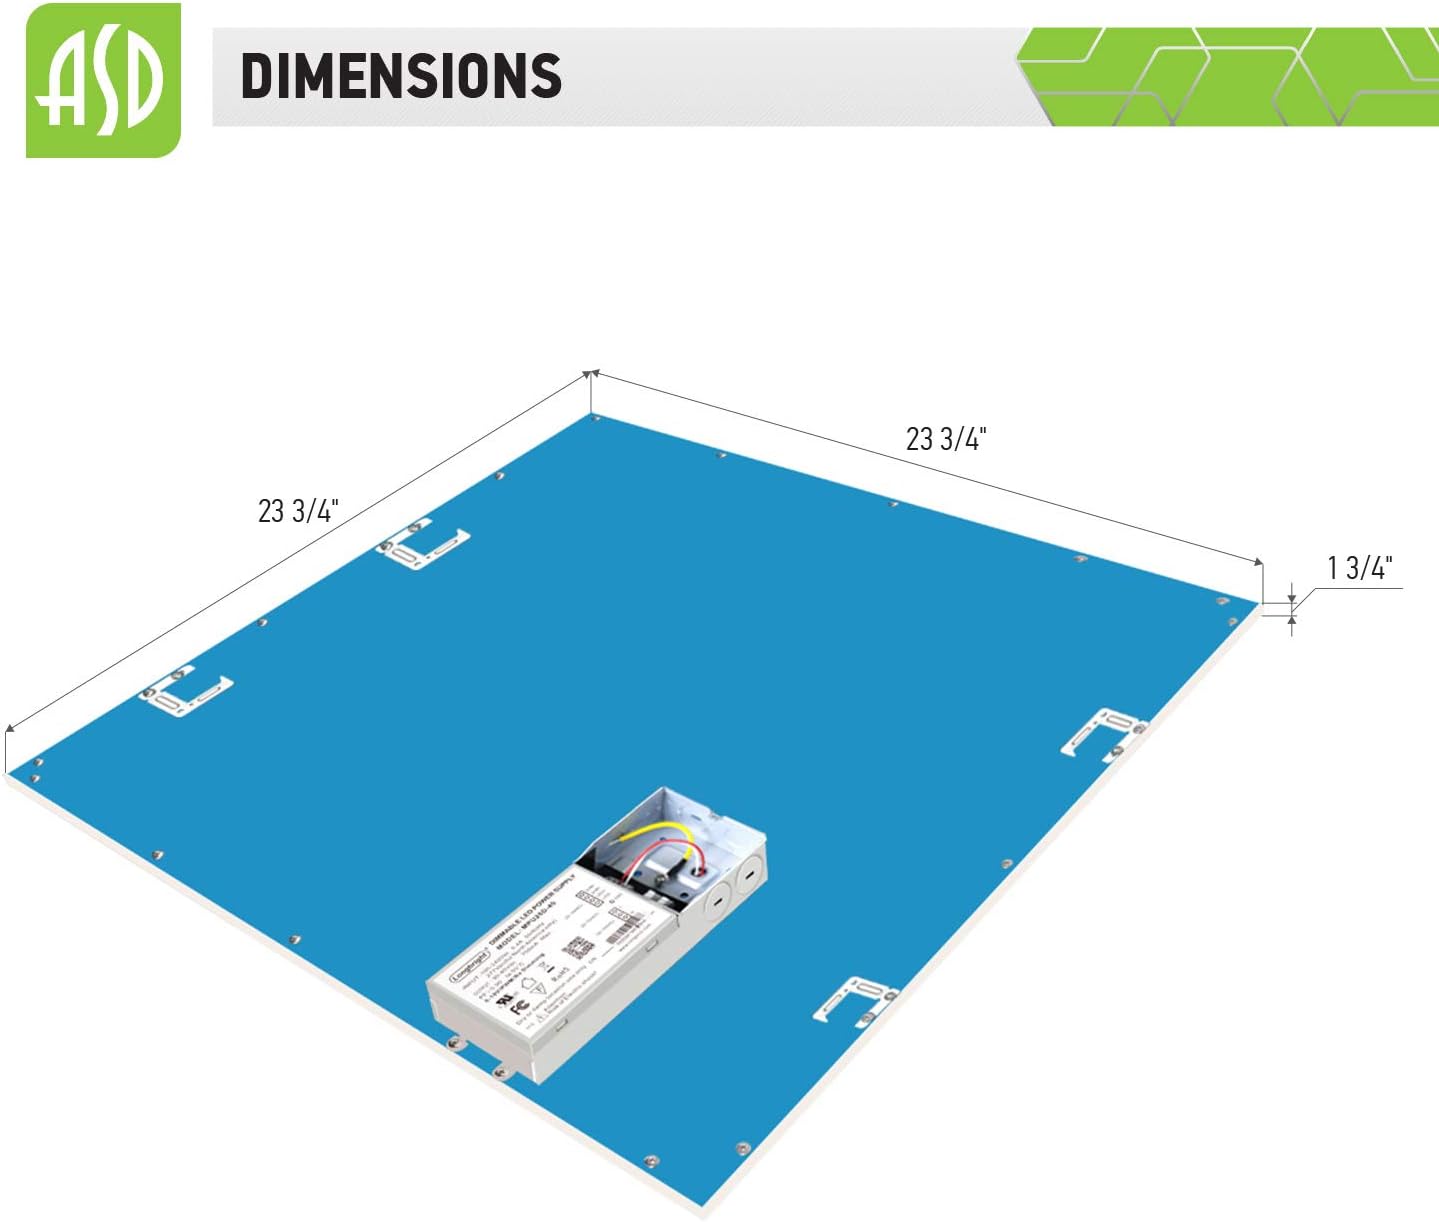
Image 3.2: Diagram showing the physical dimensions of the 2x2 LED panel light.
The panel measures approximately 23 3/4 inches by 23 3/4 inches, with a thickness of 1 3/4 inches.
3.3. Características

Image 3.3: Visual representation of key features including diffuser and frame material.
- Non-Yellowing PC Diffuser: Provides uniform light distribution with no glare.
- Anti-Corrosion Aluminum Frame: Designed for fast heat dissipation and durability.
- 0-10V Dimmable Driver: Includes circuit overload and low-voltage protección.
3.4. Available Sizes and Finish
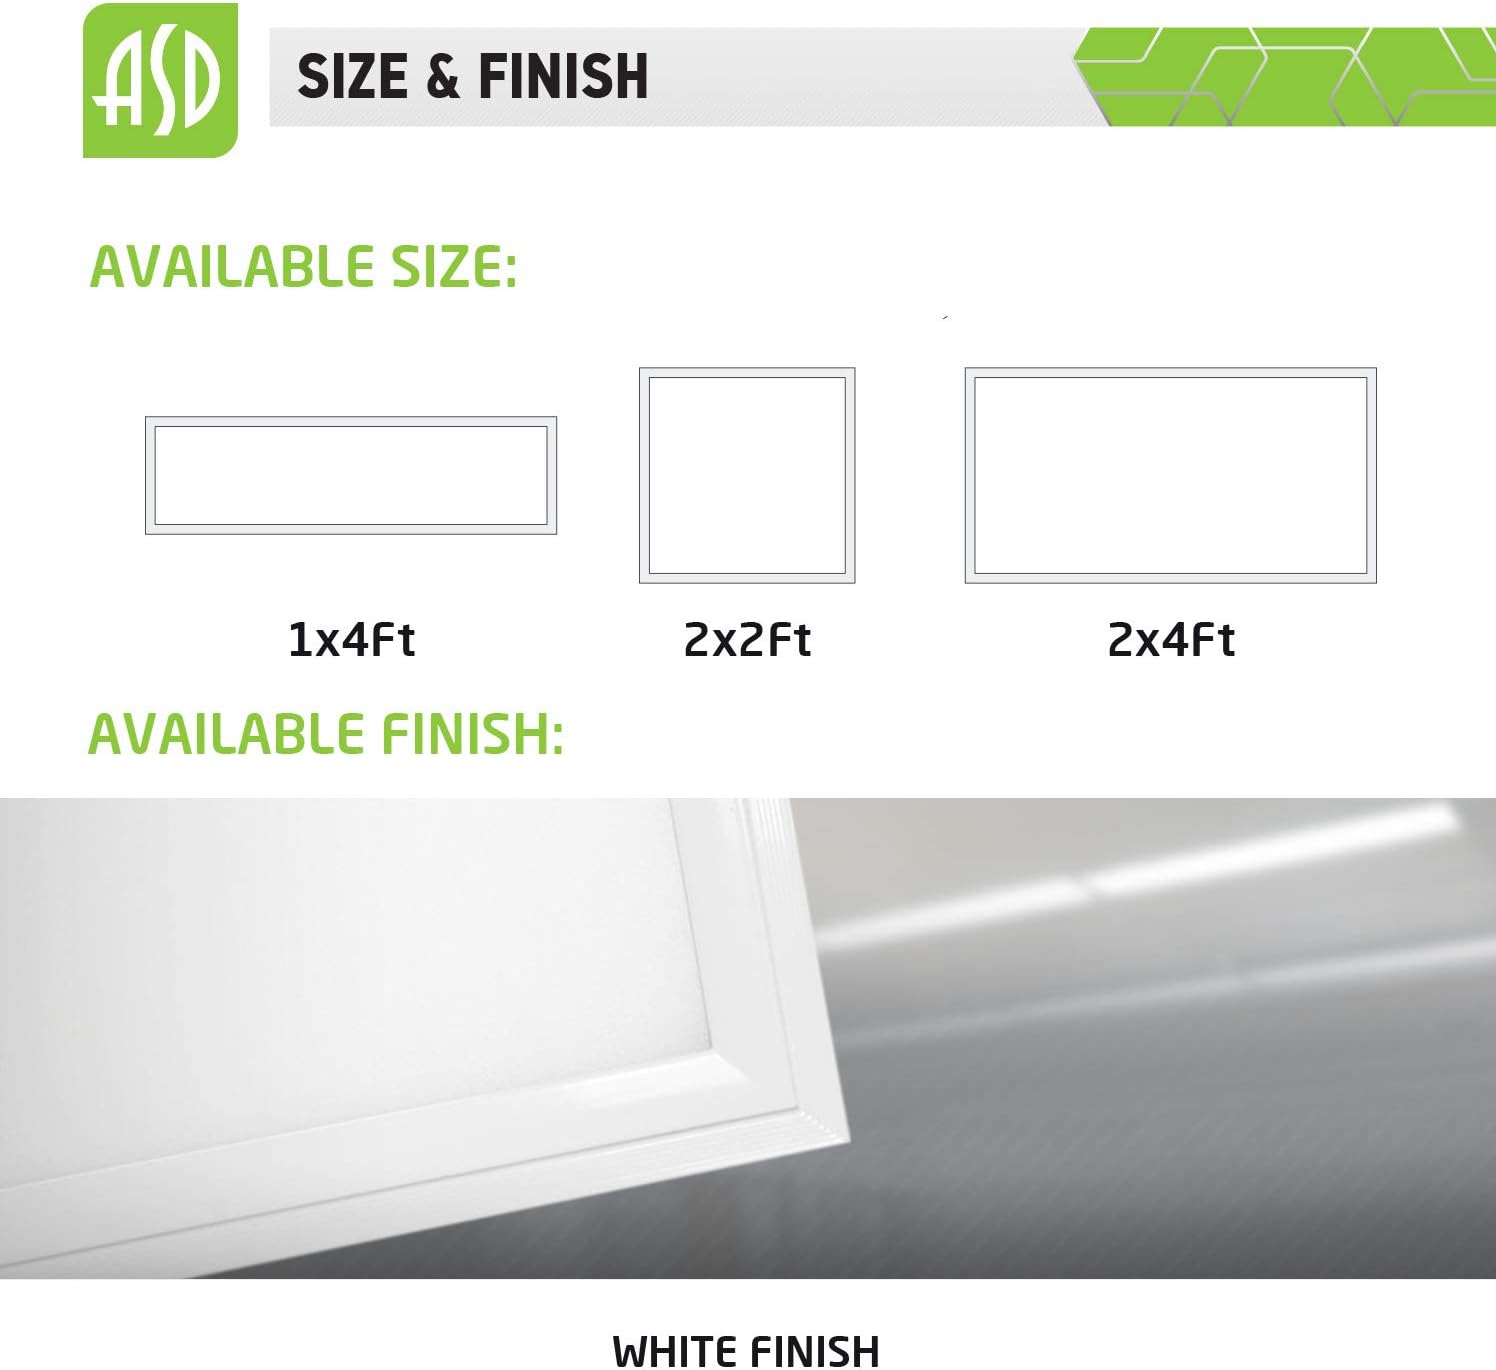
Image 3.4: Illustration of various available panel sizes and the standard white finish.
This product series is available in multiple sizes, including 1x4Ft, 2x2Ft (this model), and 2x4Ft. All models feature a clean white finish.
4. Instalación
Before beginning installation, ensure power is disconnected at the circuit breaker. Follow the instructions carefully for your specific mounting type.
4.1. Instalación de montaje empotrado

Image 4.1: Step-by-step guide for installing the LED panel light into a recessed ceiling grid.
- Paso 1: Choose the ceiling panel where you want to install the product and remove it. For convenience, move adjacent ceiling tiles. Fix the LED panel into the ceiling: raise up the product above the grid, then place it on T-bars. Bend points for all four tabs.
- Paso 2: Asegure el panel con la rejilla como se muestra en la imagen. Asegúrese de que la pestaña esté bien sujeta a la rejilla. Conecte los cables a la caja de empalmes del panel con los colores N, L y G usando tuercas.
- Paso 3: Devuelva las tejas de techo adyacentes a sus lugares. Encienda la alimentación principal. La instalación ha terminado.
4.2. Instalación de montaje en superficie
For surface mount installation, a separate surface mount kit (ASD-FELP22-L, ASD-FELP24-L) is required and sold separately.
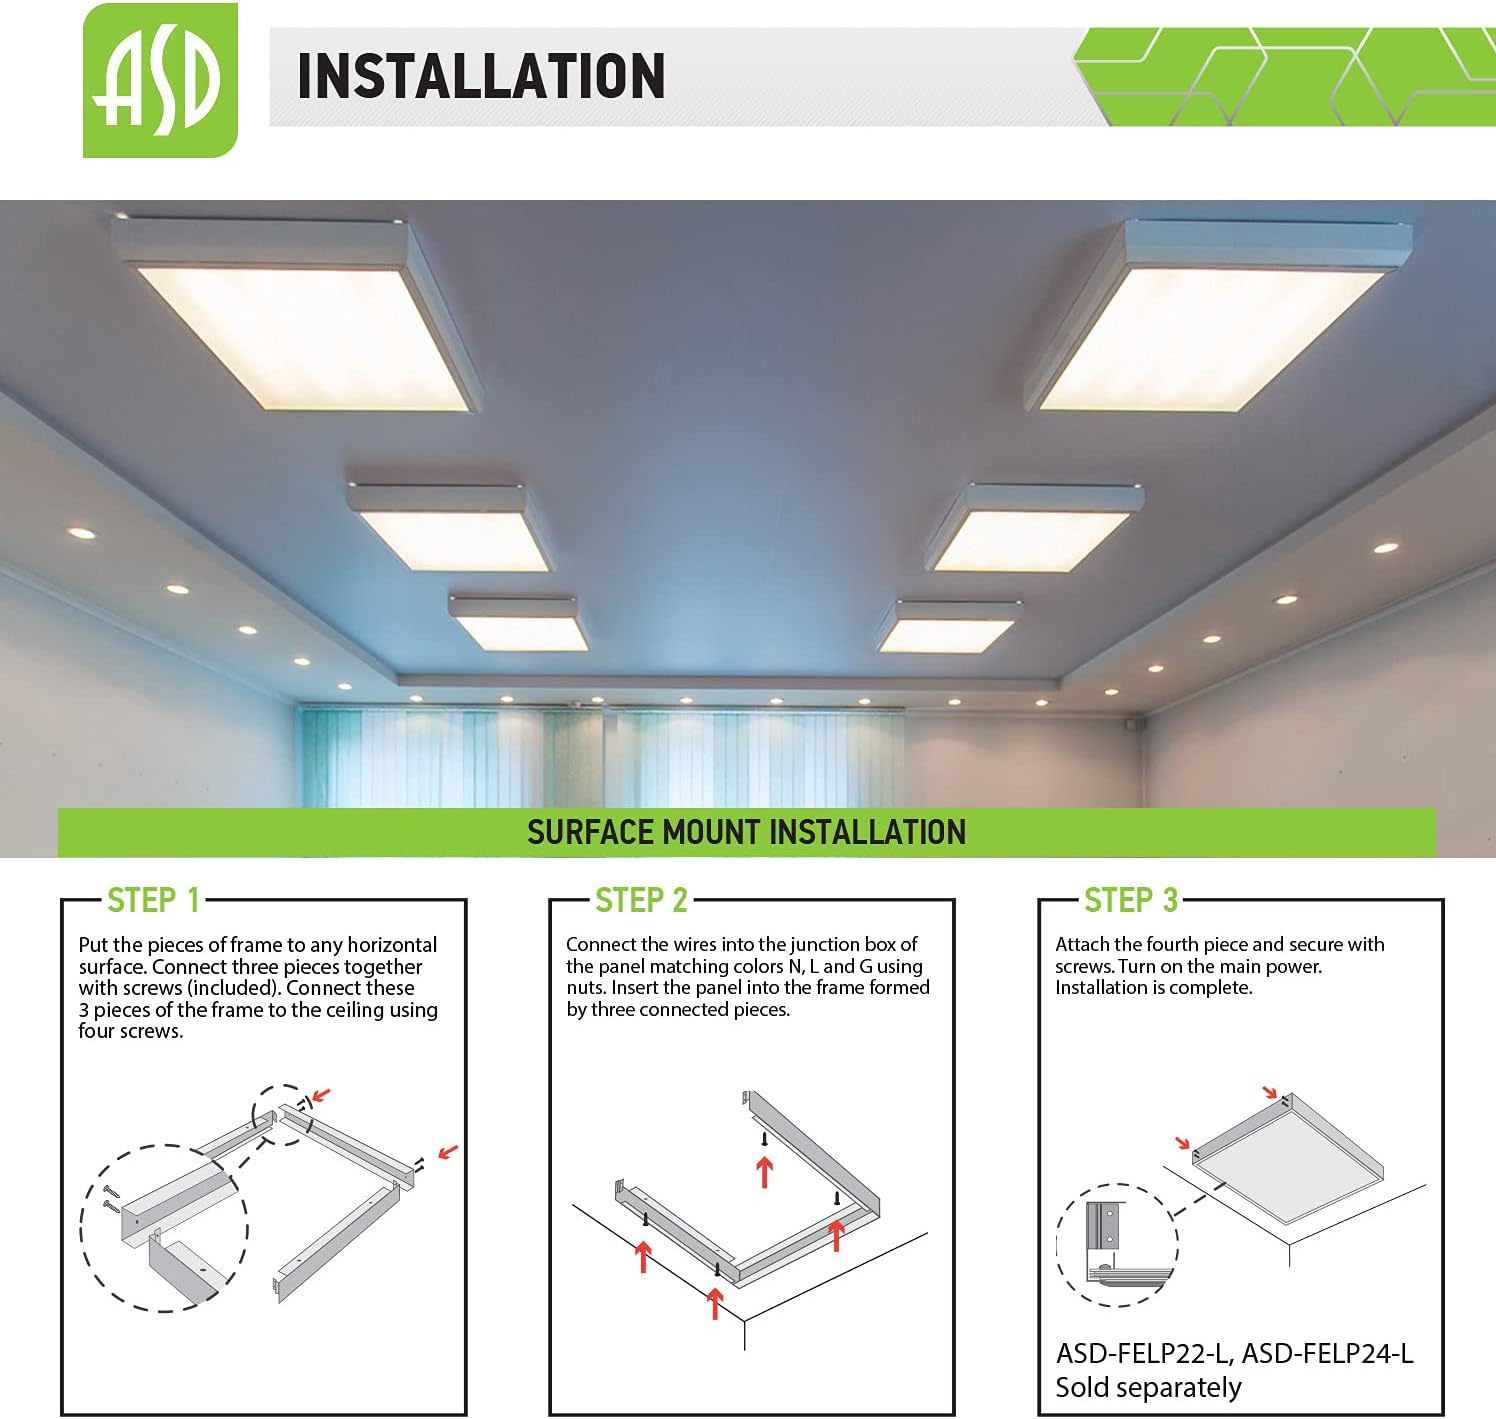
Image 4.2: Step-by-step guide for surface mounting the LED panel light using an external frame kit.
- Paso 1: Coloca las piezas del marco en cualquier superficie horizontal. Conecte tres piezas con tornillos (incluidos). Conecte estas 3 piezas del marco al techo usando cuatro tornillos.
- Paso 2: Connect the wires into the junction box of the panel matching colors N, L, and G using nuts. Insert the panel into the frame formed by three connected pieces.
- Paso 3: Coloque la cuarta pieza y asegúrela con tornillos. Encienda la alimentación principal. La instalación está completa.
5. Instrucciones de funcionamiento
Once properly installed, the ASD LED Flat Panel Light operates like any standard lighting fixture. Ensure the power supply is connected and the wall switch is in the 'ON' position.
5.1. Funcionalidad de atenuación
This fixture supports 0-10V dimming. To utilize the dimming feature, connect the fixture to a compatible 0-10V dimmer switch (sold separately). Follow the dimmer manufacturer's instructions for wiring and operation. The light output will adjust smoothly from 100% down to 10% or lower, depending on the dimmer's capabilities.
6. Mantenimiento
The ASD LED Flat Panel Light requires minimal maintenance. Regular cleaning will help maintain its appearance and light output.
- Limpieza: Asegúrese de que la alimentación esté apagada antes de limpiar. Utilice un paño suave, seco o ligeramente húmedo.amp cloth to wipe the surface of the panel. Do not use abrasive cleaners, solvents, or cleaners containing alcohol, as these may damage the finish or diffuser.
- No hay piezas que el usuario pueda reparar: The LED components and driver are integrated and not designed for user servicing. Do not attempt to open or repair the fixture.
7. Solución de problemas
If you experience issues with your LED panel light, refer to the following common problems and solutions:
| Problema | Posible causa | Solución |
|---|---|---|
| La luz no se enciende. | No hay suministro de energía; cableado suelto; interruptor o disyuntor defectuoso. | Check power supply at the circuit breaker. Verify all wire connections are secure. Test the switch. |
| La luz parpadea o se atenúa de manera inconsistente. | Incompatible dimmer; loose dimming wires; voltage fluctuaciones. | Ensure a 0-10V compatible dimmer is used. Check dimming wire connections. Consult an electrician for voltagproblemas electrónicos. |
| La salida de luz es menor de lo esperado. | Dimmer set too low; dust accumulation on diffuser. | Adjust dimmer to maximum setting. Clean the diffuser surface. |
8. Aplicación
The ASD 2x2 LED Flat Panel Light is versatile and suitable for a wide range of indoor commercial and residential applications, providing bright and even illumination.
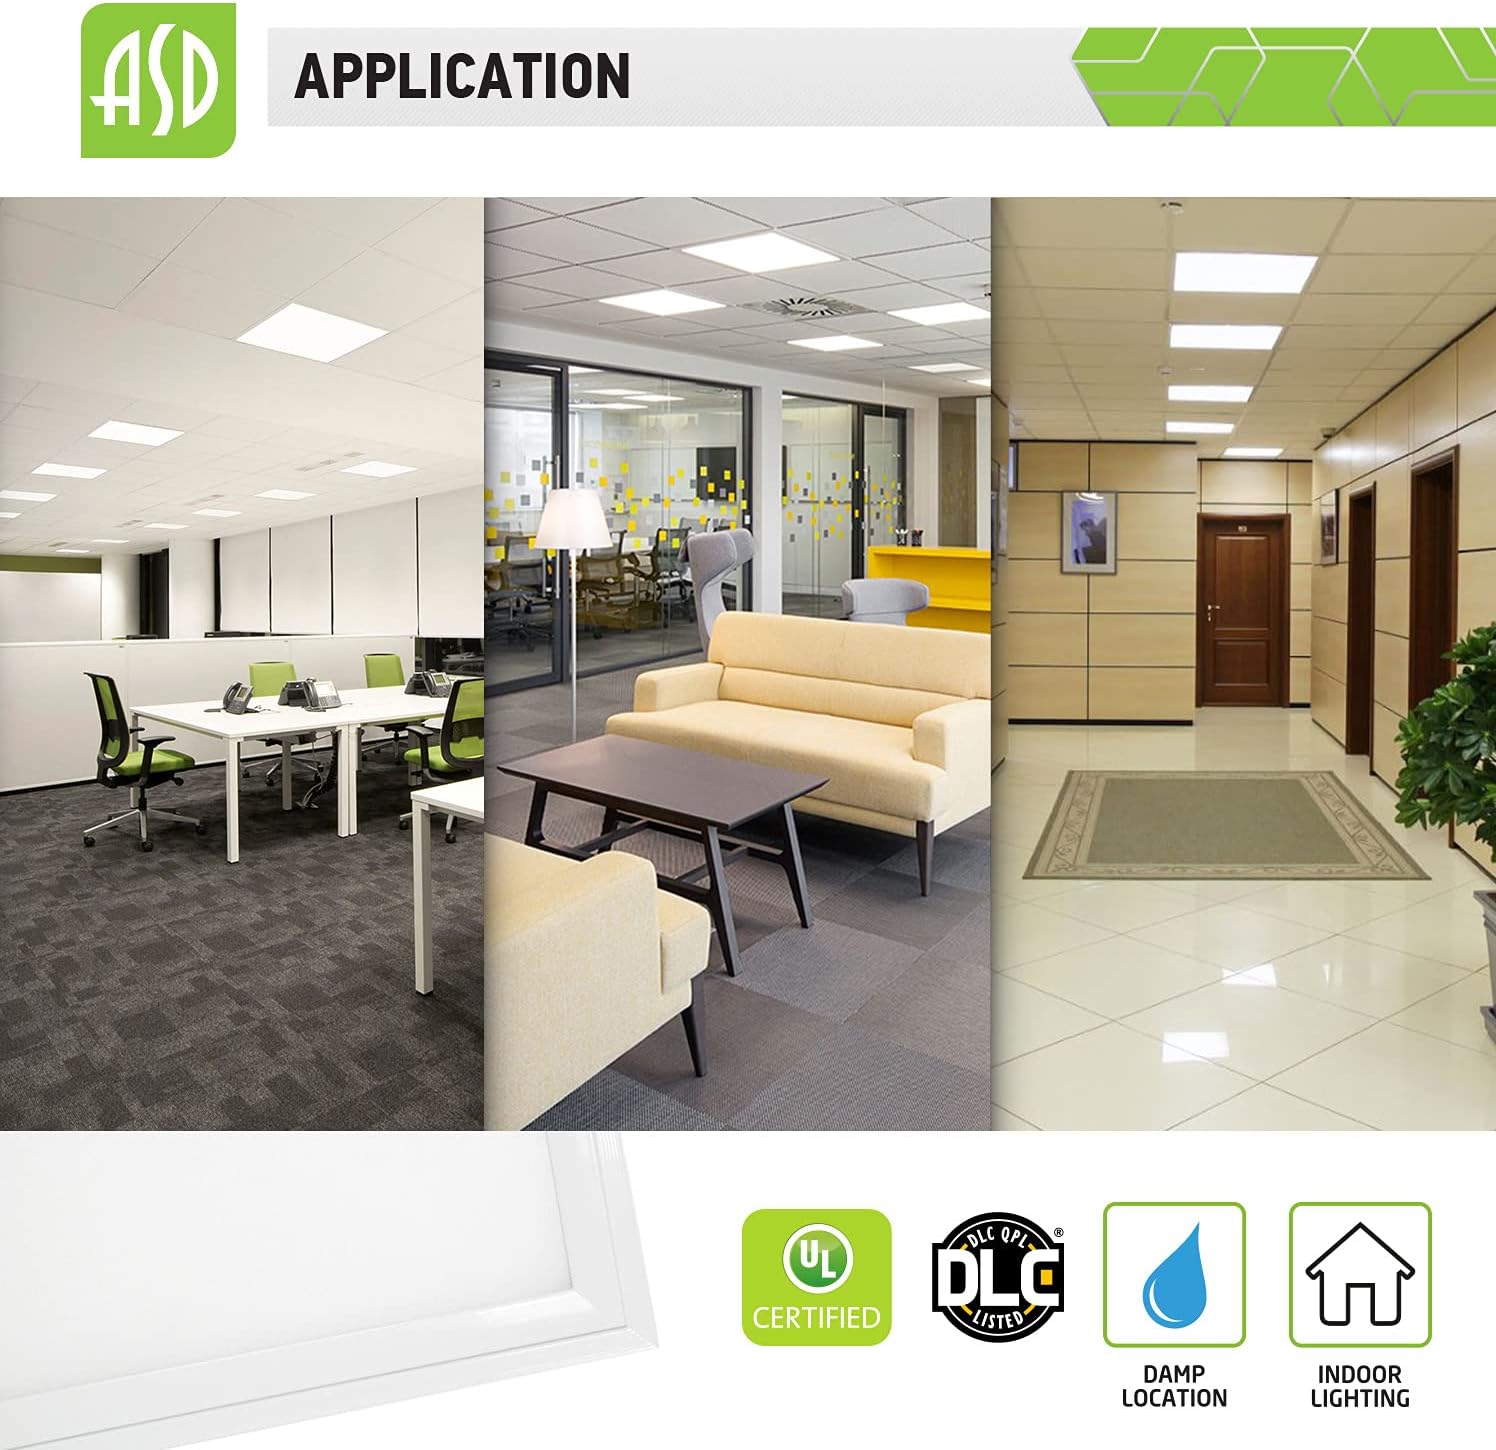
Image 8.1: Various indoor settings where the LED panel light can be effectively used, such as offices, hallways, and common areas.
9. Garantía y soporte
ASD is committed to providing high-quality products and excellent customer service.

Image 9.1: Information regarding product certifications, warranty period, and company origin.
- Garantía: El TEA proporciona una 5 año de garantía on this product, guaranteeing top quality and safety.
- Certificaciones: This product is UL and DLC Standard certified, ensuring compliance with industry safety and performance standards.
- Reembolsos: Top US certifications may allow participation in rebates. Please check the rebate programs available in your state.
- Servicio al cliente: As an American company, ASD offers exceptional customer service. For support, please visit the ASD Lighting Corporation store on Amazon or contact their customer service directly.