1. Producto terminadoview
The lexvss 4L Automatic Pet Feeder is designed to provide a convenient and controlled feeding solution for your pets. This device features Wi-Fi connectivity for remote control via a smartphone application, programmable meal times and portions, and a voice recording function to call your pets for meals. It supports both adapter power and battery backup for reliable operation.
Características principales:
- Control remoto de la aplicación: Manage feeding schedules, portions, and monitor food levels from anywhere using the "Tuya Smart" app on your 2.4GHz Wi-Fi connected smartphone.
- Grabación de voz: Record a 10-second message to play during meal dispensations, encouraging your pet to eat.
- Precise Feeding: Schedule up to 8 meals per day, with 1 to 12 portions per meal. Each portion is approximately 7g (1/10 cup). Suitable for dry food kibble sizes 2-10mm (0.07-0.4in).
- Diseño de seguridad: Features a translucent food hopper for easy monitoring of food levels and secure lock buttons on the lid to prevent pets from accessing the food.
- Fuente de alimentación dual: Operates via a DC 5V adapter or 3 D-cell alkaline batteries (not included) for backup power, ensuring continuous feeding even during power outages or Wi-Fi disconnection.

Imagen: Más alláview of the lexvss 4L WiFi Smart Pet Feeder highlighting its key features such as programmable timer, manual feeding, schedule feeding, 10-second voice recorder, locking keys design, and auto & manual modes.
2. Información importante de seguridad
Please read and observe all important notices listed below to ensure safe and proper use of the pet feeder.
- Do NOT allow pets to chew on or swallow any parts of the feeder.
- If an extension cord is necessary, use one with a proper rating.
- NO instale ni guarde el comedero para mascotas en un lugar expuesto a la intemperie o a temperaturas inferiores a -20 °C/-4 °F.
- Use alkaline D batteries ONLY for power backup. Do NOT use rechargeable batteries.
- Check the batteries regularly. Replace batteries with new ones before leaving for extended periods.
- Do NOT lift the pet feeder by the lid, food tank, or food tray. Lift and carry it using both hands and the base, keeping the unit upright.
- Suitable for dry food ONLY, with kibble size ranging from 2-10mm (0.07-0.4in) in diameter. Larger kibble may get stuck at the food outlet.
3. Componentes del producto
Familiarize yourself with the different parts of your lexvss Automatic Pet Feeder.
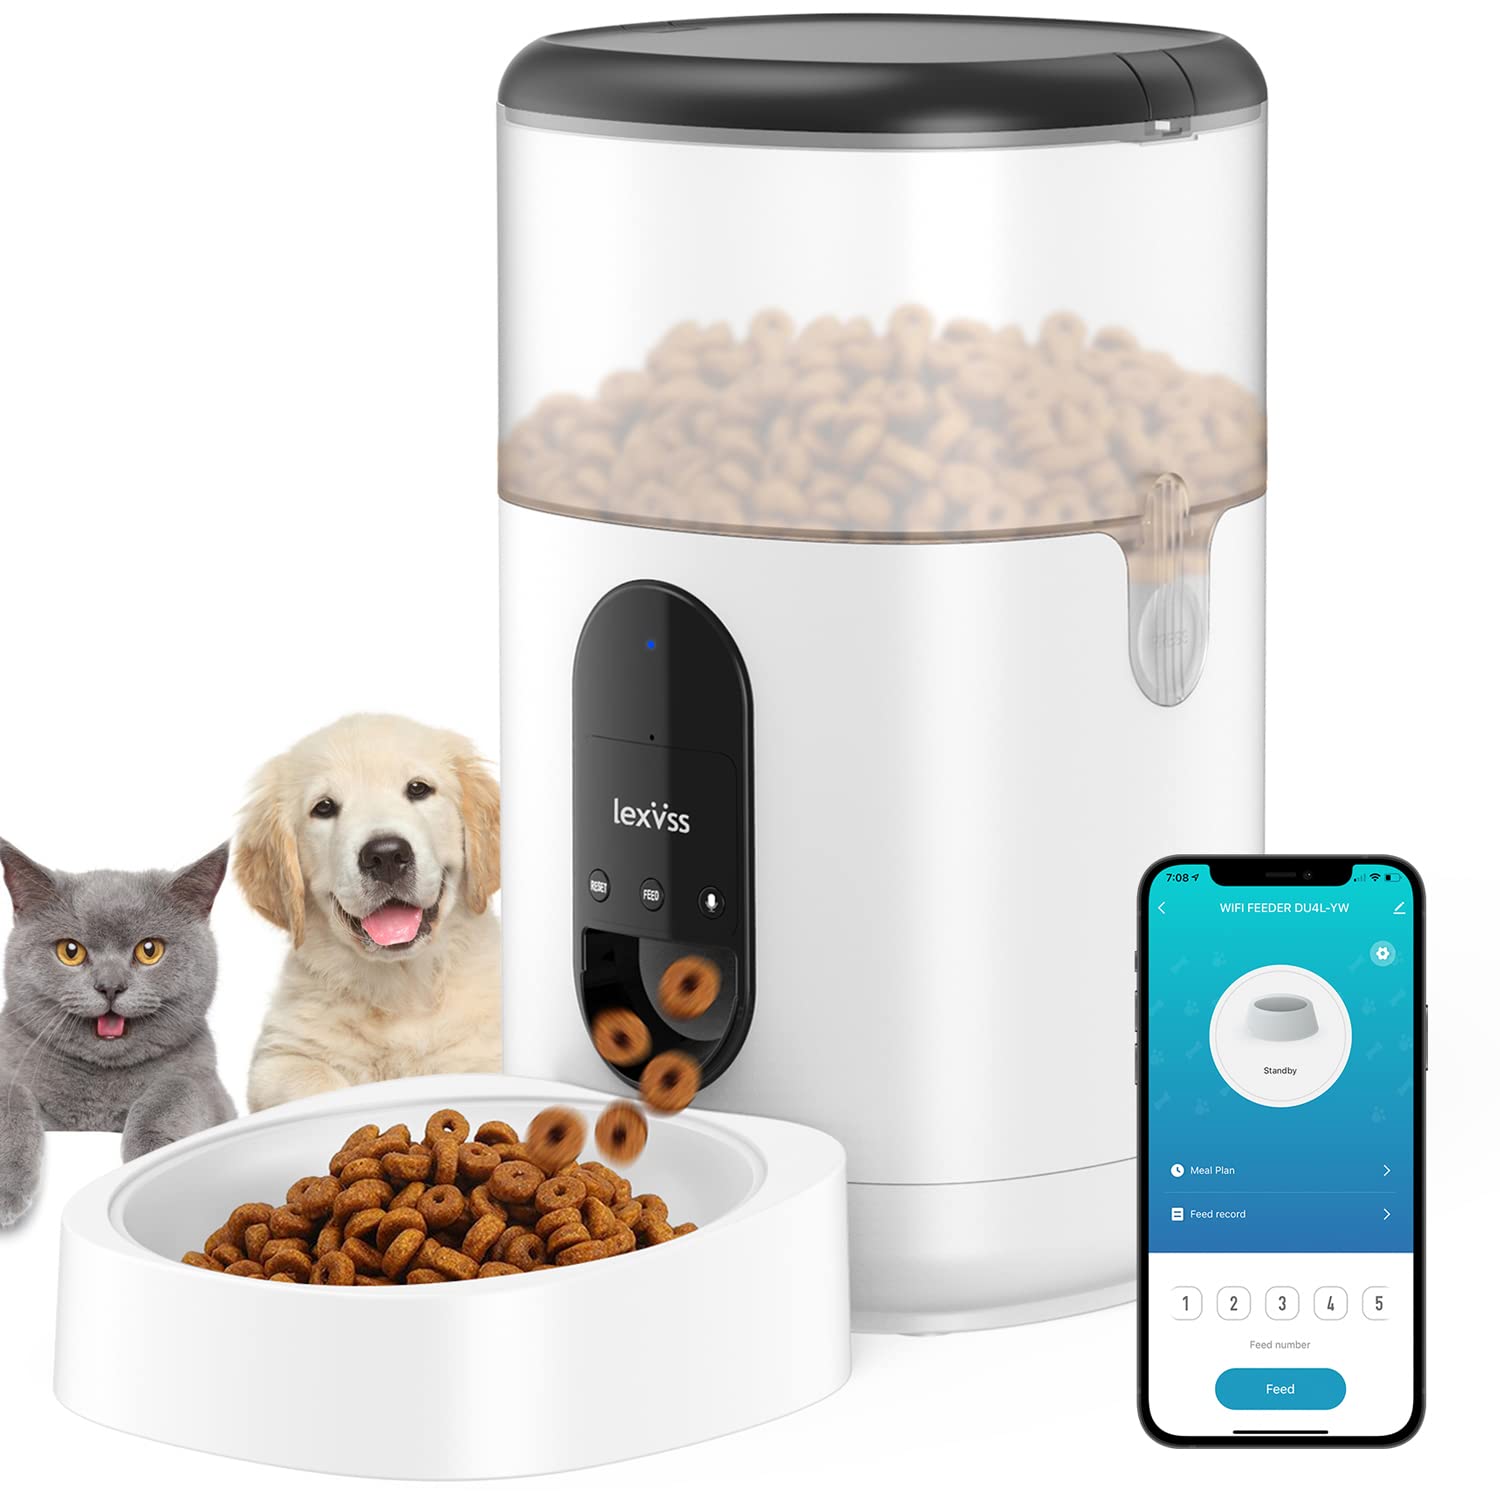
Image: Detailed diagram illustrating the components of the lexvss Automatic Pet Feeder, including Lid Buckles, Lid, Desiccant Tray, Food Container, Food Container Buckles, Base, Control Panel, Food Outlet, Food Tray, Battery Compartment, Speaker, and Power Socket.
- Tapa: Top cover of the food container.
- Lid Buckles: Asegure la tapa en su lugar.
- Desiccant Tray: Holds a desiccant bag to keep food fresh.
- Contenedor de alimentos: Transparent reservoir for dry pet food (4L capacity).
- Food Container Buckles: Secure the food container to the base.
- Base: Main unit housing the electronics and dispensing mechanism.
- Panel de control: Buttons for manual feeding, recording, and reset.
- Punto de venta de comida: Where food is dispensed into the tray.
- Bandeja de comida: Recipiente extraíble para que las mascotas puedan comer.
- Compartimento de la batería: Located at the bottom for D-cell batteries.
- Vocero: Para reproducir mensajes de voz grabados.
- Toma de corriente: Para conectar el adaptador de corriente DC 5V.
4. Guía de configuración
4.1 Conexión de la fuente de alimentación
The feeder can be powered by the included DC 5V adapter or by 3 D-cell alkaline batteries (not included) for backup.
- Alimentación del adaptador: Connect the DC 5V power adapter to the power socket on the back of the feeder and plug it into a wall outlet.
- Copia de seguridad de la batería: Open the battery compartment at the bottom of the feeder. Insert 3 new D-cell alkaline batteries, ensuring correct polarity. Close the compartment securely.
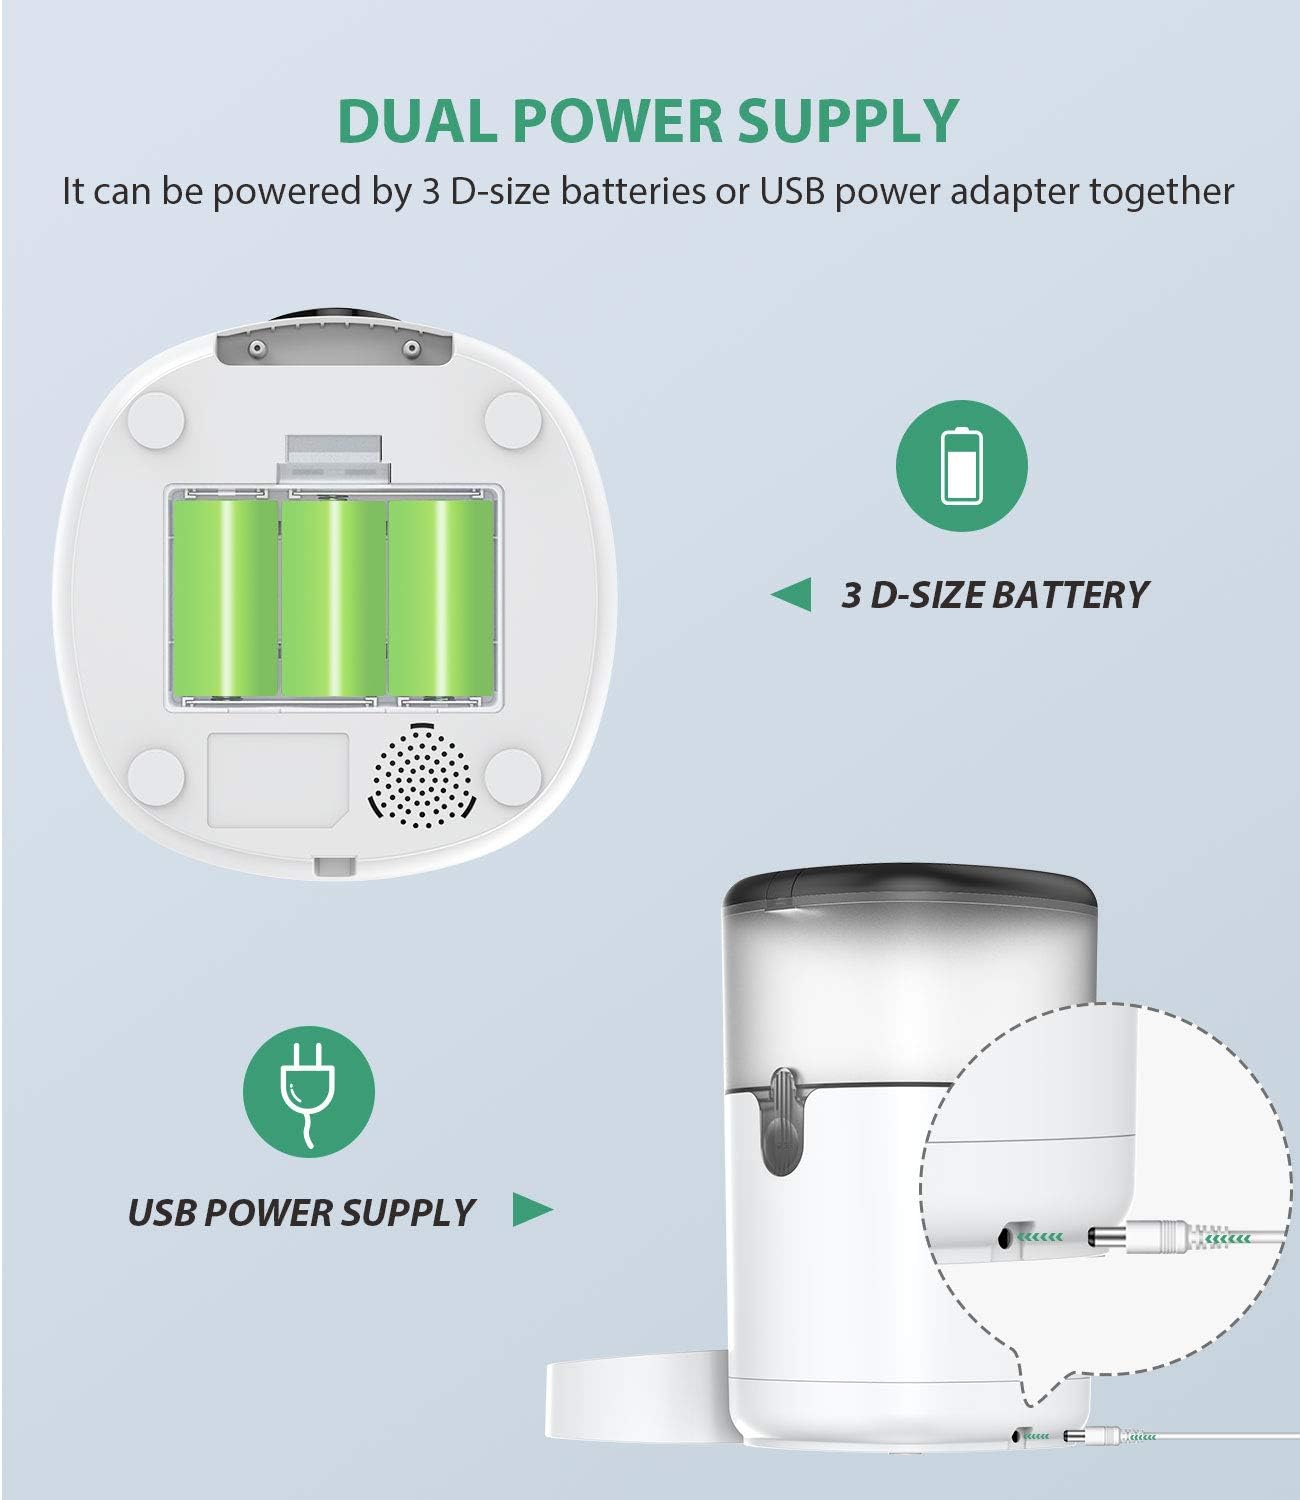
Image: Illustration of the dual power supply options for the lexvss pet feeder, showing the USB power supply connection and the 3 D-size battery compartment.
4.2 Llenado del recipiente de alimentos
- Unlock the lid buckles and remove the lid.
- Place a desiccant bag into the desiccant tray (if not already installed) to maintain food freshness.
- Pour dry pet food into the food container. Ensure kibble size is between 2-10mm (0.07-0.4in).
- Replace the lid and secure the lid buckles.
4.3 Instalación de la aplicación y conexión Wi-Fi
The lexvss pet feeder connects to your smartphone via the "Tuya Smart" app.
- Descarga la aplicación "Tuya Smart" desde la tienda de aplicaciones de tu teléfono inteligente (iOS o Android).
- Regístrese o inicie sesión en su cuenta Tuya Smart.
- Asegúrese de que su teléfono esté conectado a una red Wi-Fi de 2.4 GHz. El alimentador no admite Wi-Fi de 5 GHz.
- On the app, tap "Add Device" or the "+" icon. Select "Small Home Appliances" then "Pet Feeder (Wi-Fi)".
- Follow the on-screen instructions in the app to connect the feeder to your Wi-Fi network. This typically involves putting the feeder into pairing mode (often by pressing and holding a reset button until an indicator light flashes).
- Once connected, you can control the feeder remotely via the app.

Image: Screenshots of the Tuya Smart app interface demonstrating how to schedule up to 8 meals a day with 1 to 12 portions per meal for the automatic pet feeder.
5. Instrucciones de funcionamiento
5.1 Programming Meal Schedules
Use the "Tuya Smart" app to set up automated feeding schedules.
- Open the "Tuya Smart" app and select your pet feeder device.
- Vaya a la sección “Horario” o “Plan de alimentación”.
- Tap "Add" to create a new feeding event.
- Establezca el tiempo de alimentación deseado (hasta 8 comidas por día).
- Select the number of portions for each meal (1 to 12 portions). Each portion is approximately 7g.
- Choose the days of the week for this schedule to be active.
- Save the schedule. The feeder will now dispense food automatically at the programmed times.
5.2 Grabar un mensaje de voz
Record a personalized 10-second message to play during each feeding.
- Locate the "Record" button on the feeder's control panel.
- Press and hold the "Record" button. The indicator light may change to signal recording is active.
- Speak your message (e.g., "Dinner time, [Pet's Name]!") into the microphone for up to 10 seconds.
- Release the "Record" button to save the message.
- El mensaje grabado se reproducirá automáticamente antes de cada comida programada.

Image: A pet feeder with a dog and cat, illustrating the voice recording feature with a speech bubble saying "Dinner time is up".
5.3 Alimentación manual
To dispense food immediately, use the manual feed button.
- Press the "Feed" button on the control panel.
- Each press will dispense one portion of food.
- Alternatively, use the "Feed" option within the "Tuya Smart" app for remote manual feeding.
6. Mantenimiento y limpieza
La limpieza regular garantiza la higiene y el rendimiento óptimo del comedero de su mascota.
- Desmontaje: Unplug the feeder from power. Remove the food tray, then unlock the food container buckles and lift off the food container.
- Componentes de limpieza: The food tray and food container can be washed with mild soap and water. Rinse thoroughly and dry completely before reassembly.
- Unidad base: Limpie la unidad base con un paño suave yamp cloth. Do NOT immerse the base unit in water or any other liquid, as it contains electronic components.
- Bolsa desecante: Reemplace la bolsa desecante cada 1-2 meses para mantener la frescura de los alimentos.
- Reensamblaje: Ensure all parts are completely dry. Reattach the food container to the base, securing the buckles. Place the food tray back into position.
7. Solución de problemas
If you encounter issues with your lexvss Automatic Pet Feeder, refer to the following common solutions:
| Problema | Posible causa | Solución |
|---|---|---|
| El comedero no dispensa comida. |
|
|
| La aplicación no puede conectarse al alimentador. |
|
|
| El mensaje de voz no se reproduce. |
|
|
| Scheduled feedings are inconsistent or deleted. |
|
|
8. Especificaciones del producto
| Característica | Detalle |
|---|---|
| Marca | lexvs |
| Modelo | B08TBDGYY5 |
| Capacidad | 4 litros |
| Especies objetivo | Gato perro |
| Modo de operación | Automático |
| Características especiales | Voice Recording, Programmable Feeding, Wi-Fi Control |
| Fuente de alimentación | DC 5V Adapter, 3 x D-cell Alkaline Batteries (backup, not included) |
| Compatibilidad del tamaño de las croquetas | 2-10mm (0.07-0.4in) diameter |
| Dimensiones del producto | 19 x 19 x 32.99 cm; 1.81 kg |
| Conectividad | Wi-Fi de 2.4 GHz |