
Defiant GA7X2D01AAP
Manual del usuario del cerrojo electrónico de un solo cilindro con teclado numérico Castle de níquel satinado Defiant GA7X2D01AAP
Model: GA7X2D01AAP | Brand: Defiant
1. Introducción
This manual provides comprehensive instructions for the installation, operation, and maintenance of your Defiant GA7X2D01AAP Castle Satin Nickel Single Cylinder Electronic Keypad Deadbolt. This electronic deadbolt offers enhanced security and convenience through keyless entry technology, eliminating the need for traditional keys. It is designed for ease of use and reliable performance, suitable for residential applications.
Please read this manual thoroughly before installation and operation to ensure proper functionality and to maximize the lifespan of your product.
2. Configuración e instalación
The Defiant GA7X2D01AAP deadbolt is designed for simple installation without the need for hard wiring. It is compatible with doors ranging from 1-3/8 inches to 1-3/4 inches in thickness. Ensure you have the necessary tools, such as a screwdriver, before beginning the installation process.
2.1 Contenido del paquete
Verifique que todos los componentes estén presentes antes de comenzar la instalación:
- Electronic Keypad Assembly (Exterior)
- Conjunto de cerrojo interior
- Pestillo de cerrojo
- Placa de impacto
- Tornillos de montaje
- 2 x Llaves físicas
- Plantilla de instalación (si está incluida)

Figure 2.1: Included components, showing the two physical keys, the strike plate, and a cylindrical mounting ring.
2.2 Instalación de la batería
The deadbolt operates on 4 AA batteries (not included). It is recommended to use new, high-quality alkaline batteries for optimal performance.
- Retire la cubierta de la batería del conjunto del cerrojo interior.
- Inserte 4 pilas AA, asegurándose de la polaridad correcta (+/-).
- Vuelva a colocar la tapa de la batería.
2.3 Pasos de instalación física
Follow these general steps for physical installation. Refer to the detailed instructions provided in your product packaging for specific drilling and mounting procedures.
- Prepare the door: Ensure the door is properly bored for a deadbolt. The deadbolt is designed for standard door preparations.
- Install the latch: Insert the deadbolt latch into the door edge. Ensure the "UP" arrow (if present) is facing upwards.
- Install the exterior keypad assembly: Feed the cable from the exterior keypad through the door hole and align the keypad with the latch.
- Install the interior assembly: Connect the cable from the exterior keypad to the interior assembly. Secure the interior assembly to the door using the provided mounting screws.
- Install the strike plate: Secure the strike plate to the door frame, ensuring it aligns correctly with the deadbolt latch.
- Test the lock: After installation, test the deadbolt using both the keypad and the physical key to ensure smooth operation.

Figura 2.2: Lado view of the deadbolt latch mechanism, showing how it fits into the door edge.
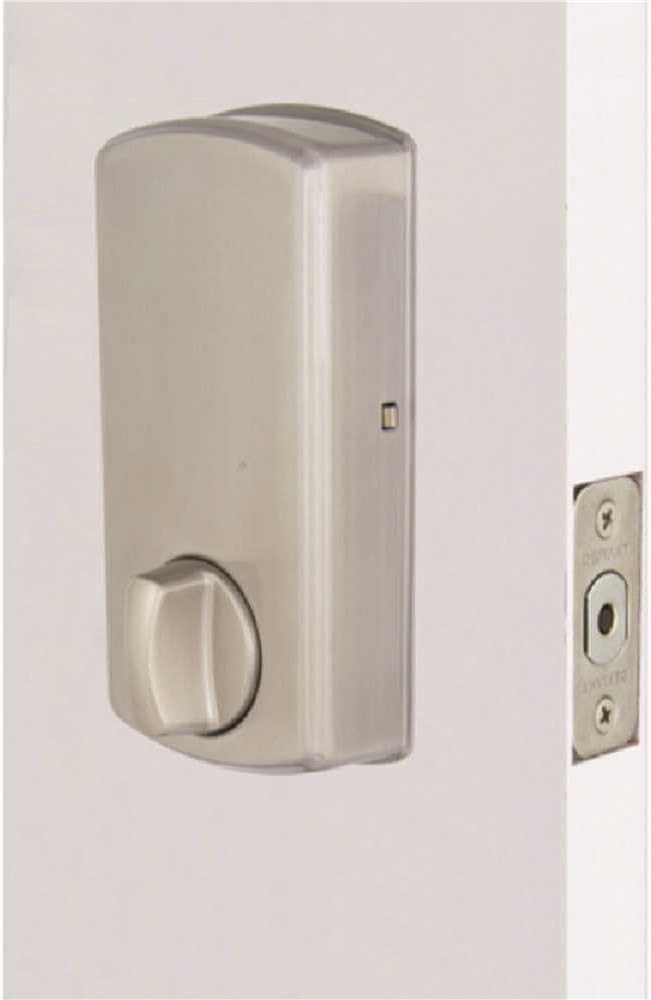
Figura 2.3: Interior view of the deadbolt, showing the thumb turn and battery compartment.
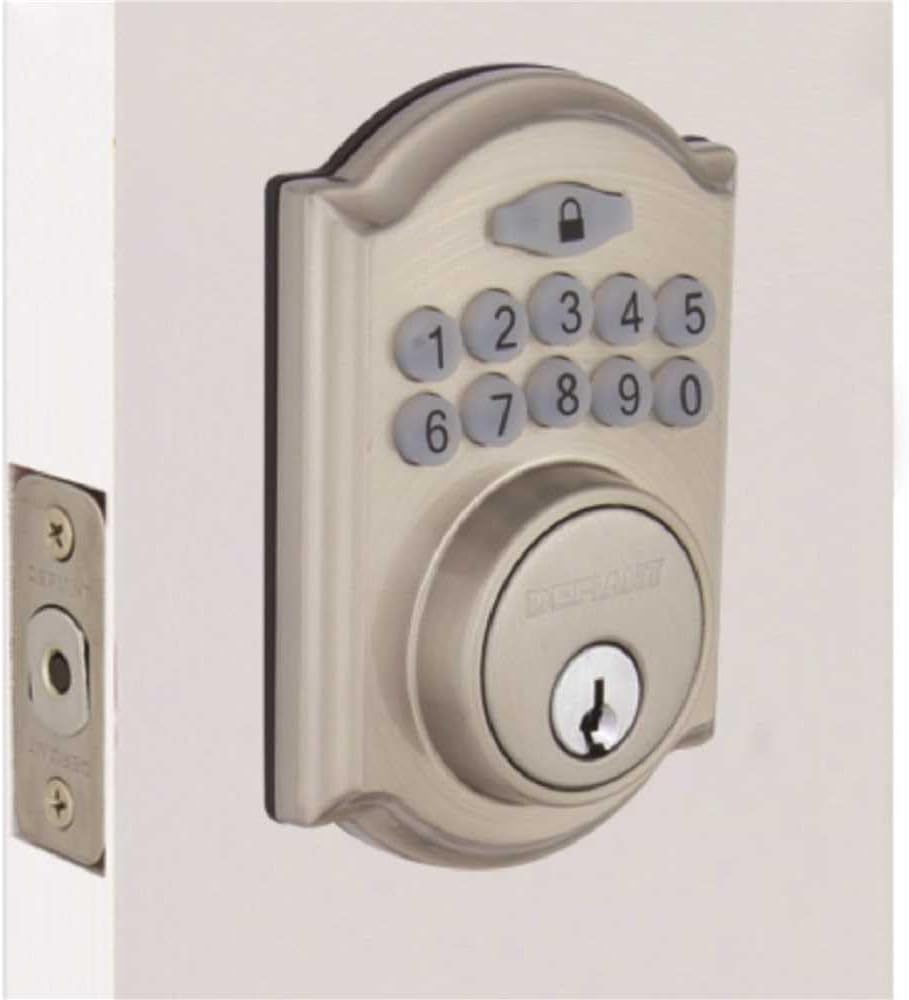
Figure 2.4: The Defiant electronic deadbolt installed on a door, providing a visual of the complete exterior assembly.
3. Instrucciones de funcionamiento
Your Defiant electronic deadbolt offers convenient keyless access and customizable security features.
3.1 Teclado terminadoview

Figure 3.1: The electronic keypad, featuring a backlit display for improved visibility in low light conditions.
The keypad is backlit for increased visibility, making it easy to operate in low-light conditions.
3.2 Configuración de códigos de usuario
Refer to your product's specific programming guide for detailed steps on how to set, change, and delete user codes. Typically, this involves entering a master code followed by a sequence to add or modify user codes.
3.3 Bloqueo y Desbloqueo
- Para desbloquear: Enter a valid user code on the keypad. The deadbolt will retract.
- Para bloquear: Press the lock button on the keypad, or use the thumb turn on the interior side.
3.4 Función de bloqueo automático
The deadbolt features an auto-lock function with an adjustable delay, typically ranging from 10 to 99 seconds. This feature automatically locks the deadbolt after a set period once it has been unlocked, providing added security. Consult your programming guide to enable and adjust this setting.
3.5 Modo Vacaciones
User codes can be temporarily deactivated as needed, which is useful for vacation periods or when you want to restrict access without deleting codes. Refer to your programming guide for instructions on activating and deactivating vacation mode.
4. Mantenimiento
Regular maintenance ensures the longevity and reliable operation of your electronic deadbolt.
4.1 Limpieza
Limpie el exterior del cerrojo con un paño suave.amp paño. Evite utilizar limpiadores abrasivos, disolventes o productos químicos fuertes, ya que pueden dañar el acabado y los componentes electrónicos.
4.2 Reemplazo de batería
The deadbolt is equipped with a low battery indicator. When the batteries are low, the indicator will alert you, typically through a series of beeps or a flashing light. Replace all 4 AA batteries promptly when this occurs to ensure continuous operation. Always use new, high-quality alkaline batteries.
- Retire la tapa de la batería del conjunto interior.
- Retire las baterías viejas y deséchelas de acuerdo con las regulaciones locales.
- Inserte pilas AA nuevas, respetando la polaridad correcta.
- Vuelva a colocar la tapa de la batería.
4.3 Mechanical Check
Periodically check the screws and mounting hardware to ensure they are tight. Ensure the deadbolt latch moves freely and smoothly without obstruction. Lubricate the latch mechanism with a silicone-based lubricant if necessary, avoiding oil-based lubricants that can attract dust.
5. Solución de problemas
Esta sección aborda problemas comunes que puede encontrar con su cerrojo electrónico.
5.1 El teclado no responde/no hay energía
- Compruebe las baterías: The most common cause. Replace all 4 AA batteries with new ones.
- Orientación de la batería: Asegúrese de que las baterías estén insertadas con la polaridad correcta (+/-).
- Conexión suelta: Verify that the cable connecting the exterior keypad to the interior assembly is securely plugged in.
5.2 Deadbolt Does Not Lock or Unlock
- Código incorrecto: Ensure the correct user code is being entered.
- Batería baja: Replace batteries if the low battery indicator is active.
- Desalineación: Check if the deadbolt latch and strike plate are properly aligned. Adjust the strike plate if necessary.
- Obstrucción: Ensure there are no obstructions in the door frame or latch mechanism.
- Programming Issue: If codes are not working, try reprogramming them according to the programming guide.
5.3 Auto-Lock Not Functioning
- Feature Enabled: Verify that the auto-lock feature is enabled in the lock's programming.
- Configuración de retardo: Check the auto-lock delay setting. It might be set to a longer duration than expected.
5.4 Keypad Backlight Not Working
- Baterías: Low batteries can affect backlight performance. Replace batteries.
- Sensor: Some keypads have a light sensor. Ensure it's not obstructed or in an unusually bright environment that would prevent the backlight from activating.
6. Especificaciones
| Característica | Detalle |
|---|---|
| Marca | Desafiante |
| Nombre del modelo | GA7X2D01AAP |
| Tipo de bloqueo | Cerradura de teclado electrónico |
| Material | Zinc |
| Finalizar | Níquel satinado |
| Dimensiones (L x An x Al) | Aproximadamente 5 x 5 x 5 pulgadas |
| Peso del artículo | Aproximadamente 10.1 libras |
| Fuente de poder | 4 pilas AA (no incluidas) |
| Compatibilidad del espesor de la puerta | 1-3/8 pulg. a 1-3/4 pulg. |
| Grado de seguridad | ANSI / BHMA Grado 3 |
| Componentes incluidos | Electronic Deadbolt, 2 Keys |
| Características especiales | Backlit Keypad, Auto-Lock (adjustable delay), Low Battery Indicator, Vacation Mode |
7. Garantía y soporte
7.1 Garantía del producto
The Defiant GA7X2D01AAP Electronic Keypad Deadbolt is backed by a 1 año de garantía A partir de la fecha de compra. Esta garantía cubre defectos de materiales y mano de obra en condiciones normales de uso. Conserve su comprobante de compra para reclamaciones de garantía.
The warranty does not cover damage resulting from improper installation, misuse, abuse, neglect, unauthorized repairs, or acts of nature.
7.2 Atención al cliente
For technical assistance, troubleshooting beyond this manual, or warranty inquiries, please contact Defiant customer support. Refer to the contact information provided in your product packaging or visit the official Defiant webSitio para obtener los detalles de soporte más actualizados.
When contacting support, please have your product model number (GA7X2D01AAP) and proof of purchase readily available.
Ask a question about this manual
Ask about setup, troubleshooting, compatibility, parts, safety, or missing instructions. Manuals+ will review the question and use this page’s manual context to help answer it.