1. Introducción
The ACEMIC GT-5 is a portable digital wireless microphone system designed for instruments, particularly electric blowpipes, and stage performances. It features digital audio transmission, 16 selectable frequencies, and a digital ID code to prevent interference. This manual provides detailed instructions for setting up, operating, and maintaining your GT-5 system.

Figura 1.1: The ACEMIC GT-5 wireless microphone system, showing the transmitter (left) and the receiver (right). The transmitter features a 6.35mm plug, while the receiver has controls for power and frequency synchronization.
2. Contenido del paquete
Verifique el contenido del paquete para asegurarse de que todos los artículos estén presentes:
- GT-5 Wireless Transmitter
- GT-5 Wireless Receiver
- Battery (Note: While the product specifications list a battery as an included component, some descriptions indicate it may not be included. Please verify upon receipt.)
3. Características principales
- Transmisión de audio inalámbrica digital para un sonido nítido.
- Preestablecido 16 frecuencias seleccionables para evitar interferencias.
- Digital ID code technology for robust signal integrity.
- Operating range of up to 40 meters (line-of-sight).
- Suitable for electric blowpipe, stagEspectáculos electrónicos y espectáculos callejeros.
- Portable plug-on receiver, directly connects to mixers or active speakers.
- Lithium battery power supply for extended use.
4. Instrucciones de configuración
4.1. Carga de las baterías
Both the transmitter and receiver are powered by 3.7V lithium batteries. Ensure both units are fully charged before first use. Connect the appropriate charging cables (not specified in product details, assume standard USB charging) to a power source.
4.2. Conexión del receptor
- Identify the receiver unit. It features a 6.35mm (1/4 inch) plug.
- Plug the receiver directly into the 6.35mm input jack of your mixer, amplifier, or active speaker. The receiver's plug can swivel for optimal positioning.

Figura 4.2.1: The GT-5 receiver connected to a mixer, demonstrating its plug-and-play functionality.
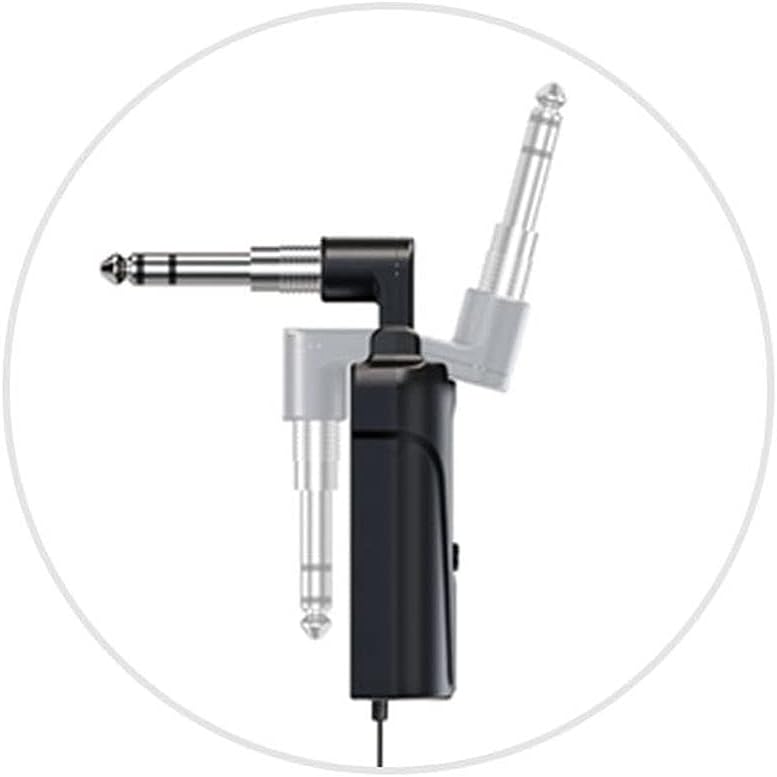
Figura 4.2.2: Detail of the receiver's swivel plug, allowing for flexible connection angles.
4.3. Powering On and Synchronization
- Turn on the receiver by pressing its power button. The display should illuminate.
- Encienda el transmisor presionando su botón de encendido.
- The system uses IR sync to download the frequency from the receiver to the transmitter. Ensure both units are in close proximity (within a few inches) and facing each other's IR windows (if present, otherwise ensure general proximity).
- Press the "SYNC" button on the receiver (or follow specific synchronization instructions if provided with the physical product) to initiate frequency pairing. The RF indicator on both units should show a stable connection once synchronized.
- If interference occurs, you can change the frequency. The system offers 16 selectable channels. Refer to the operating section for frequency adjustment.

Figura 4.3.1: The GT-5 transmitter attached to an electric blowpipe, ready for use.
5. Instrucciones de funcionamiento
5.1. Usando el micrófono
Once the transmitter and receiver are synchronized, the system is ready for use. The transmitter is designed to be attached to an instrument, such as an electric blowpipe.
- Ensure the microphone is positioned correctly to capture the instrument's sound effectively.
- Monitor the audio output from your mixer/speaker to adjust volume levels as needed.
- Maintain a line-of-sight operating range of up to 40 meters between the transmitter and receiver for optimal signal quality. Obstacles can reduce this range.
5.2. Changing Frequencies
If you experience interference or need to operate multiple GT-5 systems simultaneously, you can change the operating frequency.
- On the receiver, use the channel selection buttons (usually labeled CHR or similar, or up/down arrows) to cycle through the 16 available frequencies.
- After selecting a new frequency on the receiver, perform the IR synchronization process again (as described in Section 4.3) to pair the transmitter with the new frequency.
6. Mantenimiento
- Limpieza: Utilice un paño suave y seco para limpiar el exterior del transmisor y el receptor. No utilice limpiadores líquidos ni disolventes.
- Almacenamiento: Cuando no esté en uso, guarde el sistema en un lugar fresco y seco, lejos de la luz solar directa y de temperaturas extremas.
- Cuidado de la batería: For optimal battery life, avoid fully discharging the batteries frequently. If storing for extended periods, charge the batteries to approximately 50% every few months.
- Evite la humedad: Protect the units from water and excessive humidity.
7. Solución de problemas
| Problema | Posible causa | Solución |
|---|---|---|
| No hay salida de sonido |
|
|
| Interferencia o estática |
|
|
| Duración corta de la batería |
|
|
8. Especificaciones
Especificaciones generales del sistema:
- Rango de frecuencia: Region dependent
- Transmisión de audio: Digital wireless
- S de audioampModo de lectura: 48 kHz
- Frecuencias seleccionables: 16 pre-set channels
- Código de identificación: Digital ID code for interference prevention
- Rango de operación: Hasta 40 m (línea de visión)
- Fuente de alimentación: Batería de litio de 3.7 V (para ambas unidades)
Especificaciones del receptor:
- Modo de modulación: pi/4 DQPSK
- Estado latente: <6 ms
- Respuesta de frecuencia: 60 Hz - 15 kHz ± 2 dB
- Distorsión armónica total: <0.8% (1 KHz)
- Relación señal / ruido: >92dB
- Sensibilidad de recepción: -92dBm
- Producción: Enchufe de 6.35 mm
- Uso continuo: >6 horas
- Dimensiones: 185 x 20 x 10 mm
Especificaciones del transmisor:
- Modo de modulación: pi/4 DQPSK
- Potencia del transmisor: 10 mW
- Sensibilidad: -47dB ± 2dB
- Cambio de frecuencia: Sincronización por infrarrojos
- Tipo de micrófono: Condensador
- Dimensión del micrófono: Φ14 x 5.0 mm
- Uso continuo: >6 horas
- Dimensiones: 125 x 40 x 20 mm
9. Garantía y soporte
For warranty information and technical support, please refer to the documentation provided with your purchase or contact ACEMIC customer service directly. Keep your proof of purchase for warranty claims.