
1. Introducción
Thank you for choosing the LiebeWH MH-020G Dual-Frequency Ultrasonic Cleaner. This device is designed for efficient and thorough cleaning of various items using ultrasonic waves, combined with heating and degassing functions. It is suitable for a wide range of applications, from delicate jewelry to industrial parts. Please read this manual carefully before operating the unit to ensure safe and optimal performance.
2. Instrucciones de seguridad
¡ADVERTENCIA!
- Always unplug the power source before filling or emptying the tank.
- Do not operate the heating function without water in the tank.
- Never leave the unit unattended while heating or in operation.
- Ensure the unit is powered off and the water has cooled to a normal temperature before draining the tank.
- Mantenga la unidad fuera del alcance de los niños.
- No sumerja el cuerpo principal del limpiador en agua ni en otros líquidos.
- Use only appropriate cleaning solutions. Avoid flammable or corrosive liquids.
- Si el cable de alimentación está dañado, debe ser reemplazado por el fabricante, su agente de servicio o personas igualmente calificadas para evitar riesgos.
3. Producto terminadoview
The LiebeWH MH-020G Ultrasonic Cleaner features a durable SUS304 stainless steel tank, dual-frequency ultrasonic transducers, and an intuitive control panel for setting time, temperature, and special functions like degassing and turbo mode.

Figure 3.1: Main components of the LiebeWH MH-020G Ultrasonic Cleaner, including the unit, power cord, and cleaning basket.

Figure 3.2: The ultrasonic cleaner with its lid open, revealing the SUS304 stainless steel cleaning tank.

Figure 3.3: The included stainless steel cleaning basket, designed to hold items during the ultrasonic cleaning process.

Figure 3.4: The control panel with digital displays for temperature and time, and buttons for heating, degassing, sweep, turbo, and power.
Aplicaciones
This ultrasonic cleaner is suitable for various applications, including:
- Piezas de hardware
- Componentes electrónicos
- Auto parts
- Dental instruments
- Laboratory equipment
- Jewelry, watches, glasses
- Hospital cleaning rooms

Figura 3.5: ExampAlgunos artículos que se pueden limpiar eficazmente con el limpiador ultrasónico.
4. Configuración
- Desembalaje: Retire con cuidado el limpiador ultrasónico y todos los accesorios del embalaje. Inspeccione si presentan daños.
- Colocación: Coloque la unidad sobre una superficie estable, plana y seca. Asegúrese de que haya suficiente ventilación alrededor de la unidad.
- Conexión de energía: Ensure the power switch on the back of the unit is in the OFF position. Connect the power cord to the unit and then to a grounded electrical outlet (EU Stekker).
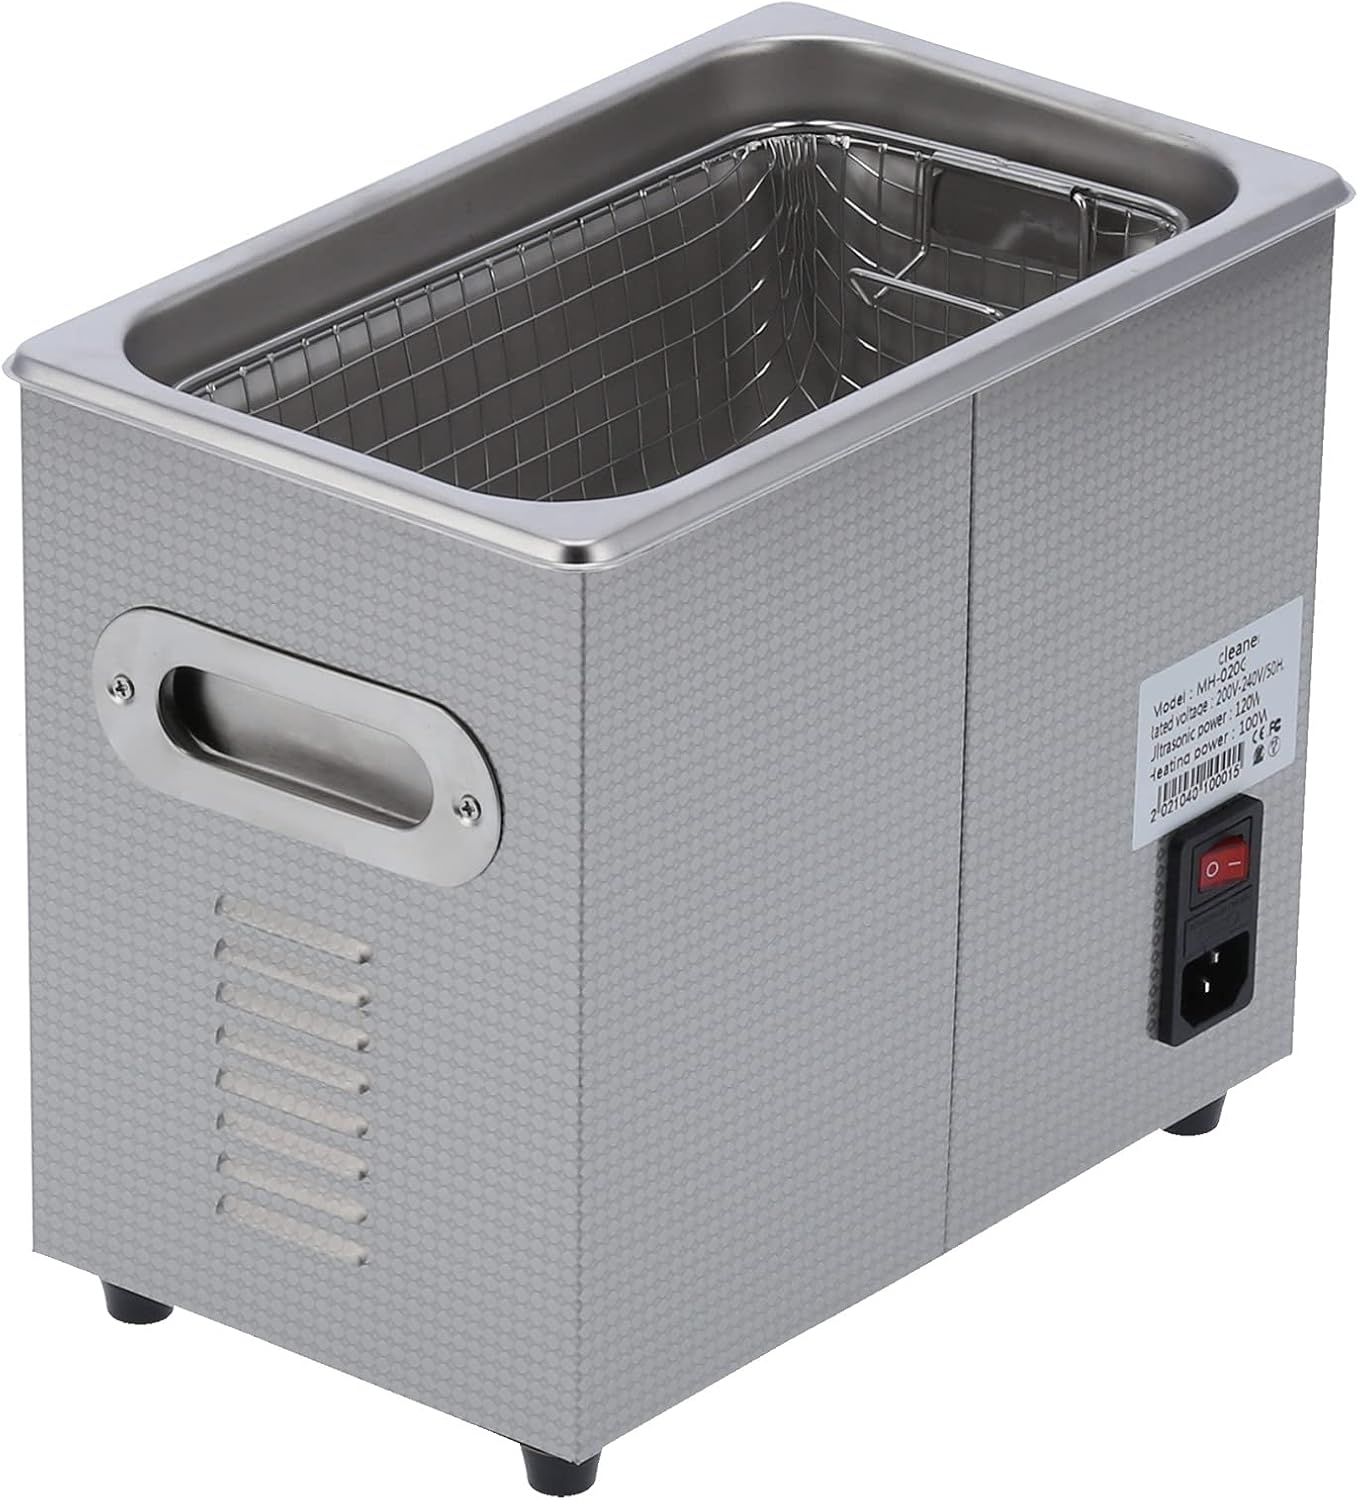
Figura 4.1: Posterior view of the unit, highlighting the power input and main power switch.
5. Instrucciones de funcionamiento
Siga estos pasos para una limpieza eficaz:
- Llene el tanque: Open the lid and fill the stainless steel tank with water. For optimal performance, fill the tank approximately 2/3 full.
- Añadir solución de limpieza (opcional): If required for your items, add an appropriate amount of cleaning detergent to the water. Stir the cleaning agent evenly to mix.
- Colocar elementos: Carefully place the items to be cleaned into the cleaning basket, then lower the basket into the tank. Ensure items are fully submerged but not touching the bottom of the tank directly. For heavily soiled items, pre-soaking may improve results.
- Establecer hora y temperatura:
- Encienda el interruptor de alimentación principal.
- Use the control panel to set the desired cleaning time (0-30 minutes) and heating temperature (0-80 ℃). If your model does not have a heating function, only set the time.
- Press the 'Heating' button to activate the heating function.
- Press the 'Degas' button to remove dissolved gases from the solution, which can improve cleaning efficiency.
- Press the 'Sweep' or 'Turbo' buttons for specialized cleaning modes if desired.
- Empezar a limpiar: Press the 'ON/OFF' button to start the ultrasonic cleaning process. The unit will operate for the set duration.
- Despues de limpiar: Once the cleaning cycle is complete, turn off the unit. Wait for the water to cool down to a safe temperature if heating was used. Carefully remove the cleaning basket with the cleaned items.

Figure 5.1: The ultrasonic cleaner effectively cleaning delicate items such as glasses and a ring.
6. Mantenimiento
Proper maintenance ensures the longevity and efficiency of your ultrasonic cleaner:
- Drain Wastewater: After each use, especially if using cleaning solutions, drain the wastewater from the tank.
- Limpiar el tanque: Wipe the inside of the tank with a dry, soft cloth. Do not use abrasive cleaners or steel wool.
- Limpieza exterior: Limpiar el exterior de la unidad con un anuncioamp Paño. No rocíe agua directamente sobre la unidad.
- Almacenamiento: Guarde la unidad en un lugar fresco y seco cuando no la utilice. Asegúrese de que el tanque esté completamente seco antes de guardarla.
- Inspección regular: Revise periódicamente el cable de alimentación para detectar signos de daño.
7. Solución de problemas
Si tiene problemas con su limpiador ultrasónico, consulte los siguientes problemas y soluciones comunes:
- La unidad no se enciende:
- Compruebe que el cable de alimentación esté bien enchufado tanto a la unidad como a la toma eléctrica.
- Asegúrese de que el interruptor de encendido principal en la parte posterior de la unidad esté en la posición "ENCENDIDO".
- Verify the electrical outlet is functioning correctly by plugging in another appliance.
- Ultrasonic function not working:
- Ensure the tank is filled with water to the recommended level.
- Check if the cleaning time has been set and the 'ON/OFF' button has been pressed.
- Listen for a faint buzzing sound; ultrasonic waves are often not visible.
- La función de calefacción no funciona:
- Ensure the tank is filled with water. The heating element requires water to operate safely.
- Verify the temperature setting is above 0 ℃ and the 'Heating' button is activated.
- Malos resultados de limpieza:
- Ensure items are properly submerged and not overcrowded.
- Consider using a suitable cleaning solution for the type of dirt and material.
- Increase cleaning time or temperature (if applicable).
- Try using the 'Degas' function before cleaning to improve cavitation.
Si los problemas persisten, comuníquese con el servicio de atención al cliente.
8. Especificaciones
Technical specifications for the LiebeWH MH-020G Ultrasonic Cleaner:
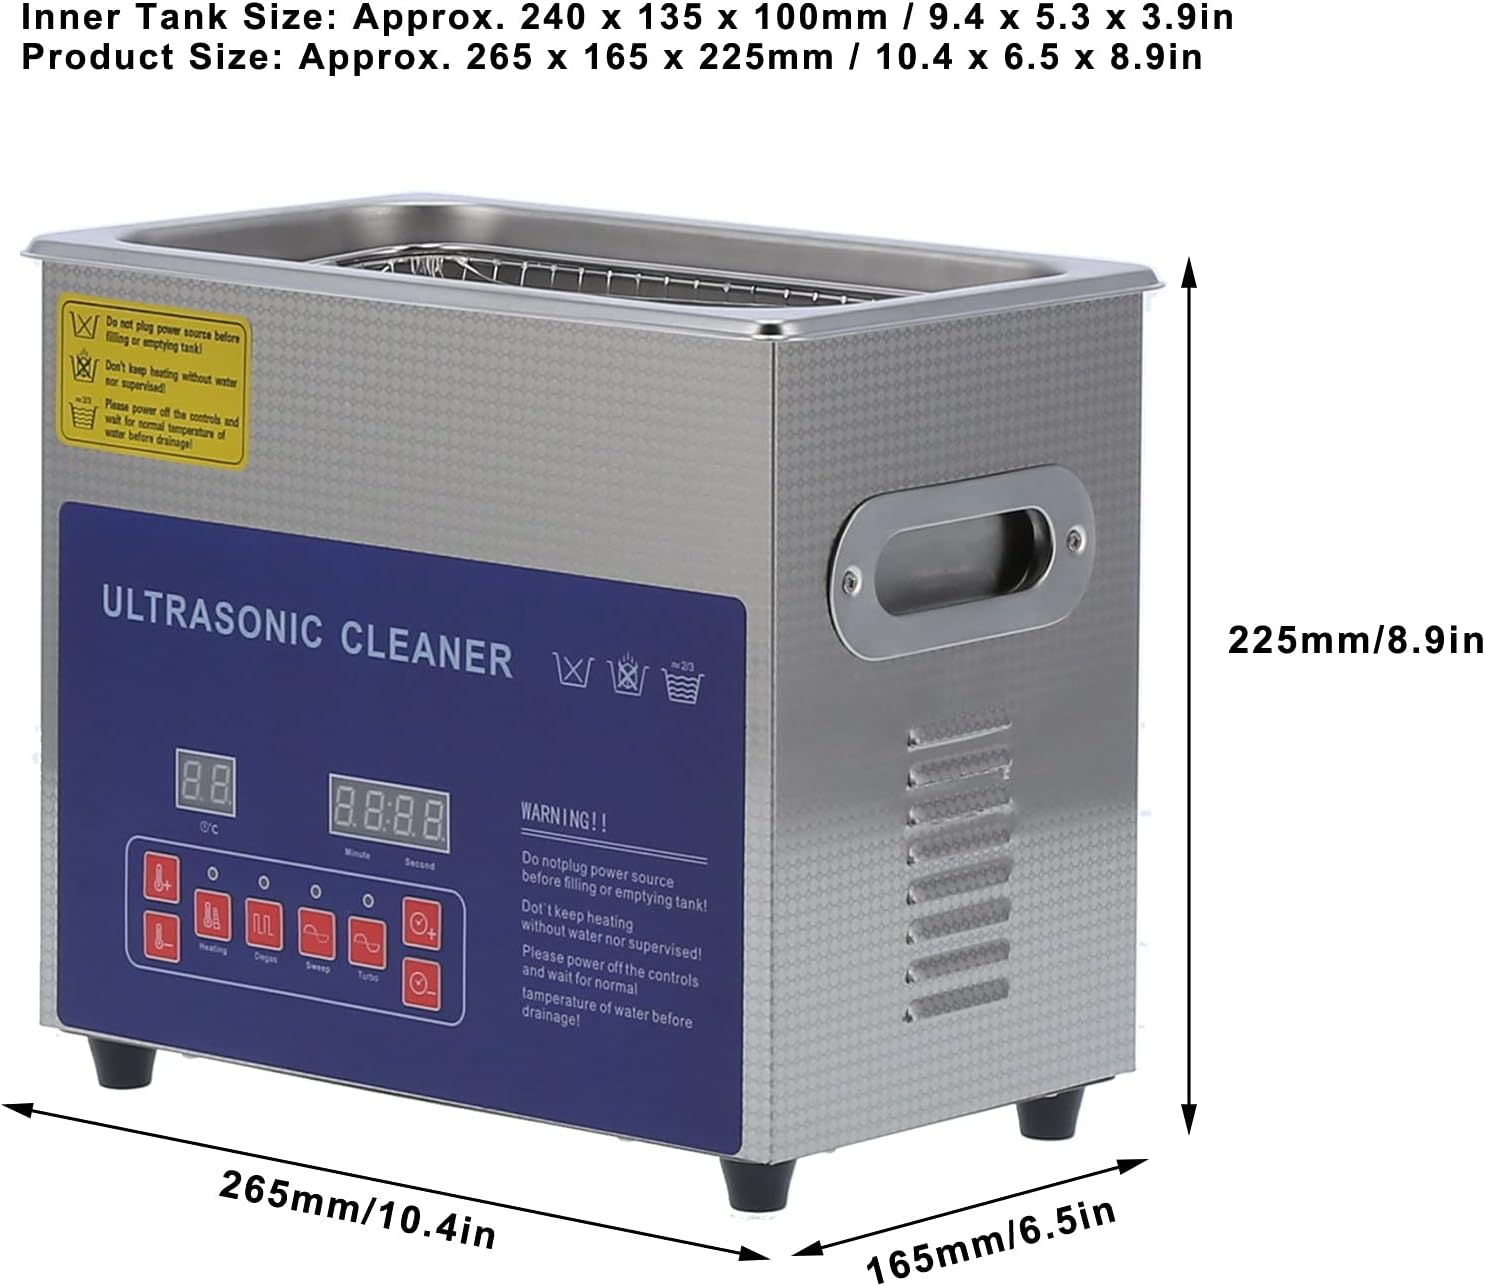
Figure 8.1: Product dimensions for the LiebeWH MH-020G Ultrasonic Cleaner.
| Característica | Especificación |
|---|---|
| Modelo | MH-020G |
| Material | Acero inoxidable SUS304 |
| Capacidad | 3 Liters (Actual capacity: 3L) |
| Poder ultrasónico | 120 W |
| Potencia de calefacción | 100 W |
| Frecuencia | Dual Frequency: 40 kHz / 33 kHz |
| Vibrating Heads | 2 |
| Rango de temperatura de calentamiento | 0-80 ℃ |
| Cleaning Time Range | 0-30 minutos |
| Inner Tank Dimensions (L x W x H) | Aprox. 240 x 135 x 100 mm (9.4 x 5.3 x 3.9 pulgadas) |
| Tamaño del producto (L x An x Al) | Aprox. 265 x 165 x 225 mm (10.4 x 6.5 x 8.9 pulgadas) |
| Fabricante | LiebeWH |
| Dimensiones del paquete | 34 x 30 x 25 cm |
| Peso del paquete | 3.68 kilogramos |
9. Garantía y soporte
LiebeWH products are covered by a quality guarantee. For specific warranty details, please refer to the documentation provided with your purchase or contact your retailer. For technical support, troubleshooting assistance, or spare parts, please contact LiebeWH customer service through their official channels or your point of purchase.