
1. Introducción
Thank you for choosing the CREATE FRYER AIR PRO 3.5L Air Fryer. This appliance uses advanced hot air technology to cook your favorite foods with little to no oil, offering a healthier alternative to traditional frying. It features a 3.5-liter capacity, a digital LCD screen, and 8 pre-installed programs for convenient cooking. Please read this manual thoroughly before first use to ensure safe and optimal performance.
2. Instrucciones de seguridad importantes
Siga siempre las precauciones básicas de seguridad al utilizar aparatos eléctricos para reducir el riesgo de incendio, descarga eléctrica y lesiones.
- Lea todas las instrucciones antes de usar.
- No sumerja la unidad principal, el cable ni el enchufe en agua ni en otros líquidos.
- Asegúrese del volumentage indicado en el aparato corresponde al voltaje de su red local.tage.
- Es necesaria una estrecha supervisión cuando cualquier aparato sea utilizado por niños o cerca de ellos.
- Desenchufe el aparato del tomacorriente cuando no lo utilice y antes de limpiarlo. Deje que se enfríe antes de colocar o quitar piezas.
- No opere ningún aparato con un cable o enchufe dañado, o después de que el aparato funcione mal o haya sufrido algún daño de cualquier tipo.
- No utilice accesorios no recomendados por el fabricante del aparato.
- No coloque el aparato contra la pared ni contra otros electrodomésticos. Deje al menos 10 cm de espacio libre en la parte trasera y los laterales, y 10 cm por encima del aparato.
- No coloque nada encima del aparato.
- No utilice el aparato para ningún otro fin que el descrito en este manual.
- Hot air is released through the air outlet openings during hot air frying. Keep your hands and face at a safe distance from the steam and from the air outlet openings.
- The outer surfaces may become hot during use. Do not touch hot surfaces. Use handles or knobs.
- Asegúrese siempre que la cesta esté correctamente insertada antes de utilizarla.
3. Producto terminadoview y componentes
Familiarize yourself with the main parts of your CREATE FRYER AIR PRO:
- Unidad principal con panel de control
- Pantalla LCD digital
- Temperature/Time Control Dial
- Cesta para freidora de aire
- Plato para verduras (extraíble)
- Manejar
- Entrada de aire
- Ventilaciones de salida de aire

Image: A composite image displaying the CREATE FRYER AIR PRO air fryer unit alongside its separate basket and crisper plate components.
4. Configuración y primer uso
4.1 Desembalaje
Carefully remove all packaging materials, stickers, and labels from the appliance. Keep packaging for future storage or disposal.
4.2 Limpieza inicial
- Limpie el exterior del aparato con un paño húmedo.amp paño.
- Clean the basket and crisper plate with hot water, dish soap, and a non-abrasive sponge. These parts are dishwasher safe.
- Asegúrese de que todas las piezas estén completamente secas antes de su uso.
4.3 Colocación
Place the appliance on a stable, horizontal, and heat-resistant surface. Ensure there is adequate air circulation around the unit (at least 10 cm clearance on all sides and top).
4.4 Primer uso (ciclo de rodaje)
Se recomienda usar la freidora de aire en vacío durante unos 10-15 minutos a 180 °C antes de cocinar alimentos por primera vez. Esto ayuda a eliminar cualquier residuo de fabricación y olor. Es normal que se perciba un ligero olor durante este proceso.
5. Instrucciones de funcionamiento
5.1 Funcionamiento básico
- Conecte el cable de alimentación a una toma de corriente con conexión a tierra. El aparato emitirá un pitido y la pantalla se iluminará brevemente.
- Pull the basket out of the air fryer. Place your ingredients into the basket, ensuring not to overfill (do not exceed the MAX line).
- Deslice la canasta nuevamente dentro de la freidora de aire hasta que encaje en su lugar.
- The display will show the default temperature and time. Use the control dial to adjust the temperature (80°C to 200°C) and time (1 to 60 minutes). Press the dial to switch between temperature and time settings.
- Press the Start/Pause button (usually a play/pause icon) to begin cooking.
- Durante la cocción, puede extraer la cesta para agitar o voltear los ingredientes. La freidora de aire se pausará automáticamente y se reanudará al volver a insertar la cesta.
- Una vez que el temporizador llegue a cero, la freidora de aire emitirá un pitido, indicando que la cocción está completa.
- Carefully pull out the basket and empty the cooked food. Use heat-resistant tongs or gloves.

Imagen: Un detalle view of the CREATE FRYER AIR PRO's digital control panel, highlighting the temperature display and various cooking program icons.
5.2 Programas preinstalados
The FRYER AIR PRO comes with 8 pre-installed programs for common dishes. To use them:
- After placing food in the basket, press the Menu button (often represented by multiple icons or a 'P' symbol) to cycle through the programs.
- Each program has a preset temperature and time. You can adjust these settings manually after selecting a program if desired.
- Presione el botón Inicio/Pausa para comenzar el programa seleccionado.
The 8 programs include:
- Pommes Frites (Fries)
- Revben (Ribs)
- Fisk (Fish)
- Räkor (Shrimp)
- Kyckling (Chicken)
- Pajer (Pies)
- Kycklingben (Chicken Legs)
- Bröd (Bread)
5.3 Consejos para cocinar
- Para obtener mejores resultados, precaliente la freidora de aire durante 3 a 5 minutos antes de agregar la comida.
- Agite la canasta a la mitad de la cocción para dorar de manera uniforme, especialmente los alimentos más pequeños, como papas fritas o nuggets.
- Lightly brush or spray food with oil for extra crispiness, though many foods require no added oil.
- Do not overcrowd the basket. Cook in batches if necessary to ensure proper air circulation and even cooking.
- For foods that typically require baking, the air fryer can often achieve similar results with a crispy exterior.
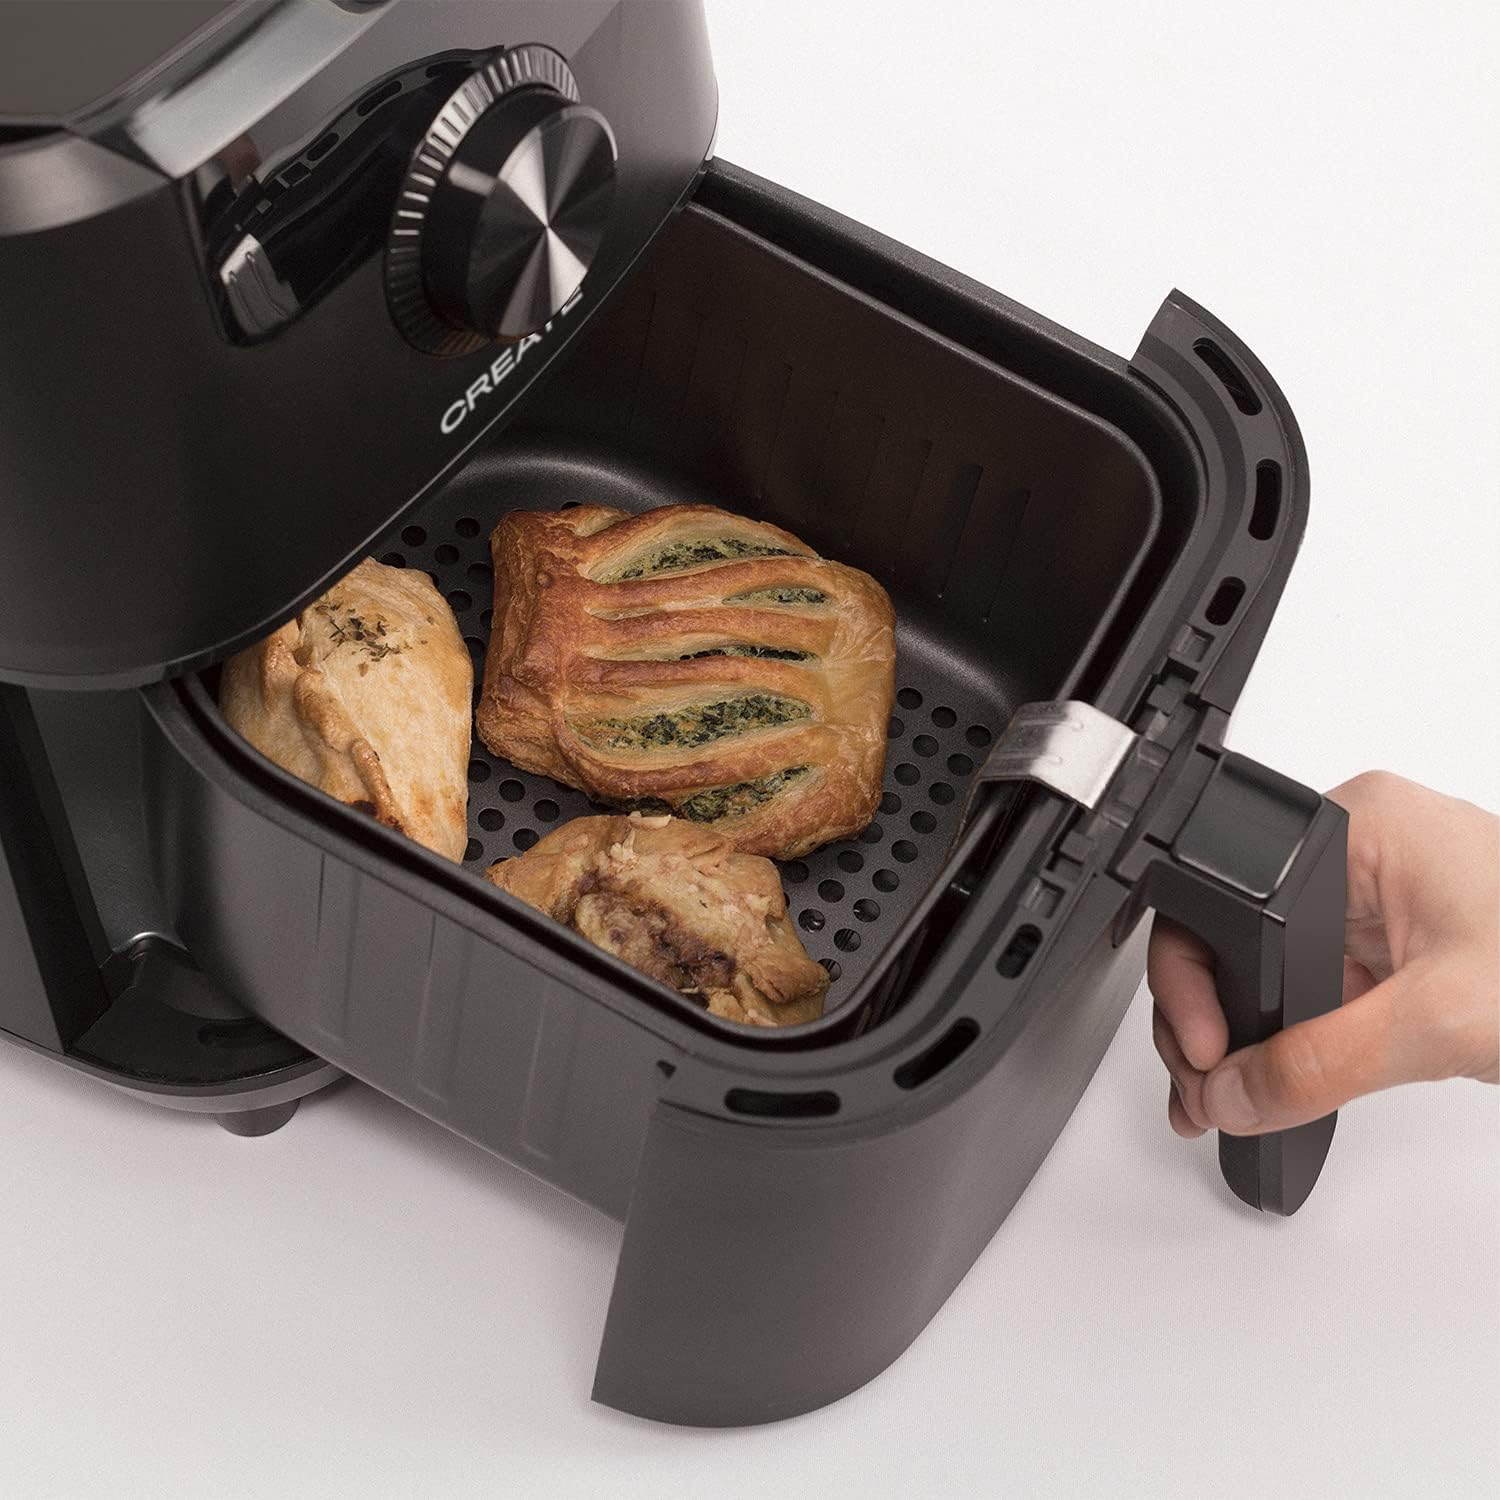
Image: The air fryer basket, pulled out from the main unit, containing cooked pastries and chicken pieces, demonstrating the cooking capacity.
6. Mantenimiento y limpieza
Limpie la freidora de aire después de cada uso.
- Desenchufe el aparato del tomacorriente de pared y deje que se enfríe completamente antes de limpiarlo.
- Limpie el exterior de la unidad principal con adamp Paño. No utilice limpiadores abrasivos.
- Remove the basket and crisper plate. Wash them with hot water, dish soap, and a non-abrasive sponge. The non-stick coating makes cleaning easy. These parts are also dishwasher safe.
- For stubborn food residues, soak the basket and crisper plate in hot water with dish soap for about 10 minutes before cleaning.
- Asegúrese de que todas las piezas estén completamente secas antes de volver a ensamblar o guardar el aparato.
- Guarde la freidora en un lugar fresco y seco.

Image: The air fryer basket, with its crisper plate, fully removed from the main unit, illustrating its readiness for cleaning.
7. Solución de problemas
| Problema | Posible causa | Solución |
|---|---|---|
| La freidora no se enciende. | El aparato no está enchufado. | Asegúrese de que el cable de alimentación esté enchufado de forma segura a una toma de corriente con conexión a tierra. |
| La comida no se cocina de manera uniforme. | Basket is overcrowded. Food not shaken. | Cocine en tandas más pequeñas. Agite la cesta a la mitad de la cocción. |
| Del aparato sale humo blanco. | Residuos de grasa de uso anterior. | Limpie bien la cesta y el plato para verduras después de cada uso. |
| La comida no queda crujiente. | Too much moisture in food. Not enough oil (if desired). | Pat food dry before cooking. Lightly spray or brush with oil for extra crispiness. |
8. Especificaciones
- Nombre del modelo: FRYER AIR PRO
- Número de modelo: 52025_186434
- Marca: CREAR
- Capacidad: 3.5 litros
- Quétage: 1500 vatios
- Volumentage: 240 V
- Rango de temperatura: 80°C - 200°C
- Método de control: Tocar, marcar
- Características especiales: Programmable, Temperature Control, Digital Display
- Material: Plástico
- Color: Negro
- Dimensiones (profundidad x anchura x altura): 37.8 cm x 26.5 cm x 33.7 cm
- Recubrimiento antiadherente: Sí
9. Garantía y soporte
For warranty information, please refer to the warranty card included with your product or visit the official CREATE website. If you encounter any issues not covered in this manual, please contact CREATE customer support for assistance.
Websitio: www.create.com (Example link, please refer to actual manufacturer's websitio)