
1. Introducción
This manual provides essential information for the safe and efficient operation, maintenance, and troubleshooting of your Profile GE Automatic Espresso Machine + Milk Frother. Please read these instructions thoroughly before first use and retain for future reference.

Image 1.1: The Profile GE Automatic Espresso Machine with a prepared espresso and a latte.
2. Información de seguridad
Siga siempre las precauciones básicas de seguridad al utilizar aparatos eléctricos para reducir el riesgo de incendio, descarga eléctrica y lesiones a las personas.
- Ensure the appliance is connected to a grounded outlet.
- No sumerja la máquina, el cable o el enchufe en agua u otros líquidos.
- Desconéctelo del tomacorriente cuando no esté en uso y antes de limpiarlo.
- No utilice ningún aparato con un cable o enchufe dañado.
- Mantenga las manos y los cables alejados de superficies calientes.
- Utilice únicamente los accesorios recomendados por el fabricante.
3. Producto terminadoview
El profesionalfile GE Automatic Espresso Machine is designed for convenience and quality, featuring an integrated grinder, milk frother, and smart connectivity.
3.1 Componentes
- Panel de control: Touch-sensitive buttons for various drink selections and functions.
- Tolva de frijoles: Stores whole coffee beans for grinding.
- Reserva de agua: Tanque extraíble para suministro de agua.
- Boquilla de café: Dispensa café recién hecho.
- Varilla de vapor: Para espumar leche.
- Bandeja de goteo: Recoge el exceso de líquidos.
- Contenedor de terreno: Recoge posos de café usados.

Image 3.1: The top control panel with buttons for Espresso, Americano, My Brew, Steam, and Hot Water.

Image 3.2: The integrated bean hopper with whole coffee beans and grind size adjustment knob.

Image 3.3: The removable water reservoir being lifted from the machine.
4. Configuración
4.1 Desembalaje y colocación inicial
- Retire con cuidado todos los materiales de embalaje.
- Place the machine on a stable, level surface away from heat sources and direct sunlight.
- Asegúrese de que haya suficiente espacio alrededor de la máquina para ventilación y acceso a los componentes.
4.2 Limpieza inicial
Before first use, clean all removable parts with warm water and mild detergent. Rinse thoroughly and dry. Wipe the exterior of the machine with a damp paño.
4.3 Llenado del depósito de agua
- Remove the water reservoir from the machine (refer to Image 3.3).
- Fill with fresh, cold drinking water up to the MAX line.
- Replace the reservoir securely into the machine.
4.4 Adición de granos de café
- Open the lid of the bean hopper (refer to Image 3.2).
- Vierta los granos de café enteros en la tolva. No la llene demasiado.
- Cierre bien la tapa.
4.5 Powering On and Initial Rinse
- Enchufe el cable de alimentación a una toma eléctrica con conexión a tierra.
- Press the power button on the control panel. The machine will perform an initial rinse cycle.
- Coloque un recipiente debajo de la salida del café para recoger el agua de enjuague.
4.6 Conexión de la aplicación SmartHQ
For enhanced customization and software updates, connect your espresso machine to the SmartHQ app.
- Descargue la aplicación SmartHQ desde la tienda de aplicaciones de su dispositivo.
- Follow the in-app instructions to pair your espresso machine.
- Customize drink preferences, volume, and strength through the app.

Image 4.1: Using the SmartHQ app to control and customize the espresso machine.
5. Instrucciones de funcionamiento
5.1 Preparar café
The machine offers Espresso, Americano, Lungo, and Hot Water options. The 'My Cup' setting is pre-set to Ristretto and can be adjusted via the SmartHQ app.
- Ensure the water reservoir is filled and the bean hopper contains coffee beans.
- Coloque una taza debajo de la salida de café.
- Select your desired drink (Espresso, Americano, Lungo, My Cup) from the control panel.
- La máquina molerá automáticamente los granos, preparará y dispensará el café.

Image 5.1: The espresso machine dispensing a fresh shot of espresso.
5.2 Ajuste del tamaño de molienda
The integrated conical burr grinder allows for 5 levels of grind size adjustment, from coarsest to finest, to optimize flavor extraction.
- Locate the grind size adjustment knob inside the bean hopper (refer to Image 3.2).
- Turn the knob to select your desired grind setting. Finer grinds are suitable for espresso, while coarser grinds are better for longer coffee types.
5.3 Uso del espumador de vapor
The steam frother creates various milk textures for cappuccinos, lattes, and more.
- Fill the included stainless steel frothing pitcher with cold milk.
- Coloque la varilla de vapor dentro de la leche.
- Presione el botón “Vapor” en el panel de control.
- Move the pitcher to achieve desired foam texture.
- Once finished, press the 'Steam' button again to stop.
- Immediately clean the steam wand after each use to prevent milk residue buildup.
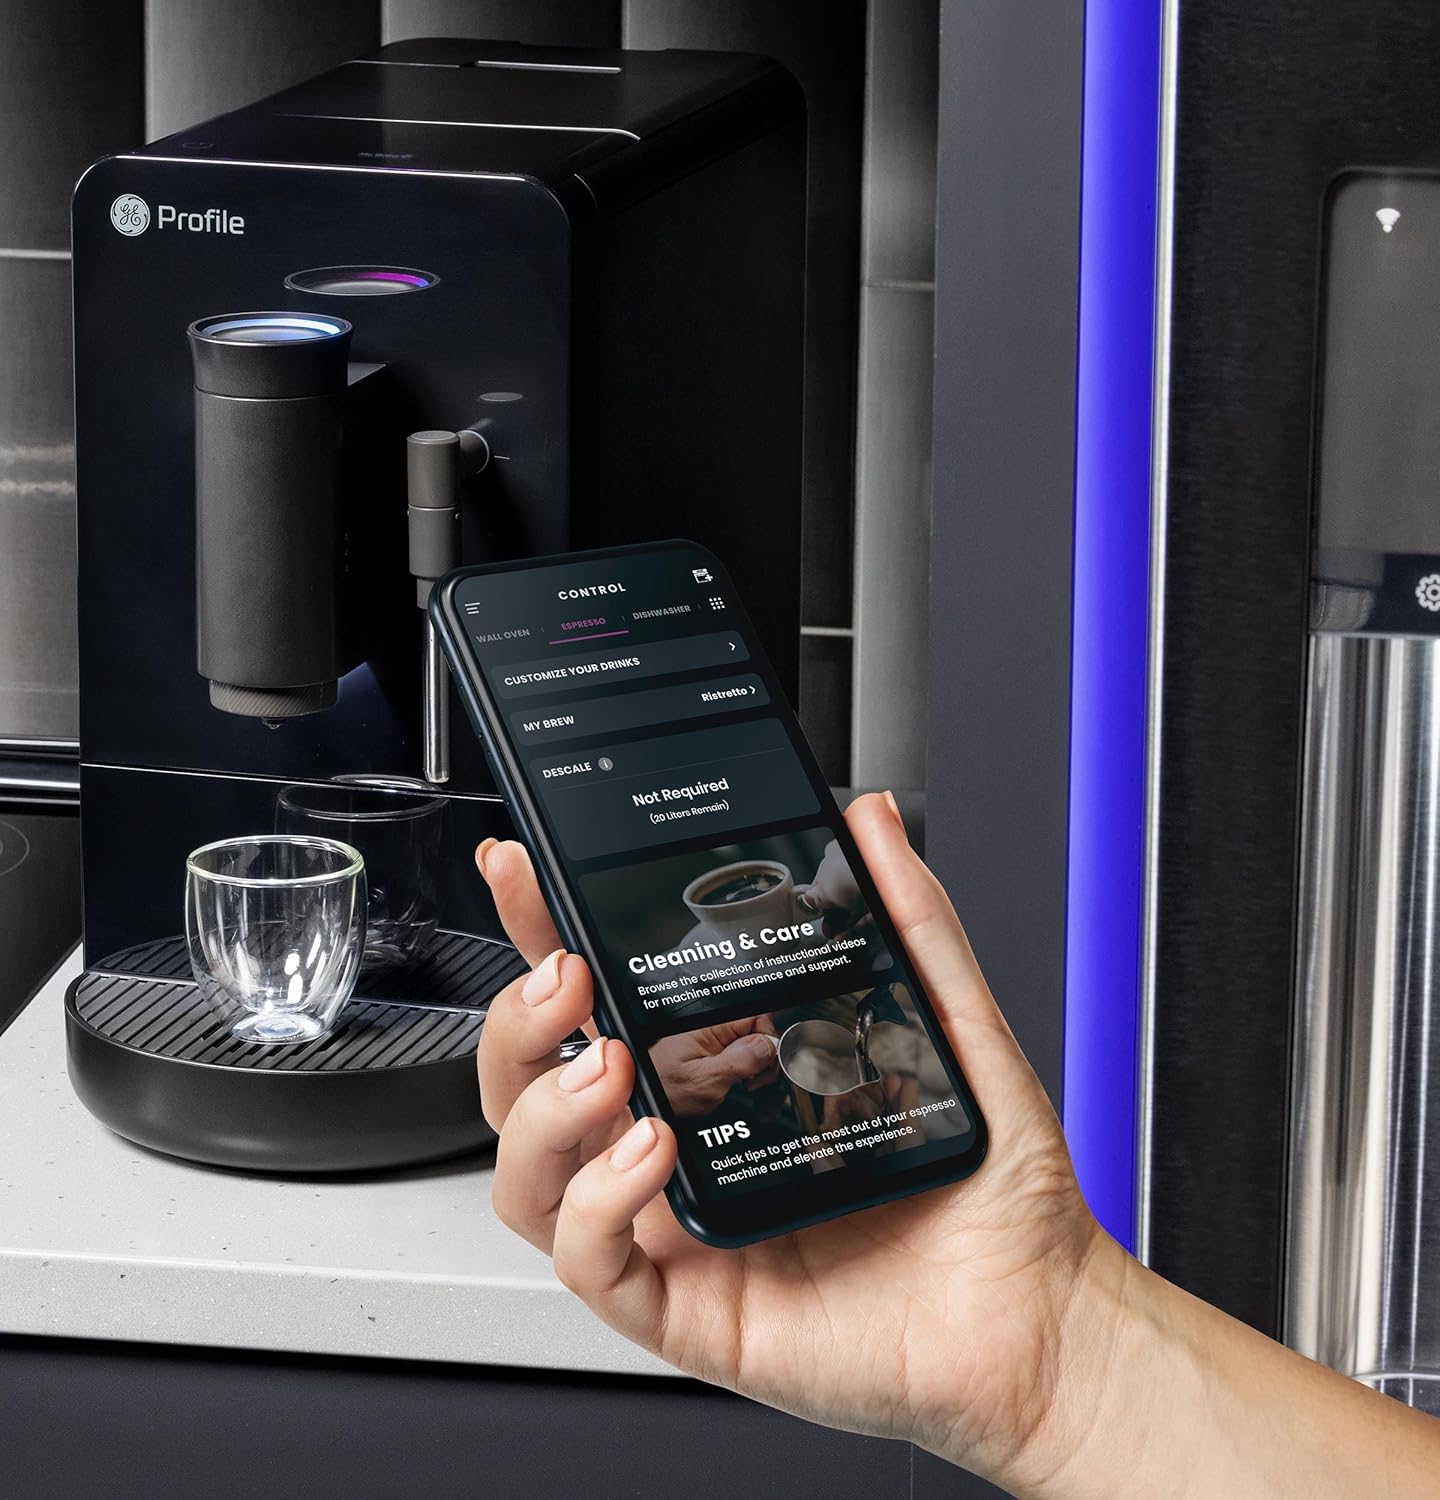
Image 5.2: A hand using the steam wand to froth milk in a stainless steel pitcher.
6. Mantenimiento
La limpieza y el mantenimiento regulares garantizan un rendimiento óptimo y la longevidad de su máquina de café expreso.
6.1 Limpieza diaria
- Varilla de vapor: Después de cada uso, limpie la varilla de vapor con un paño húmedo.amp cloth. Purge steam briefly to clear any milk residue from the nozzle.
- Bandeja de goteo y recipiente para posos: Vacíe y enjuague a diario. La máquina indicará cuándo es necesario vaciar el depósito de posos.
- Reserva de agua: Enjuague diariamente y rellene con agua fresca.
6.2 Limpieza semanal
- Unidad de preparación: The brew unit is typically removable for rinsing under running water. Refer to the included cleaning kit instructions for detailed steps.
- Tolva de frijoles: Periodically clean out any oil residue or old beans.
6.3 Descalcificar
The machine will prompt you when descaling is required. Use a descaling solution specifically designed for espresso machines and follow the instructions provided with the descaling agent or in the SmartHQ app.
7. Solución de problemas
Esta sección aborda problemas comunes que puede encontrar con su máquina de café expreso.
| Problema | Posible causa | Solución |
|---|---|---|
| No coffee dispensed / "Add Beans" message | Bean hopper empty or beans not feeding correctly. | Refill bean hopper. Gently stir beans to ensure they feed into the grinder. |
| El café está demasiado débil o aguado | Grind size too coarse, insufficient coffee dose, or descaling needed. | Adjust grind size to a finer setting. Check SmartHQ app for strength settings. Perform descaling if prompted. |
| La leche no hace espuma correctamente | Steam wand clogged, milk type unsuitable, or insufficient steam pressure. | Clean steam wand thoroughly. Use fresh, cold milk. Ensure machine is heated to steam temperature. |
| La máquina no enciende | No enchufado, sin energíatage, o se disparó el disyuntor. | Check power connection. Verify power outlet functionality. Reset circuit breaker if necessary. |
| SmartHQ app connectivity issues | Incorrect Wi-Fi password, network interference, or app bug. | Verify Wi-Fi credentials. Ensure machine is within Wi-Fi range. Restart app and machine. Check for app updates. |
8. Especificaciones
- Marca: Profile
- Nombre del modelo: GE profesionalfile Automatic Espresso Machine + Frother
- Número de modelo del artículo: P7CEBBS6RBB
- Color: Negro
- Dimensiones del producto: 7" de profundidad x 16" de ancho x 12.5" de alto
- Peso del artículo: 16 libras
- Volumentage: 120 V
- Modo de operación: Completamente automático
- Características especiales: Built-In Bean Hopper, Built-In Conical Burr Grinder & Adjustable Grind Size, Programmable My Brew Setting, Steam Frother & Frothing Pitcher, WiFi Connected
- Componentes incluidos: Kit de limpieza, contenedor de granos de café, máquina de espresso, tubo de vapor, jarra de leche, tanque de agua
- Tipo de entrada de café: Frijoles enteros
- Entrada de interfaz humana: Pantalla táctil

Image 8.1: Product dimensions of the espresso machine.
9. Garantía y soporte
This product is covered by a manufacturer's warranty. For specific warranty details, registration, or technical support, please refer to the warranty card included with your product or visit the official GE Profile website. You may also contact customer service through the SmartHQ app for assistance.