
Introducción
Thank you for choosing the Optex 990047 Indoor/Outdoor Wireless Digital Thermometer. This device provides accurate temperature readings for both your indoor environment and an outdoor location via a wireless sensor. Please read this manual carefully before use to ensure proper operation and to maximize the lifespan of your thermometer.
Contenido del paquete
- 1 x Optex 990047 Main Display Unit
- 1 x Sensor inalámbrico para exteriores
- 1 x Manual de usuario
- (Batteries not included, typically requires AAA or AA batteries for both units)
Producto terminadoview
Familiarize yourself with the components of your Optex thermometer.
Main Display Unit (Front)

Imagen: Frente view of the Optex 990047 main display unit. The digital screen shows indoor and outdoor temperatures, along with high/low records and trend indicators. Below the screen are three buttons: 'CH', '°C/°F', and 'CLEAR'.
- Pantalla digital: Shows indoor temperature (top) and outdoor temperature (bottom), along with HI/LO records and temperature trend arrows.
- Botón CH: Selects the wireless channel (if multiple sensors are used) or initiates sensor search.
- Botón °C/°F: Alterna entre unidades de temperatura Celsius y Fahrenheit.
- Botón CLEAR: Clears the recorded HI/LO temperatures.
Main Display Unit (Back)

Imagen: Atrás view of the Optex 990047 main display unit. It features a battery compartment cover and an integrated kickstand for tabletop placement, as well as a hanging hole.
- Compartimento de la batería: Houses the batteries for the main unit.
- Pata de cabra: Allows the unit to stand upright on a flat surface.
- Orificio para montaje en pared: For hanging the unit on a wall.
Sensor de exterior inalámbrico
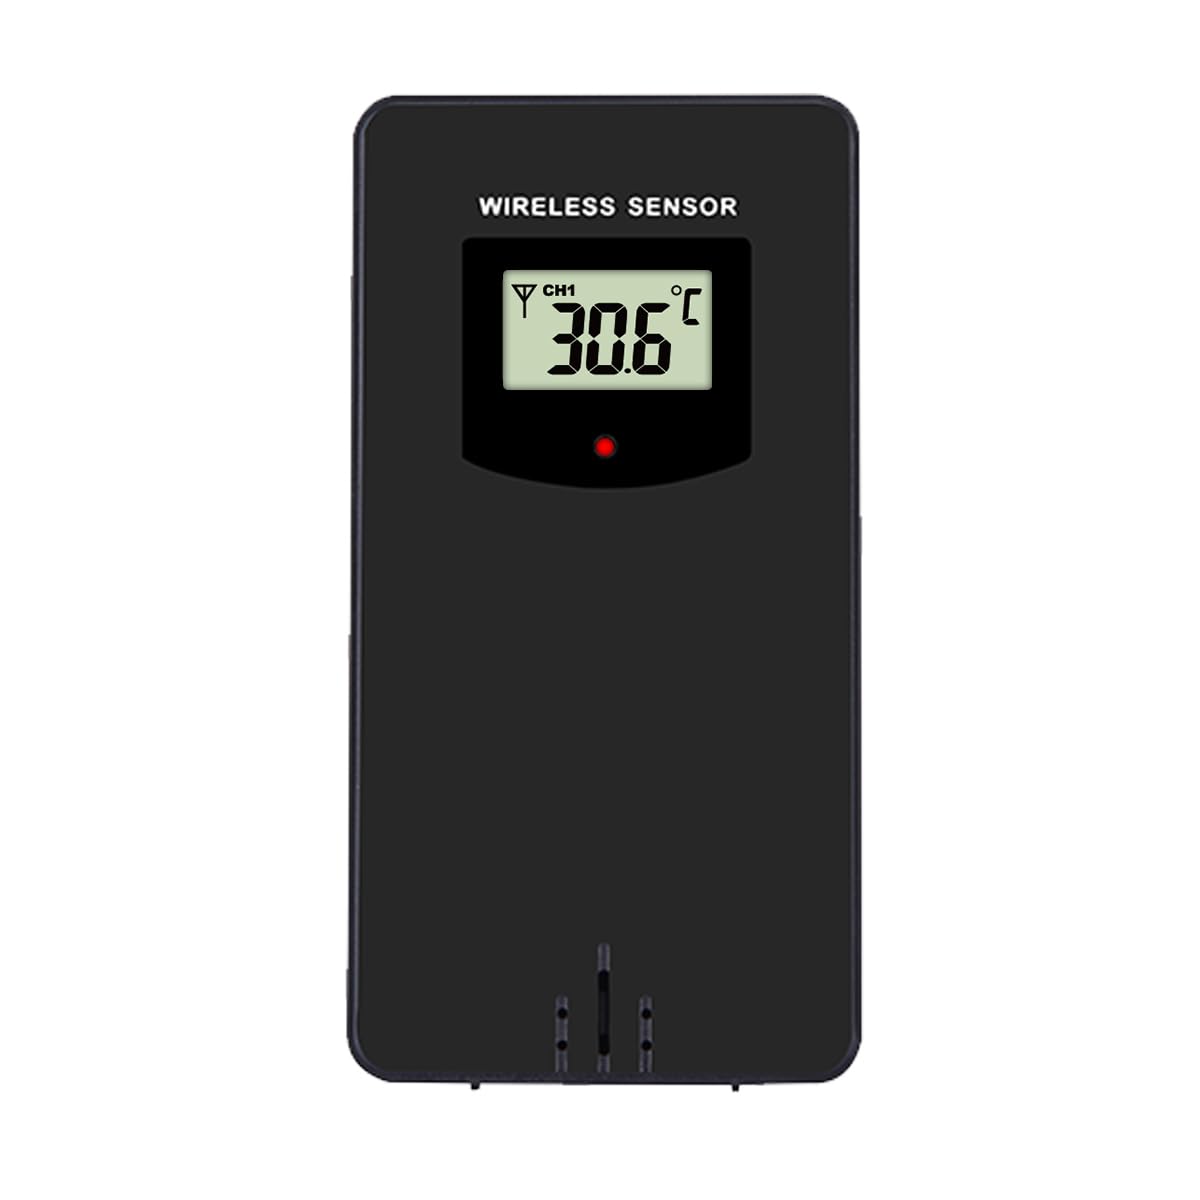
Imagen: Frente view of the Optex wireless outdoor temperature sensor. It has a small digital display showing the current temperature and channel, along with a red indicator light and a battery compartment on the back.
- Sensor de temperatura: Measures the outdoor temperature.
- Indicador de transmisión: A small LED light that flashes when data is transmitted.
- Compartimento de la batería: Houses the batteries for the outdoor sensor.
- Cambio de canal: (Typically inside the battery compartment) Allows selection of a specific channel (1, 2, or 3) if using multiple sensors.
Configuración
- Install Batteries in the Outdoor Sensor:
- Abra el compartimiento de la batería en la parte posterior del sensor inalámbrico.
- Inserte 2 pilas AAA (no incluidas) de acuerdo con las marcas de polaridad (+/-).
- Cierre el compartimento de la batería.
- Note: If there is a channel switch inside the compartment, ensure it is set to Channel 1 for initial setup.
- Install Batteries in the Main Display Unit:
- Abra el compartimiento de la batería en la parte posterior de la unidad de pantalla principal.
- Inserte 2 pilas AAA (no incluidas) de acuerdo con las marcas de polaridad (+/-).
- Cierre el compartimento de la batería.
- The display will light up and begin searching for the outdoor sensor.
- Emparejamiento del sensor:
- Place the outdoor sensor and the main display unit close to each other during the initial setup.
- The main unit should automatically detect and connect to the outdoor sensor within a few minutes. The outdoor temperature will appear on the display.
- If the outdoor temperature does not appear, press and hold the "CH" button on the main unit for 3 seconds to initiate a manual search for the sensor.
- Colocación del sensor exterior:
- Choose a shaded location for the outdoor sensor, away from direct sunlight and rain, to ensure accurate readings.
- Avoid placing it near heat sources (e.g., vents, appliances) or metal objects that could interfere with the wireless signal.
- The maximum wireless range is approximately 30 meters (100 feet) in open air. Walls and obstacles will reduce this range.
Operación
Reading Temperatures
The main display unit shows the indoor temperature at the top and the outdoor temperature (from the wireless sensor) at the bottom. Both displays show the current temperature, along with the recorded high (HI) and low (LO) temperatures for the day, and a trend indicator.
Cambio de unidades de temperatura (°C/°F)
Presione el ° C / ° F button once to switch between Celsius and Fahrenheit temperature units.
Clearing HI/LO Records
The thermometer automatically records the highest and lowest temperatures since the last reset. To clear these records and start new ones, press the CLARO button once. The HI/LO values will reset to the current temperature.
Channel Selection (for multiple sensors)
If you are using multiple outdoor sensors (sold separately), you can switch between their readings by pressing the CH button. Each press will cycle through the available channels (e.g., CH1, CH2, CH3). Ensure each sensor is set to a unique channel via its internal switch.
Mantenimiento
- Limpieza: Limpie las unidades con un paño suave y seco.amp Paño. No utilice limpiadores abrasivos ni disolventes.
- Reemplazo de batería: Reemplace las baterías de la unidad principal y del sensor exterior cuando aparezca el indicador de batería baja en la pantalla. Siempre reemplace todas las baterías a la vez por otras nuevas del mismo tipo.
- Almacenamiento: If storing the thermometer for an extended period, remove all batteries to prevent leakage. Store in a cool, dry place.
Solución de problemas
| Problema | Solución |
|---|---|
| No outdoor temperature reading / "---" displayed. |
|
| Lecturas de temperatura inexactas. |
|
| La pantalla está tenue o en blanco. |
|
Presupuesto
- Modelo: Optex 990047
- Tipo de pantalla: LCD digital
- Rango de temperatura interior: -10 °C a 50 °C (14 °F a 122 °F) (Estimated, based on typical indoor thermometers)
- Rango de temperatura exterior: -40 °C a 60 °C (-40 °F a 140 °F) (Estimated, based on typical outdoor sensors)
- Precisión de temperatura: +/- 1°C (+/- 2°F) (Estimado)
- Alcance inalámbrico: Hasta 30 metros (100 pies) al aire libre (Estimado)
- Fuente de alimentación (unidad principal): 2 pilas AAA de 1.5 V (no incluidas)
- Fuente de alimentación (sensor exterior): 2 pilas AAA de 1.5 V (no incluidas)
- Material: Plástico
- Color: Negro
Información de seguridad
- No exponga la unidad principal ni el sensor a temperaturas extremas, luz solar directa o humedad excesiva.
- Do not immerse the units in water. The outdoor sensor is weather-resistant but not waterproof.
- Do not attempt to disassemble or repair the units. This will void the warranty.
- Deseche las baterías viejas de manera responsable de acuerdo con las regulaciones locales.
- Mantenga las pilas fuera del alcance de los niños.
Garantía y soporte
Optex products are designed for reliability and performance. For warranty information or technical support, please refer to the contact details provided with your purchase or visit the official Optex webSitio. Tenga a mano el número de modelo (990047) al contactar con el soporte técnico.