
1. Introducción
Thank you for choosing the DELLA Umbra Series 9000 BTU WiFi Mini Split AC with Heat Pump. This manual provides essential information for the safe and efficient operation, installation, and maintenance of your unit. Please read this manual thoroughly before installation and use, and retain it for future reference.
Información importante de seguridad
This appliance is designed for professional installation only. Attempting DIY installation without proper qualifications may result in injury, property damage, or voiding the warranty. Always consult a qualified HVAC technician for installation and complex maintenance tasks.
- Asegúrese de que la fuente de alimentación coincida con las especificaciones de la unidad.
- No bloquee las entradas ni salidas de aire.
- Mantenga a los niños y a las mascotas alejados de la unidad exterior.
- Apague la energía antes de realizar cualquier mantenimiento o limpieza.
- Utilice únicamente refrigerantes especificados (R32).
2. Producto terminadoview
The DELLA Umbra Series Mini Split AC is an energy-efficient system designed for cooling and heating spaces up to 450 sq.ft. It features WiFi connectivity, Alexa compatibility, and a heat pump for year-round comfort.
Características principales:
- Eficiencia energética: Clasificación SEER2 de 19 con tecnología DC Inverter para un ahorro de energía de hasta un 30 %.
- Funciones inteligentes: 4D airflow (up-down, left-right), I Feel mode, 24-hour timer, sleep mode, eco energy-saving mode, multiple fan speeds, turbo function.
- Sensor inteligente: Remote control senses room temperature for optimal comfort and energy savings.
- Funcionamiento silencioso: Funciona a un nivel ultra silencioso de 42 dBa.
- Amplia cobertura: Cools and heats up to 450 sq.ft, operating in temperatures as low as 19°F.
- Refrigerante R32: Utiliza refrigerante R32 respetuoso con el medio ambiente.
Diagrama de componentes:

Figure 2.1: Main components included with the DELLA Umbra Series Mini Split AC.
Producto View:

Figure 2.2: DELLA Umbra Series 9000 BTU WiFi Mini Split AC.
3. Configuración e instalación
Professional installation is mandatory for this system. This is not a DIY mini split AC. Line-set vacuuming is required during installation. Any alteration of line-set length requires adjusting freon levels. Please consult a qualified HVAC professional for proper installation to ensure safety and optimal performance.
Instalación terminadaview Video:
Video 3.1: General guidance on installing your DELLA Mini Split AC unit. This video is for informational purposes only; professional installation is required.
Pasos clave de instalación (resumen):
- Ubicaciones de marcado: Use the provided template to mark the locations for the line set wall hole and the mini split bracket.
- Soporte de montaje: Fije firmemente el soporte del minisplit a la pared con los tornillos incluidos. Asegúrese de que el soporte esté bien nivelado.
- Líneas de enrutamiento: Route the line set, drain hose, and electrical wiring through the wall opening.
- Montaje de la unidad interior: Monte de forma segura la unidad minisplit interior en el soporte.
- Taping Lines: Tape the drain hose and line sets together for a neat and organized installation.
- Cómo asegurar cables eléctricos: Use zip ties to secure the electrical wires around the taped line sets and drain hose.
- Colocación del condensador exterior: Coloque la unidad condensadora exterior en su ubicación designada.
- Connecting Line Set: Connect the unit line set to the condenser line set and tighten down firmly. Use a digital torque wrench if available to ensure proper tightening according to specifications.
- Conexiones eléctricas: Connect the electrical wires (red, black, green ground) to their corresponding terminals on the condenser unit. Each wire is designated with a specific letter and number.
- Aspiración del sistema: Connect a vacuum pump to the system via a gauge. Open the valves on the gauge and activate the vacuum. Monitor the micron reading closely and close the valves once it reaches 350 microns. Turn off the vacuum pump.
- Restaurando el poder: Restore power to the outdoor unit.
- Initiating Cooling: Turn on the mini split unit and set it to the lowest cold setting. Allow a few minutes for the outdoor condenser fan to initiate.
- Válvulas de apertura: Gradually open the high side (top) valve using a service wrench. Monitor the gauge as readings will decrease into the negative range. After the high side valve is open, promptly open the low side (bottom) valve. Monitor the gauge closely as the readings will increase, which is expected.
Your DELLA mini split unit installation is complete once these steps are followed and the unit is operating correctly.
Pre-instalaciónview Video:
Vídeo 3.2: Una breve presentaciónview of the DELLA Mini Split AC installation process, highlighting key steps.
4. Instrucciones de funcionamiento
Your DELLA Umbra Series Mini Split AC can be controlled via the included remote control, the Della+ mobile app, or voice commands through Alexa.
Mando a distancia:

Figure 4.1: DELLA Mini Split AC Remote Control.
Use the remote control to adjust temperature, select operating modes, set fan speed, and activate special functions like Sleep Mode or Turbo. Refer to the remote control's specific instructions for detailed button functions.
Della+ Mobile App:
The Della+ app allows you to control your unit remotely, set schedules, and utilize smart features like Geo-Location.
Video 4.2: Learn how to set up and customize Geo-Location using the Della+ App for smart AC controls.
Vídeo 4.3: Una breve presentaciónview demonstrating the features and interface of the Della+ App.

Figura 4.2: Interfaz de la aplicación Della+.
- Descargar: Buscar "Della+" in your mobile app store.
- Emparejamiento: Follow the in-app instructions to pair your device with the AC unit.
- Modos: Select from Cool, Heat, Dry (dehumidify), Fan Only, or ECO mode.
- Velocidad del ventilador: Adjust fan speed from Quiet, Low, Mid, High, to Turbo.
- Flujo de aire: Control vertical and horizontal oscillation for optimal air distribution.
- Programación y temporizador: Set weekly schedules or countdown timers for automatic operation.
- Geolocalización: Configure automatic AC control based on your location.
Control por voz (Alexa):
The unit seamlessly integrates with Amazon Alexa for convenient voice control. Ensure your Della+ app is linked to your Alexa account.

Figure 4.3: Voice Control Compatibility with Alexa.
5. Mantenimiento
Regular maintenance ensures optimal performance and longevity of your DELLA Mini Split AC unit. Always disconnect power before performing any maintenance.
Limpieza de filtros:
The indoor unit features washable air filters. Clean them every two weeks or more frequently depending on usage and air quality.
- Abra el panel frontal de la unidad interior.
- Retire los filtros de aire.
- Lave los filtros con agua tibia y un detergente suave.
- Enjuágalos bien y déjalos secar al aire por completo antes de volver a colocarlos.
- Cierre el panel frontal.
Limpieza de la unidad interior:
Limpie la superficie de la unidad interior con un paño suave y seco.amp cloth. Do not use harsh chemicals or abrasive cleaners. The unit also features PureClean tech to prevent dust buildup and defrost the indoor unit, contributing to cleaner air.
Figura 5.1: Interna view of the indoor unit highlighting PureClean technology.
Limpieza de la unidad exterior:
Periodically clean the outdoor unit's coils and fins to remove dirt, leaves, and debris. Use a soft brush or vacuum cleaner. Ensure the area around the outdoor unit is clear of obstructions for proper airflow.

Figure 5.2: Outdoor unit with gold-plated fins for corrosion prevention.
6. Solución de problemas
Antes de contactar con el servicio de atención al cliente, vuelva aview Los siguientes problemas comunes y soluciones:
| Problema | Posible causa | Solución |
|---|---|---|
| La unidad no arranca. | No hay energía, se disparó el disyuntor, las baterías del control remoto están bajas. | Verifique la fuente de alimentación, reinicie el disyuntor, reemplace las baterías del control remoto. |
| Refrigeración/calefacción insuficiente. | Filtros de aire sucios, unidad exterior bloqueada, configuración de modo incorrecta, refrigerante bajo. | Limpie los filtros de aire, elimine las obstrucciones de la unidad exterior, seleccione el modo correcto y comuníquese con un profesional para verificar el refrigerante. |
| Ruido inusual de la unidad. | Piezas sueltas, obstrucción del ventilador, ruidos de funcionamiento normales (por ejemplo, flujo de refrigerante). | Check for loose parts or obstructions. If noise persists or is unusual, contact support. |
| Fuga de agua de la unidad interior. | Blocked drain hose, improper installation angle. | Revise y limpie la manguera de drenaje. Si el problema persiste, podría ser necesaria una reinstalación profesional. |
| El control remoto no funciona. | Batteries dead, remote out of range, signal obstruction. | Replace batteries, ensure clear line of sight to indoor unit, operate within range. |
For issues not listed here or if solutions do not resolve the problem, please contact DELLA customer support.
7. Especificaciones
| Característica | Detalle |
|---|---|
| Número de modelo | 9K1VR-19S-JPB-I+O |
| Tamaño | 9,000 BTU - 115V -- 19 SEER2 |
| Capacidad de enfriamiento | 9000 BTU/h |
| Capacidad de calentamiento | 10000 BTU/h |
| Fuente de alimentación | 115V~/60Hz/1PH |
| Potencia máxima de entrada | 1200 W |
| Volumen de flujo de aire | 560 m³/h |
| máx. Tamaño del fusible | 20A |
| Nivel de sonido | 42 decibelios |
| Dimensiones del producto | 31.18 x 7.91 x 11.5 pulgadas |
| Peso del artículo | 58.6 libras |
| Características especiales | Alexa and WiFi Enabled, DeHumidifier, Fast Cooling and Heating, Remote Control |
| Tipo de refrigerante | R32 |

Figura 7.1: Dimensiones del producto.
8. Garantía y soporte
DELLA is committed to providing high-quality products and excellent customer service.
Garantía limitada de por vida:
Your DELLA Umbra Series Mini Split AC comes with a limited lifetime warranty, offering peace of mind against manufacturing defects. This warranty is designed to cover the product for its expected lifespan under normal use and service. Please refer to the warranty card included with your product for full terms and conditions.

Figure 8.1: DELLA Lifetime Coverage.
Atención al cliente:
Our dedicated customer support team is available to assist you with any questions or concerns regarding your DELLA product.
- Soporte telefónico: Disponible de lunes a viernes, de 6 a. m. a 4 p. m., hora estándar del Pacífico.
- Chat en vivo: 24/7 support for immediate assistance.
Please have your model number (9K1VR-19S-JPB-I+O) and purchase information ready when contacting support.
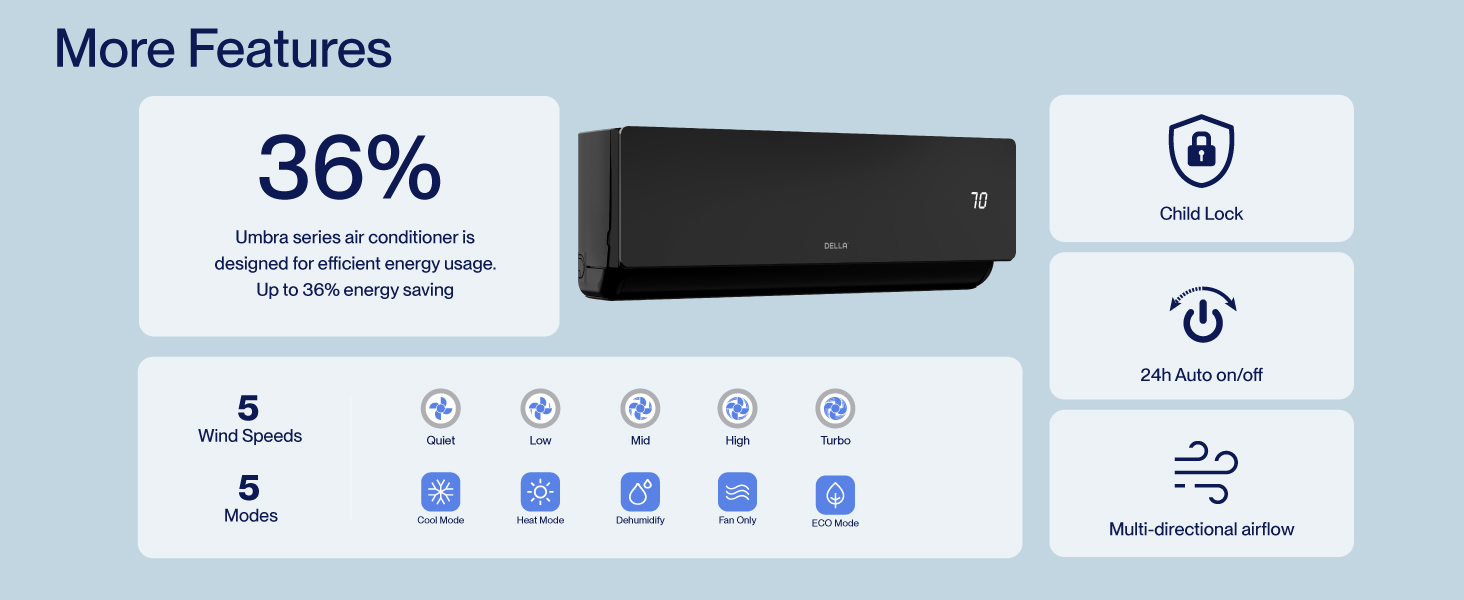
Figure 8.2: DELLA Customer Support Options.