1. Introducción
The MODSTER Discus Sport MD11391 is an Almost Ready-to-Fly (ARTF) glider model designed for thermal flight enthusiasts. This manual provides essential information for safe assembly, setup, operation, and maintenance of your glider. Its lightweight construction and aerodynamic design ensure excellent gliding performance, making it suitable for pilots of various skill levels.

Figure 1: The MODSTER Discus Sport MD11391 glider.
2. Información de seguridad
Please read and understand all safety warnings before operating the MODSTER Discus Sport MD11391 glider. Failure to follow these instructions may result in injury or property damage.
- Recomendación de edad: This product is recommended for users aged 14 to 99 years. It is not a toy and requires adult supervision for younger users.
- Entorno operativo: Never operate the model on public roads, near traffic, or in crowded areas. Choose a spacious, open, and flat meadow or designated flying field away from people, animals, and obstacles.
- Condiciones climáticas: No vuele con vientos fuertes, lluvia u otras condiciones climáticas adversas.
- Comprobación previa al vuelo: Always perform a thorough pre-flight inspection to ensure all components are securely attached and functioning correctly.
- Seguridad de la batería: Handle receiver batteries with care. Ensure correct polarity and avoid short circuits. Use only recommended battery types.
3. Contenido del paquete
Your MODSTER Discus Sport MD11391 package includes the following components:
- MODSTER Discus Sport DLG Glider (pre-assembled)
- 3 Integrated Servos with Metal Gears (pre-installed and pre-tensioned)
- Manual de instrucciones
Items Required for Operation (Not Included):
- Control remoto (transmisor)
- Small Receiver (single-cell compatible)
- Receiver Battery (approx. 500 mAh capacity recommended)
4. Montaje
The MODSTER Discus Sport MD11391 is an Almost Ready-to-Fly (ARTF) model, meaning most of the assembly is completed at the factory. You will primarily need to install your receiver and receiver battery.
- Accessing the Fuselage: Locate the quick-release canopy on the fuselage. Gently open it to access the internal RC components compartment.
- Instalación del receptor: Carefully connect your receiver to the pre-installed servos. Ensure correct channel assignments for elevator (H) and rudder (S) controls. Refer to your receiver's manual for specific connection details.
- Instalación de la batería del receptor: Place your receiver battery (e.g., 500 mAh single-cell) into the designated compartment within the fuselage. Secure it to prevent movement during flight.
- Close Canopy: Once the receiver and battery are installed and secured, close the quick-release canopy firmly.

Figure 2: Fuselage with quick-release canopy for component access.
No glue is required for the final assembly steps. The model should be ready for its first flight after approximately 30 minutes of setup.
5. Configuración y comprobaciones previas al vuelo
Antes de su primer vuelo, realice la siguiente configuración y comprobaciones:
- Enlace del transmisor: Bind your remote control (transmitter) to the installed receiver according to your transmitter's instructions.
- Comprobación de la superficie de control: Turn on your transmitter and then the glider's receiver. Verify that the elevator and rudder servos respond correctly to your transmitter inputs. Ensure control surfaces move freely and in the correct direction.
- Centro de gravedad (CG): For optimal flight performance, ensure the glider's center of gravity is within the recommended range. Typically, this is around 25-33% of the wing chord from the leading edge. Adjust battery placement if necessary to achieve the correct CG.
- Inspección visual: Check all connections, linkages, and structural integrity. Ensure wings and tail are securely attached.
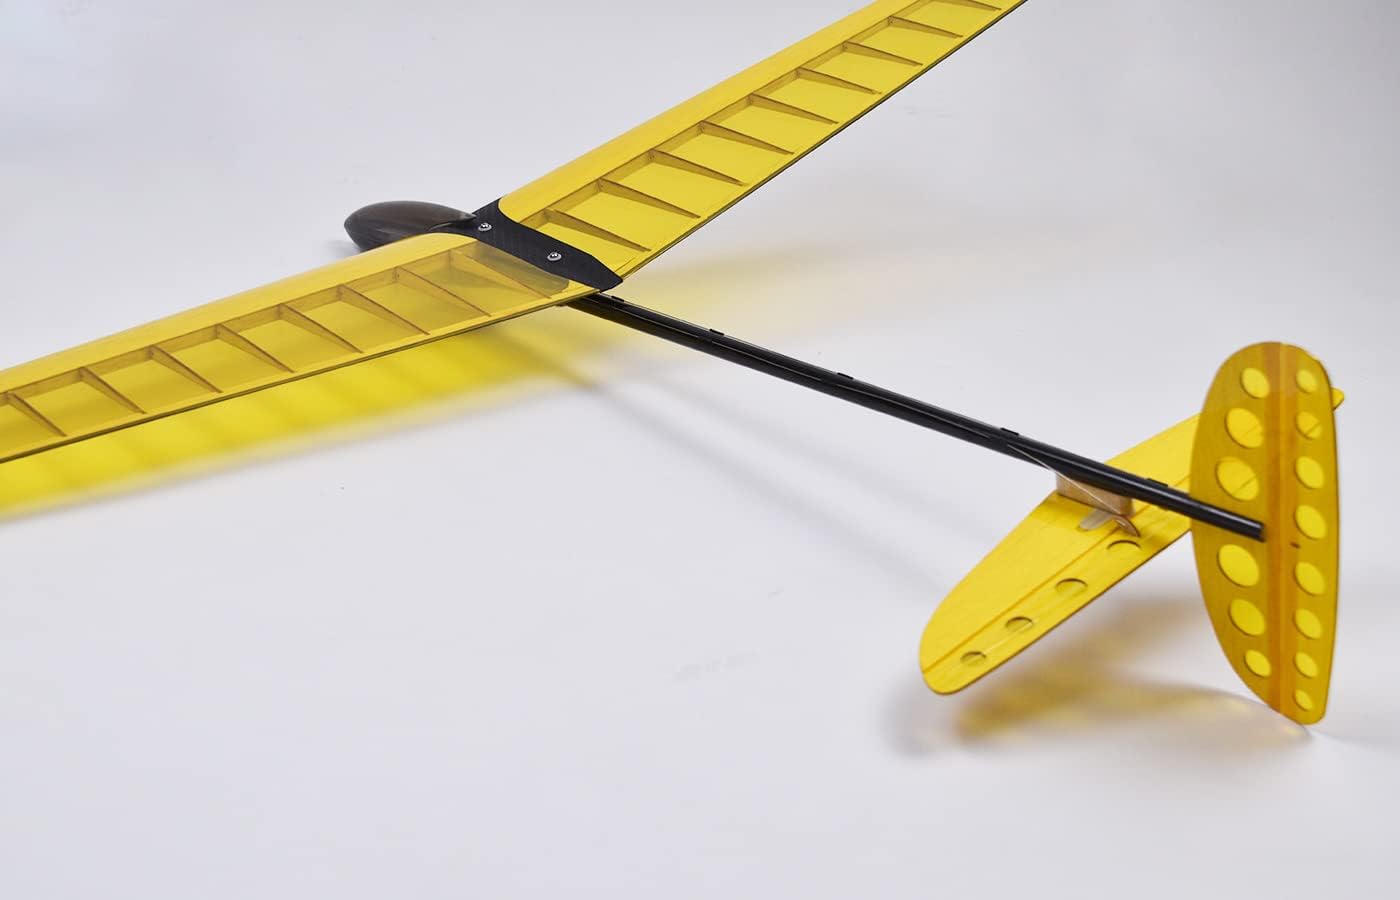
Figure 3: Tail section with rudder and elevator for control checks.
6. Instrucciones de funcionamiento
The MODSTER Discus Sport MD11391 is designed for discus launch gliding (DLG) and thermal soaring.
- Launch Technique: The glider is launched using the discus throw technique, relying on pure muscle power rather than a motor. Hold the wingtip, spin, and release the glider upwards with force to gain initial altitude.
- Thermal Soaring: Once airborne, use the glider's excellent aerodynamic properties to find and ride thermals (rising columns of warm air) for extended flight times.
- Control: Use the elevator for pitch control (climb/dive) and the rudder for yaw control (turning). Smooth and gentle inputs are key for efficient gliding.
- Aterrizaje: Plan your landing approach carefully. Reduce altitude gradually and aim for a soft landing in an open area.
- Zona de vuelo: A small, flat, and open meadow is ideal for operating the Discus Sport, ensuring safety and ample space for flight.
7. Mantenimiento
Regular maintenance will ensure the longevity and performance of your glider.
- Inspección posterior al vuelo: After each flight, inspect the glider for any damage, loose connections, or wear and tear.
- Limpieza: Clean the glider's surfaces with a soft, damp cloth. Avoid harsh chemicals that could damage the material.
- Vínculos de control: Periodically check all control linkages and servo arms for tightness and free movement. Adjust if necessary.
- Almacenamiento: Store the glider in a cool, dry place, away from direct sunlight and extreme temperatures, to prevent material degradation.
8. Solución de problemas
If you encounter issues with your MODSTER Discus Sport MD11391, refer to the following common problems and solutions:
- Glider does not respond to controls:
- Check if the transmitter and receiver are powered on and properly bound.
- Verify receiver battery charge level.
- Inspect all servo connections to the receiver.
- Poor flight performance/unstable flight:
- Re-check the Center of Gravity (CG) and adjust if necessary.
- Ensure all control surfaces are neutral and move freely.
- Check for any damage to wings or tail that might affect aerodynamics.
- Consider wind conditions; avoid flying in turbulent air.
- Servos not moving:
- Confirm power to the receiver and proper servo connections.
- Check for any physical obstruction preventing servo movement.
9. Especificaciones
| Característica | Especificación |
|---|---|
| Número de modelo | MD11391 |
| Envergadura | 950 milímetros |
| Longitud | 750 milímetros |
| Peso | 140 gramos |
| Material del fuselaje | Plástico |
| Wing Material | Wood/Ribs |
| Funciones RC | Rudder (S), Elevator (H) |
| Servos | 3 x 4.3g with metal gears (pre-installed) |
| Versión del kit | ARTF (Almost Ready-to-Fly) |
| Área del ala | 11.15 dm² |
| Edad recomendada | 14 - 99 años |
10. Garantía y soporte
For warranty information, technical support, or spare parts availability, please contact your retailer or the MODSTER manufacturer directly. Keep your proof of purchase for any warranty claims.