
Introducción
The Phanteks Eclipse G360A is a high-performance mid-tower gaming chassis designed for optimal airflow and component compatibility. It features an ultra-fine performance mesh front panel for superior cooling and dust filtration, integrated Digital-RGB lighting, and extensive support for modern gaming hardware including large GPUs and advanced liquid cooling solutions. This manual provides detailed instructions for setting up, operating, and maintaining your Eclipse G360A chassis.
Configuración e instalación
1. Unboxing y Contenidos
Carefully remove the chassis from its packaging. Verify that all components and accessories are present. The package should include the Eclipse G360A chassis, pre-installed 120mm D-RGB fans, and an accessory box containing screws, zip ties, and the user manual.
2. Compatibilidad de componentes
- Soporte de placa base: ATX, micro-ATX, mini-ITX, E-ATX (up to 280mm wide).
- Longitud de GPU: Up to 400 mm (15.7 in).
- Altura del enfriador de la CPU: Up to 162 mm (6.3 in).
- Longitud de la fuente de alimentación: Up to 220 mm (280 mm depending on HDD cage location).
- Almacenamiento: 2x 3.5" internal (included), 3x 2.5" internal (2 included).

Figura 1: Interna view highlighting 400mm GPU clearance, supporting high-end graphics cards.

Figure 2: Multiple storage options for 2.5" and 3.5" drives, with flexible mounting points.
3. Pasos de instalación
- Prepare el chasis: Remove the tempered glass side panel by unscrewing the thumb screws. The front panel can be detached for easier fan/radiator installation.
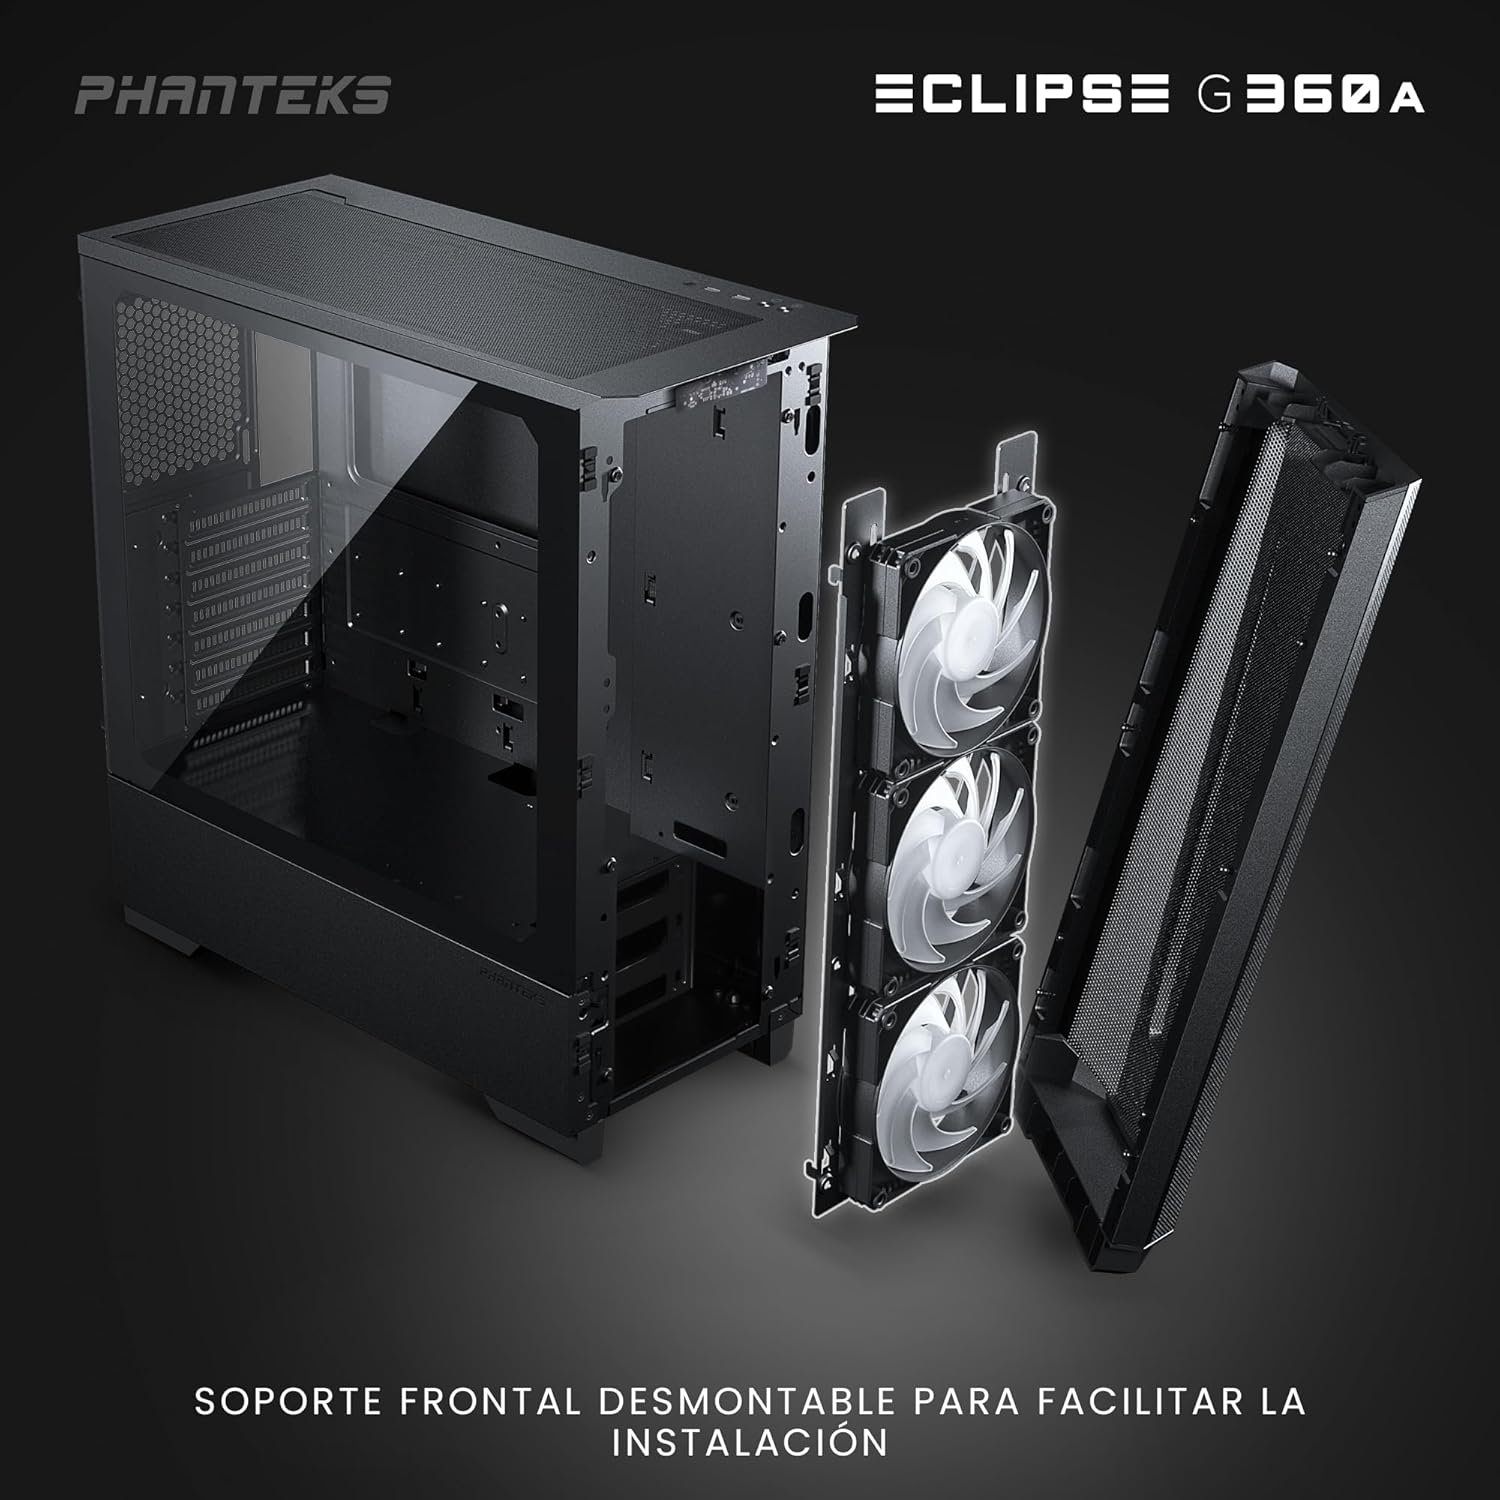
Figure 3: Detachable front panel and fan bracket for simplified installation.
- Instalar la placa base: Secure your motherboard to the standoffs using the provided screws.
- Instalar unidades de almacenamiento: Mount 2.5" SSDs to the dedicated locations behind the motherboard tray or on the PSU shroud. Install 3.5" HDDs into the drive cages located under the PSU shroud.
- Instalar la unidad de fuente de alimentación (PSU): Slide the PSU into its designated compartment at the bottom rear of the chassis and secure it with screws.
- Instalar tarjeta gráfica (GPU): Insert your graphics card into the PCIe slot on the motherboard. The chassis supports vertical GPU mounting with an optional bracket (PH-VGPUKT4.0_03).
- Instalar componentes de refrigeración: The G360A supports various fan and radiator configurations.
- Soporte de los fans: Front: 3x 120mm (3 pre-installed) or 2x 140mm; Top: 3x 120mm or 2x 140mm; Rear: 1x 120mm.
- Soporte del radiador: Front: Up to 360mm or 280mm; Top: Up to 360mm; Rear: 120mm. Note: Front and top 360mm radiators cannot be installed simultaneously.

Figure 4: Detailed fan and radiator placement options for optimal cooling.
- Sistema de organización de cables: Utilize the 36mm (1.4 in) cable management space behind the motherboard tray to route and secure cables for a clean build and improved airflow.
Instrucciones de funcionamiento
1. Front I/O Panel Functions
The front I/O panel provides convenient access to essential controls and ports:
- Botón de encendido: Enciende o apaga el sistema.
- 2 puertos USB 3.0: Para conectar dispositivos USB.
- Conector combinado de micrófono y auriculares: Para entrada y salida de audio.
- D-RGB Mode Button: Cycles through pre-programmed lighting effects.
- D-RGB Color Button: Changes the color of the D-RGB lighting.

Figure 5: Front I/O panel with easy-access controls for power, USB, audio, and D-RGB lighting.
2. Digital-RGB Lighting Control
The Eclipse G360A features integrated D-RGB lighting with pre-installed 120mm D-RGB fans and an LED strip along the tempered glass panel. The lighting can be controlled in two ways:
- Control manual: Use the D-RGB Mode and Color buttons on the front I/O panel to cycle through various effects and colors without software.
- Sincronización de la placa base: The D-RGB controller can be connected to a compatible motherboard's D-RGB header (e.g., ASUS Aura Sync, MSI Mystic Light Sync, GIGABYTE RGB Fusion, ASRock Polychrome Sync, Razer Chroma). This allows for software control and synchronization with other D-RGB components in your system. Refer to your motherboard manual for D-RGB header location and software instructions.
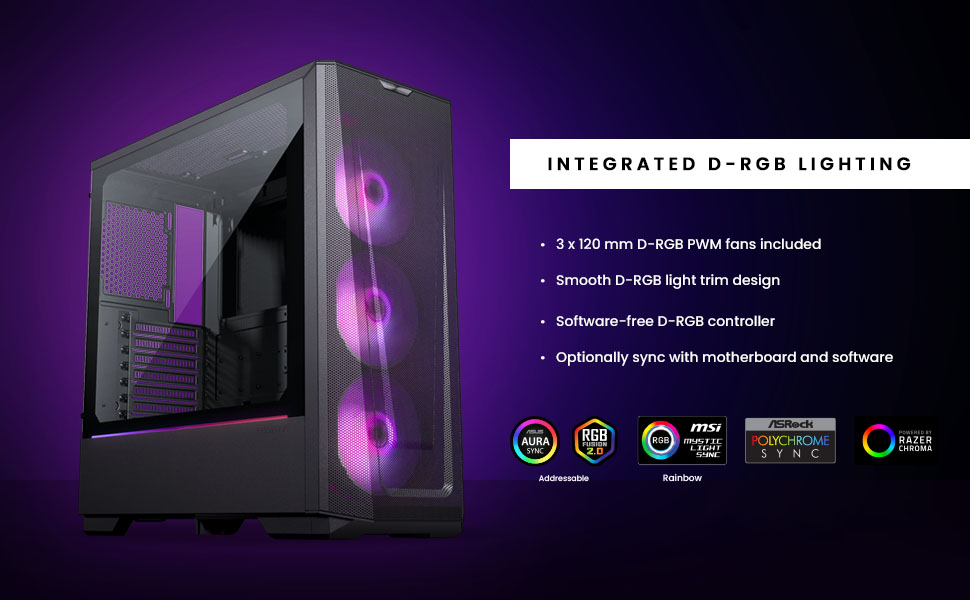
Figure 6: Integrated D-RGB lighting and compatibility with major motherboard synchronization software.
Mantenimiento
1. Cleaning the Ultra-fine Performance Mesh
The front panel's ultra-fine mesh acts as a dust filter. To maintain optimal airflow and prevent dust buildup, regularly clean the mesh:
- Gently detach the front panel.
- Use a soft brush or compressed air to remove accumulated dust from the mesh.
- Wipe the mesh with a slightly damp paño si es necesario, asegurándose de que esté completamente seco antes de volver a colocarlo.

Figure 7: The ultra-fine performance mesh design, crucial for airflow and dust filtration.
2. General Chassis Cleaning
For general cleaning of the chassis exterior and interior:
- Asegúrese de que el sistema esté apagado y desenchufado.
- Use a microfiber cloth to wipe down exterior surfaces.
- For interior dust, use compressed air to blow dust out of components and the chassis.
- Clean the tempered glass panel with a glass cleaner and a soft cloth.
Solución de problemas
Problemas comunes y soluciones
| Asunto | Posible causa | Solución |
|---|---|---|
| El sistema no se enciende. | Conexiones de alimentación sueltas, fuente de alimentación defectuosa, conexión incorrecta del encabezado del panel frontal. | Check all power cables (24-pin, 8-pin CPU, GPU). Verify front panel power switch connection to motherboard. Test PSU if possible. |
| D-RGB lighting not working or incorrect. | Loose D-RGB cable connection, incorrect D-RGB header, software conflict. | Ensure D-RGB cables are securely connected. If using motherboard sync, verify connection to a 3-pin 5V D-RGB header (not 4-pin 12V RGB). Try manual control via case buttons. Reinstall or update motherboard RGB software. |
| Flujo de aire deficiente o temperaturas altas. | Dust buildup, incorrect fan orientation, obstructed airflow. | Clean front mesh and other dust filters. Ensure fans are oriented correctly (intake/exhaust). Check for cable obstructions inside the case. |
| Front USB ports not functioning. | Loose USB 3.0 header cable connection to motherboard. | Verify the USB 3.0 cable from the front panel is securely connected to the motherboard's USB 3.0 header. |
Presupuesto
| Característica | Detalle |
|---|---|
| Nombre del modelo | Eclipse G360A |
| Número de modelo | PH-EC360ATG_DBK02 |
| Factor de forma | Torre Media |
| Dimensiones (Ancho x Profundidad x Alto) | 455 x 200 x 465 mm / 17.9 x 7.87 x 18.3 pulgadas |
| Material (es) | Chasis de acero, vidrio templado |
| Soporte de placa base | ATX, micro-ATX, mini-ITX, E-ATX (hasta 280 mm de ancho) |
| E/S frontal | 2x USB 3.0, Microphone/Headphone Combo, Power Button, D-RGB Mode, D-RGB Color |
| Ranuras de expansión | 7 |
| Bahías de unidad internas de 3.5" | 2 (2x incluidos) |
| Bahías de unidad internas de 2.5" | 3 (2x incluidos) |
| Ventiladores preinstalados | 3x 120mm D-RGB (Front) |
| Fan Support (120mm) | Front: 3x; Top: 3x; Rear: 1x |
| Fan Support (140mm) | Front: 2x; Top: 2x |
| Radiator Support (120mm) | Delantero: hasta 360 mm; Superior: hasta 360 mm; Trasero: 120 mm |
| Radiator Support (140mm) | Delantero: hasta 280 mm; Superior: hasta 360 mm |
| Longitud máxima de GPU | 400 mm / 15.7 pulgadas |
| Altura máxima del enfriador de CPU | 162 mm / 6.3 pulgadas |
| Espacio de gestión de cables | 36 mm / 1.4 pulgadas |
| Longitud máxima de la fuente de alimentación | 220 mm / 280 mm (depends on HDD Cage location) |
Garantía y soporte
Información de garantía
Phanteks products are manufactured to the highest quality standards. For detailed warranty terms and conditions, please refer to the warranty card included with your product or visit the official Phanteks webSitio. La garantía generalmente cubre defectos de materiales y mano de obra en condiciones normales de uso.
Atención al cliente
Should you encounter any issues or have questions regarding your Phanteks Eclipse G360A chassis, please contact Phanteks customer support. You can find contact information, FAQs, and additional resources on the official Phanteks websitio: