1. Introducción
This manual provides essential information for the safe and efficient operation, installation, and maintenance of your VONROC Hydrophore Water Pump Set, Model GP500. This powerful 1000W pump with a 19L stainless steel tank is designed for various water supply applications, including garden irrigation, domestic water supply, and drawing water from wells or ponds. Please read these instructions carefully before using the product and keep them for future reference.
2. Instrucciones de seguridad
Always observe the following safety precautions to prevent electric shock, injury, or damage to the pump.
- Lea el manual: Antes de utilizarlo, lea detenidamente y comprenda todas las instrucciones de este manual.
- Seguridad eléctrica: Ensure the power supply matches the pump's specifications (230V). Always connect the pump to a properly grounded outlet. Do not operate the pump with damaged cables or plugs.
- Temperatura del agua: Do not pump liquids hotter than 35°C (95°F).
- Protección contra las heladas: Protect the pump from frost. Drain all water from the pump and hoses during winter or when temperatures drop below freezing.
- Colocación: Install the pump on a stable, level surface, protected from direct weather exposure.
- Supervisión: No deje la bomba desatendida durante el funcionamiento.
- Mantenimiento: Desconecte la fuente de alimentación antes de realizar cualquier mantenimiento o limpieza.
- Niños y mascotas: Mantenga a los niños y a las mascotas alejados de la bomba en funcionamiento.
3. Producto terminadoview
3.1 Componentes
The VONROC Hydrophore Water Pump Set consists of the following main components:
- Unidad de bomba: The electric motor and pump housing, providing 1000W of power.
- Tanque de presión: A 19-liter stainless steel tank that maintains water pressure and reduces pump cycling.
- Interruptor de presión: Automatically starts and stops the pump based on water pressure.
- Manómetro: Muestra la presión actual del sistema.
- Conexión de succión: G1 female threaded inlet for connecting the suction hose.
- Conexión de presión: G1 female threaded outlet for connecting the discharge hose.
- Tapón de drenaje: For easy draining of water from the pump.
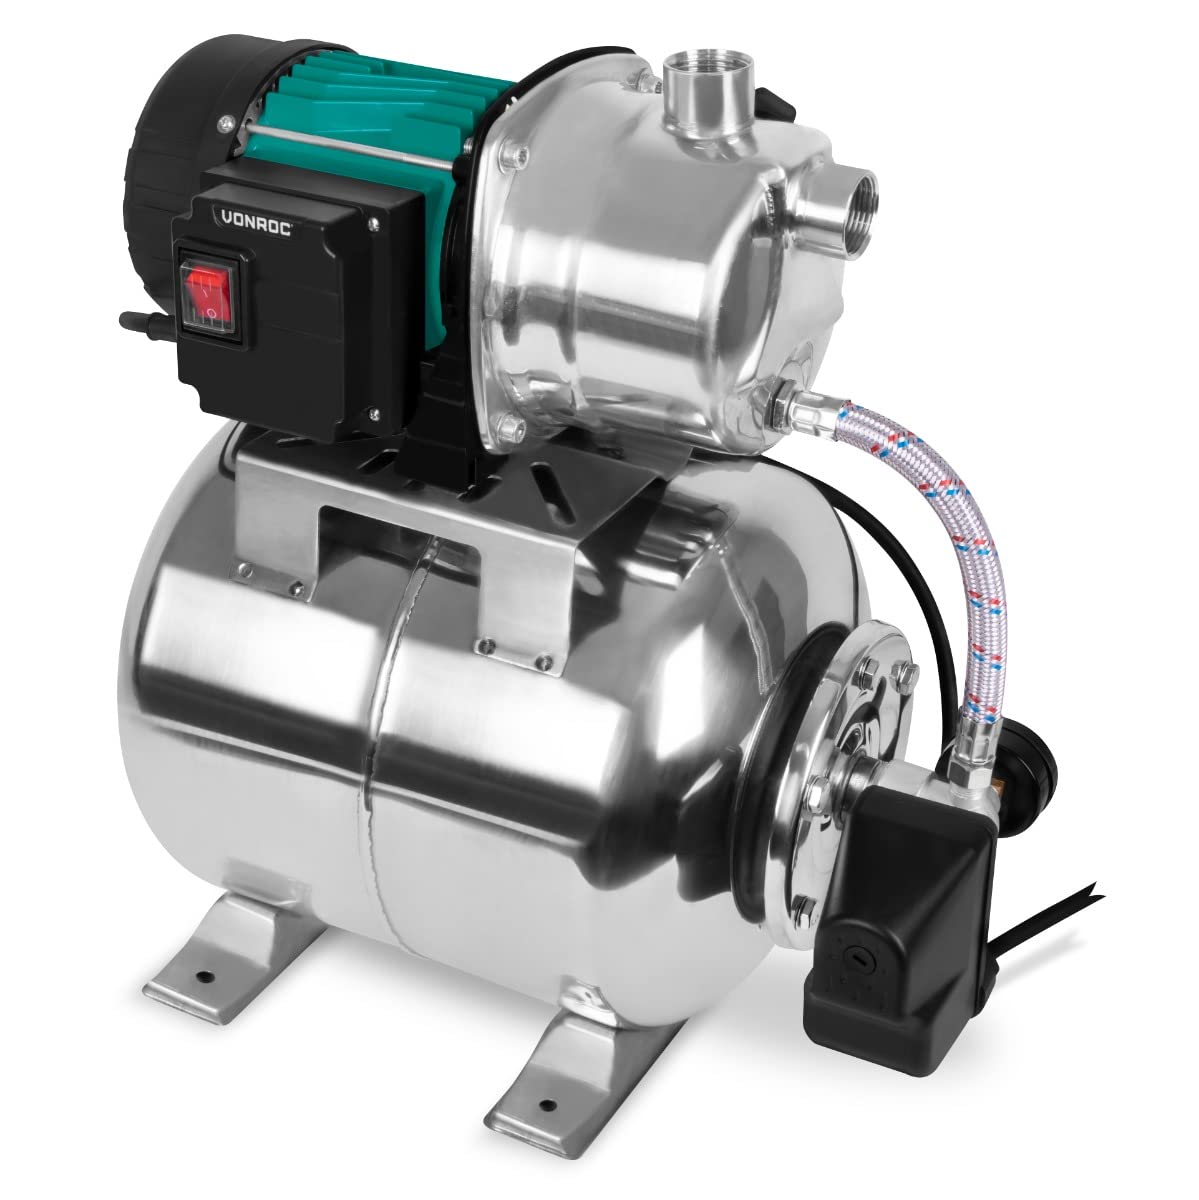
Figura 1: Sobreview of the VONROC Hydrophore Water Pump Set.
3.2 Especificaciones técnicas
| Marca | VONROC |
| Número de modelo | GP500 |
| Fuerza | 1000 W |
| Caudal máximo | 3500 litros por hora |
| Presión máxima | 4.4 barras |
| Altura máxima de succión | 8 metros |
| Cabezal de entrega máximo | 44 metros |
| Volumen del tanque | 19 litros |
| Volumentage | 230 voltios |
| Clase de protección | IPX4 (a prueba de salpicaduras) |
| Dimensiones del producto (L x An x Al) | 45 de largo x 27 de ancho x 47.5 de alto cm |
| Material | Stainless Steel (Pump and Tank) |

Figure 2: Product dimensions of the pump set.
4. Configuración
4.1 Colocación
- Place the pump on a firm, level, and stable surface to prevent vibrations and ensure proper operation.
- Ensure the pump is protected from rain, direct sunlight, and extreme temperatures.
- Maintain adequate ventilation around the pump motor.
4.2 Conexión de mangueras
- Linea de succión: Connect a robust, vacuum-resistant suction hose (minimum 1 inch diameter) to the pump's suction inlet (G1 female thread). Ensure all connections are airtight to prevent air ingress, which can impair pump performance. It is highly recommended to install a non-return valve at the end of the suction hose to prevent water from flowing back.
- Línea de presión: Connect the discharge hose (G1 female thread) to the pump's pressure outlet. This hose will lead to your irrigation system, tap, or other water consumption points.
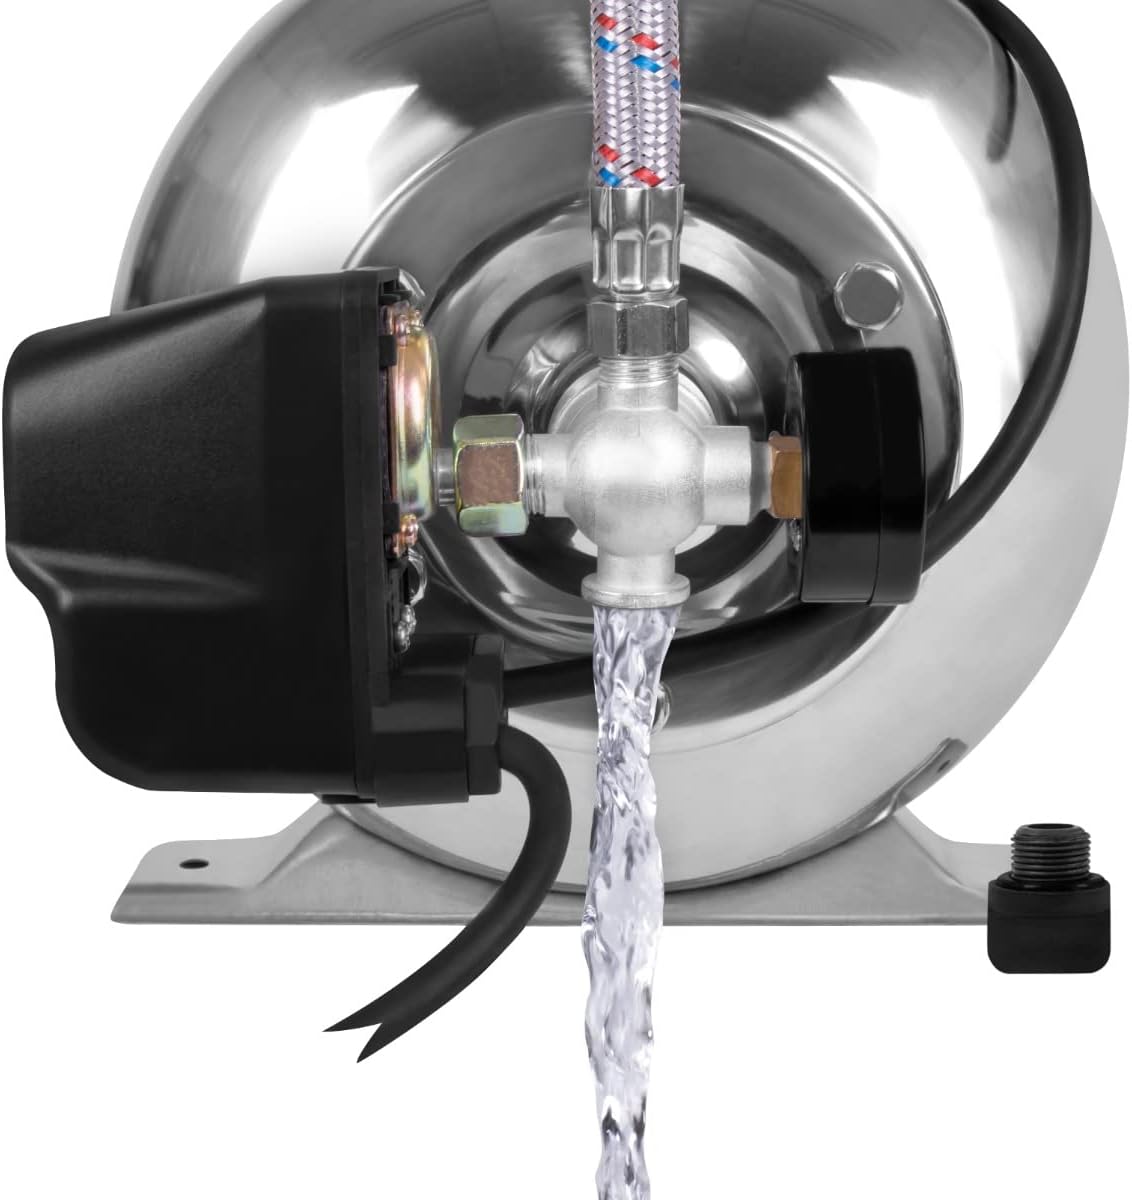
Figure 3: Suction and pressure connections.
4.3 Cebado de la bomba
Before initial use or after the pump has run dry, it is crucial to prime the pump:
- Ensure the suction hose is fully submerged in the water source.
- Open the priming port (usually a screw on top of the pump housing) and slowly fill the pump housing with water until it overflows.
- Close the priming port securely.
- Open any taps or valves in the pressure line to allow air to escape during startup.
5. Instrucciones de funcionamiento
5.1 Puesta en marcha de la bomba
- After priming, plug the pump into a suitable electrical outlet.
- Switch on the pump. The pump will start to draw water and build pressure.
- Once the pressure reaches the set cut-off point (visible on the pressure gauge), the pump will automatically switch off.
- When water is drawn (e.g., by opening a tap), the pressure will drop, and the pressure switch will automatically restart the pump.

Figure 4: Pump in operation, delivering water.
5.2 Monitoreo de la presión
The integrated pressure gauge allows you to monitor the system pressure. The pump is designed to operate within a specific pressure range, automatically switching on and off to maintain consistent water supply.

Figure 5: Pressure gauge displaying system pressure.
5.3 Apagado
To turn off the pump, simply switch it off at the power switch and disconnect it from the electrical outlet.
6. Mantenimiento
Regular maintenance ensures the longevity and optimal performance of your pump. Always disconnect the pump from the power supply before any maintenance.
- Comprobar conexiones: Periodically inspect all hose connections for leaks and ensure they are tight.
- Filtro limpio: If a pre-filter is installed on the suction line, clean it regularly to prevent blockages.
- Carcasa de la bomba: Keep the pump housing clean and free from dirt and debris.
- Winterización: Before the first frost, completely drain all water from the pump and hoses using the drain plug. Store the pump in a dry, frost-free location. Failure to do so will void the warranty.
7. Solución de problemas
Consulte la siguiente tabla para conocer los problemas más comunes y sus soluciones.
| Problema | Posible causa | Solución |
|---|---|---|
| La bomba no arranca. | No power supply; thermal overload protection activated; motor fault. | Check power connection; allow pump to cool down; contact service. |
| La bomba funciona pero no sale agua. | Pump not primed; air in suction line; suction hose blocked or leaking; water source empty. | Prime the pump; check suction line for leaks/blockages; ensure water source is adequate. |
| Low pressure or intermittent flow. | Air in system; partial blockage; worn pump components; pressure switch setting. | Check for air leaks; clean filters; contact service; adjust pressure switch (if applicable and knowledgeable). |
| La bomba funciona continuamente. | Leak in pressure system; pressure switch faulty; tank pre-charge pressure too low. | Check for leaks in pipes/fittings; contact service; check tank pre-charge pressure (refer to specific tank instructions). |
The pump is equipped with thermal protection to prevent overheating. If the pump stops unexpectedly, allow it to cool down before attempting to restart.
8. Almacenamiento
When storing the pump for extended periods, especially during winter:
- Completely drain all water from the pump, tank, and connected hoses.
- Limpie el exterior de la bomba.
- Store the pump in a dry, frost-free, and well-ventilated area, away from direct sunlight and corrosive substances.
9. Garantía y soporte
VONROC products are designed and manufactured to high-quality standards. This product comes with a manufacturer's warranty. For detailed warranty terms and conditions, please refer to the warranty card included with your product or visit the official VONROC websitio.
For technical support, spare parts, or service inquiries, please contact VONROC customer service through their official channels. Always have your model number (GP500) and purchase date available when contacting support.