1. Introducción
Thank you for choosing the Yoidesu 10-inch Car Radio Stereo. This manual provides essential information for the proper installation, operation, and maintenance of your new car multimedia system. Please read this manual thoroughly before use to ensure optimal performance and safety.
Producto terminadoview
This car stereo features a 10-inch display, runs on Android 10.1, and includes 2GB RAM with 32GB ROM for smooth operation and ample storage for applications. It supports navigation, Bluetooth connectivity, and mobile phone mirror link functionality.
Compatibilidad
This unit is designed as a replacement for the original car radio stereo in Honda CRV models manufactured between 2012 and 2016.

Image 1.1: The Yoidesu 10-inch Car Radio Stereo with its main interface.
2. Contenido del paquete
Verifique que todos los artículos enumerados a continuación estén incluidos en su paquete:
- 1 x Host Unit (Car Stereo)
- 1 x arnés de alimentación
- 1 x Cable
- 1 x Antena GPS
- 1 x Manual de usuario
- 2 cables de extensión USB
- 1 x Camera Line
- 1 cable adaptador USB
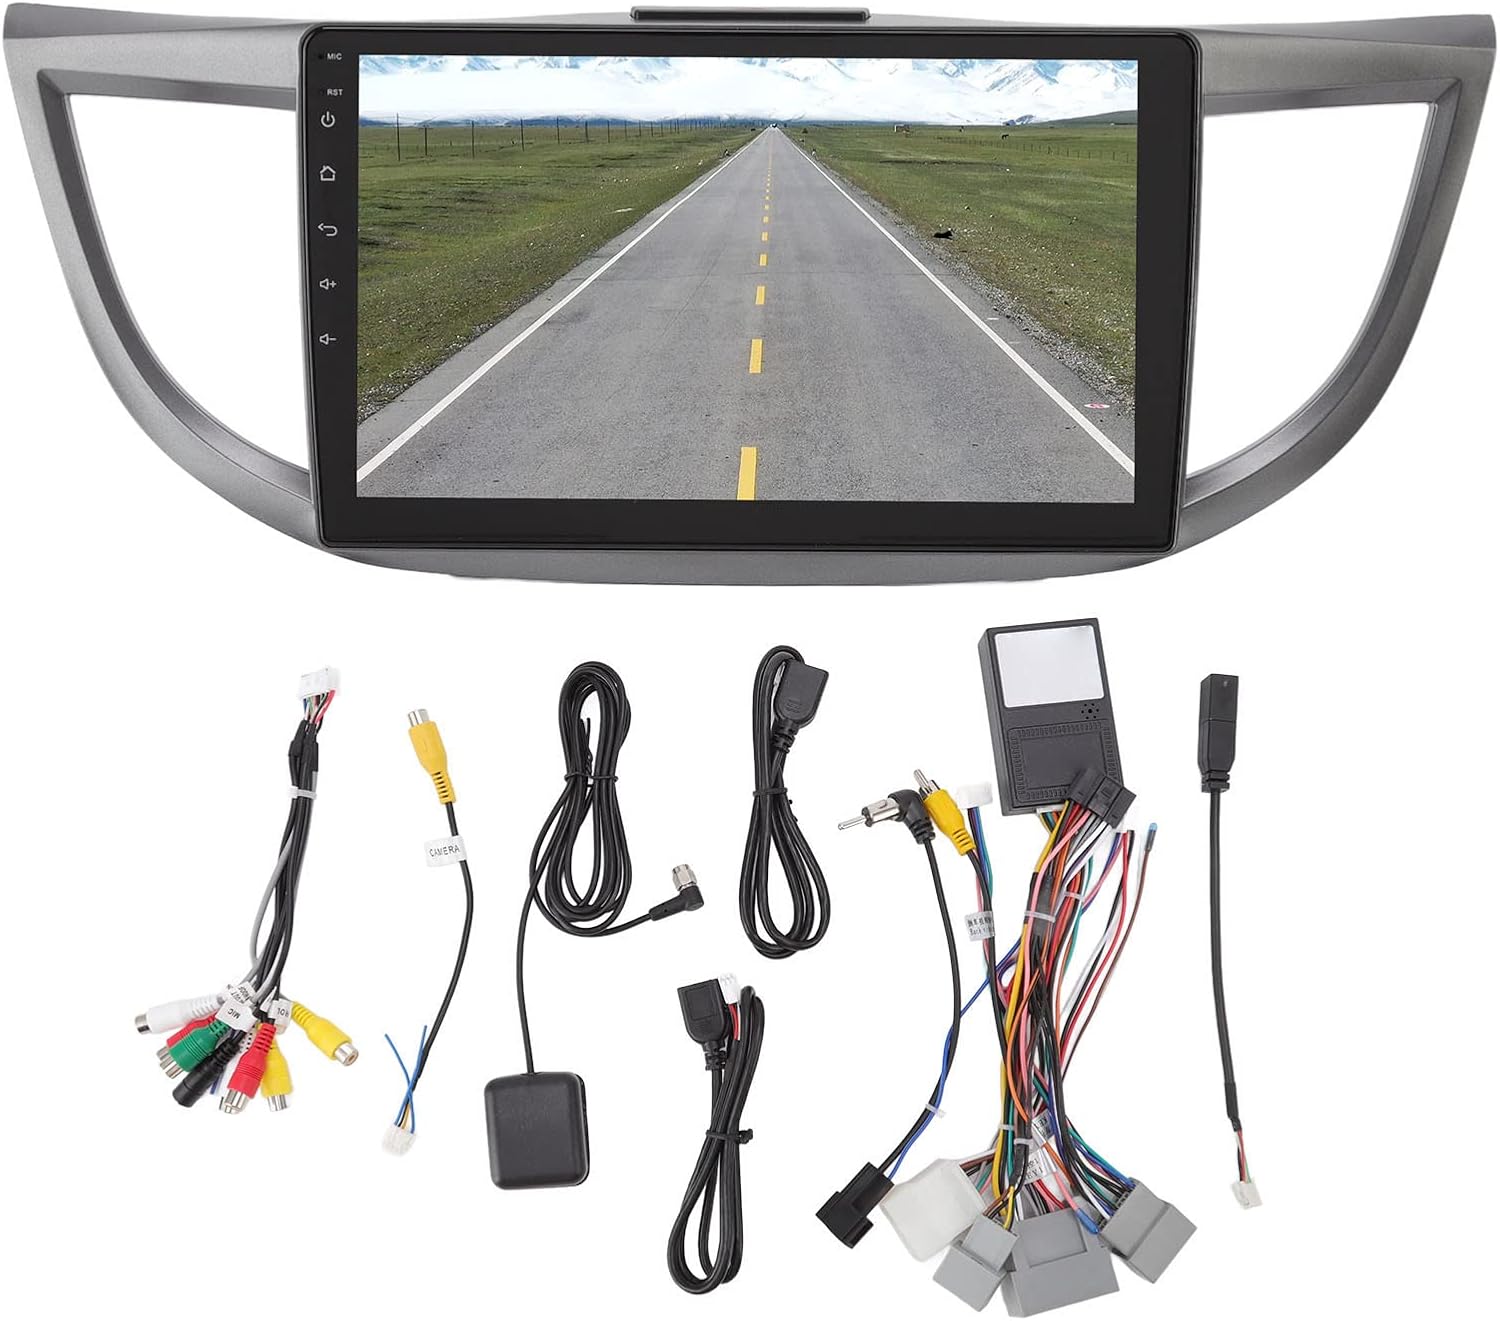
Imagen 2.1: Másview de todos los accesorios y cables incluidos.
3. Especificaciones
| Característica | Especificación |
|---|---|
| Marca | Yoidesu |
| Nombre del modelo | Estéreo de la radio del coche |
| Tipo de servicio del vehículo | Coche (Honda CRV 2012-2016) |
| Tamaño de pantalla | 10 pulgadas |
| Resolución | 1024 x 600 |
| Sistema operativo | Androide 10.1 |
| Memoria (RAM) | 2 GB |
| Almacenamiento (ROM) | 32 GB |
| Tecnología de conectividad | USB, Wifi, Bluetooth |
| Características especiales | Bluetooth, Touchscreen, Navigation, Mirror Link, Steering Wheel Control Support |
| Supported Navigation System | GPS (Mapas en línea/fuera de línea) |
| Modo de salida de audio | Altavoz estéreo |
| Volumentage | 12 V |
4. Configuración e instalación
Installation of the Yoidesu Car Radio Stereo involves replacing the existing factory unit. Due to the complexity of automotive electrical systems, professional installation is highly recommended to prevent damage to the unit or your vehicle.
Pasos generales de instalación (Consulte con un profesional)
- Preparación: Desconecte la batería del vehículo para evitar cortocircuitos eléctricos.
- Retire la unidad antigua: Carefully remove the existing car radio stereo and its surrounding trim.
- Conectar el cableado: Connect the provided power harness, GPS antenna, USB extension cables, and camera line (if applicable) to the new Yoidesu unit. Ensure all connections are secure.
- Funcionalidad de prueba: Before fully reassembling, temporarily connect the battery and test basic functions like power, audio, and display.
- Unidad segura: Mount the new unit into the dashboard opening and secure it.
- Volver a montar: Reinstall all trim pieces removed earlier.
- Comprobación final: Vuelva a conectar la batería y realice una prueba completa de todas las funciones.

Image 4.1: Before and After installation of the Yoidesu Car Radio Stereo.

Imagen 4.2: Trasera view of the main unit with wiring connections.
5. Instrucciones de funcionamiento
5.1 Sistema Android 10.1
The unit runs on Android 10.1, providing a familiar interface. You can download and install various applications from the app store, similar to a smartphone or tablet. The 2GB RAM and 32GB ROM ensure smooth operation and quick application launches.
5.2 Navegación
The car stereo supports both online and offline navigation applications. It is compatible with popular mapping services like Igo maps and Waze. After connecting to Wi-Fi, you can use online navigation anywhere. The system supports 2D and 3D map displays.
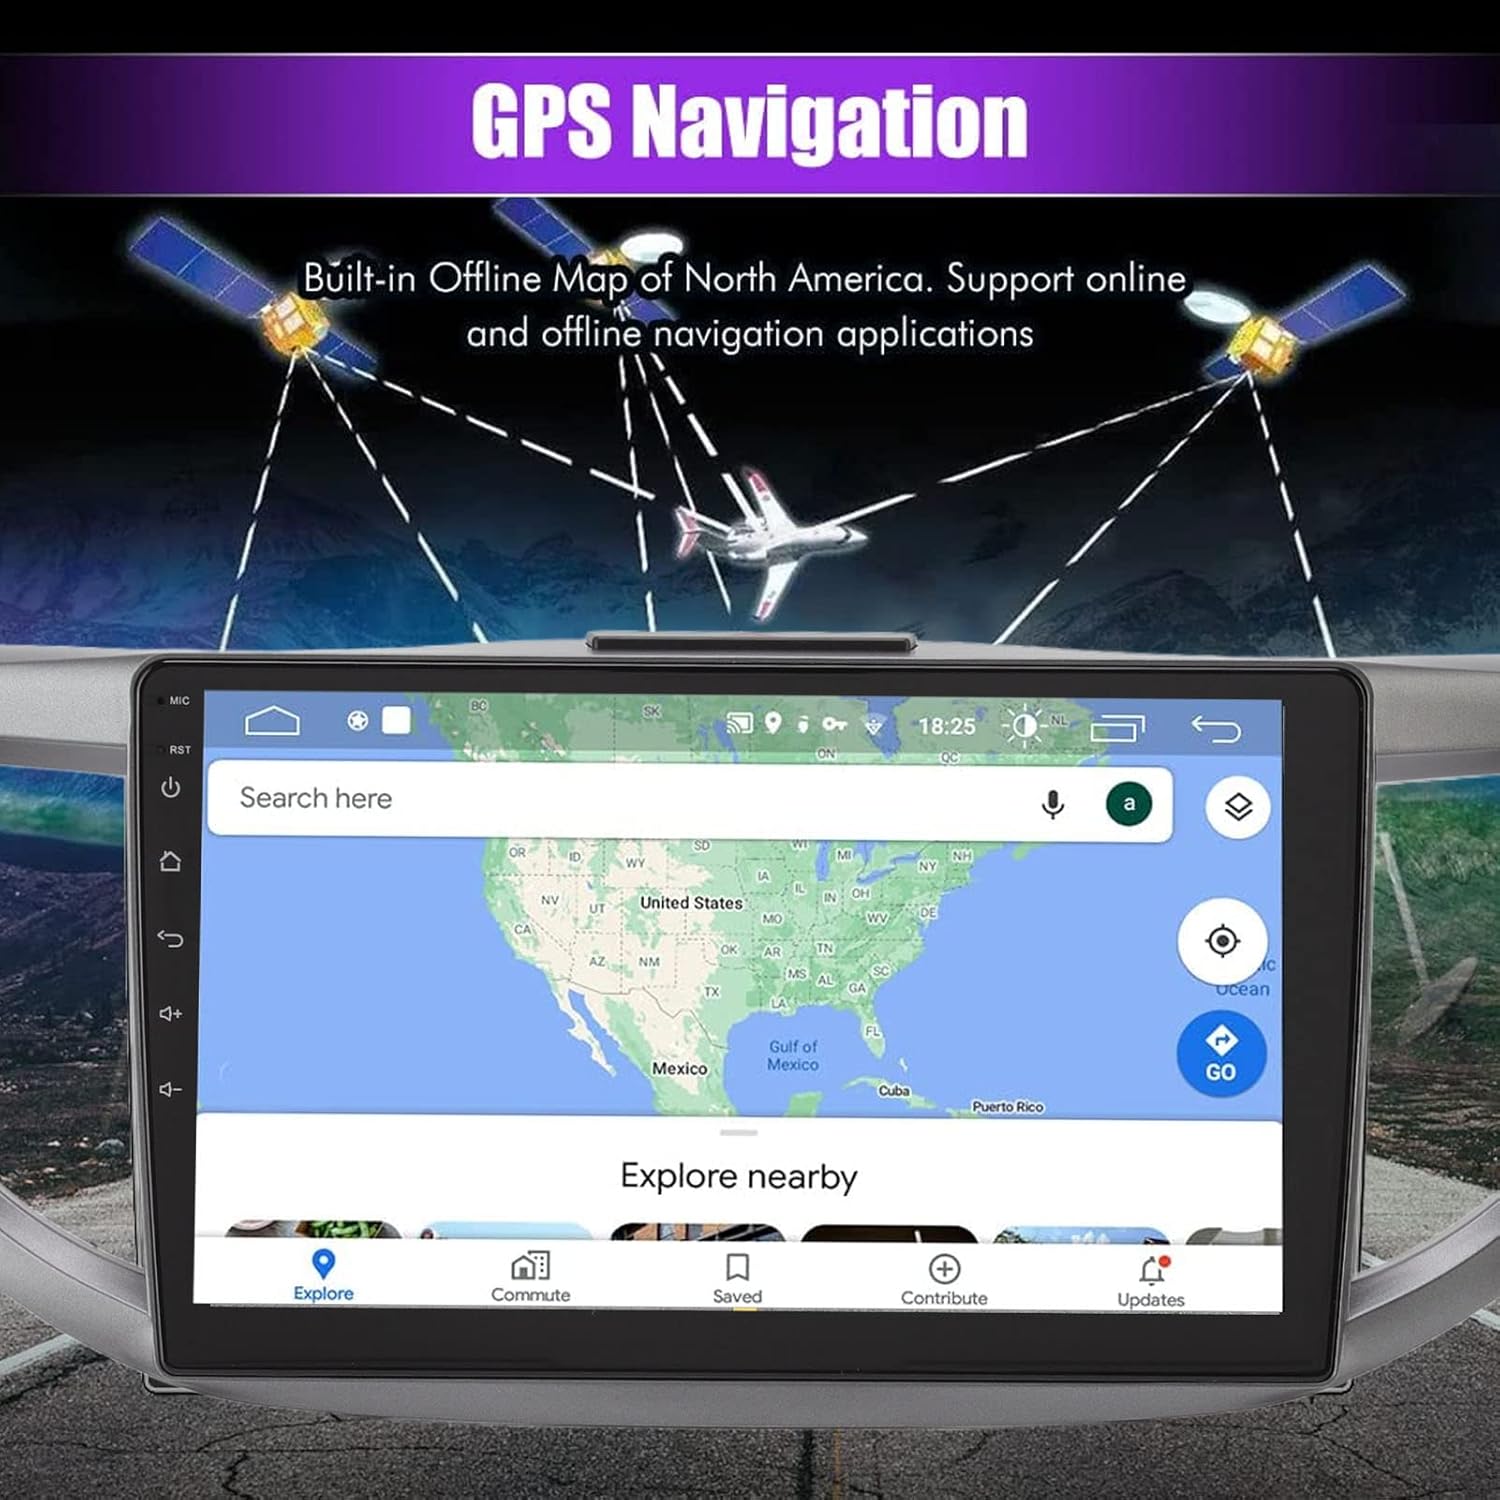
Image 5.1: GPS Navigation interface on the car stereo.
5.3 Conectividad Bluetooth
Pair your mobile phone via Bluetooth to enable hands-free calling and audio streaming. The built-in microphone captures your voice, and calls are routed through your car's speakers. To pair, go to the Bluetooth settings on the unit and search for your device.
5.4 Función de enlace de espejo
The mirror link function allows you to synchronize your Android or iOS phone's screen with the car stereo display. This enables you to view maps, videos, and other content from your phone directly on the larger car stereo screen. Follow the on-screen instructions on the unit to establish the mirror link connection.
5.5 controles del volante
The unit is designed to integrate with your vehicle's existing steering wheel controls. This allows you to manage functions such as switching songs, adjusting volume, and changing channels without taking your hands off the wheel. Configuration may be required in the unit's settings menu.
5.6 Trasero View Entrada de cámara
The system supports high-definition rear view camera input (camera sold separately). When the vehicle is shifted into reverse, the rear view image will automatically display on the screen, assisting with safer parking. The system offers excellent night vision capabilities.
Imagen 5.2: Trasera view Pantalla de cámara con líneas de asistencia al aparcamiento.
5.7 Configuración de sonido
Access the sound settings to customize your audio experience. The unit provides options for adjusting equalizer settings, balance, and fade to optimize sound output through your car's speakers.
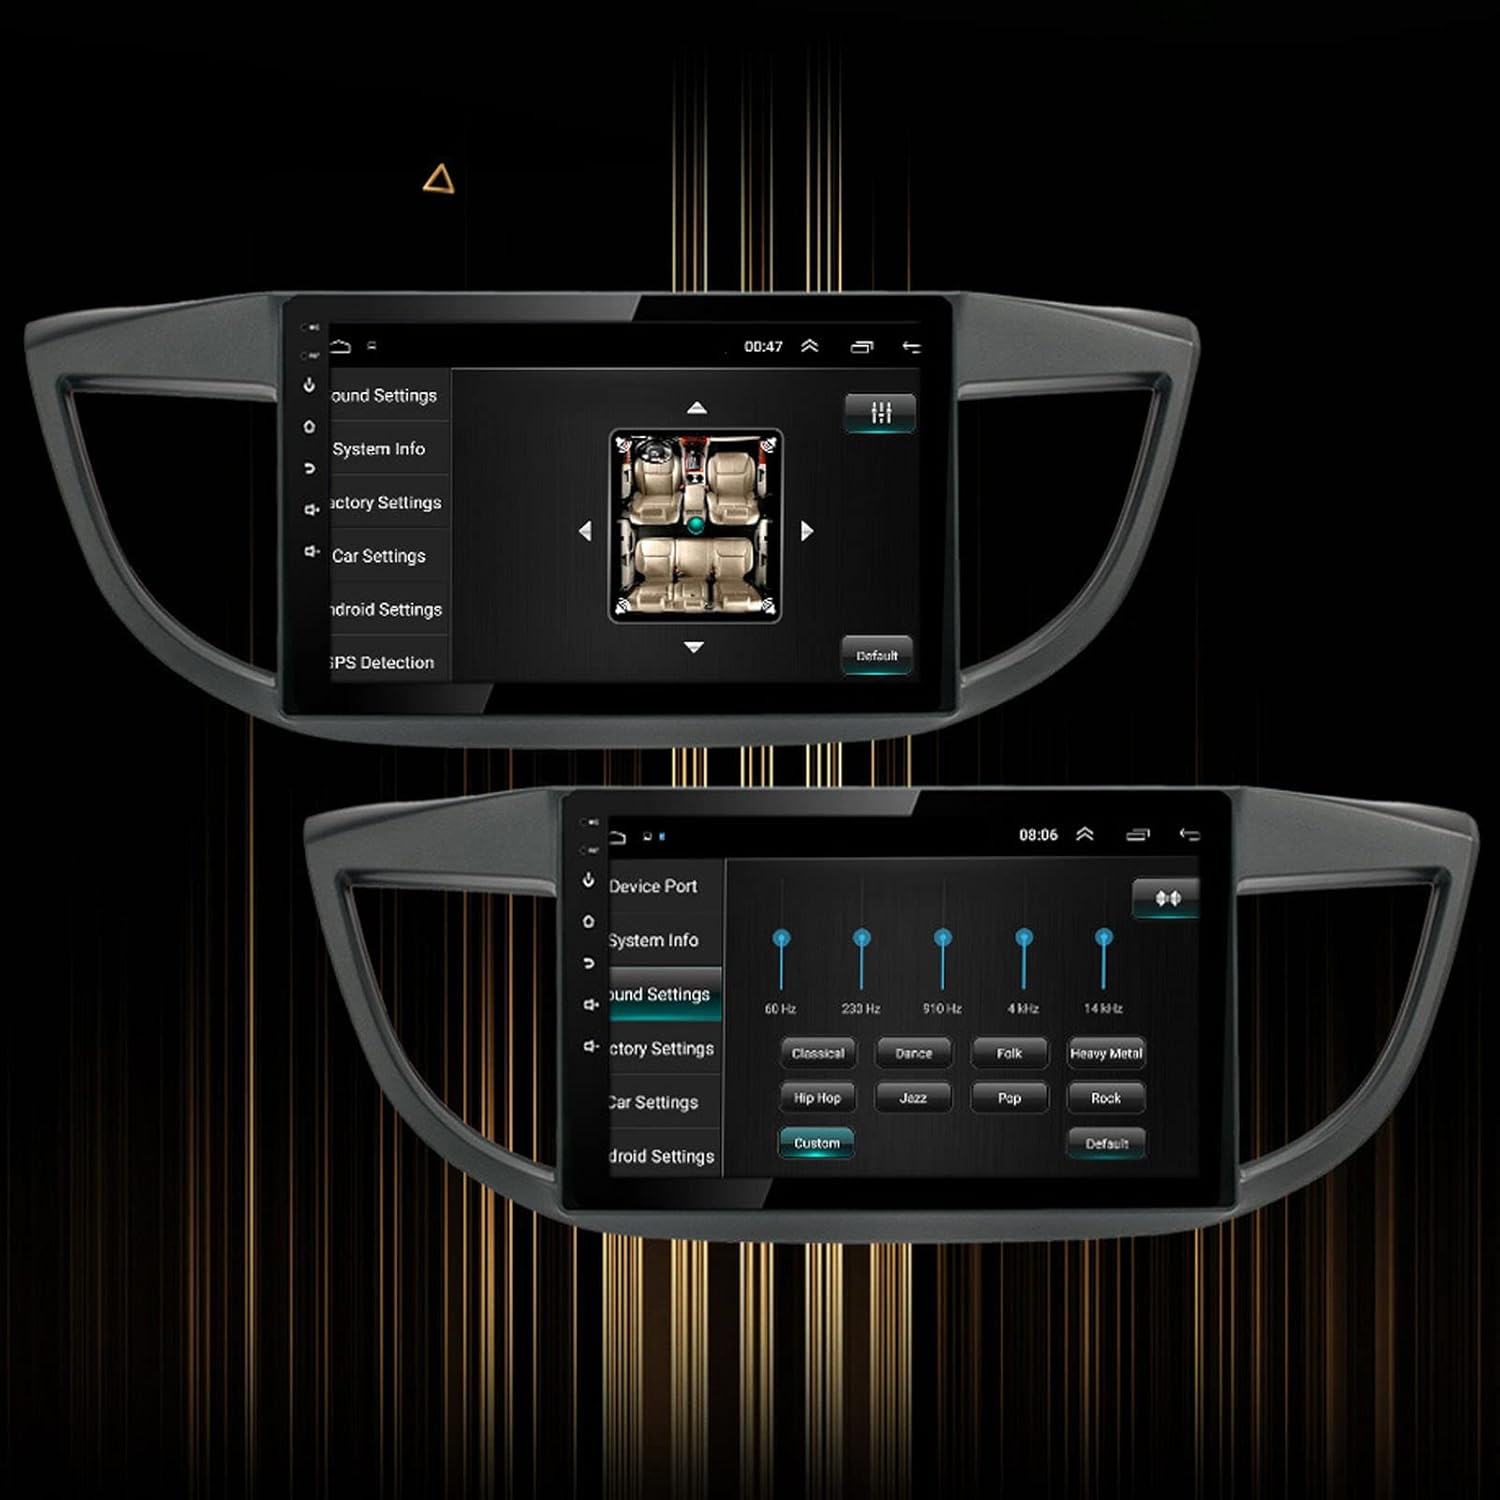
Image 5.3: Sound settings interface with equalizer options.
6. Mantenimiento
To ensure the longevity and optimal performance of your Yoidesu Car Radio Stereo, follow these maintenance guidelines:
- Limpieza de la pantalla: Utilice un paño suave y sin pelusa para limpiar suavemente la pantalla. Para manchas difíciles, limpie ligeramenteampen the cloth with water or a screen-cleaning solution specifically designed for electronics. Avoid harsh chemicals, abrasive materials, or excessive moisture.
- Limpieza general: Mantenga la unidad y el área circundante del tablero libres de polvo y residuos. Use un cepillo suave o aire comprimido para limpiar las grietas.
- Actualizaciones de software: Verifique periódicamente si hay actualizaciones de software disponibles a través de la configuración de la unidad o del fabricante. websitio. Las actualizaciones pueden mejorar el rendimiento, agregar funciones y corregir errores.
- Evite temperaturas extremas: Do not expose the unit to extreme heat or cold for prolonged periods, as this can affect its electronic components and screen.
7. Solución de problemas
If you encounter issues with your Yoidesu Car Radio Stereo, refer to the following common problems and solutions:
| Problema | Posible causa | Solución |
|---|---|---|
| La unidad no enciende | Conexión de alimentación suelta, fusible quemado, problema con la batería del vehículo. | Revise todos los cables y conexiones de alimentación. Inspeccione los fusibles del vehículo. Asegúrese de que la batería del vehículo esté cargada. |
| No hay salida de sonido | Cables del altavoz desconectados, volumen demasiado bajo, fuente de audio incorrecta seleccionada. | Verify speaker wire connections. Increase volume. Select the correct audio input source. |
| Pérdida o inexactitud de la señal GPS | GPS antenna obstructed or improperly installed, unit in an area with poor satellite reception. | Ensure GPS antenna is clear of obstructions and properly connected. Move to an open area for better reception. |
| Problemas de emparejamiento de Bluetooth | Bluetooth no habilitado en el teléfono/unidad, dispositivo demasiado lejos, interferencia. | Ensure Bluetooth is active on both devices. Keep devices close. Restart both devices. |
| Los controles del volante no funcionan | Incorrect wiring, software configuration needed, compatibility issue. | Check wiring for steering wheel control adapter. Configure controls in the unit's settings. Note: Some users have reported potential limitations with steering wheel control functionality on specific CRV models. Ensure full compatibility before installation. |
| La pantalla táctil no responde | Fallo de software, interferencia del protector de pantalla, daño físico. | Reinicie la unidad. Retire los protectores de pantalla para probarla. Si el problema persiste, contacte con el servicio de asistencia. |
Si estas soluciones no resuelven el problema, comuníquese con el servicio de atención al cliente para obtener más ayuda.
8. Garantía y soporte
Información de garantía
Yoidesu products are manufactured to high-quality standards. For specific warranty terms and conditions, please refer to the warranty card included with your product or contact the seller/manufacturer directly. Keep your purchase receipt as proof of purchase for any warranty claims.
Atención al cliente
For technical assistance, installation queries, or any other support needs, please contact your retailer or the Yoidesu customer service team. Contact information can typically be found on the product packaging or the official Yoidesu websitio.
Recursos en línea:
- Visita el Yoidesu Store on Amazon Para obtener información y actualizaciones del producto.