
1. Introducción
This manual provides detailed instructions for the assembly, operation, and maintenance of your Amewi 22576 CoolRC DIY Desert Buggy. This 1:18 scale 2WD building kit offers a combination of construction and driving enjoyment. The intelligent plug-in system allows for tool-free assembly of the 71-piece model within approximately 30 minutes, without the need for glue. The entire structure and body are constructed from durable ABS plastic. The buggy is designed for both indoor and outdoor use, featuring high-grip rubber tires, shock absorption, and splash protection. It can reach a maximum speed of approximately 8 km/h. A 2.4 GHz remote control is included.
2. Información de seguridad
Warning! Not suitable for children under 3 years. Contains small parts that may be swallowed. Adult supervision is recommended during assembly and operation, especially for younger users.
- Siempre opere el vehículo en un entorno seguro, lejos de personas, mascotas y obstáculos.
- No lo utilice cerca del agua ni en condiciones húmedas para evitar daños a los componentes electrónicos.
- Asegúrese de que todas las piezas estén bien fijadas antes de la operación.
- Use only recommended batteries and follow proper battery installation guidelines.
- Evite tocar las piezas móviles durante el funcionamiento.
3. Contenido del paquete
Carefully unpack the box and ensure all components are present. If any parts are missing or damaged, please contact customer support.
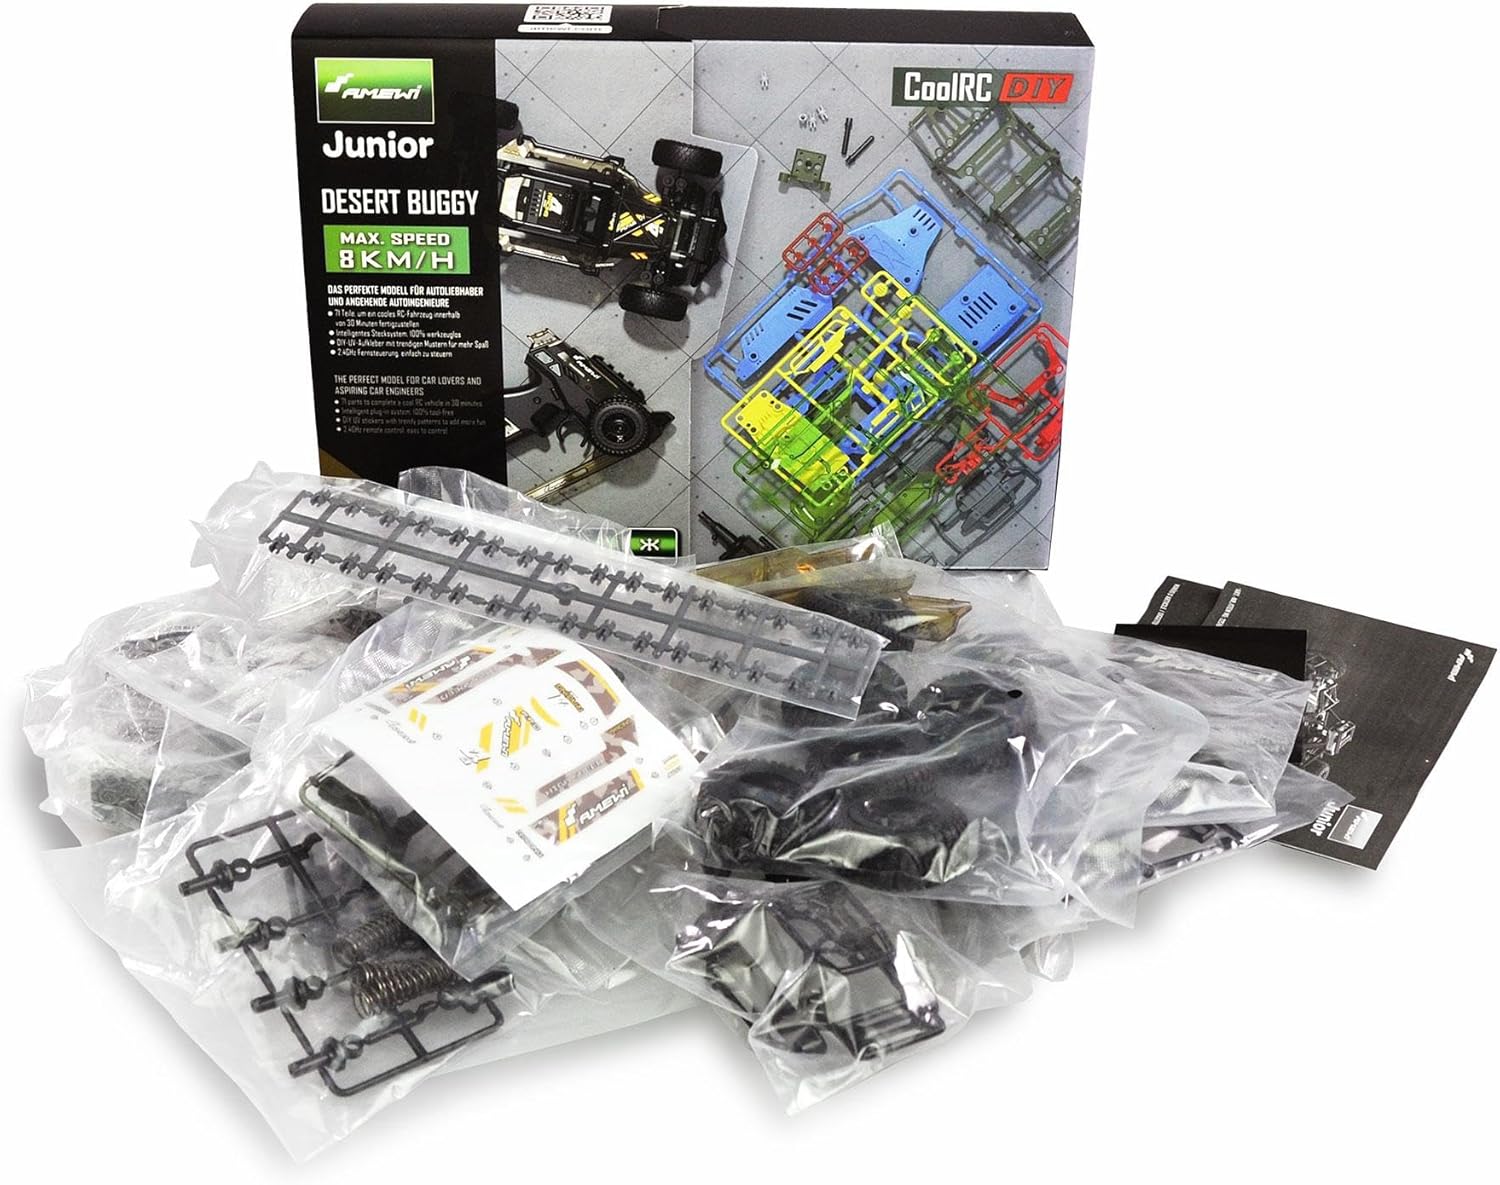
Image: The Amewi 22576 CoolRC DIY Desert Buggy kit box, showing various plastic parts in bags, a sticker sheet, and the remote control.
- Building Set (71 Pieces)
- Control remoto de 2.4 GHz
- Juego de pegatinas
- Instrucciones de montaje (DE/EN)

Image: All 71 pieces of the Amewi 22576 CoolRC DIY Desert Buggy kit are laid out on a white surface, including chassis parts, wheels, suspension components, and electronic modules.
4. Instrucciones de montaje
The Amewi 22576 CoolRC DIY Desert Buggy is designed for easy, tool-free assembly using an intelligent plug-in system. Refer to the included detailed mounting instructions (DE/EN) for step-by-step guidance.
- Desempaquetar componentes: Carefully remove all 71 pieces from their packaging and organize them according to the assembly manual.
- Construcción del chasis: Begin by assembling the main chassis frame using the interlocking plastic components. Ensure all connections are firm.
- Suspension and Axles: Attach the suspension arms, shock absorbers, and axles to the chassis. The sprung chassis design allows for off-road capability.
- Motor y caja de cambios: Integrate the brushed motor and gearbox assembly into the chassis as indicated in the instructions.
- Conjunto de ruedas: Mount the high-grip rubber tires onto the wheel hubs and attach them to the axles.
- Body Panels: Secure the ABS plastic body panels to the chassis. These panels provide the desert buggy's distinctive look.
- Instalación electrónica: Install the receiver and other electronic components into their designated slots.
- Aplicar pegatinas: Personalize your buggy with the UV-resistant stickers from the included sticker set.
The entire assembly process should take approximately 30 minutes.

Imagen: Una vista aérea view of the fully assembled Amewi 22576 CoolRC DIY Desert Buggy positioned next to its 2.4 GHz remote control, with some kit parts visible in the background.
5. Instalación de la batería
Batteries are not included with the kit and must be purchased separately.
Para el vehículo:
- Requires 3 x 1.5V AA batteries.
- Localice el compartimiento de la batería en la parte inferior del vehículo.
- Abra la tapa del compartimento.
- Inserte las 3 pilas AA, asegurándose de la polaridad correcta (+/-).
- Cierre bien la tapa del compartimento de la batería.
Para el control remoto:

Imagen: Un primer plano view of the 2.4 GHz gun-style remote control, featuring a steering wheel and trigger for throttle control.
- Requires 2 x 1.5V AA batteries.
- Ubique el compartimiento de la batería en la parte posterior del control remoto.
- Abra la tapa del compartimento.
- Inserte las 2 pilas AA, asegurándose de la polaridad correcta (+/-).
- Cierre bien la tapa del compartimento de la batería.
6. Instrucciones de funcionamiento
Once the vehicle and remote control have batteries installed, you are ready to operate your Amewi CoolRC DIY Desert Buggy.
- Encendido: Turn on the power switch on the vehicle, then turn on the power switch on the remote control. The remote and vehicle should automatically pair.
- Gobierno: Utilice el volante del control remoto para girar el vehículo hacia la izquierda o hacia la derecha.
- Acelerador: Use the trigger on the remote control to control forward and reverse movement. Pull the trigger to move forward, push it away to brake or reverse.
- Entorno de conducción: The buggy is suitable for both indoor and outdoor use. Its sprung chassis and high-grip rubber tires provide good performance on various terrains. Avoid excessively rough or wet surfaces.
- Apagado: Always turn off the vehicle first, then the remote control, after use.

Imagen: Un lado profesionalfile of the fully assembled Amewi 22576 CoolRC DIY Desert Buggy, showcasing its robust design, large wheels, and detailed bodywork with stickers.
7. Mantenimiento
Regular maintenance will help prolong the life and performance of your Desert Buggy.
- Limpieza: After outdoor use, gently clean the vehicle with a soft, dry cloth to remove dirt and debris. Do not use water or harsh chemicals.
- Inspección: Revise periódicamente todos los tornillos y conexiones para asegurarse de que estén bien apretados.
- Llantas: Inspect tires for wear or damage. Ensure they are free of embedded debris.
- Almacenamiento: When not in use, store the vehicle and remote control in a cool, dry place, away from direct sunlight. Remove batteries from both the vehicle and remote control if storing for extended periods to prevent leakage.
8. Solución de problemas
If you encounter issues with your Amewi CoolRC DIY Desert Buggy, refer to the following common solutions:
- El vehículo no responde:
- Check if both the vehicle and remote control are powered on.
- Ensure batteries in both the vehicle and remote control are correctly installed and have sufficient charge. Replace if necessary.
- Verify that the remote control and vehicle are properly paired. Turn both off and then on again.
- Alcance deficiente o control intermitente:
- Ensure there are no strong interference sources (e.g., other 2.4 GHz devices) nearby.
- Check battery levels in both the vehicle and remote control.
- Asegúrese de estar dentro del rango operativo efectivo del control remoto.
- Vehicle Moves Slowly or Not at All:
- Replace vehicle batteries with fresh ones.
- Compruebe si hay obstrucciones en las ruedas o en la transmisión.
9. Especificaciones
| Número de modelo | 22576 |
| Escala | 1:18 |
| Longitud | Aprox. 250 mm (9.84 pulgadas) |
| Ancho | Aprox. 135 mm (5.31 pulgadas) |
| Altura | Aprox. 75 mm (2.95 pulgadas) |
| Peso | Aprox. 300 g |
| Material principal | Plástico ABS |
| Tipo de motor | Cepillado |
| Mando a distancia | 2.4 GHz Gun Type |
| Velocidad máxima | 8 kilómetros por hora |
| Recuento de piezas | 71 piezas |
| Tiempo de montaje | Aproximadamente 30 minutos |
| Baterías de vehículos requeridas | 3 x 1.5V AA (no incluido) |
| Se requieren baterías remotas | 2 x 1.5V AA (no incluido) |
| Rango de edad | Children, Youth (Manufacturer Minimum Age: 96 months) |
| Características adicionales | Weather Resistant (Splash Guard) |
10. Garantía y soporte
For warranty information or technical support, please refer to the contact details provided by your retailer or visit the official Amewi webSitio. Conserve su recibo de compra como comprobante de compra.