
XTUGA CT120
Manual del usuario del mezclador de audio de 12 canales XTUGA CT120
Modelo: CT120
Introducción
Thank you for choosing the XTUGA CT120 12-Channel Audio Mixer. This professional audio mixing console is designed for a wide range of applications, from live performances and webcasting to studio recording and home audio setups. It features versatile connectivity options, including Bluetooth and USB, along with precise sound control for optimal audio quality.
Please read this manual thoroughly before operating the device to ensure proper usage, maximize performance, and prevent damage.

Figura 1: Frente view del mezclador de audio de 12 canales XTUGA CT120, mostradoasing all inputs, controls, and outputs.
Precauciones de seguridad
To ensure safe operation and prolong the life of your XTUGA CT120 mixer, please observe the following:
- Operate the device in a well-ventilated environment, away from heat sources and open flames.
- Avoid contact with water or any liquids. Do not expose the mixer to rain or moisture.
- If the product is wireless, keep it away from other sources of interference during operation.
- No intente desmontar ni reparar el dispositivo usted mismo. Encargue cualquier servicio técnico a personal cualificado.
- For products requiring power, use only the standard power supply provided or specified. Incorrect voltagPodemos dañar el equipo.
- Avoid scratching the casing and surface of the equipment with sharp objects.

Figure 2: Important safety guidelines for handling and operating the mixer.
Configuración
Conexión de energía
Connect the provided power adapter to the mixer's power input and then to a suitable electrical outlet. Ensure the power switch is in the OFF position before connecting.
Conexiones de entrada
The CT120 mixer features 12 channels, each with XLR and 1/4-inch line inputs. Connect your microphones, instruments, or other audio sources to the appropriate input jacks.
- Entradas XLR: Para micrófonos y otras fuentes de audio balanceadas.
- 1/4-inch Line Inputs: For instruments, line-level devices, and unbalanced audio sources.

Figure 3: The +48V phantom power feature, essential for condenser microphones. Each channel supports independent phantom power.
Alimentación fantasma de +48 V: For condenser microphones, activate the +48V phantom power switch. This supplies the necessary voltage to the microphone via the XLR cable. Ensure dynamic microphones are not connected when phantom power is engaged, unless they are designed to handle it.
Conexiones de salida
Connect your main speakers or recording devices to the L MAIN OUT R (XLR or 1/4-inch TRS) outputs. Use the PHONES output for headphone monitoring.
Instrucciones de funcionamiento
Operación básica
- Encendido: After all connections are made, switch on the power.
- Ajuste de ganancia: Use the GAIN knob for each channel to set the input level. Adjust until the signal is strong but does not clip (indicated by the PEAK LED).
- Volumen del canal: Utilice los faders de canal para controlar el volumen individual de cada entrada.
- Mezcla principal: Adjust the L MAIN R faders to control the overall output volume.
Ecualización (EQ)
Each channel features a 3-band equalizer (HI, MF, LF) for tone shaping. Adjust these knobs to enhance or cut specific frequencies:
- HI (alta frecuencia): Adjusts treble.
- MF (frecuencia media): Adjusts midrange.
- LF (baja frecuencia): Adjusts bass.

Figura 4: detallada view of the 3-band EQ controls, allowing for precise sound adjustments for each channel.
Conectividad Bluetooth
The CT120 supports wireless Bluetooth streaming. To connect a device:
- Activate Bluetooth on your mobile phone, tablet, or other smart device.
- On the mixer's digital MP3 player section, select the Bluetooth mode.
- Buscar "BT-Speaker" in your device's Bluetooth settings and pair.
- Una vez conectado, puede transmitir audio de forma inalámbrica al mezclador.

Figure 5: The mixer's Bluetooth function allows seamless wireless audio streaming from compatible smart devices.
USB/MP3 Player and Recording
The integrated USB interface allows for direct playback from USB drives and connection to a computer for recording and editing.
- Reproducción USB: Insert a USB flash drive containing MP3/WAV/WMA files into the USB port. Use the digital MP3 player controls to navigate and play tracks.
- Conexión de computadora: Connect the mixer to your computer via a USB cable. The mixer will be recognized as an audio interface, allowing you to record the mixed audio directly to your computer or play audio from your computer through the mixer.

Figure 6: The USB port enables connection to computers for recording and playback, and direct playback from USB flash drives.
Escucha
Use the 3.5mm PHONES jack for real-time monitoring of your mix. Adjust the HEADPHONES volume knob to control the monitoring level.

Figure 7: The dedicated headphone output allows for real-time monitoring of the audio mix.
Indicadores de nivel
The PFL/AFL and L MAIN R LED level indicators provide visual feedback on signal levels, helping you prevent clipping and ensure optimal audio output.
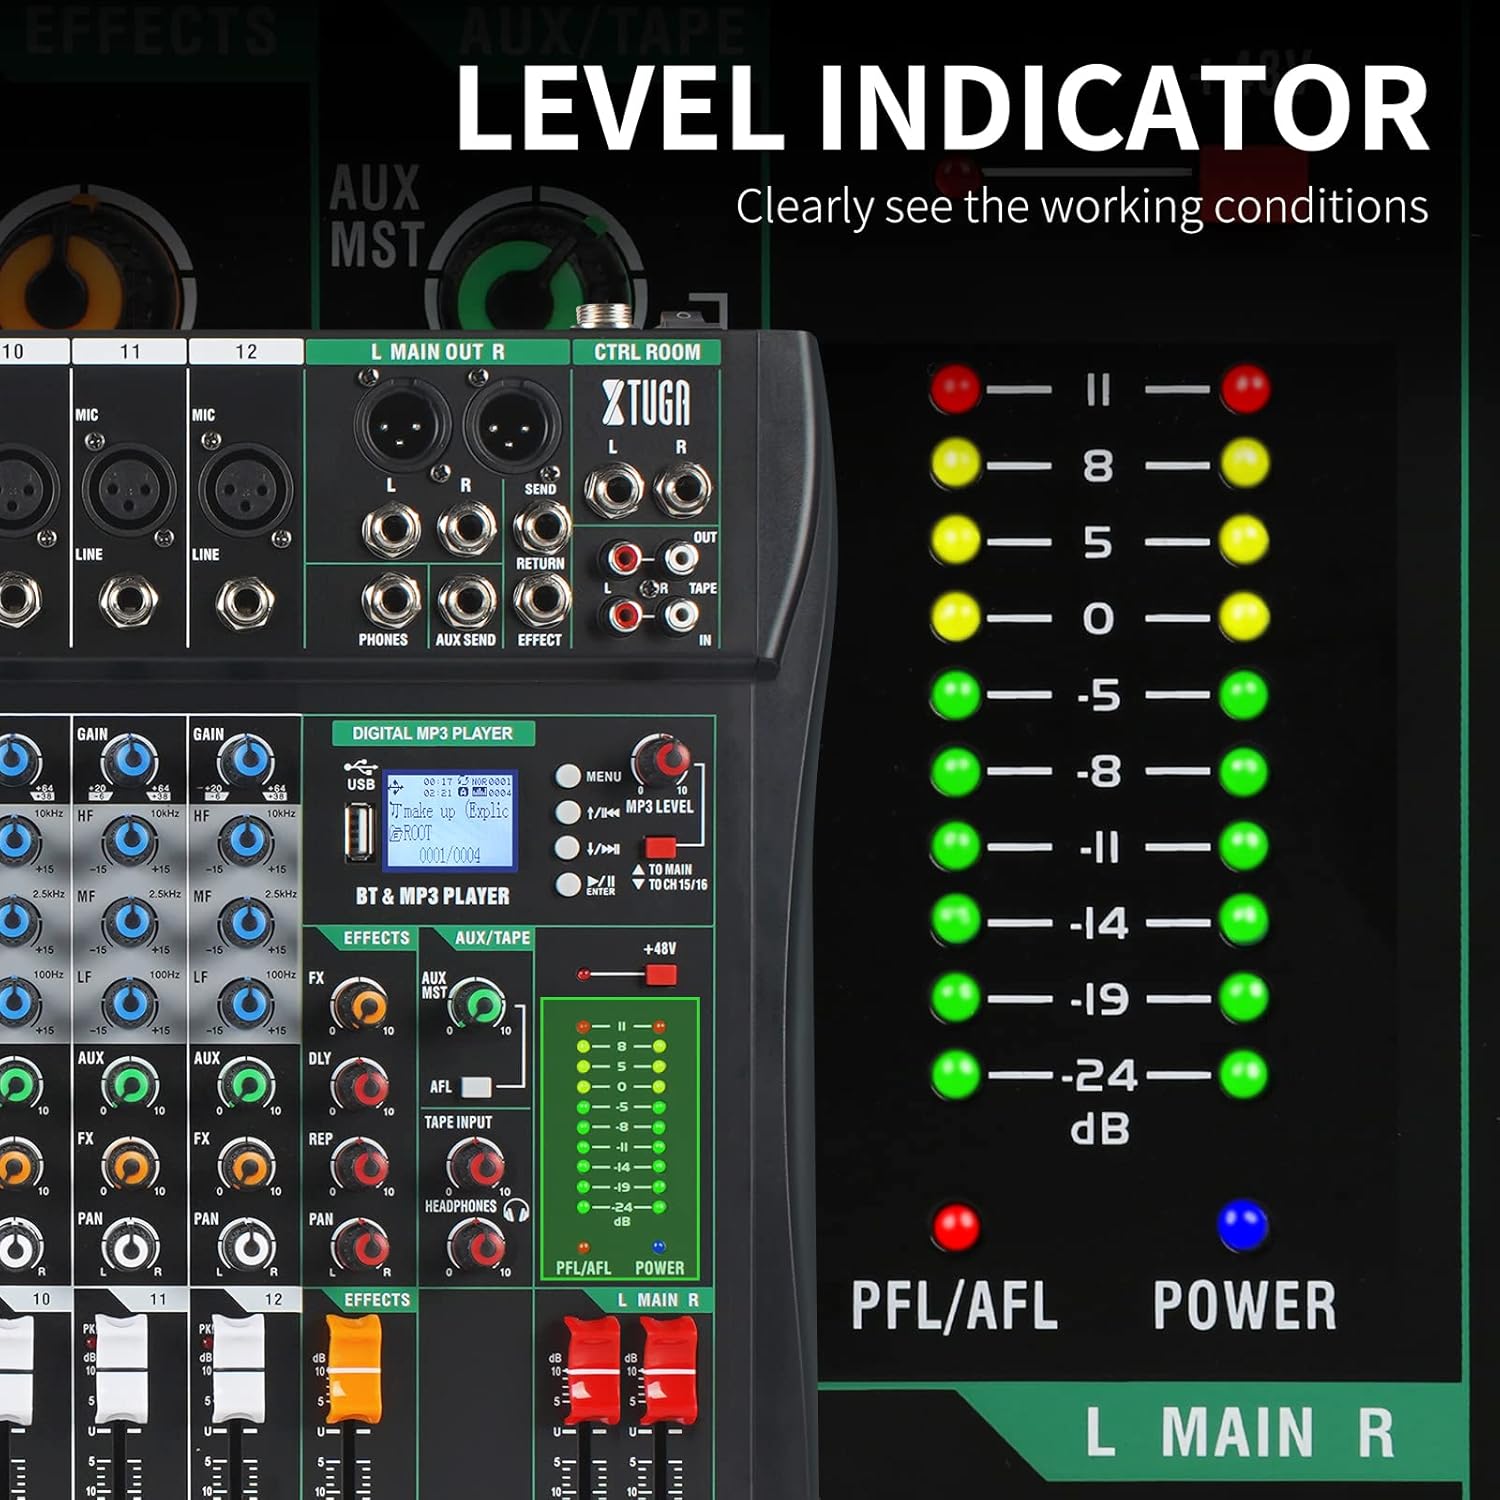
Figure 8: The LED level indicators clearly display the working conditions and signal strength of the audio output.
Mantenimiento
Regular maintenance helps ensure the longevity and optimal performance of your XTUGA CT120 mixer.
- Limpieza: Utilice un paño suave y seco para limpiar el exterior de la batidora. Para la suciedad difícil, utilice un paño ligeramente seco.amp cloth can be used, followed by a dry cloth. Do not use abrasive cleaners, solvents, or waxes.
- Protección contra el polvo: Keep the mixer covered when not in use to prevent dust accumulation, especially on faders and knobs. The sealed rotary controls are designed to resist dust, but general cleanliness is still important.
- Almacenamiento: Guarde la batidora en un lugar fresco y seco, alejado de la luz solar directa y de temperaturas extremas.
- Sistema de organización de cables: Ensure all cables are neatly organized and not under strain to prevent damage to the connectors and ports.
Solución de problemas
| Problema | Posible causa | Solución |
|---|---|---|
| Sin poder | Power cable not connected; Power switch off; Faulty power adapter/outlet | Verifique la conexión del cable de alimentación; asegúrese de que el interruptor de encendido esté encendido; pruebe con una toma de corriente o un adaptador diferente. |
| No hay salida de sonido | Main volume faders down; Channel faders down; Incorrect input/output connections; Mute engaged | Increase main and channel faders; Verify all audio connections; Check for any mute buttons. |
| Sonido distorsionado | Input gain too high; Output level too high; Faulty cable/microphone | Reduce GAIN knob for the affected channel; Lower main output level; Test with different cables/microphones. |
| El Bluetooth no se conecta | Mixer not in Bluetooth mode; Device not discoverable; Interference | Ensure mixer is in Bluetooth mode; Make sure your device's Bluetooth is on and discoverable; Move closer to the mixer; Restart both devices. |
| La alimentación fantasma no funciona | Phantom power switch off; Faulty XLR cable; Condenser microphone not connected | Ensure +48V switch is ON; Check XLR cable integrity; Confirm a condenser microphone is in use. |
Presupuesto
| Característica | Detalle |
|---|---|
| Modelo | CT120 |
| Número de canales | 12 |
| Entradas de audio | XLR, Balanced Line (1/4 inch TRS) |
| Tipo de conector de salida | 1/4 inch TRS jack, XLR |
| Potencia Phantom | +48V (selectable per channel) |
| Tecnología de conectividad | USB, Bluetooth |
| Fuente de poder | Cable eléctrico |
| Dimensiones (paquete) | 57.29 x 45.6 x 12.2 cm (22.56 x 17.95 x 4.8 pulgadas) |
| Peso del artículo | 5.57 kilogramos (12.28 libras) |
| Fabricante | XTUGA |
| País natal | Porcelana |
Garantía y soporte
For warranty information and technical support, please contact XTUGA customer service. Details regarding warranty periods and service procedures are typically provided with your purchase documentation or can be found on the official XTUGA websitio.
When contacting support, please have your product model (CT120) and purchase details ready.
Recursos en línea: For additional support, FAQs, and driver downloads (if applicable), please visit the official XTUGA websitio.
Ask a question about this manual
Ask about setup, troubleshooting, compatibility, parts, safety, or missing instructions. Manuals+ will review the question and use this page’s manual context to help answer it.